Close
0%
0%

URU Card

FIDO2 Arduino Authenticator

Public Chat
Similar projects worth following
People keep asking me to make URU Key open source. Limitations in the biometrics part prevent me to do that. Therefore I have started a new FIDO2 authenticator project.

URU Card is a spin-off project of the URU Key

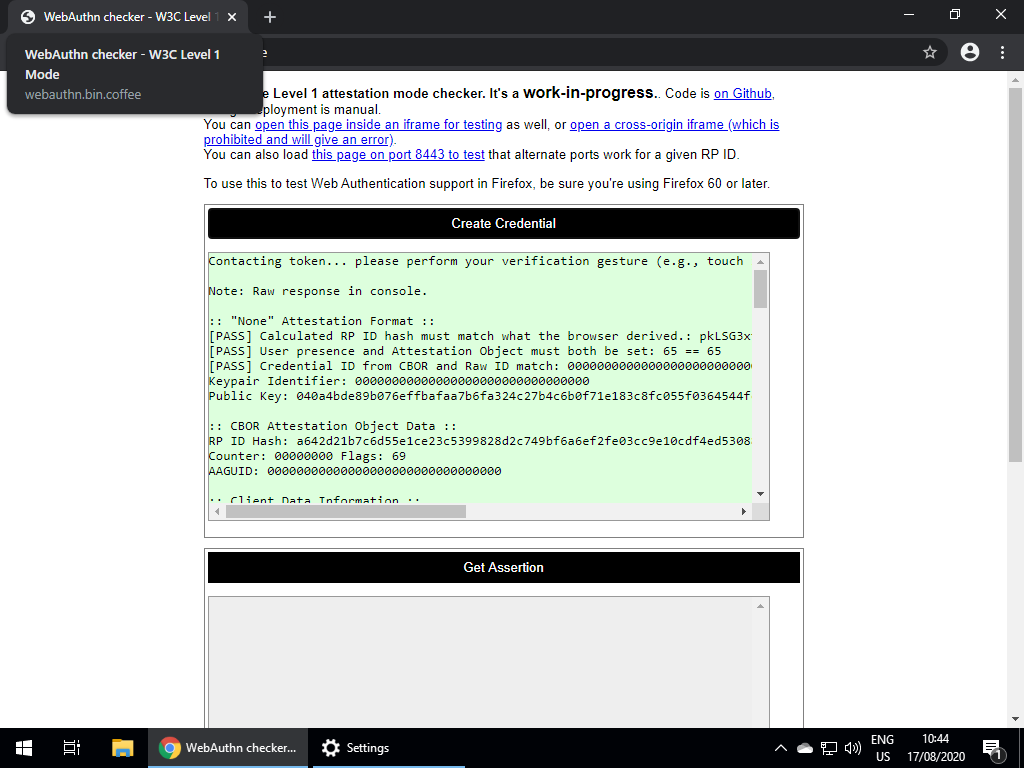
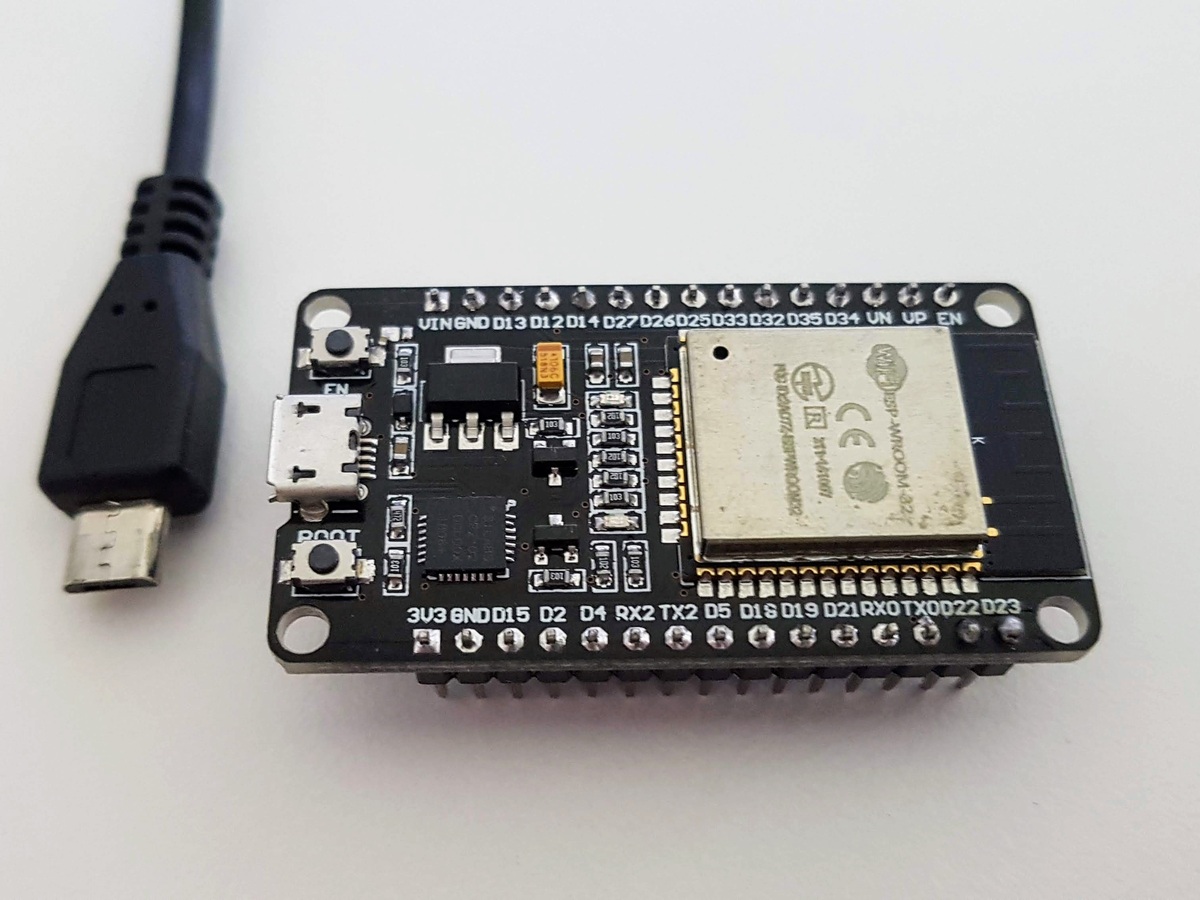
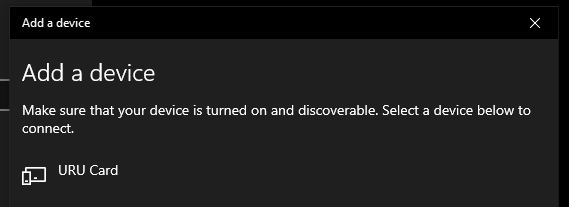
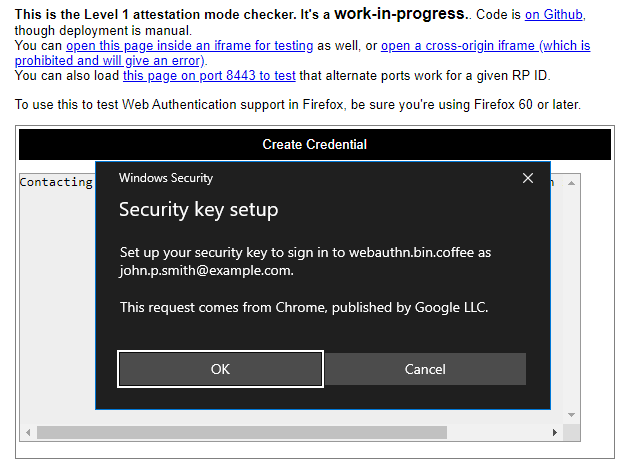
It's a small, credit-card size FIDO2 Authenticator device. It's open-source, both hardware and software. It's wireless. It's built using simple and affordable components. It's programmed with Arduino.

Excited? Feel free to join.

  • 1 × ESP32 Dev board
  • 1 × ESP32 Pico D4 Microcontroller
  • 1 × ATECC508A Security IC
  • 1 × MPR121 Semiconductors and Integrated Circuits / Misc. Semiconductors and Integrated Circuits
  • 1 × SSD1306 0.91" OLED display

  • The new PCB design

    Andrey Ovcharov10/21/2020 at 13:47 0 comments

    Recently I have received the new batch of PCBs for my URU Card device. Since I do not have a 3D printer and appropriate skills I am going to construct a hard shell using the stack of PCBs. This time I have chosen black colour for the boards as it comes in a nice matt finish.

    Set of PCBs for the URU Card
    Set of PCBs for the URU Card

    In addition to the mainboard, I have simply designed two more PCBs. One with fancy cut-outs for the components and one to use as a cover. These boards will be glued together as a sandwich to create a simple hard shell for the device.

    Inner PCB with the cutouts for the components
    Inner PCB with the cutouts for the components

    To further simplify the device I have replaced ceramic antenna with PCB one following the popular design from Texas Instruments. It takes slightly more space on the board but comes with zero cost and during the test of the device I did not notice any performance penalty.

    The unpopulated place on the board is reserved for the FT260 chip. This IC is a USB HID device and can be used in future to implement USB transport supported by FIDO2 protocol.

    The cut out for the display is much smaller now and opens visible part of the display only.

    Display of the URU Card device
    Display of the URU Card device

    Holes in the corners of the boards are used to align the URU Card in the programmer for ESP32/ESP8266 devices I have designed before. As well they are used to align all three boards during glueing together. The spring-loaded pins provide reliable connection during programming and require almost zero space on the device.

    Programmer
    Programmer

    The assembled device works exactly as before. The display is clearly visible through the cut out hole. One nice addition - the backboard completely prevents from accidental touch detection from the backside of the device while front touch keyboard works without any problems.

    The size of the device remains the same and despite the thickness of around 3 millimetres, it fits my wallet exactly like any other credit or discount card.

    URU Card in the wallet
    URU Card in the wallet

    I think this time I have achieved one important milestone in the development of the device. Now it has a very simple and affordable case without losing any functionality or size requirements. As well the design was simplified with the replacement of the ceramic antenna with PCB one.

    For those who want to reproduce the device, the dedicated GitHub repository contains the design files for Eagle CAD and set of Gerber files to order the board from the manufacturing services.

    References

  • URU Card - minimal FIDO2 implementation with Arduino

    Andrey Ovcharov08/21/2020 at 09:06 0 comments

    This update was delayed due to summer holidays but it brings achievement of the very important milestone. Now we have a very minimal implementation of the FIDO2 authentication protocol on the Arduino framework. The simplicity of the Arduino platform and the availability of the hardware opens the door to secure authentication to everyone interested.

    The current state of the project

    1. I have implemented the basic Bluetooth Low Energy (BLE) communication profile.
    2. I have implemented GetInfo command so the server recognises the authenticator and starts the authentication process
    3. The very basic implementation of a command MakeCredential receives the data from the server and returns signed credential
    4. The command GetAssertion receives the credential and responds with confirmation of authentication.

    The words “very basic” mean that many many features of the authentication flow are missing. For example, the private key is a simple hardcoded value and there are no real checks for user presence or user verification.

    However, the project can be compiled, uploaded to the ESP32 development board and get “green” results in a simple test.

    Results of URU Card online testing

    How to run the project

    So, what do you need to run the URU Card at home?

    ESP32 development board and USB cable

    You can use simple and affordable Wroom 32 development board. At the moment advanced features like secure element ATECC508a are not used so there is no need in more sophisticated boards.

    Connect the board to your computer using USB cable and make sure the UART port is available to your system. Make sure the selected port provides enough current as the ESP32 chips are quite hungry and sensitive to stability of the power source.

    Development Environment - PlatformIO

    I am using a combination of Visual Studio Code and PlatformIO for the development. This combo gives ease of configuration, building and uploading the firmware to the board. Just follow installation instructions for your platform.

    Windows machine or virtual environment

    Despite the fact, the FIDO2 protocol supports BLE transport, at the moment is it available only under Windows. So, you will need either a Windows machine or a virtual environment. I am using Oracle Virtual Box and the trial version of Windows 10.

    Building the project

    First of all, get a copy of the source code using either git command or downloading a zip file from the project’s GitHub page.

    Then, build the project and upload it to the development board using the following command in terminal (Mac OS/Linux):

    pio run -t upload -monitor
    

    The program will start immediately and the serial console will start output of the debug information.

    Pairing the device

    Open the Bluetooth settings in your Windows. Click the button “Add Bluetooth or other devices” and proceed with the pairing of the “URU Card”.

    Example of pairing dialog window

    After a few seconds, the device should be paired and appear in the list of available devices.

    Running the test

    Open the browser in your Windows. Chrome, Firefox and Edge browsers work equally well as they are using the system layer to communicate with the authenticator device. Visit the page webauthn.bin.coffee and click the button “Create Credential”.

    Setup URU Card in the browser

    Just follow the key setup procedure and after a few seconds, a new credential will be generated by the device and sent to the browser.

    The “Get Assertion” button will use a similar procedure to confirm the credential produced on the previous step.

    The same procedure can be executed on page webauthn.me.

    Questions?

    The current state of the project provides a solid base to work on the fully-featured wireless FIDO2 authenticator device implemented with the Arduino framework. While the many crucial features are still missing, the existing ones provide a solid base to start playing with the technology.

    If you have any questions regarding running the project on your development...

    Read more »

View all 2 project logs

Enjoy this project?

Share

Discussions

Similar Projects

Does this project spark your interest?

Become a member to follow this project and never miss any updates