 EK
EKFollowing from the previous update, design of the spool box and fabrication of the pieces in HDPE is one of the tasks that has its priority adjusted to be worked on now. The reason for this is to ensure there’s enough time to receive the pieces.
The spool box is what will house the spool of rope that attaches to the intelligent buoy. This in turn will latch onto the top of the spool box. Inside of the intelligent buoy will be the electronics - including a monitor to watch for surrounding fish traffic.
Here’s the start of the top piece:

Read on for more of the progress!
The first step was to design a few test pieces. These will be milled and we will then see the results to determine if any changes are needed. Thanks to Bruce and Giovanni at the DesignLab for helping with this.

Top left: Varying the spacing by 0.05mm each step, and included dog bones for 1/8" bit.
Top right: Same as left, but without the dog bones.
Bottom left: Tab and slot design
Bottom right: T-slot design for fastener
There was a lot of sketching to figure out exactly how the pieces will interlock together. This is usually easier to do on paper where you can erase quickly than CAD. There is an additional requirement - the spool boxes will need to stack.

Above: These sketches are figuring out where exactly the intelligent buoy will be placed on the spool box. The top middle was the idea that won because its placement would have the least likelihood of interference during the entry and descent in the water - as it has one ‘side’ ‘protected’ by the top plate. There will be 3D printed mounts, likely with magnets too, to help keep it in place.

Above: Now that the intelligent buoy has a place, it was time to figure out the other pieces and how they interlock. One of the tricky parts was bottom right, the fastening for the spool. Lucky for this, the head of the M6 doesn’t stick out when recessed into the material.
Here’s the start of the top plate of the spool box. This will be the fixed piece that sets the dimensions for the other pieces. Decided to go with the top plate for this, because it’s only dependency is the enclosure (nalgene bottle).

Deciding about the screws being recessed or not was a thought experiment. Here’s what the stack looks like. This shows the screw, a thin gasket, then a 3D printed piece that goes through the cutout in the HDPE. The purpose of the cutouts is for custom mounting brackets that will be specified later, and these can be iterated using 3D printing. Maybe a better way of doing this would be to leave it completely blank, then in real life use a drill to make the holes. However, the lack of precision irks me (not to mention I don’t have the proper setup for that task right now).

There’s a small error in the example above with the 3D printed piece. That will be fixed later, the purpose of this was to check the spacing and see there’s enough length on the fastener for a washer and hex nut.
Some progress was started on the front plate. The front plate can serve as a template for the back plate and side plates. Here’s how it looks with the two stacked. There will be 3D printed feet on the bottom that extend inwards to help with the stacking.

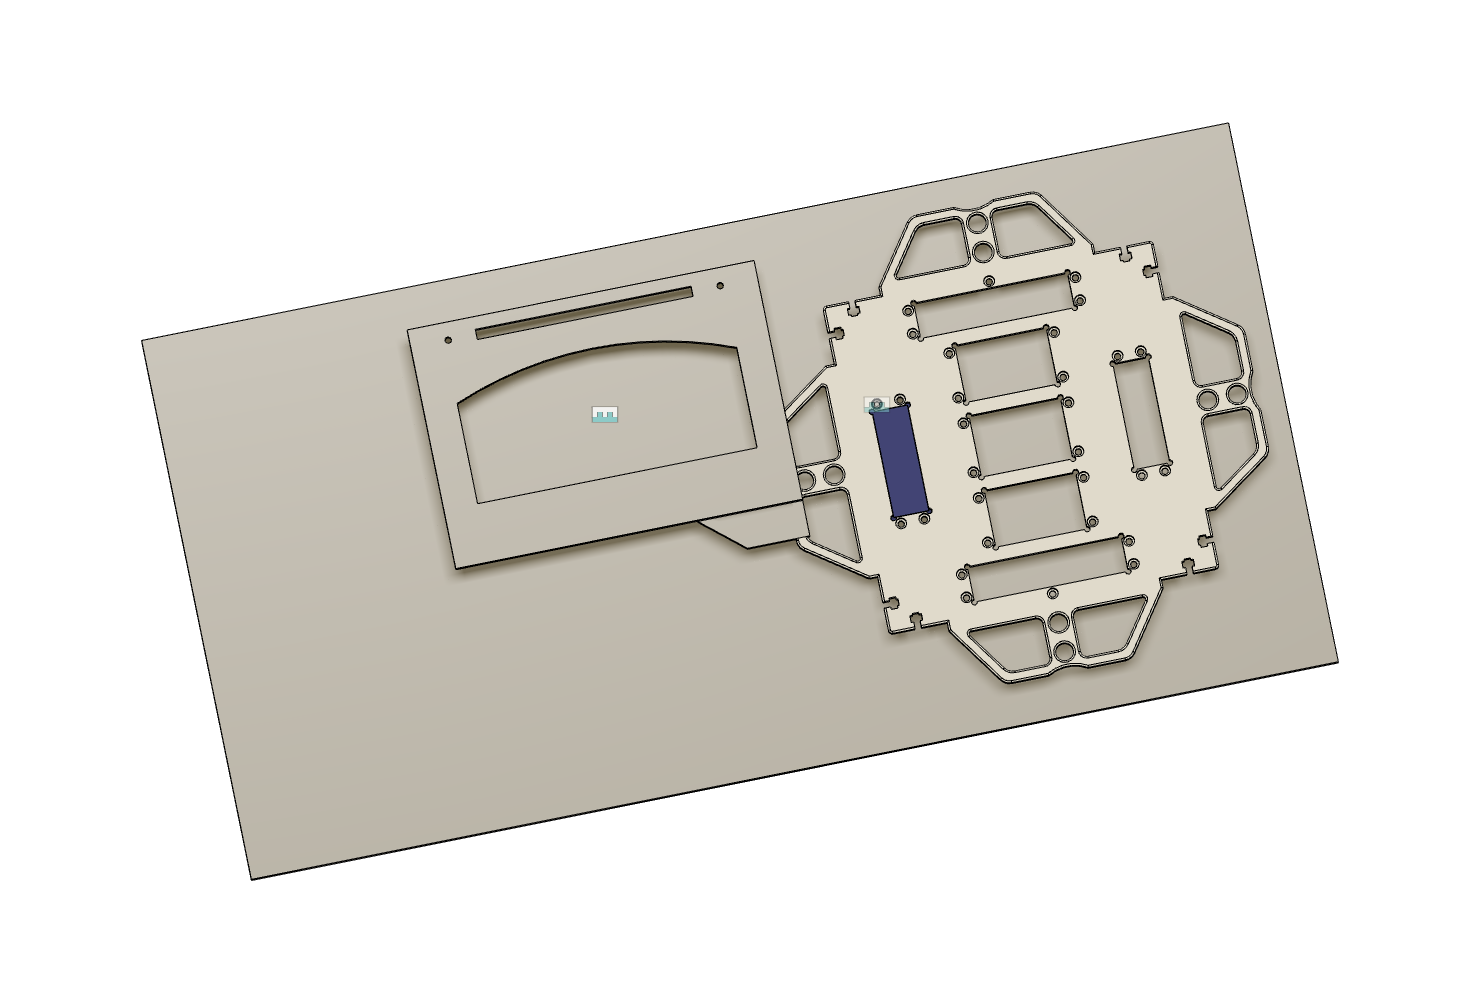
The sheet of HDPE ordered is 24” x 48”. We might need to order additional sheets. Also considering removing 2 of the rope handles from the top plate to decrease the size. Here’s how much space is already being used by these two pieces:
This is the progress so far. Tomorrow, (aka, today), we will hopefully see results from the first test cuts! From there we can decide what needs to change.
The next steps are to continue modelling the spool box. The Digikey order arrives tomorrow, and the PCBs have been shipped.
Discussions
Become a Hackaday.io Member
Create an account to leave a comment. Already have an account? Log In.