 EK
EKIn the previous update we covered the first experiment results that did not work. In this update, we’ll take a step back in time to before then to show the iteration and prototyping that went into that experiment.
Internal Servo Horn
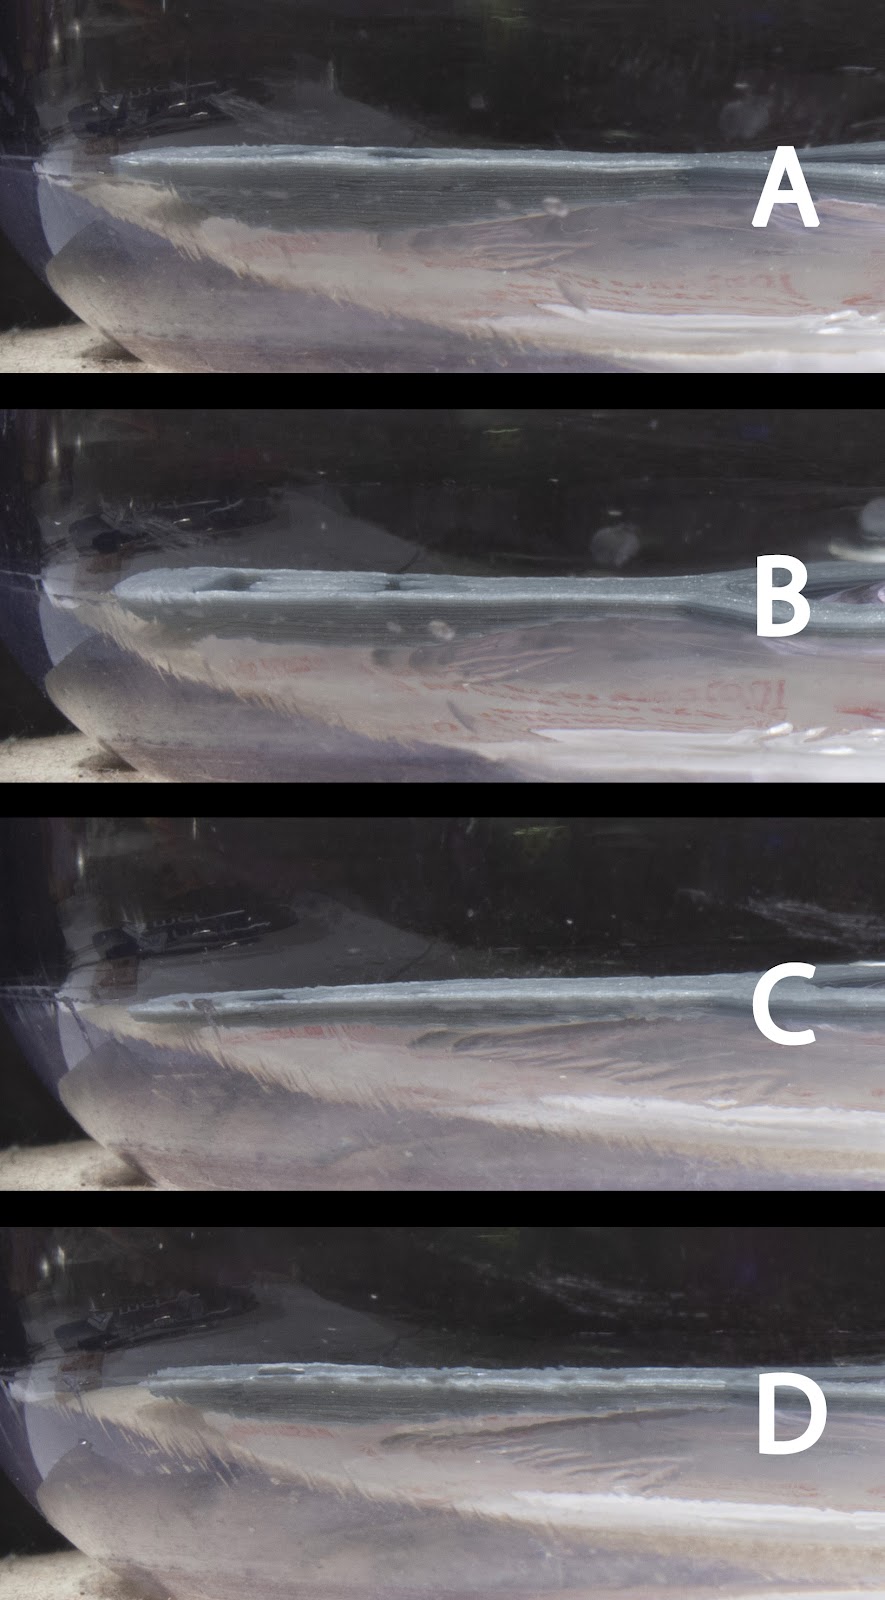
Let’s start with the internal servo horn. The internal servo horn will need to map to the curvature of the enclosure. To figure this out, I made a set of 4 experimental curvatures, printed them, and looked at how close their profile mapped to the enclosure. Here’s what that comparison looked like:
Read on for more!
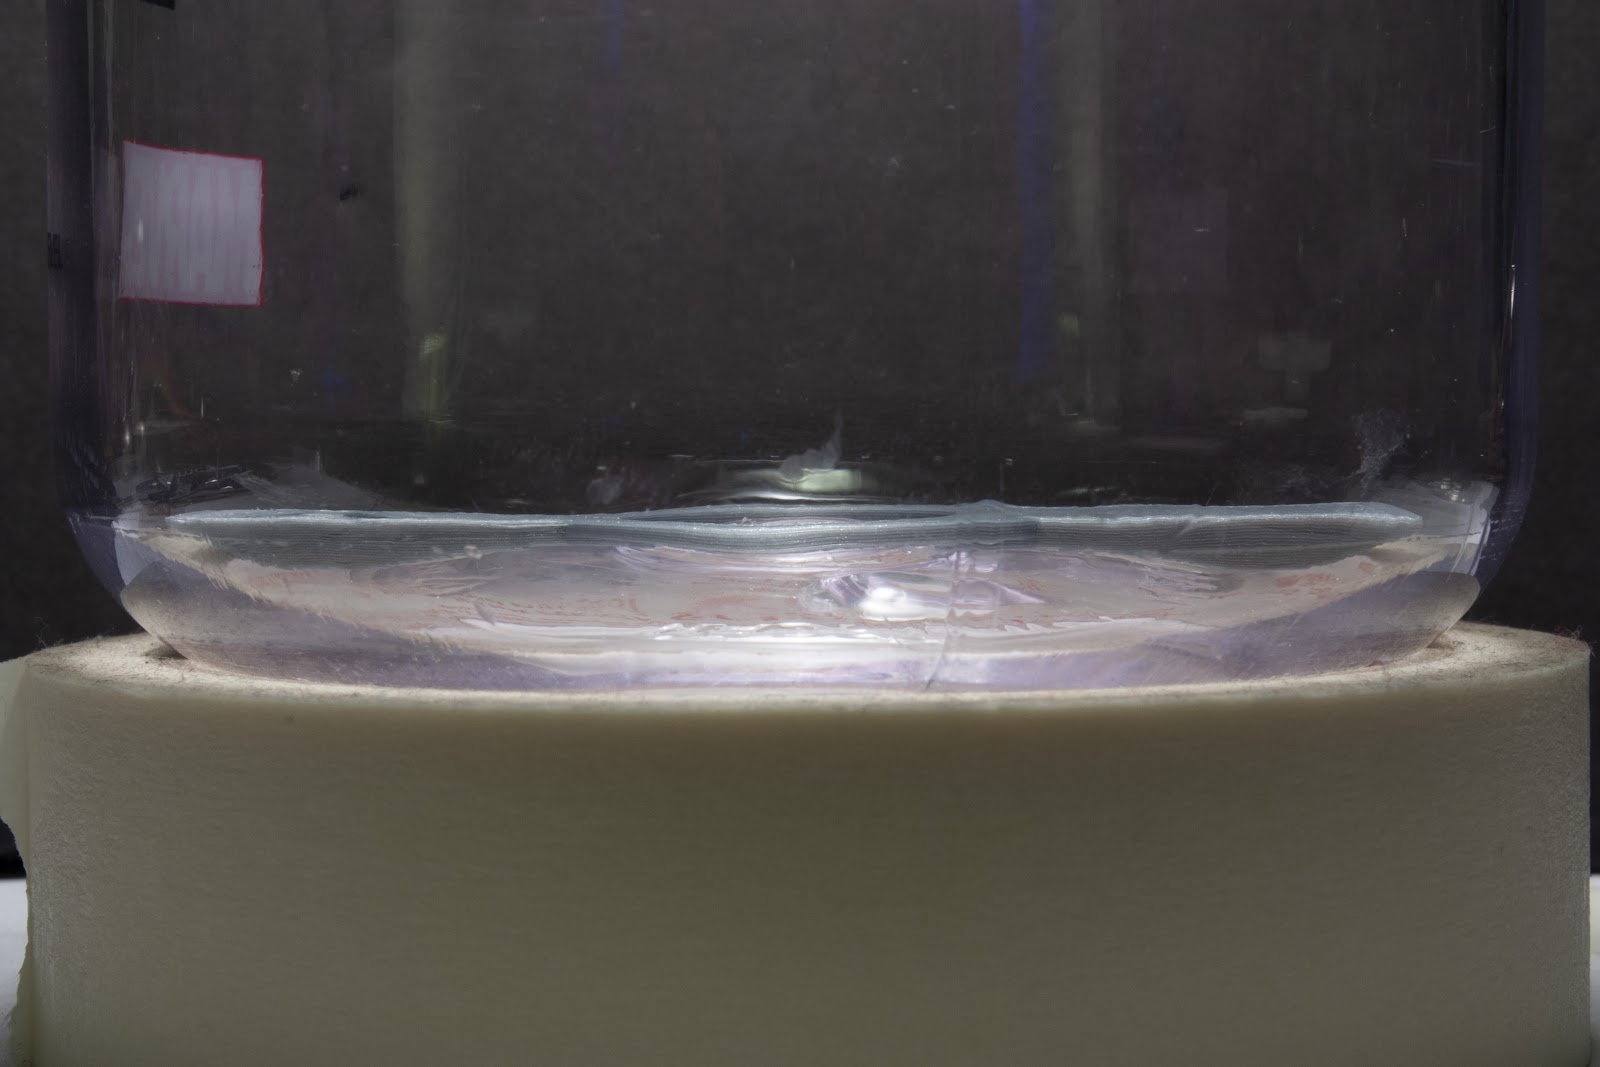
From a different angle:

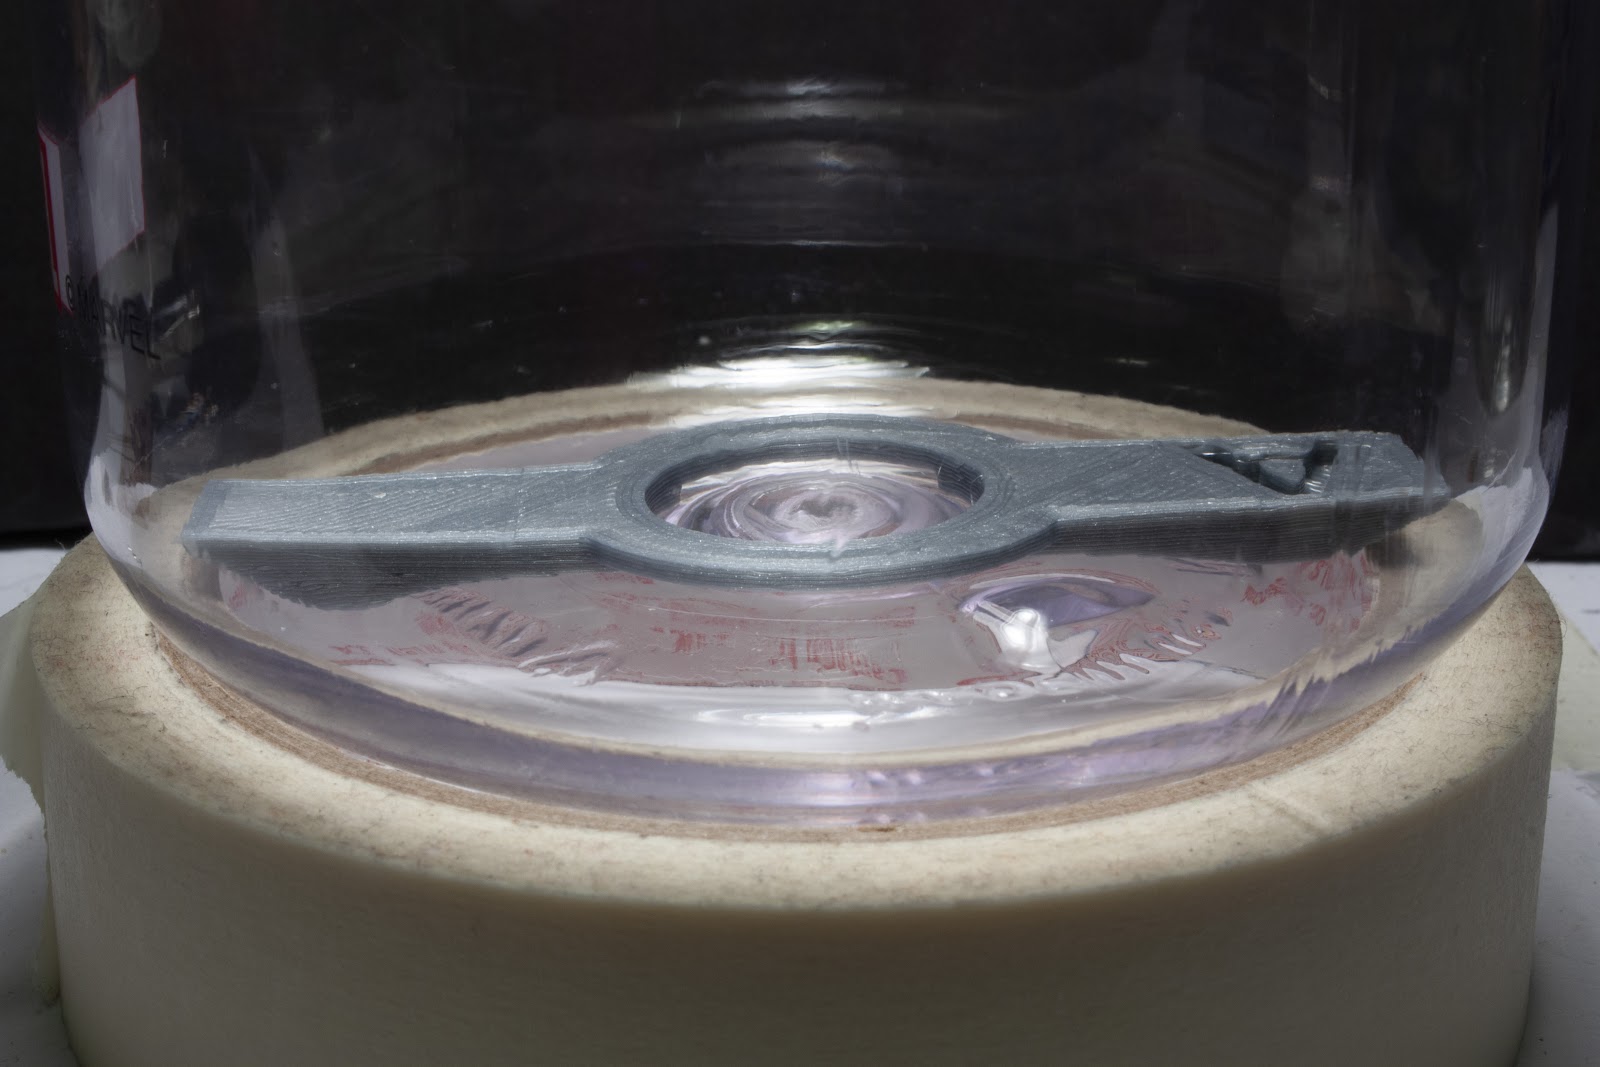
After comparing the images, the winner that seemed to be the closest was A. Here’s a look at it:
Now that the shape profile was chosen, design work could be done on adding the magnets. The first iteration included 4 magnets on each side, plus two additional on the other sides (sorry for the vague descriptive vocabulary there - see photo below).

However, this approach did not fit because the magnets on the sides increased the piece’s distance in Y axis to be tangent to the opening. These sides were then chopped off to verify that it would fit - and it did.
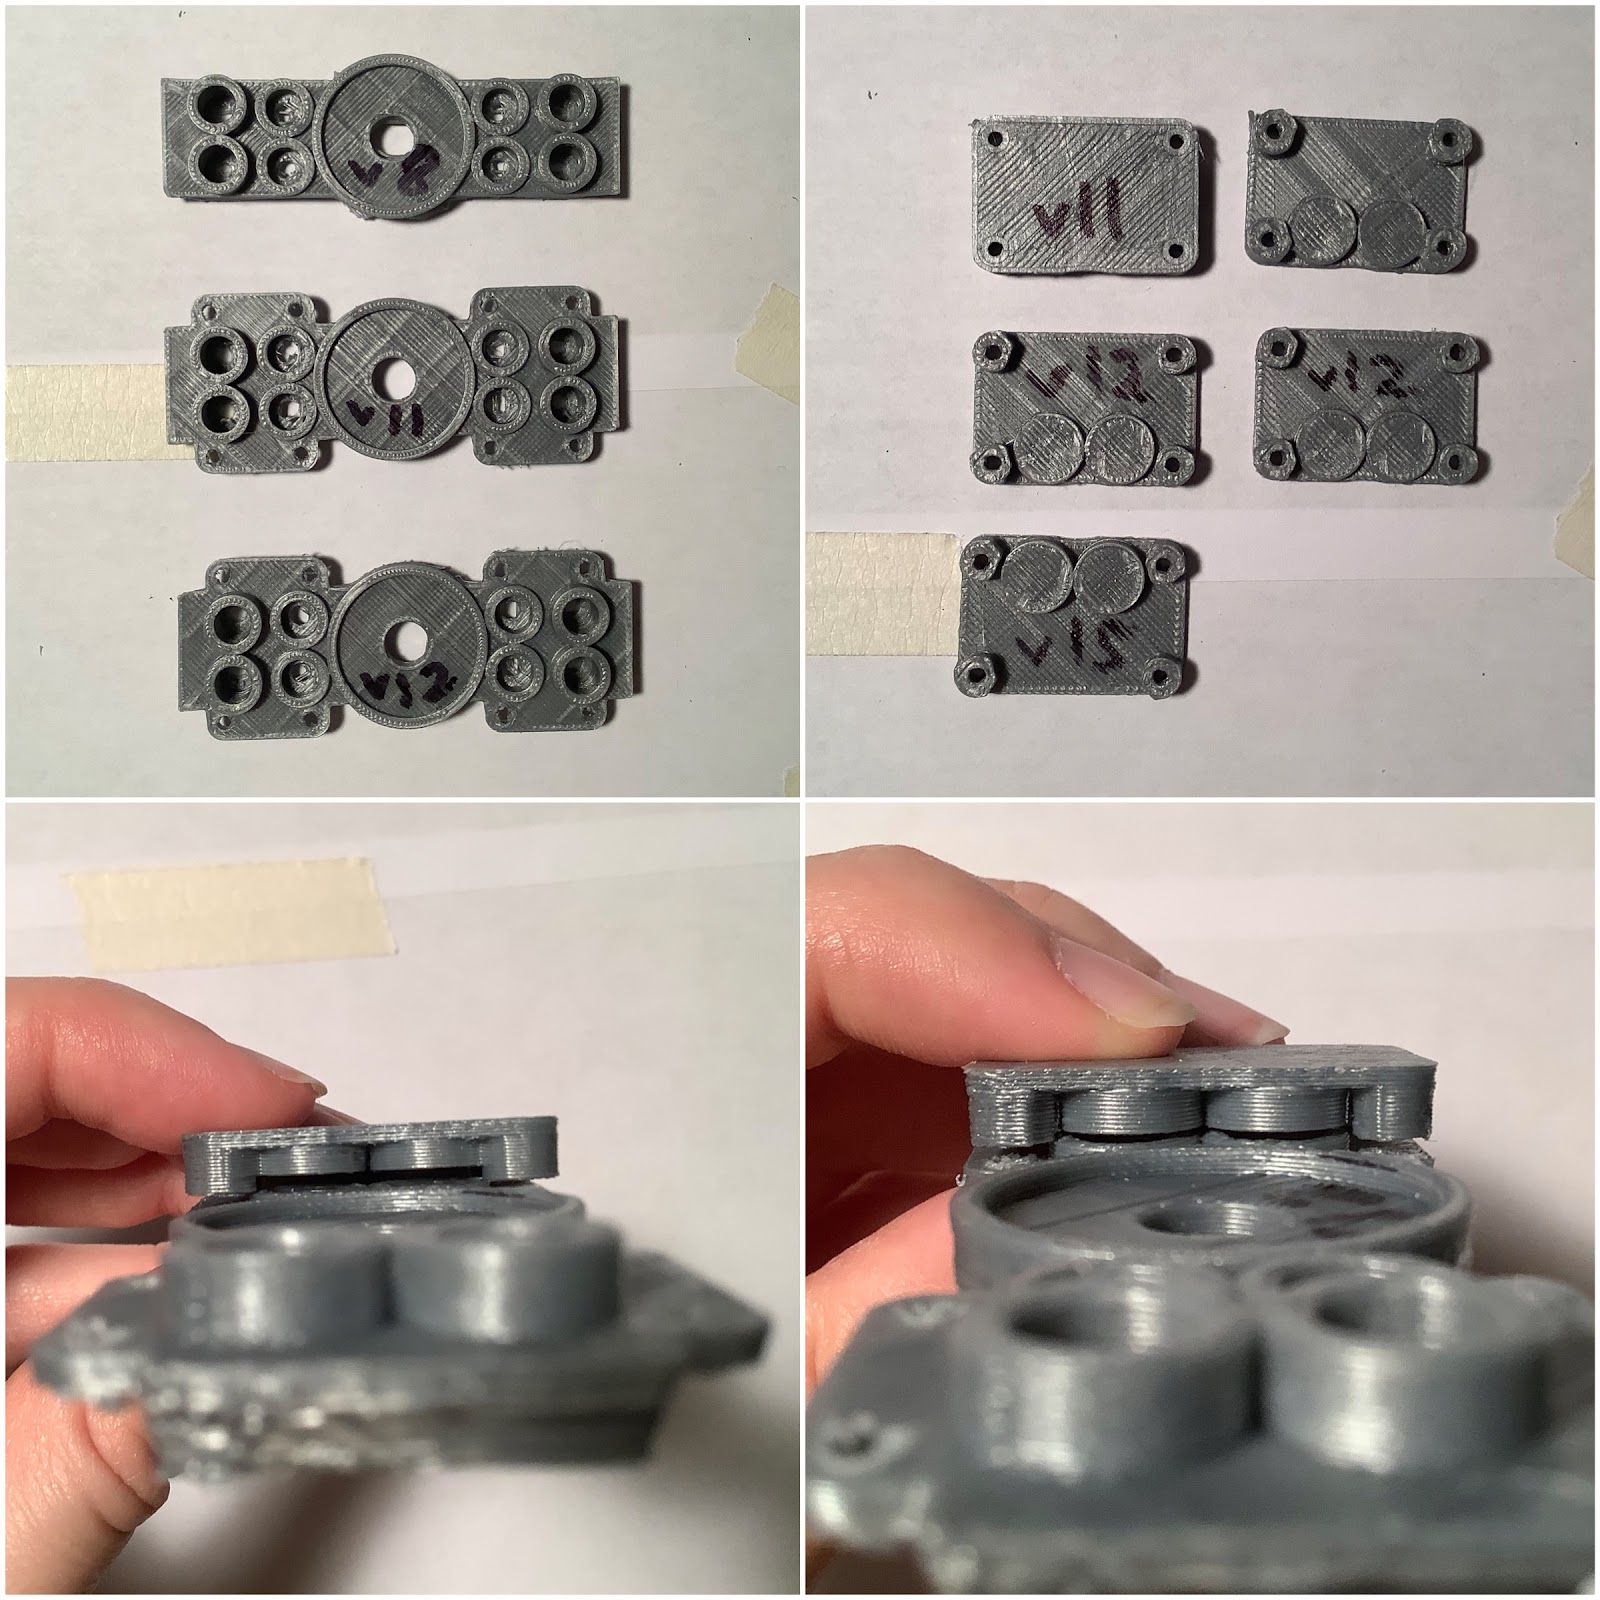
Above photo - Here are the next iterations of the internal servo horn piece. From v11 to v12, the thickness distance was increased as the magnets closest to the horn were not supported very well on v11. On the top right, this was running in to a DFM (design for manufacturing) issue. In this case, DFM via FDM 3D printing. The height on the CAD model of the two circles did not translate to reality (bottom left). After increasing this a bit, it then worked (bottom right). I believe the root cause of this is layer height resolution (0.3mm) and cooling (my printer has no cooling on the extruder). No big deal, just required a few iterations.

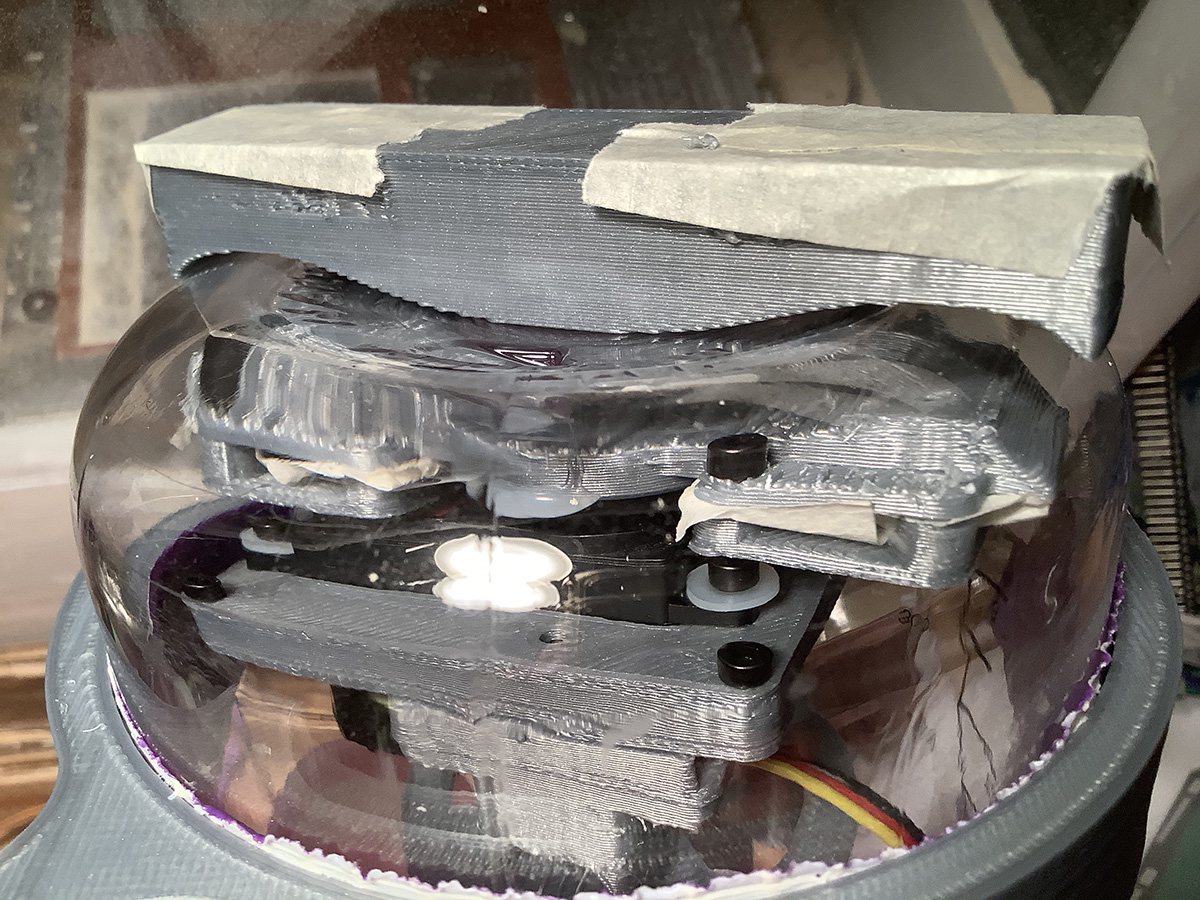
Above photo - Here’s the assembly of the internal servo horn. Tape was used on the magnets to prevent them from jumping during assembly (top left). Then, the covers were added (top right). The servo horn was attached to the servo’s servo horn using hot glue (bottom left). The reason for hot glue at this stage is because it was unknown how well the coupling would or would not be. If it were to be very strong, we would want the servo horn to disconnect from the servo instead of breaking the servo — specifically for the experimental stage. However, as we have seen, the results did not come close to having that effect. The external servo horn was then added, attached with magnets (bottom right).
External Servo Horn
The external servo horn required an abundance of patience. There were quite a few iterations required to determine the outer curvature of the enclosure (which was different than the inside). Here you can see the iterations and curve profiles:

The winning profile then went on to become the external servo horn. Here’s a look at how it maps to the enclosure:
In addition to this, some adjustments were needed on extending the distance internally to the servo block assembly. This was done by adding 5 mm to the end stage. In the future, I would accomplish this by sandwiching a wave spring in between stages to apply equal pressure to the internal servo horn contacting the bottom of the enclosure. That being said, looked briefly at the price of wave springs on McMaster-Carr and was a little surprised. Instead, a compliant mechanism can be designed and fabricated using flexible filament.

Threaded Lid
A prototype enclosure lid was printed. The design added the upper stage to it, and combined with the other mesh. The purpose of this test was to see if the threads work properly. They did! Next, it was sent to @Giovannis for printing on the Formlabs. That test will be to see if the lid can be waterproof. The design is built on Carlos Murphy’s Nalgene Cap from GrabCAD.
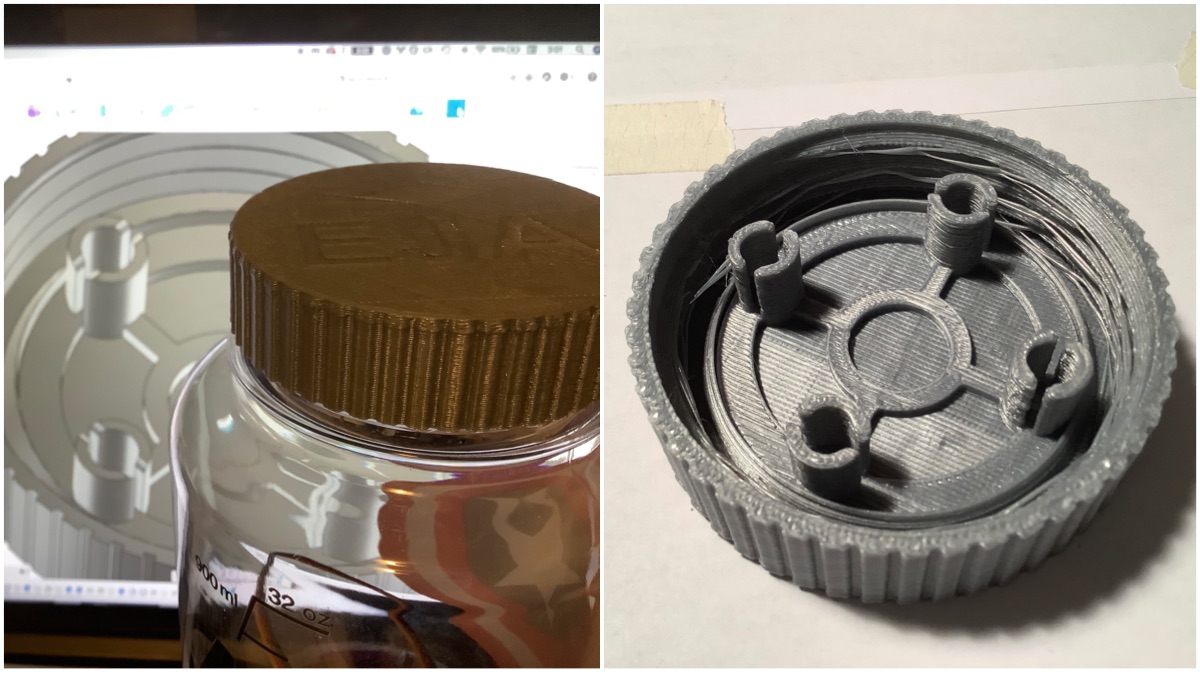
As you might have noticed from the above photo, the piece is not DFM - 3D printing. There are some improvements to be made now, because the original purpose of the test was to be a quick test print. There can be layer delamination on the vertical pieces that hold the wooden dowels, and fillets or ribs would assist. This was kindly pointed out by Giovanni with the results of the print at DesignLab:

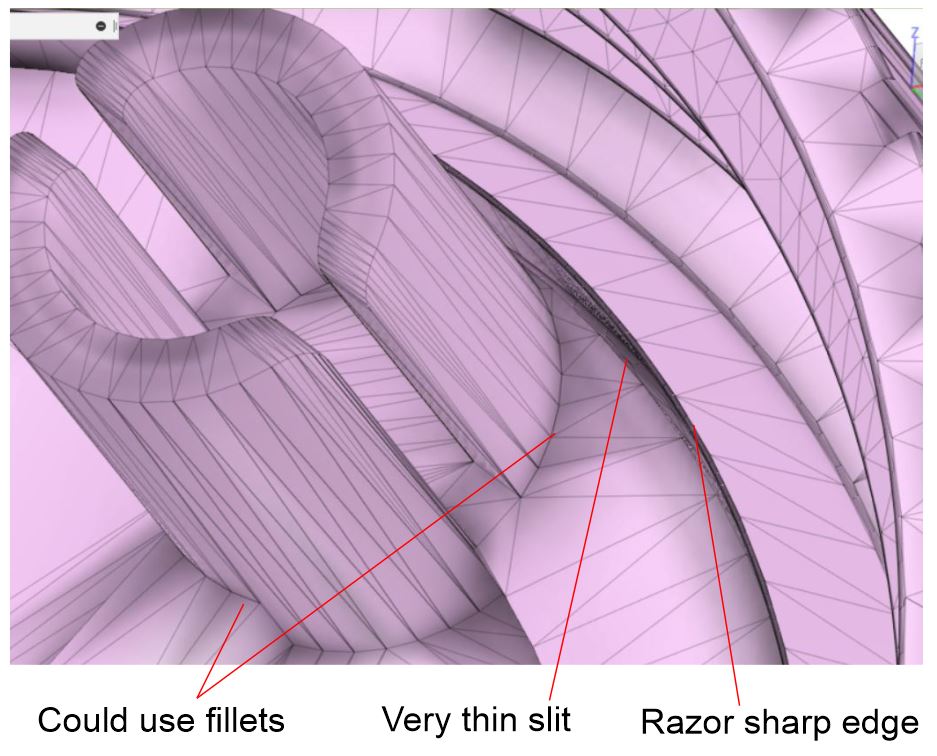
What’s interesting here is that the ‘very thin slit’ is a remnant of the combined upper stage piece with the internal lid. The upper stage piece is undersized a little, so that with DFM - 3D printing, it will friction fit (eventually will use glue). So for this piece, that was noticeable!
Anyway, here are the first set of prints from the DesignLab! Those two pieces will be mailed out to Leo and Tobi soon!

Thanks, DesignLab! More to follow :)
Moving Forwards
Yes, it’s disappointing that the experiment results did not work this time given all the prototyping hours. It was an important learning experience to show just how crucial it is to try things as fast as possible and not be overly confident in early ideas as to invest the time into CAD and 3D printing.
Here’s the next thing to try. An attachment on the servo horn in a thin material (first paper, then delrin sheet). The magnets would be attached to this sheet. The sheet would be folded like origami, to fit into the enclosure opening. There are three candidate ideas for this design, as sketched below:
This will be prototyped quickly this week to see if a solution can be arrived at.
Next Steps
The next step is to take score of where I’m at right now with mechanical & design, and re-adjust the schedule and priorities where necessary. Further work on the experiment may move to a lower priority for now, as the spool box design and test pieces need to be completed for milling in HDPE at the DesignLab then shipping across the continent and into Canada.
Also, not sure if it’s worth noting, cleaned up some of the desk surfaces where I’m at. Always seem to find that helps to clear away the fails and promote trying new ideas. A blank slate, ready for work!
Discussions
Become a Hackaday.io Member
Create an account to leave a comment. Already have an account? Log In.