 EK
EKNote: The content in this update was from August 22nd.
With time getting closer to the deadline, the pressure is ON to start testing something. The plan is to make a DIY Buoy B with some supplies here, in order to test some of the mechanical and design elements. As a treat, we will also test some lights - this will help us understand if it can be used as an illumination source for a camera monitor.
This was such an exciting moment! At last, all of the electronics are fully enclosed and the wiper is moving!
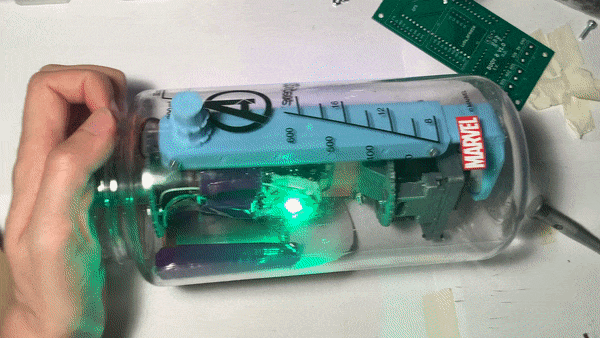
Read on for the steps that lead to this moment and to see the LED shine!
Here’s the updated internal wiper moving:

The alignment has been improved to be closer to the center:

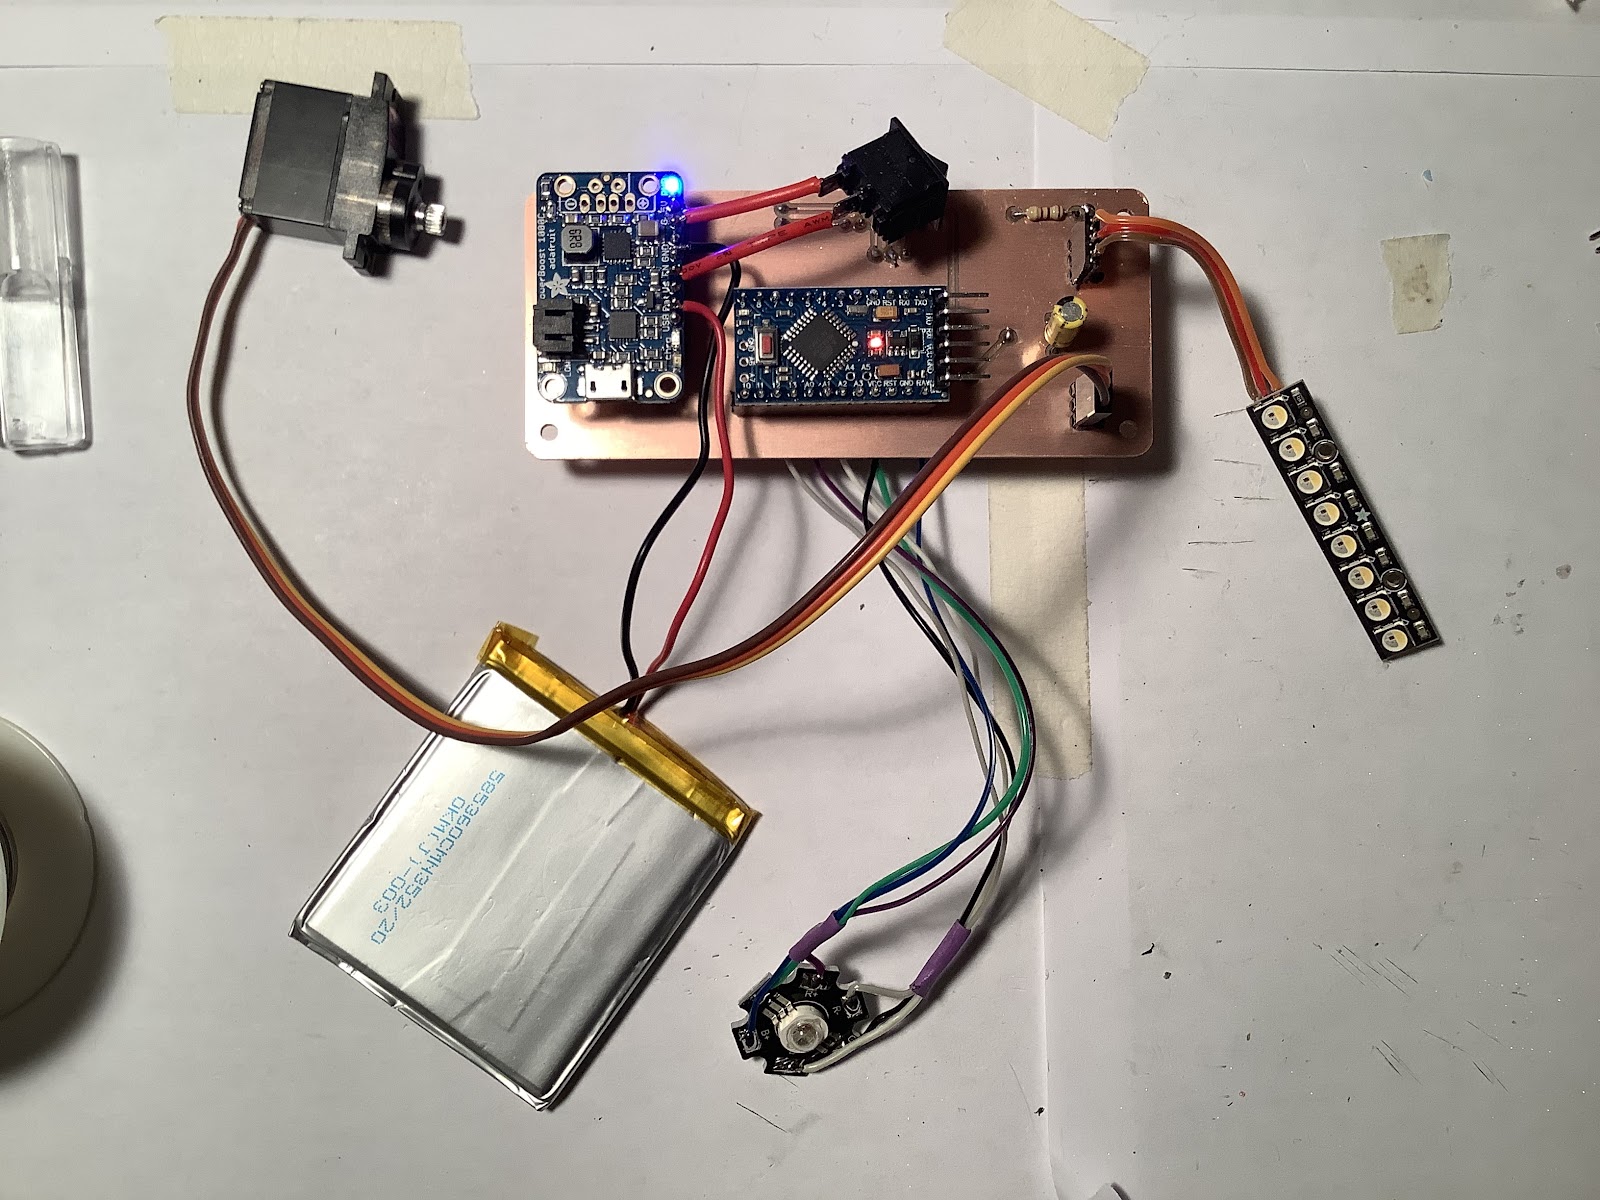
The DIY Buoy B will use a simple Arduino Pro Mini, the Robot Missions Super Bright Lights board, a 3W RGB LED, a Neopixel strip, a servo, and an Adafruit PowerBoost 1000. The battery will be a 2000 mAh LiPo. This is all attached to a double sided copper clad DIY circuit board:

The above image shows the process of making vias. Since this is not through plated, spare leads from resistors and the like are used to go between the two layers.
Next up was to scavenge some parts from old projects!


Here’s the board when populated and testing underway:
Test inserting it into the enclosure was a great experience in how horrible it went. There were many challenges and it needs a better design. Fastening the lid was the most difficult part, since everything rotates when doing so.
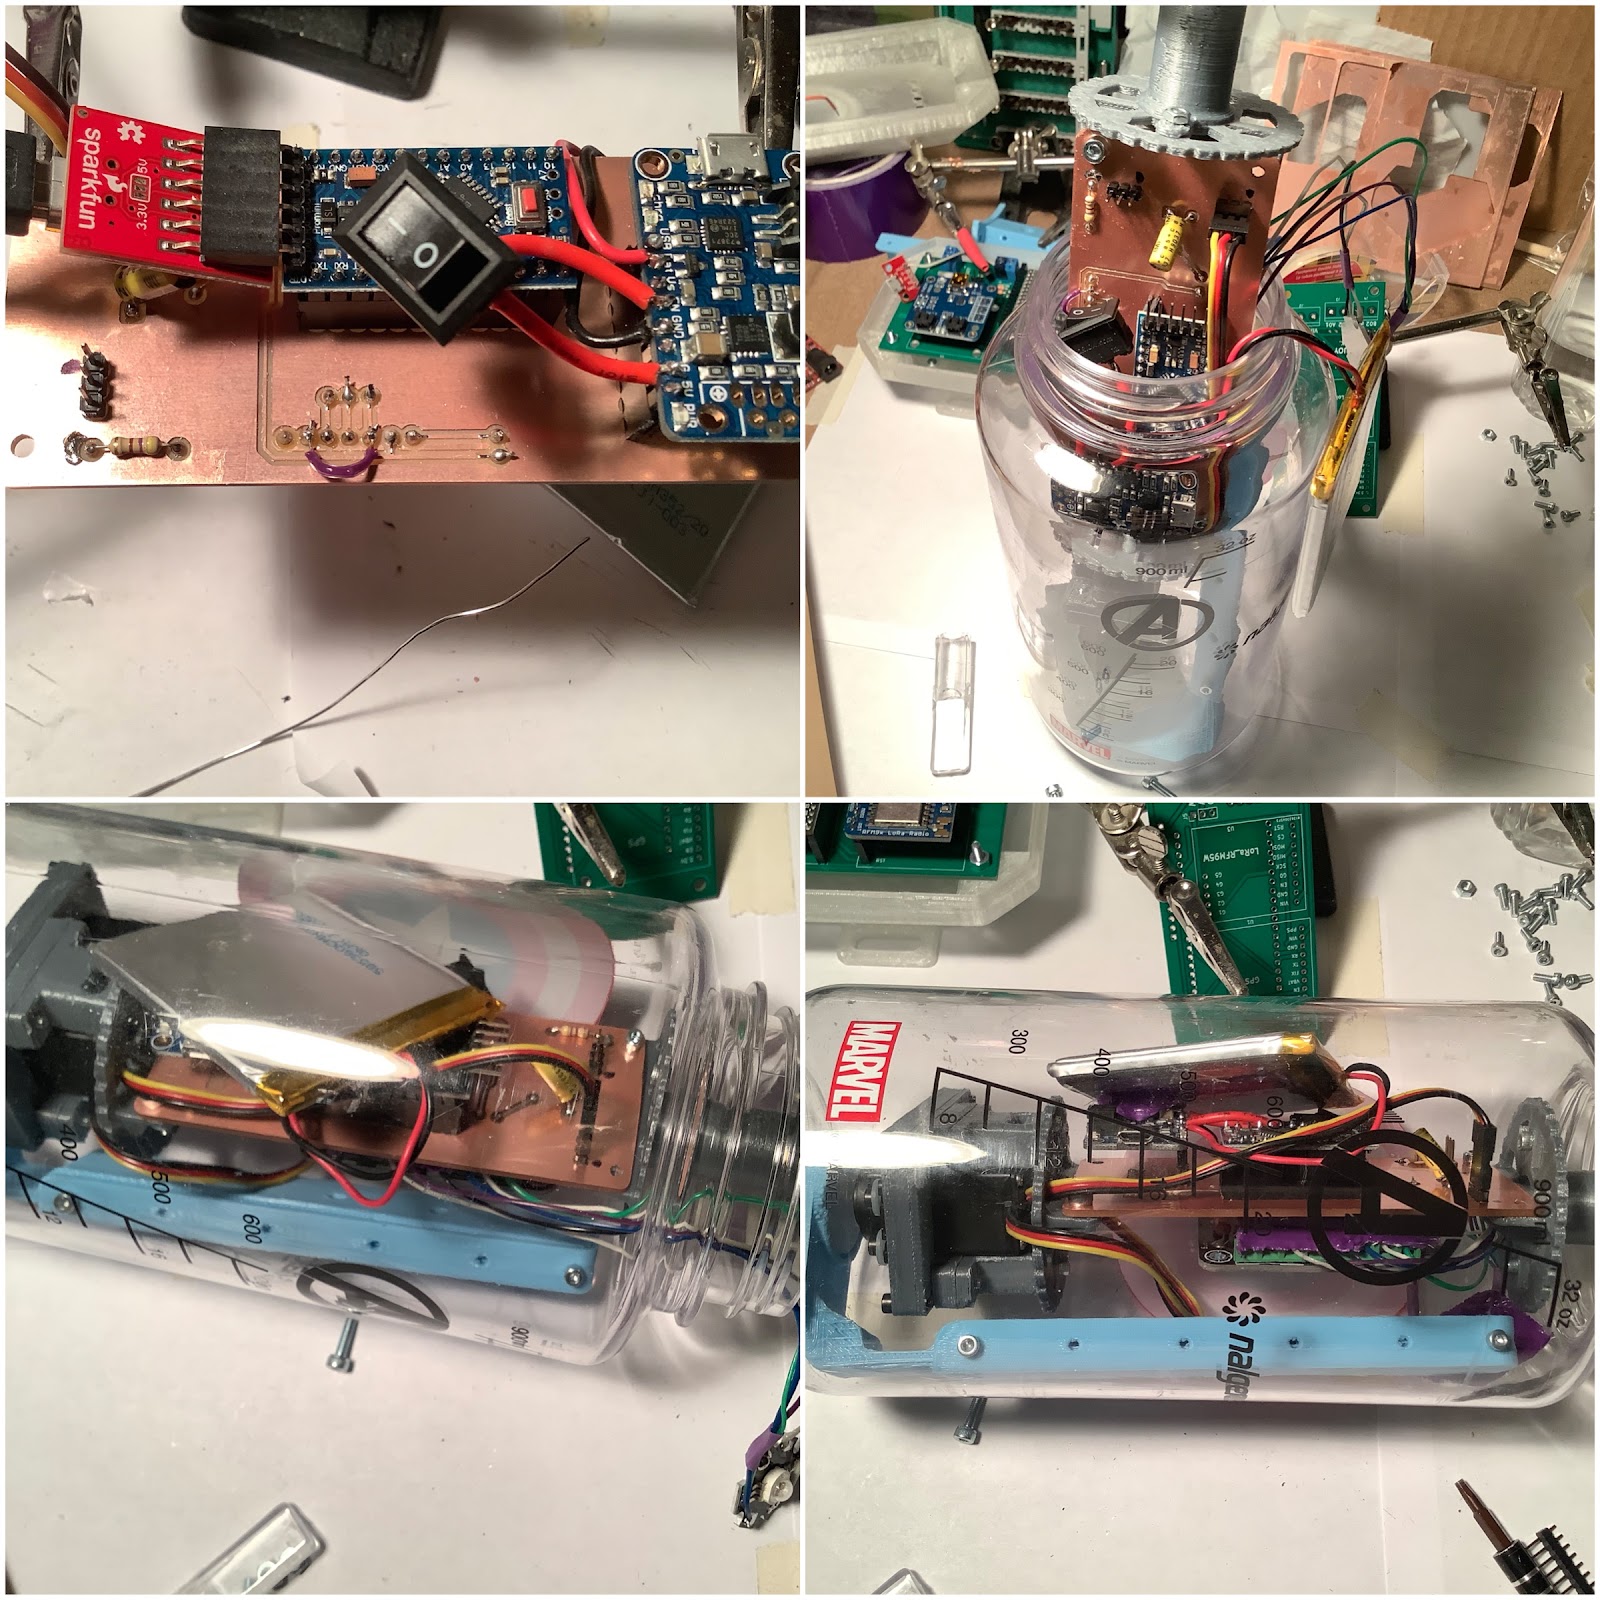
The battery placement works well when it is placed near the top of the enclosure attached to the inside:
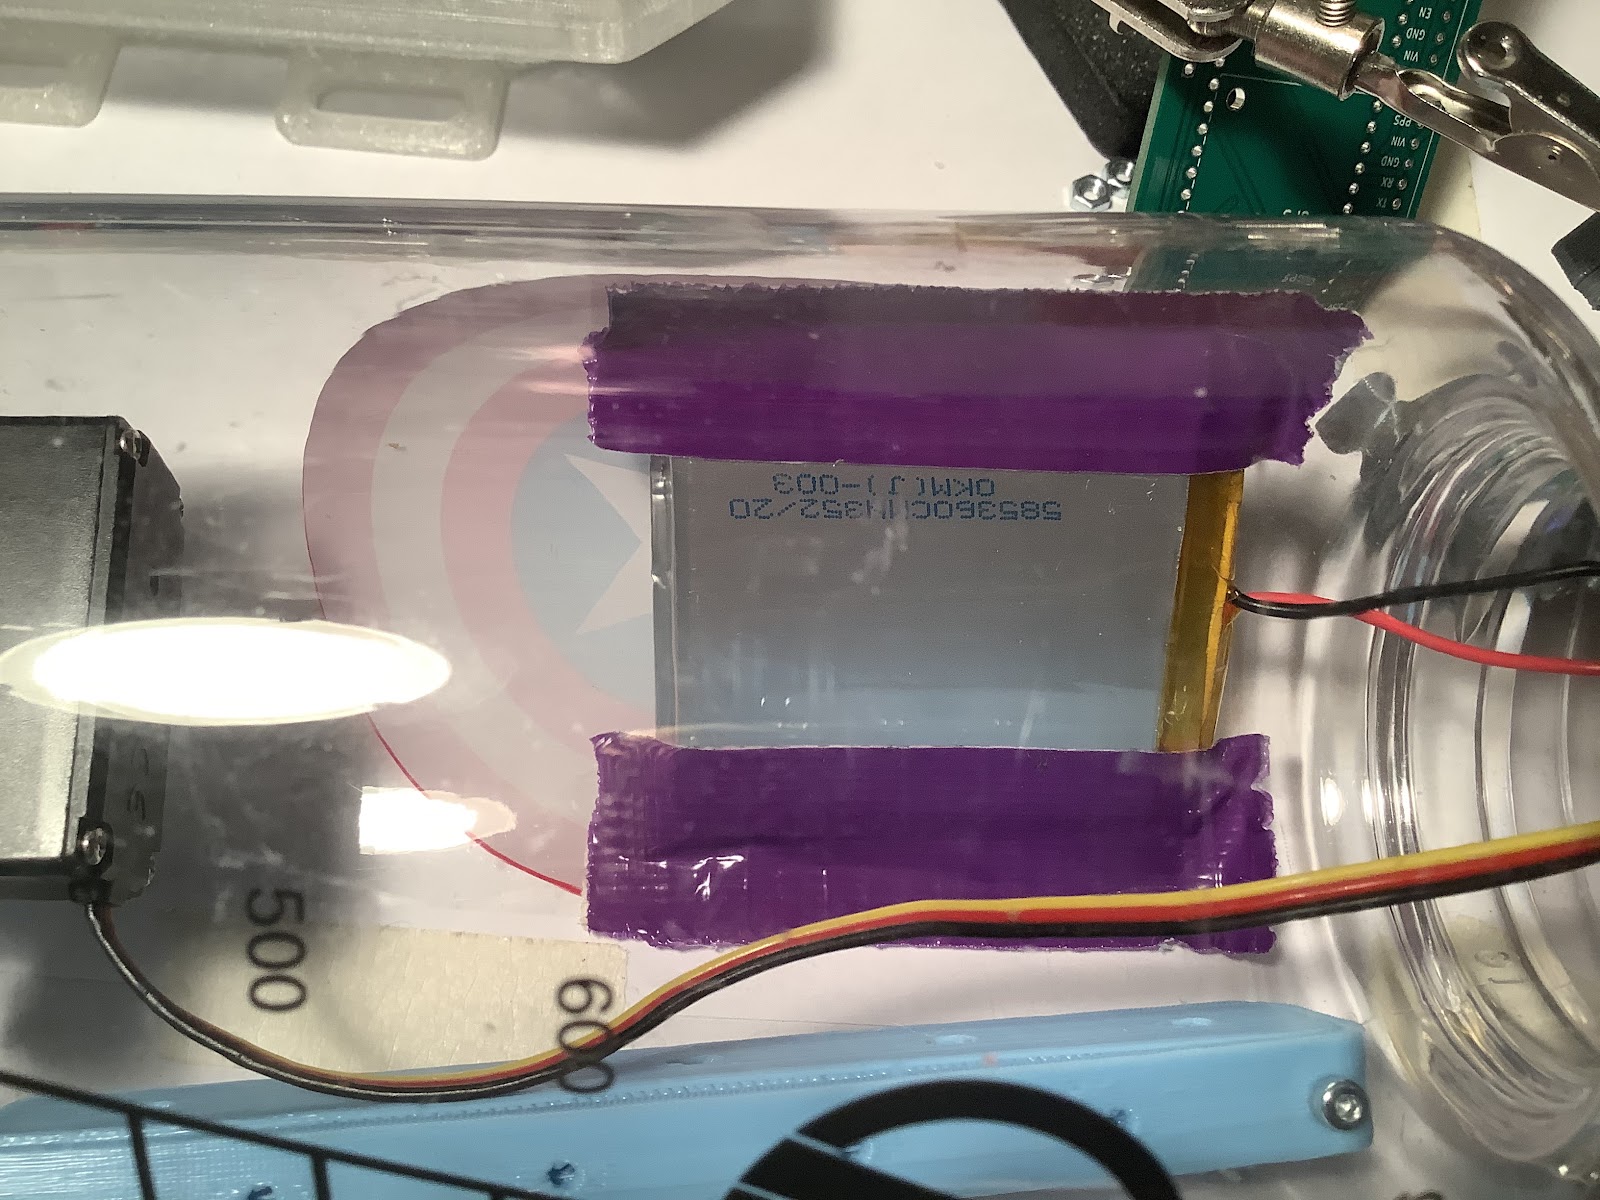
The wires for the super bright led also have duct tape to manage the cables:

During the install, the servo has to be aligned so that the servo horn faces the opposite side as the battery. This means that with the range of movement, the internal magnet wiper should not move close to the battery.

Hooray! Everything is finally fully enclosed! Here’s what it looks like with the leds:

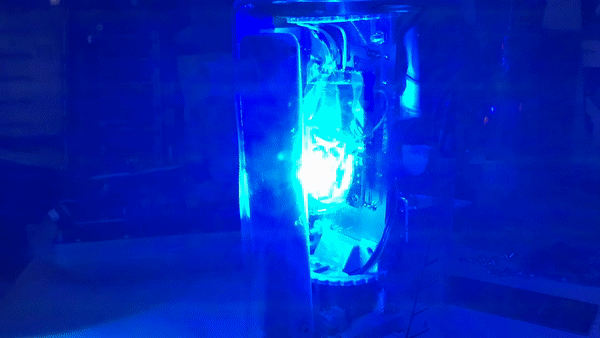

From a bench test, the light seems quite bright! However, we can’t make assumptions about a bench test (TRL 4) versus testing in a relevant environment (TRL 5). This is why we will test!
A few fixes were needed on this iteration. Namely, the Neopixels were attached directly to Vbat. This wasn’t good in terms of being able to switch off all the power. The fix was to change this to Vcc. The signal to the Neopixel still worked fine, without a logic level shifter to 5V.

Other changes included making the wires to the switch longer, and adding a detachable header connector for the battery. Oh yeah, and thanks to the PowerBoost having reverse polarity protection… oops! Everything still worked. :)
Discussions
Become a Hackaday.io Member
Create an account to leave a comment. Already have an account? Log In.