 Elecrow
Yesterday, I saw my 8-year-old nephew playing Minecraft with the Raspberry Pi I gave him before, then I got an idea, that is using code to make a customized and exciting Minecraft-pi LED blocks project. Minecraft Pi is a great way to get started with the Raspberry Pi microcomputer, the Minecraft Pi is a special custom made version of Minecraft that allows us to interact with the game using a deadly simple Python API to customize the game experience and props!
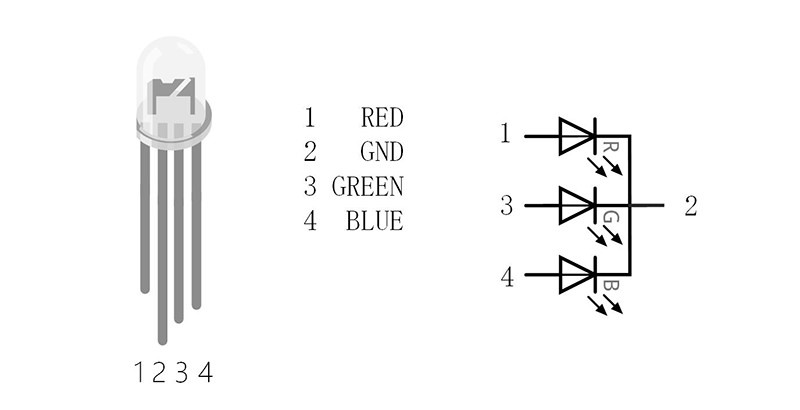
There are many projects you can do in the Minecraft world with the Raspberry Pi but specifically for us it wasn’t enough, we were looking for something challenging and blinking at the same time. In this project, we’ll step on multiple Minecraft blocks, detect the ID of the block and detect the color of the specific block we stepped on, based on the color we’ll light our RGB LED to create interactive steps game!
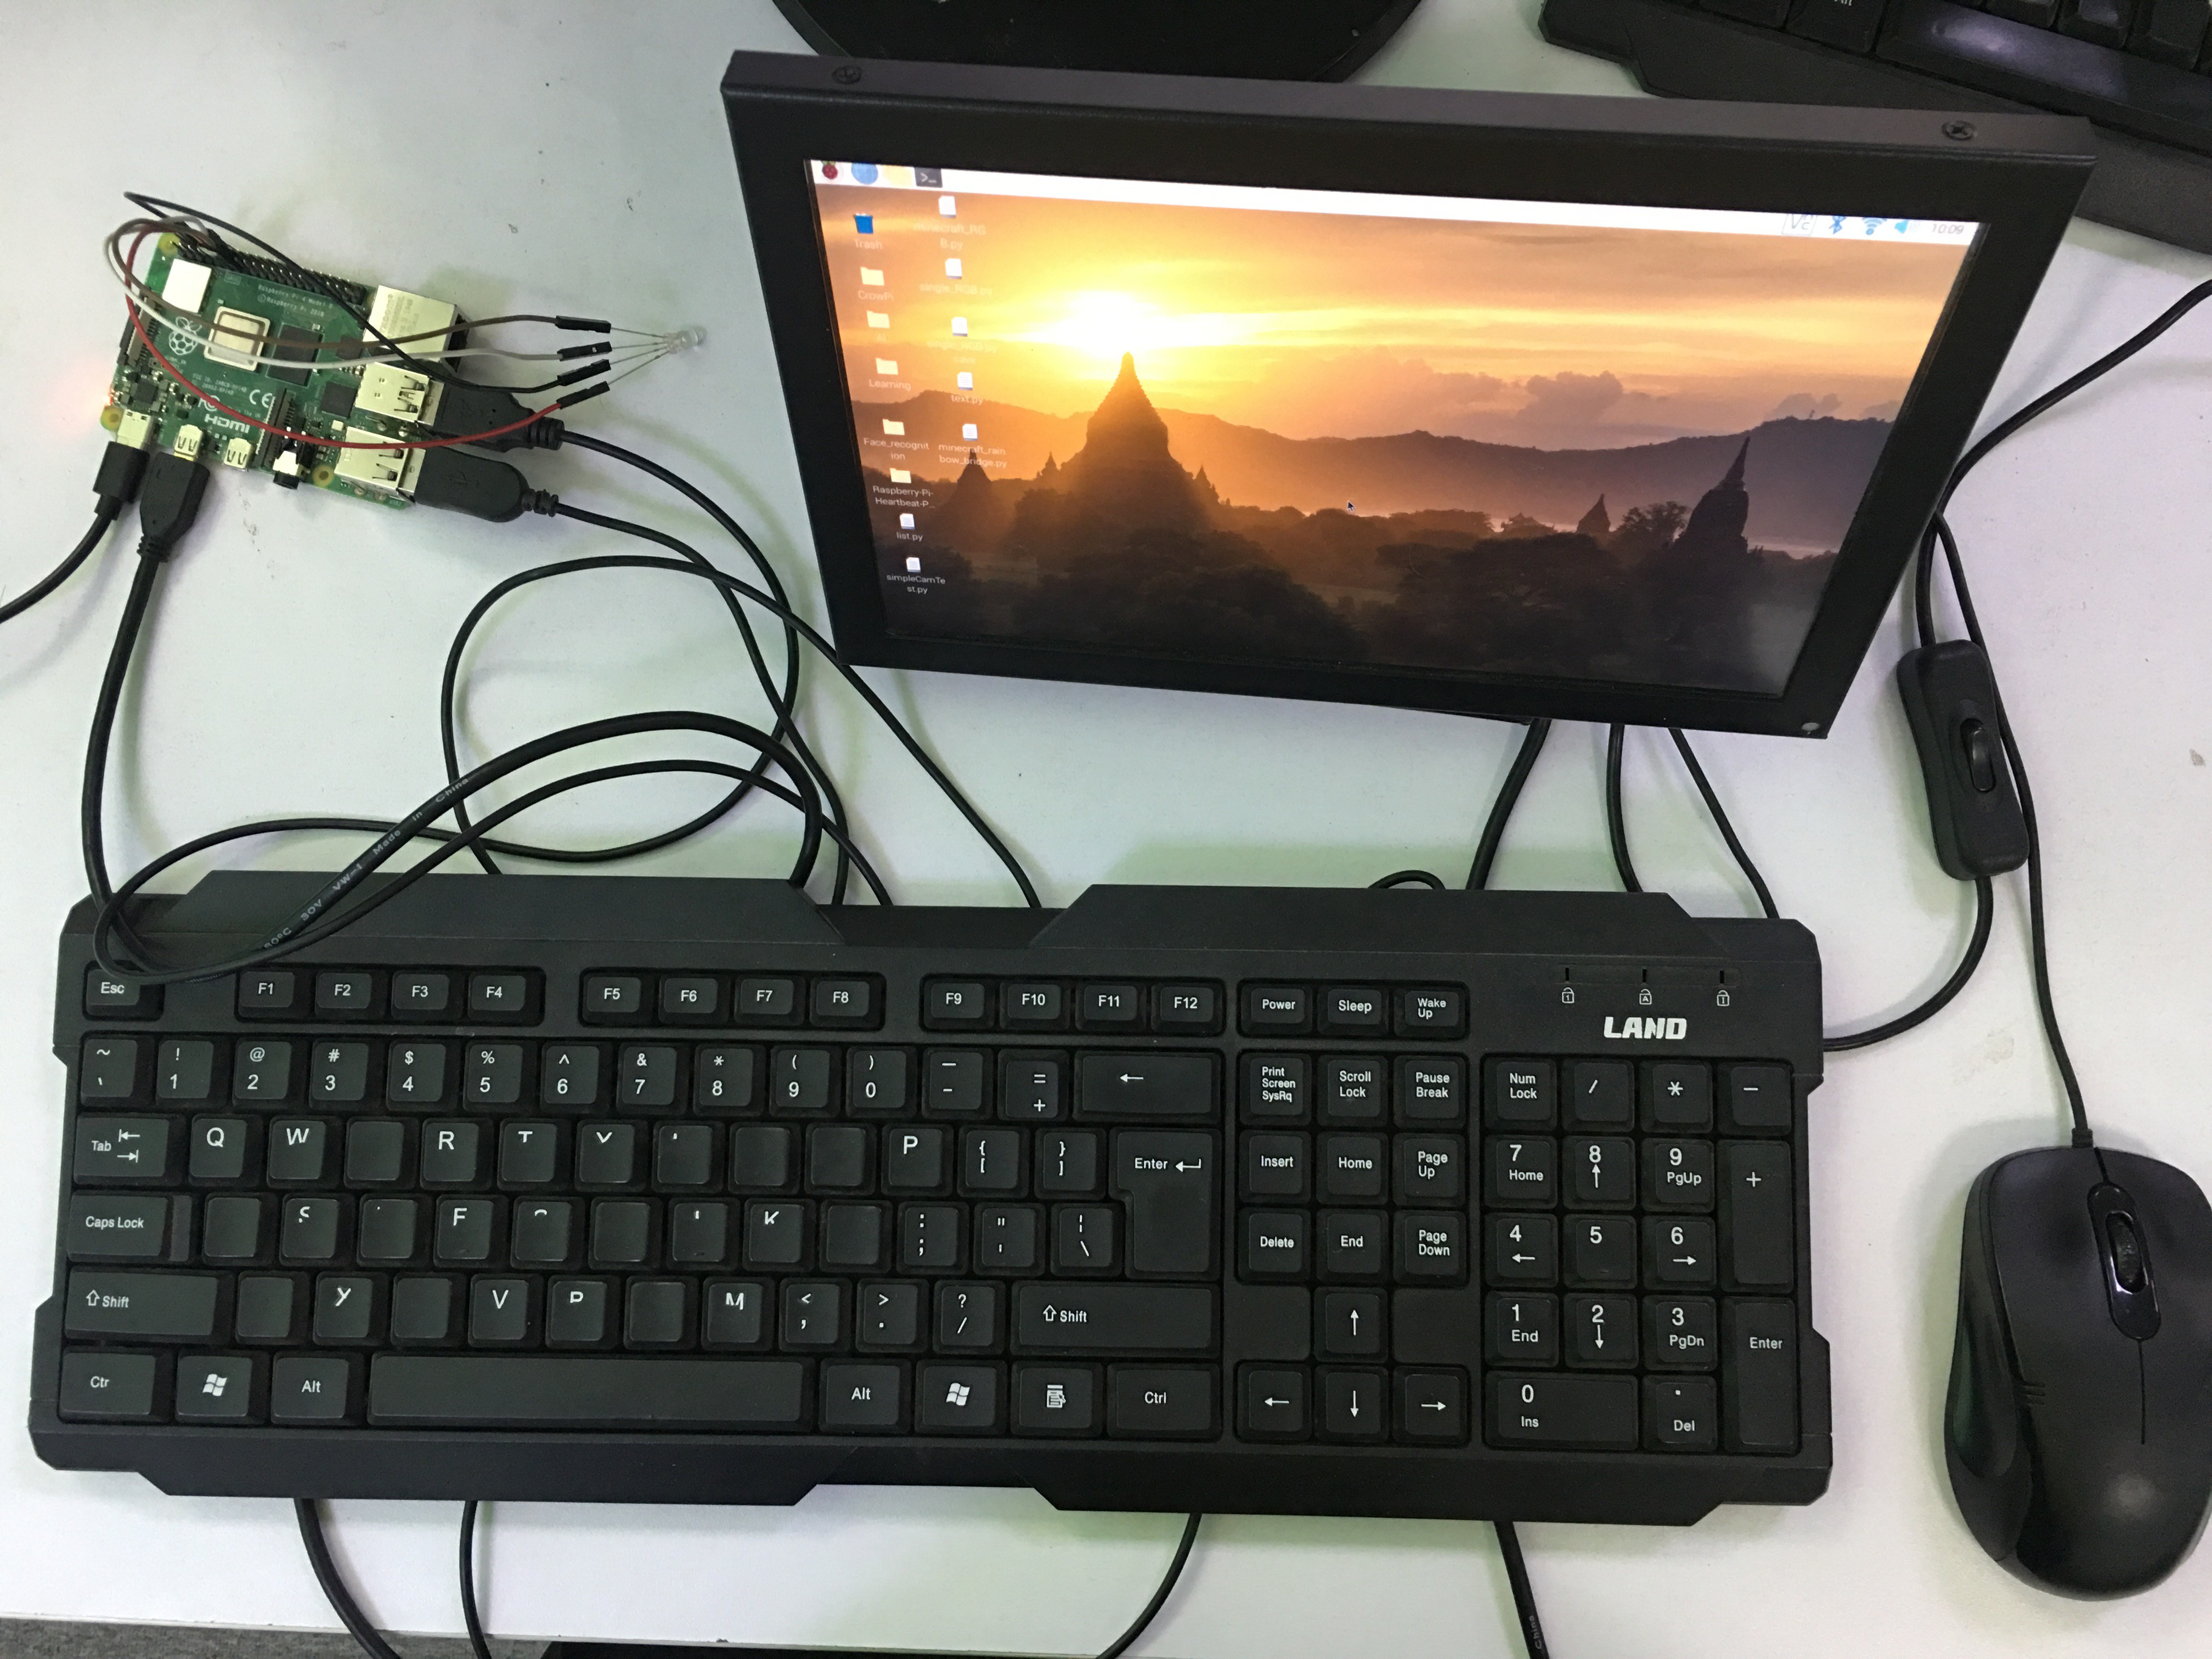
I will use two methods to achieve the effect, the first is through the accessories, which may be very chaotic...; the second is using CrowPi2 (learning computer with many sensors,currently crowdfunded on Kickstarter https://www.kickstarter.com/projects/elecrow/crowpi2-steam-education-platformand-raspberry-pi-laptop?ref=74xfxi )
let’s get started and see how to archive such an amazing project!

 gamaral
 Clay Graham
 Jonathan Beri
 T3rr0rByte13