 medeiros1
This project is about a kitchen scale.
Operation:
See the following video to understand how to operate and calibrate the scale:
https://www.youtube.com/watch?v=eGyq23pixPM
The challenges for this project were:
- To provide a nice looking flat design kitchen scale, where reasonable size vessels can be put on.
- To be able to print all mechanical parts on a 3D FDM printer without extra support structures.
- To use standard parts well known in the maker scene.
- To allow zero power consumption in switched off mode though the operation uses only two buttons and no power switch.
- To provide a flexible software that may change weight unit and display accuracy.
- To make it very accurate. This means there must be an easy way of calibration even the non-linearity of the sensor should be calibrated out.
I could find lots of scale projects, but none of them fulfilled neither more than two of the above challenges nor all of them.
So I built my own ... See below how the challenges have been achieved.
Mechanics:
The scale mechanics has been designed with 3D print in mind. This means all parts of the scale can be printed on a standard size 3D FDM (Fused Deposition Modeling) printer without any extra support.
Properties of the mechanics of the scale
All case and chassis parts are 3D printable.
Since Thingiverse is obviously not able to provide all 3D files correctly, here you will find all necessary stl and obj. files in one zip archive:
https://bechele.de/?page_id=467
>> apparently not fully true >> All 3D and CAD files are ready for download on thingiverse: https://www.thingiverse.com/thing:4551860 << apparently not fully true<<
No extra support is required for printing on a FDM printer all download files are already delivered in their proposed printing direction.
Two parts need a raft to stick properly on the print bed. This is the front cover and the button support. All other parts need just a brim.
For the front cover I used PETG, because there the inter layer adhesion is quite good and that is important, because there are very thin parts that have a rather high mechanical load in the inter layer direction. For the weight plate i used ABS, because due to the big number of faces, it is easier to clean off printing smudge marks and chips. PETG would be a mess there, because chips stick very hard on PETG.
The scale was designed with the idea to be as small as possible, so the electronics compartment has very limited space. Even the electronic parts for the power circuit need to be selected with this in mind.
Bill of Material:
Required mechanical parts:
6 Screws M3 x 6 DIN 965
2 Screws M4 x 20 DIN 912
2 Screws M4 x 16 DIN 912
10 Mini screws 1 x 4 plastic thread similar to DIN 7981
Electronics:
For the electronics I had in mind to use standard modules that are commonly used in the electronic maker scene, that can be purchased easily and cheap from the internet. Also I focused on low power consumption. Therefore I designed a zero power voltage supply that drops the power consumption to zero during off mode, though power on is realized by a key press. So I realized the Electronics with an Arduino pro mini and a weight cell and controller based on HX711. These parts can be usually purchased for less than 10€ all together from the internet. If you search for "HX711 module" and/or "arduino pro mini"you will find plenty of offers.
For more about electronics and software visit: https://bechele.de/?page_id=435
Software:
For the software I had flexibility in mind and the possibility to use different range sensors and different weight units. Therefore weight calibration is not fixed in code, but flexibly adaptable and calibrateable via software. In other words with no changes in the arduino sketch you may calibrate your scale by software. So the accuracy of your scale depends only on the accuracy of your calibration weights and the fluctuation and drift of your A/D...
Read more »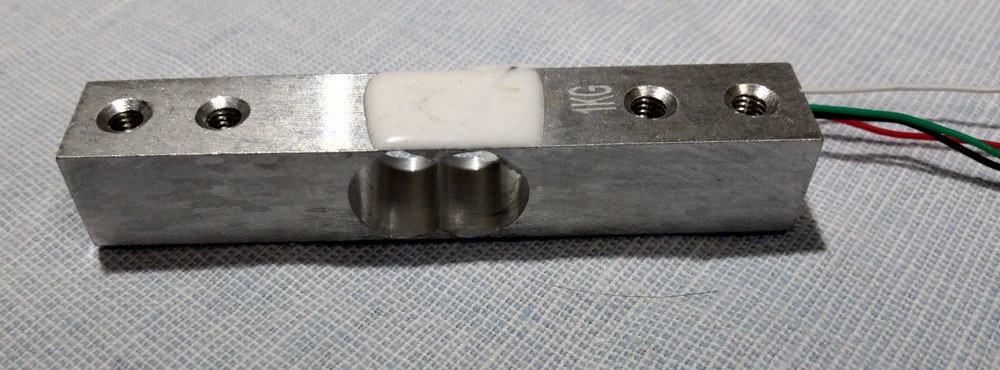

 Bram Peirs @ FW2W
 Steve Pendergrast
 Brian Brocken
 loren
loren