 Clyde D. Corpuz
Beginnings
This project started out as a little idea of mine in late 2019. Back then, I only had a year of experience with Arduino and electronics in general, but I've always had a knack for tinkering and figuring out how things work. Where I come from, official Arduino boards are considered relatively expensive, and the local market for development boards are mainly dominated by Chinese-made clones. I found some cheap ATtiny2313 microcontrollers being sold in a local online selling platform (around $3.70 for 5 chips) and I thought to myself, “Why not make a development board cheaper than a Chinese Nano?” (That’s only easy to say of course, and I did not expect that this small idea would throw me down a deep rabbit hole where I learned so much about PCB design concepts and electronics in general)
I immediately bought 10 of those ATtiny2313 chips and began the project with the initial motivation to give the boards to my friends as Christmas gifts. I quickly realized that the ATtiny2313 wouldn't be up to the task of being an ATmega328p alternative (not by a long shot) due to its small flash memory (a whopping 2kB) in which installing a bootloader would render 25% of the memory unusable for program code. At that time, as any sane person would, I was using Spence Konde (DrAzzy)'s ATTinyCore library so that I could program them with the Arduino IDE. DrAzzy thankfully pointed me in the right direction and suggested the use of the new ATtiny chips from the TinyAVR 0/1-series which have loads more program memory and RAM for about the same (or cheaper) price. Meanwhile, I realized that this idea could be more than just a simple Christmas gift to my friends, and instead be something that can help other people.
Why $2?
As we progress further and become more advanced (especially with the coming of Industry 4.0), people would need to be able to have more basic skills (such as electronics) to keep up with technology integrated into our lives, as well as to find better jobs and opportunities. To do so, there must be a way to increase accessibility to tools necessary to learn these skills, especially to those living in poverty (poverty rates are especially high here in the Philippines). Many of the schools offering basic education here do not have the appropriate learning tools (such as an Arduino or similar boards) to use in simple to advanced electronics classes since these kinds of lessons are not officially part of the local curriculum but are instead pushed by the teachers themselves.
I remember an experience during my high school Physics class where we had to buy an Arduino Uno or compatible board to use for a day. Many of my colleagues had a hard time looking for one while some even bought an expensive, or even outright wrong boards which were never even allowed to be used in class. In the end, many of them felt like they just wasted their money as most were not that into electronics in the first place.
What’s $2 for you? It’s not that significant of an amount is it not? As I’ve mentioned previously, Arduino boards are considered relatively expensive where I come from and are not widely known to the general public. The market for these kinds of boards is also mainly dominated by Chinese-made clones - which are good enough I guess, but these boards lack any kind of support and their quality control is questionable at best. The idea behind making it very cheap while still maintaining some sense of quality is to aid in increasing accessibility to learning tools by lowering the barrier of entry, especially to the financially disadvantaged. Also, for those in a well-off situation, $2 dollars would be nothing. It’s the same price for a snack or even a meal! By providing affordable boards, people would be motivated to create more projects and turn their robotics dream into reality. Another benefit is that it encourages more prototyping (Would you really prototype risky setups in official Arduino boards?? @_@).
I’d like to note that $2 only covers the price of materials. If these things would come to market they would probably be around $3-4/unit which are also in the ballpark of the Chinese clones. Regardless, the idea still holds.
Version 1.0
With DrAzzy's suggestion, I decided to use the ATtiny1616 as the MCU for the first version of my project. I used the SOP-10 package to make assembly easier as I have yet to learn reflow soldering nor do I have a hot air station. Even though there exists the 3216 variant which costs a little more and has twice the memory, I didn't use it since I wanted to save every cent I can to fit my $2 constraint and instead try to obtain better and more reliable components from reputable manufacturers and distributors. I also felt that 16kB of program memory would be enough for basic education applications. I then created the schematic and PCB design files in EasyEDA, which I had to learn from scratch since I did not have prior experience. Thankfully there are a lot of resources around the internet that I easily found and heavily studied. I derived most of the design from the Chinese Nano clones, mostly using the same parts including the CH340G USB to serial converter (which is an excellent chip for its price). I had to fix some design flaws from those schematics though, like the RX and TX resistors between the serial converter and MCU.
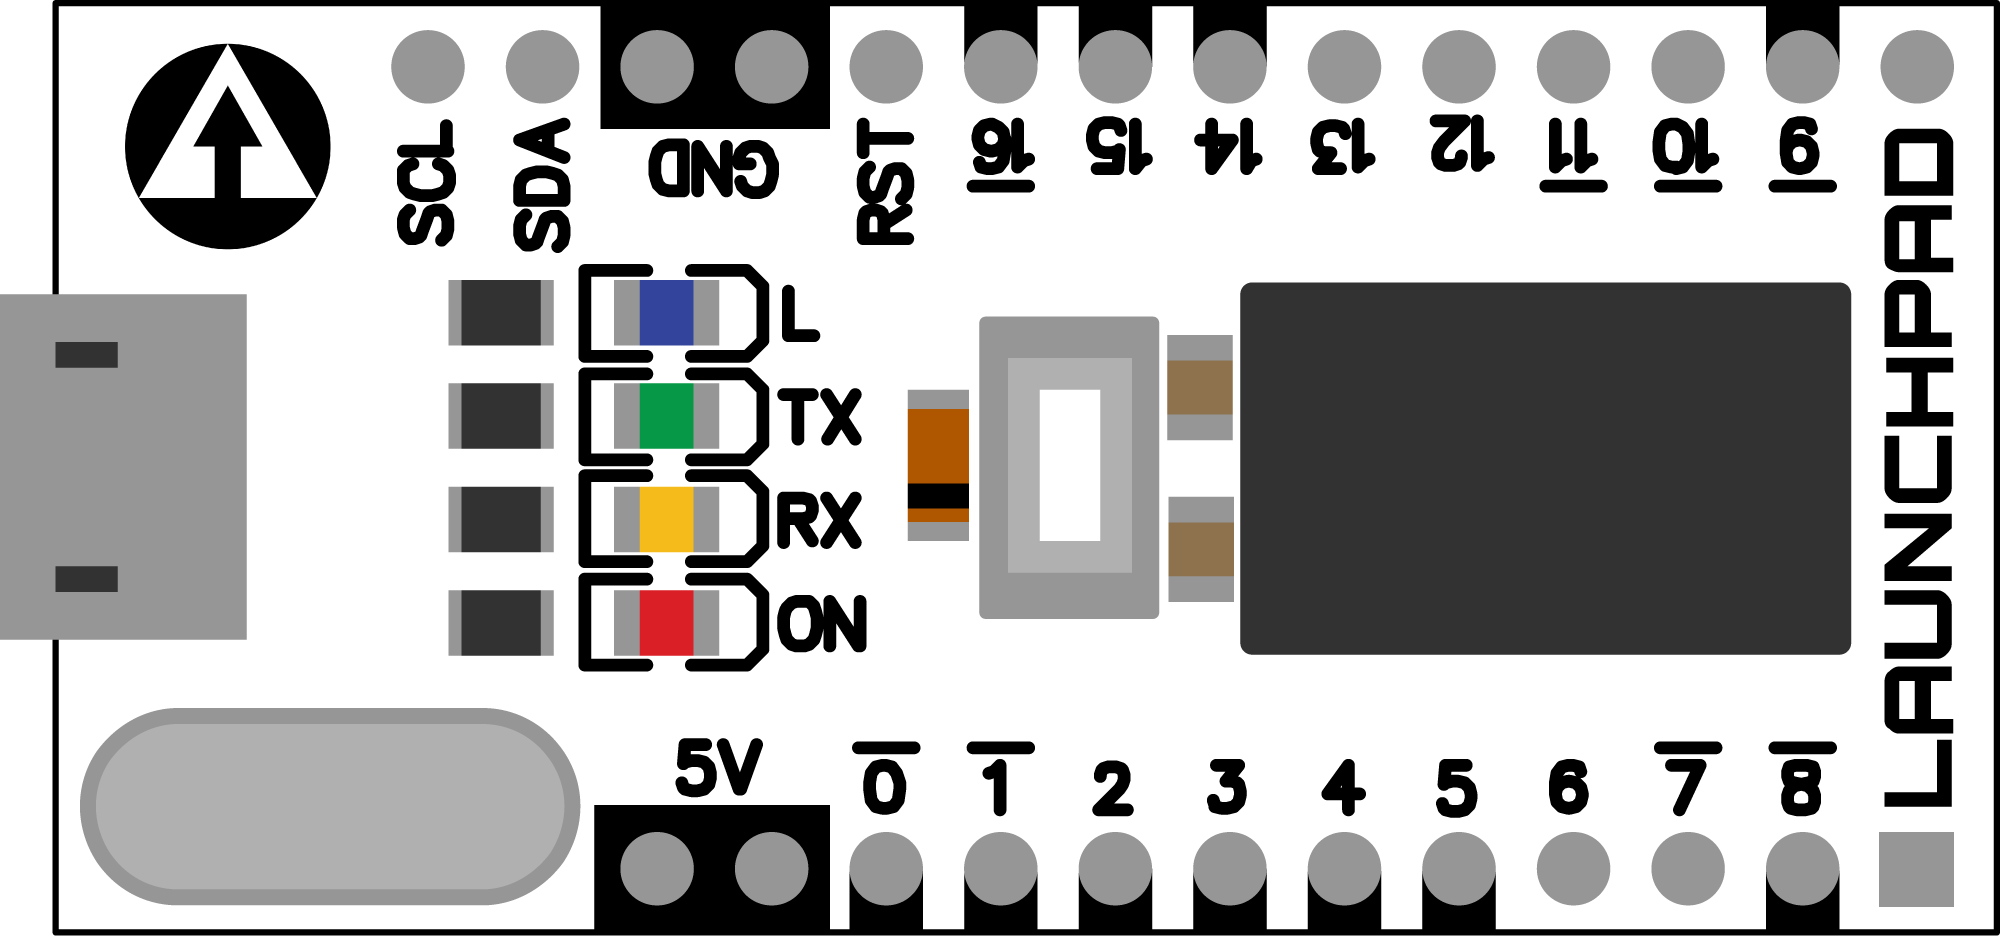
In terms of design, I wanted it to look clean and have an intuitive pin layout. I also tried to minimize the number of components on top of the board to not intimidate beginners in handling electronics (The bottom is okay since there would be male headers guarding the components anyway). Since the ATtiny differs from the ATmega328p in terms of capabilities in each pin (with some analog pins also having PWM output) I did away with the Ax and Dx naming scheme and instead named the pins 0-16 that then have markings on them to specify their functions:

Prototyping

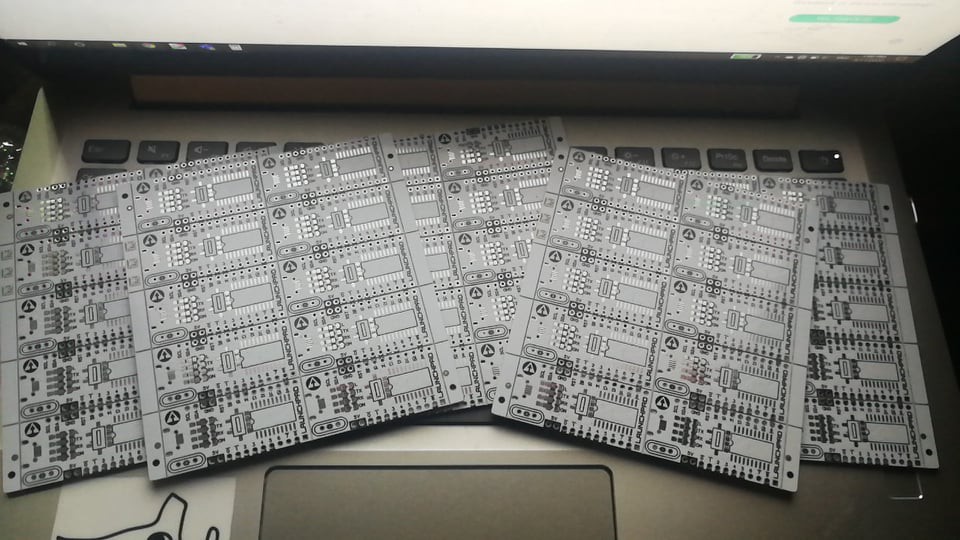
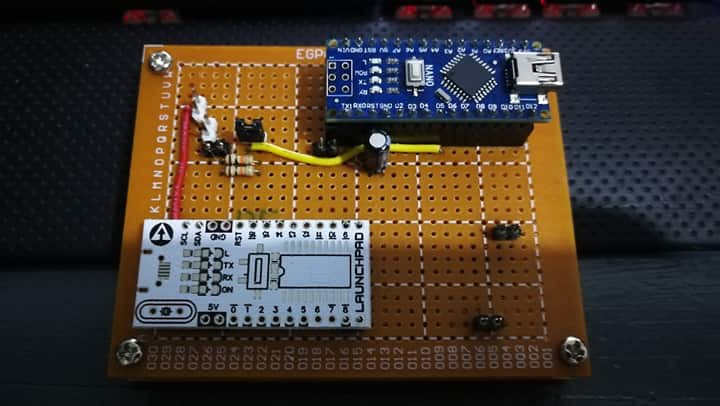
Before I finalized the PCB design and schematics, I first created a prototype on perfboard using some adapter boards and through-hole components (this step is REALLY, REALLY important. You should never risk ordering PCBs without making sure that it actually works). With this, I was able to troubleshoot and fix some more issues with the design. I then proceeded to order the PCBs through JLCPCB. I got the boards panelized to help keep the unit costs low.
Assembly
All of the boards I've assembled so far have had their components hand-soldered since I have not yet done reflow soldering. During my first attempts at assembling the boards, I broke individual boards from the panel and assembled them one by one. Each board probably took about an hour at most to assemble. To help in assembly, I made a crude assembly jig that also doubled as a UPDI programmer using perfboard and some machined male headers to keep the board in place and ensure electrical contact during programming. I used jtag2updi as the programmer with schematics and the code here. After an initial batch of boards, I then proceeded to assemble boards 3 at a time, and then 5 at a time. I have yet to assemble 10 boards in a panel in one go but I guess that's probably more efficient.
Once all the components are soldered in place (save one jumper resistor at the bottom of the board connecting the reset/UPDI pin to the auto-reset circuit), I then proceeded to burn bootloaders to the board. As of right now, I still haven’t placed the jumper resistors yet as I’m still burning bootloaders that do not disable the UPDI pin for easier troubleshooting/programming as I mess around with the options within megaTinyCore (and I am yet to test the boards).
Testing
To set my boards apart from the generic Chinese clones, I'd like thoroughly test them first (Especially if I do sell these things). I'm still in the process of creating a crude testing jig for the boards. Aside from checking the 5V regulator output, I'm currently planning to do an LED light-up test for each pin but I also want to do more complicated testing wherein a Nano would send commands to it via Serial (since if it accepts code through the bootloader I'd assume that those pins are fine right?) and the board would do things such as turning pins high or low with the Nano reading the status of each pin or vice versa with LED's indicating the status of the testing process. Any suggestions/ideas are welcome!
Well, that's it so far. I'd probably update you guys on the testing jig or board revisions when I finally get the energy to work on the project again. I'm currently been taking a break and focusing on other projects at the moment but I thought I'd share this one with you.
- C
Discussions
Become a Hackaday.io Member
Create an account to leave a comment. Already have an account? Log In.
Clyde - great job! We use Pro Mini's in one of our products control system. An Arduino pro or nano form factor, in the $2 cost range, is scary low? As a VP of Engr, , one element of my job involves a lot of approving new components, materials,systems, software , tools, processes and suppliers, , , into our production system. A interesting aspect I would like to share with you, is I am constantly looking for PCBs with "LESS"! Less memory, Less IO pins, Less functions, , etc. Why? It's cheaper to buy 100 Arduino nanos, , or similar STM 32 boards AND then NOT use 70% of their cability VS. ordering 100 custom PCBs with the exact components, memory, qty of pins, etc on it. Custom PCBs are crazy to design, test, validate, integrate into a production system. We have to create documentation, then publish it to our warranty, buy and stock inventory for our customers, and supply parts for maintenance, repair, overhaul. And it's just simpler to use Arduino or Pololus Documentation, parts supply, etc! I really like how you want to keep it low cost and bare bones on capability! Project boards and production PCBs are two very seperate products. I like that you are trending to the production product side, keep it simple, and it will sell!!!
Are you sure? yes | no
Thanks for the kind words Todd!
Yes, that was initially my intention - to create a simplistic, no-frills, and easy to use development board that can be used in a wide array of simple applications while having high library compatibility within the Arduino environment. I also plan to develop it into some sort of platform at some point where you can just plop one up to another PCB to make it do more specific or special tasks (just like shields). As you may have read in the log, this was intended mostly as an educational product to teach people who would have not otherwise have any access to learning tools such as the Arduino boards while also having access to support and documentation. I'm honored and glad that it's also garnering praise from people in the industry.
Again, thank you very much!
-CC
Are you sure? yes | no