Close
0%
0%

Alexa Home Automation System Using NodeMCU & Relay

You can easily control light, fan, and other home appliances with the voice command.

Public Chat
Similar projects worth following
In this IoT project, I have made the Alexa Smart Home Automation system using the NodeMCU ESP8266 & Relay Module. You can easily control light, fan, and other home appliances with the voice command. To connect the Echo Dot smart speaker with the NodeMCU, I have used only the Amazon Alexa app.

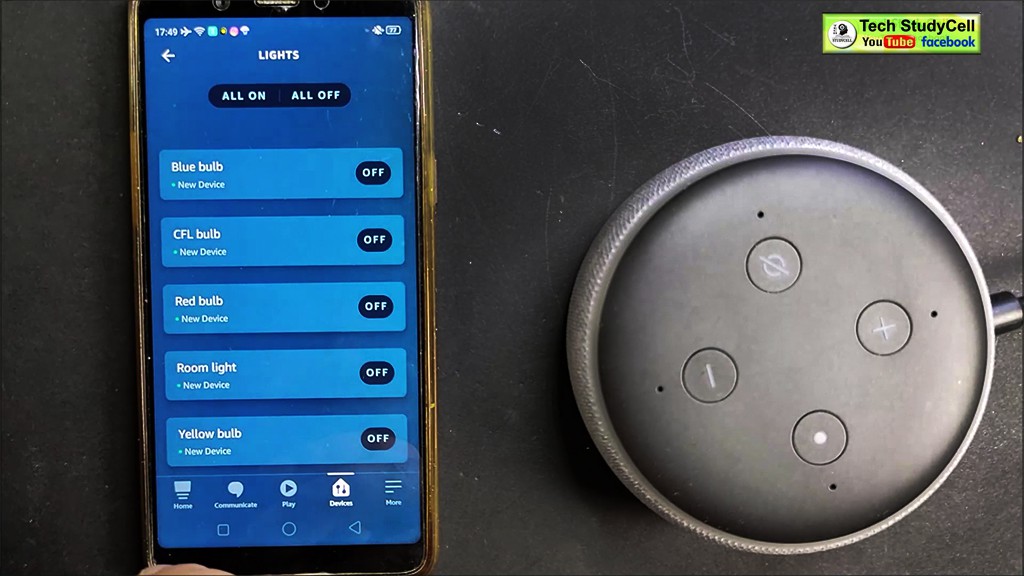
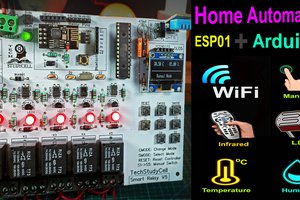
If you don't have Echo Dot smart speaker, still you can control the home appliances. And you can also monitor the relay time feedback of the switches from the smartphone.

You can also use the ESP32 board instead of the NodeMCU micro controller.
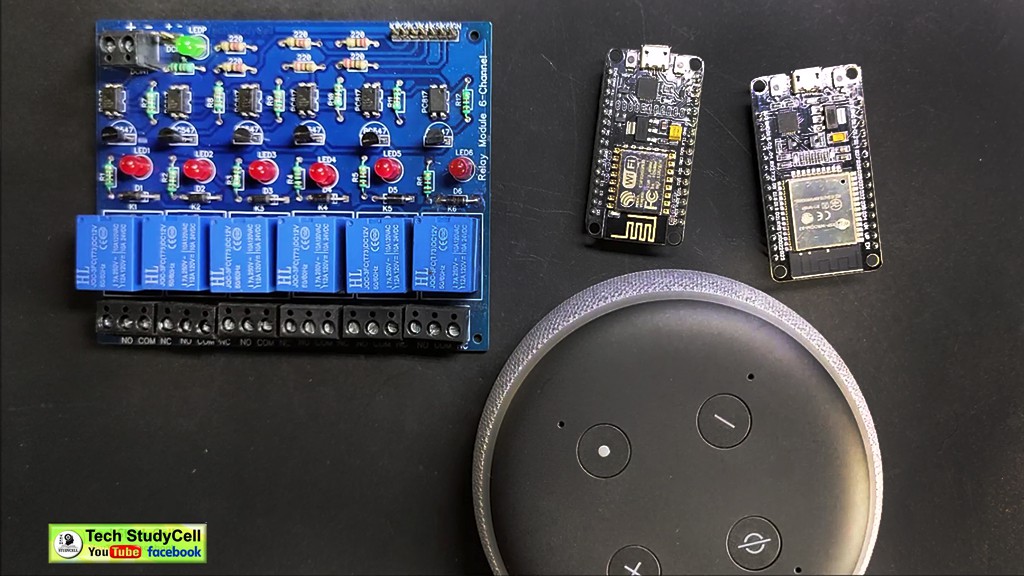
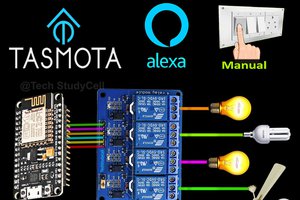
Required Components:

1. Alexa Echo Dot

2. Relay Module

3. NodeMCU or ESP32 board

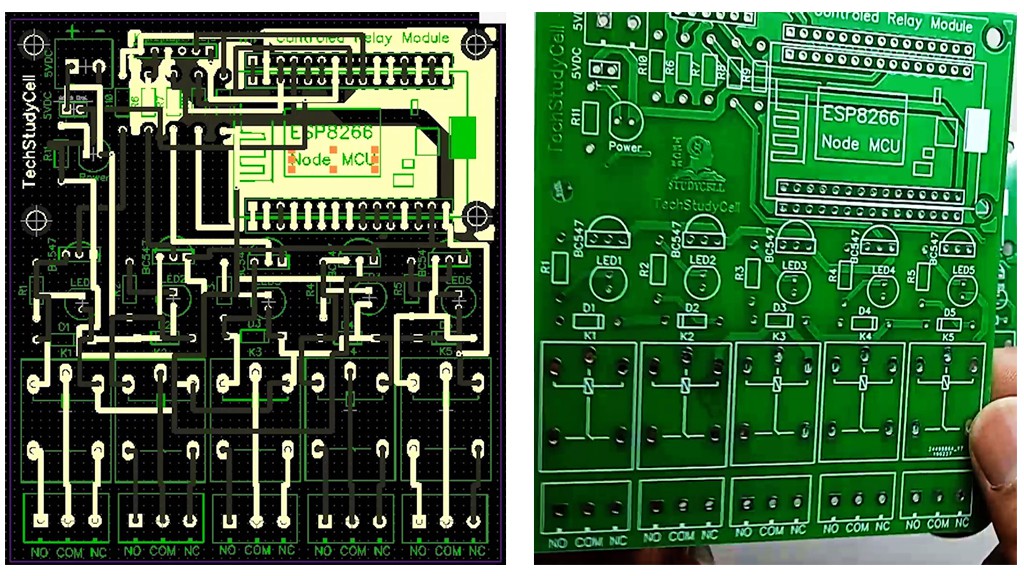
Required Components for Relay Module:

1. Relays 5v (SPDT)

2. BC547 Transistors

3. LED 5mm

4. 220-ohm Resistors

5. Connectors

Circuit Diagram:

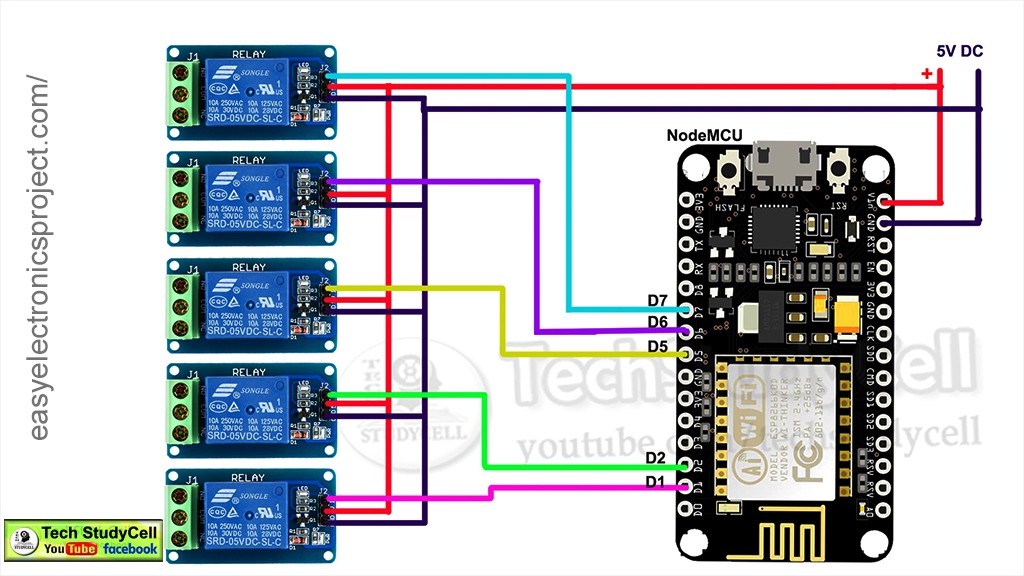
As you can see the circuit for this home automation project is very simple. 

You can easily make this circuit with the Relay module and NodeMCU. 

Here, I have used D1, D2, D5, D6, D7 pins of NodeMCU to control the 5 Relays. And I have used a 5V mobile charger to supply the circuit.

Code_Alexa_Control_Relay_Local_WiFi.zip

Code for this Alexa Home Automation project

x-zip-compressed - 1.67 kB - 08/05/2020 at 11:03

Download

  • 1
    Program the NodeMCU

    In the tutorial video, I have explained the code in detail.

    As I said, you can use both NodeMCU or ESP32 for this project. I have used the ESPAlexa library for this project.

    If you use NodeMCU ESP8266 then you have to download and install the ESP8266 board version (2.5.1) (as shown in the picture).

    I have faced some issues with the latest version of the ESP8266 board library while uploading the code.

    In the code enter the WiFi credentials, and set the names of the devices like Room light, fan, Night Lamp, etc.

    Here, I have used the active High relay module, so if you use the active low relay module then you have to do little modifications in the code as shown in the tutorial video.

    Still, if you face any issue, let me know in the comment section.

    I have attached the code for this Alexa home automation project.

    Download Code for this Alexa Home Automation projects:

    https://drive.google.com/uc?export=download&id=128pmPYrWQYnTO2yAiV-STgVQd0-4hkbr

  • 2
    Configure the Amazon Alexa App

    First, download and install the Amazon Alexa App from the Google PlayStore or App Store.

    Your mobile and the NodeMCU should be connected with the same wifi network.

    Steps to add devices in Amazon Alexa App.

    1. Open the Amazon Alexa App.

    2. Goto Devices.

    3. Tap on the "+" icon on the top, then select Add Devices.

    4. Select Light, then select Other.

    5. Tap on the Discover Devices.

    It will take some time to discover all the devices.

    After that add all the devices one by one in the Amazon Alexa App.

    In the tutorial video, I have step by step how to connect devices with the Amazon Alexa app.

  • 3
    Designing the PCB

    Although you don't need any custom design PCB to make this smart home system. But to make the circuit compact and to give the project a professional look, I have designed the PCB for this Alexa project.

View all 9 instructions

Enjoy this project?

Share

Discussions

diman wrote 10/03/2021 at 13:13 point

Hi bro,

I want use your project but I need also to integrate some button to command the same relay's output, but I didn't found solution.

Because I need also to switch on lamps from local 
Please can you help me??

regards

  Are you sure? yes | no

Similar Projects

Does this project spark your interest?

Become a member to follow this project and never miss any updates