 Thomas Ruschival
Why?
First and most important - because it is fun!
Did you ever buy a product you really loved for its specs and features and after some time you found something is missing or doesn’t feel right? - Well, so did I.
Ten years ago I got a Terratec Noxon iRadio Cube digital alarm clock with internet radio and UPNP player. A great gadget, unfortunately it died :( Even worse - Terratec went out of business and does no longer maintain software. I had to find a replacement.
After some research I got an Auna Radio Gaga. The sound quality is amazing for a alarm clock, it can play FM Radio, DAB+, internet streams and podcasts using digital frontier radio service - really neat features but I missed adding other podcast urls and radio stations. I would love to hack my Auna and the software… but it turns out you can’t (at least not easily).
It was time to create DigitalRooster. And it was the perfect chance to learn a lot about electronics, CAD, 3D-printing and to get to learn QML.
What?
The minimum I wanted was to listen to podcasts and internet radio when I go to bed and to get woken up reliably in the morning with my favorite news station - but only during the week.
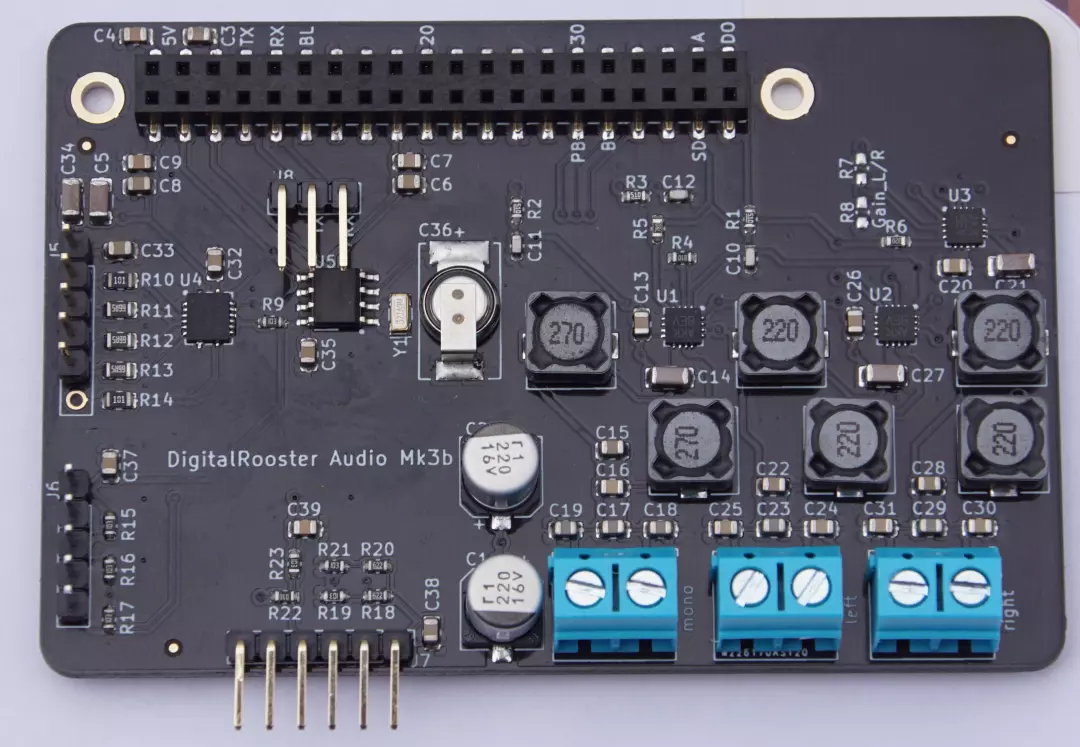
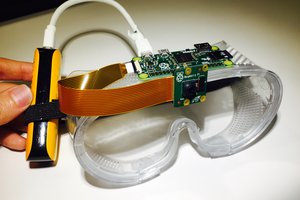
I don’t want complex controls with many buttons but I wanted a physical volume controler and on/off button, It feels more intuitive to me to turn a knob to change the volume than fiddling with virtual sliders on a touch display. So the hardware got a fancy Grayhill rotary encoder with push button and a touch display (capacitive)
First the core functionality of DigitalRoosterGui was developed running on Debian GNU/Linux and Microsoft Windows as a library that could be tested independently. The QML GUI came next.
Porting it to embedded Linux with buildroot on Raspberry Pi was relatively easy.
I had past experience with board support packages and buildroot from previous
projects. Playing around with Raspberry Pi Zero W using framebuffer copy (fbcp)
the performance was o.k. but not overwhelming. I dropped Raspbian and the original rpi-linux kernel. At the time it was stuck at a heavily patched 4.19 kernel that didn't include tiny-drm and KMS for graphics. Now I am using vanilla mainline kernel with VC4 video driver and tiny-drm for the SPI display - No more fbcp!
I am working on a port to Banana Pi M2 Zero with quad-core CPU and a MALI GPU. On Mali/Lima there are some quirks with QT shaders but we will figure it out. The performance on Banana Pi is currently sub-par. It takes ages for the display to react to a touch event. The Raspberry Pi solution is working like a charm.
For more advanced configuration such as adding new podcasts a basic REST API is provided.
What's next?
I think it is mature enough to share it and evolve it with others. I am sure you have a lot of great ideas that are missing in the current implementation - and probably there are tons of stuff that you would like to change - go ahead it is open source and I like to work with others! Check out the Contributing page.
My current plans and ideas are:
- integrate a ADPS9960 sensor for at least brightness control (and later maybe gesture control)
- have RGBA LEDs to wake me up with a sunrise simulation
I have no experience in modern web development. A cool single-page application for the REST API would be cool....


 Kevin Cheng
 dave
dave
 Andrew Lee
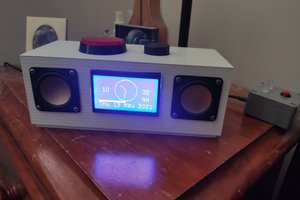
 Leo Febey
Poll for the community:
I am thinking about some hardware changes - at least some more test-points for needle testing of the boards. Maybe rethink the 40-Pin double side header which I still love but is quite a luxury item.
What would you like to see in the hardware?
Is the mono audio channel something worth while or superfluous?