 Jeremy
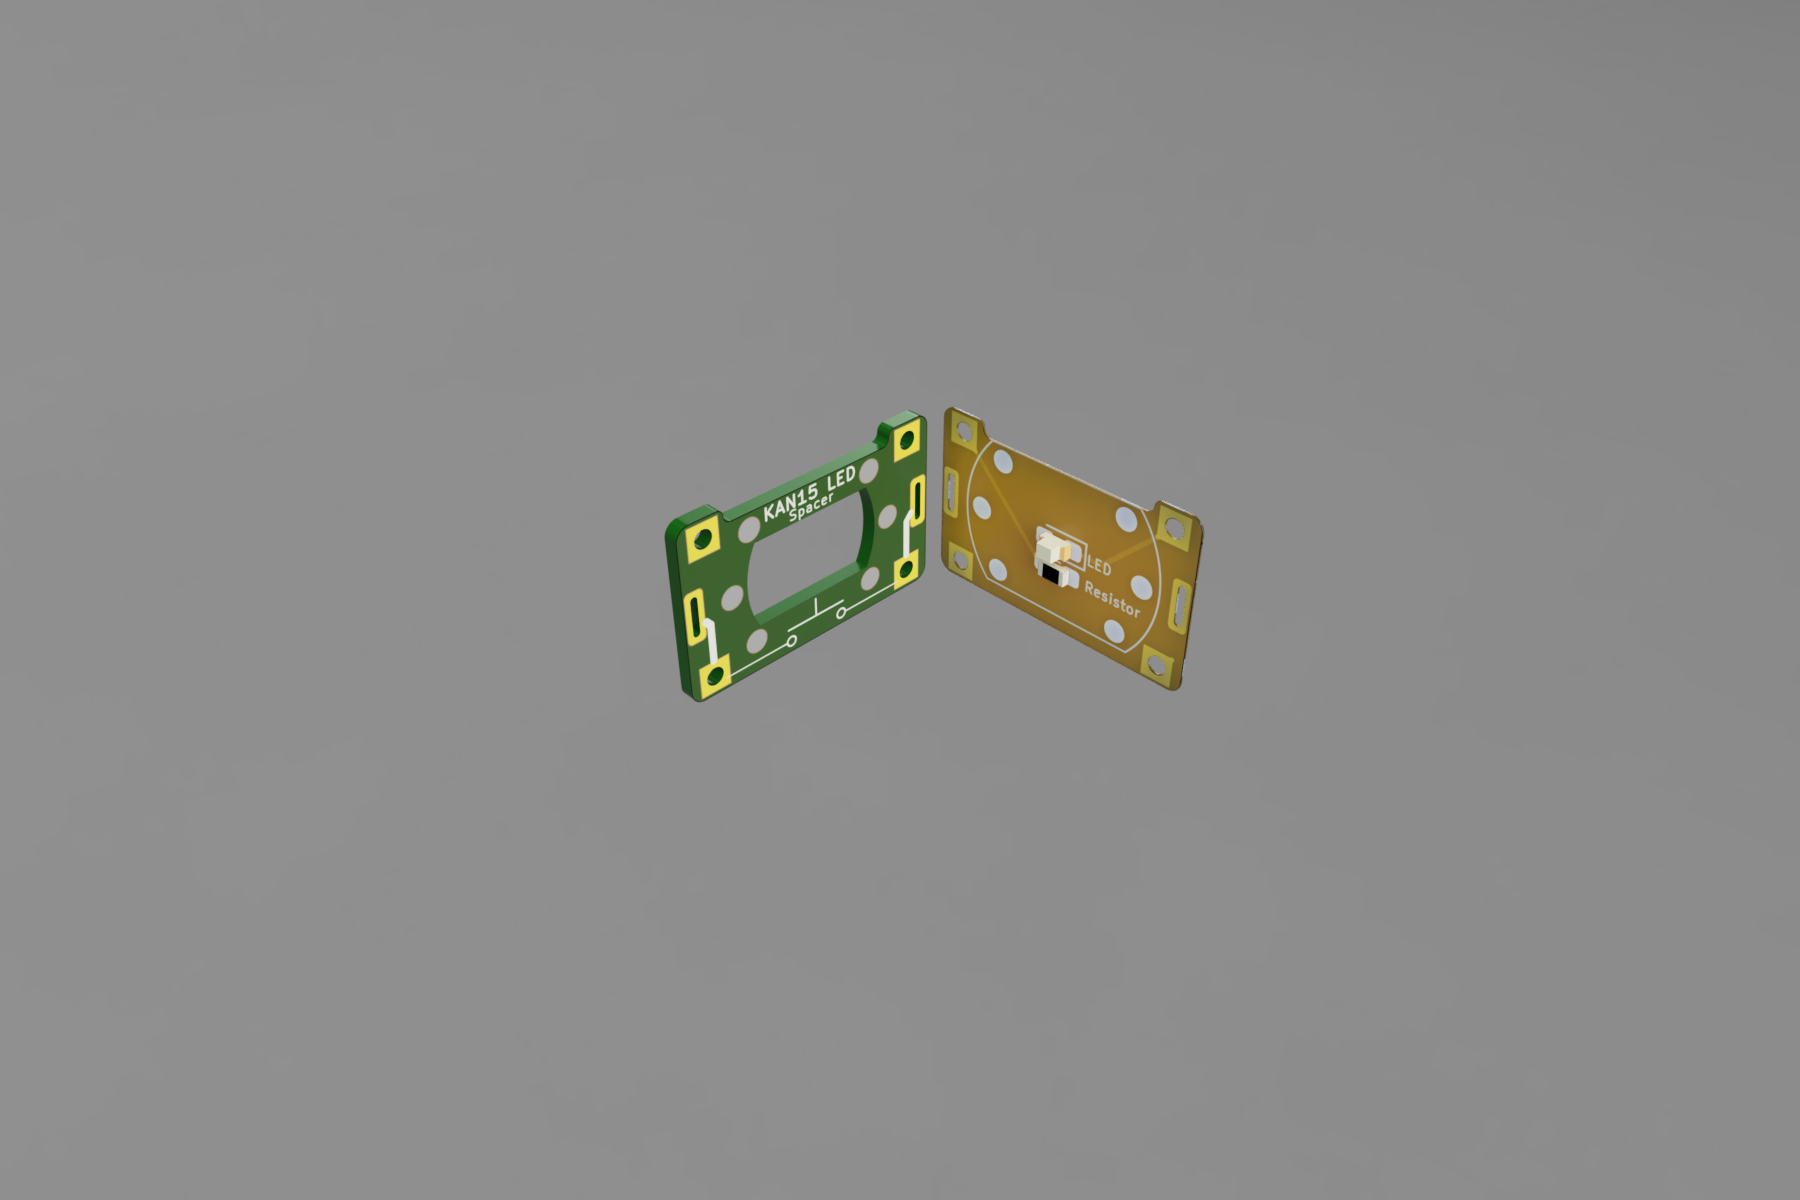
A couple weeks ago I was struggling to get to sleep while my head was wrapped around this problem: in order to create an LED breakout board for this switch, you would need to create a pretty thick stackup: 3D printed spacer ( 0.8mm) + PCB (1.6mm) + switch (7mm) = 9mm (3/8 inch). Not to mention that it requires you to own a 3D printer.
Then, it occurred to me. Thin PCB spacer (0.8mm) + flex PCB (0.1mm) bottom.
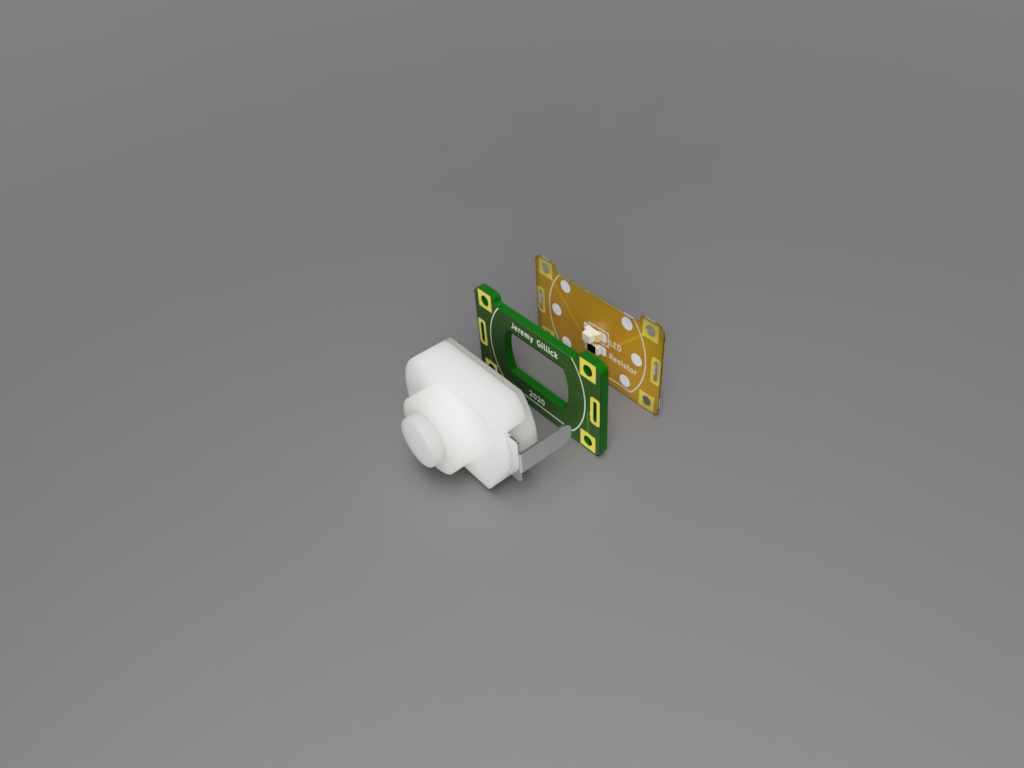
Layers:
- Switch
- Spacer made of 0.8mm PCB.
- Flex PCB for LED and resistor. (or really thin PCB)

This should create a very thin stack and allow the LED to shine through the bottom of the switch well.
To assist with lining up the layers and holding them together, there are matching round solder pads on the sides of the PCB/Flex which connect (perhaps unnecessary).
I'm waiting on an order from OSH park with the new parts and will post an update when I get them.
PCB Files
You can download all the PCB files in KiCad format from this new github repository:
Discussions
Become a Hackaday.io Member
Create an account to leave a comment. Already have an account? Log In.
Any reason why you would not just use reverse-firing SMD LED's with a hole through the board?
Are you sure? yes | no
That's totally possible and something I'm planning to explore again. This time around I was looking for something entirely encapsulated, without parts mounted on the bottom side.
Are you sure? yes | no
Makes sense! I have always wanted to see if I could embed LED's inside a pcb with a plated slot...
Are you sure? yes | no