Close
0%
0%

DIY Nanoleaf (Vrikxa)

Checkout this project to know how to make your own Vrikxa, a version of Nanoleaf

Similar projects worth following
I wanted to get Nanoleaf for myself but it was very expensive. So I decided to make one for myself. Here is the video of whole process:

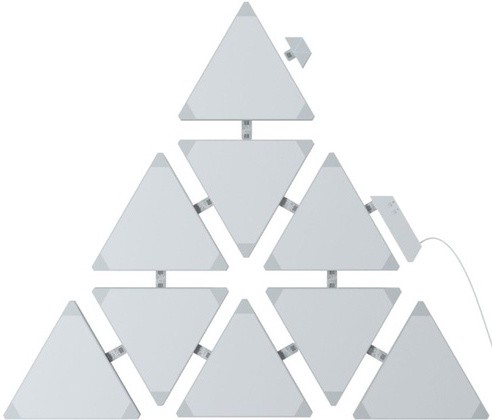
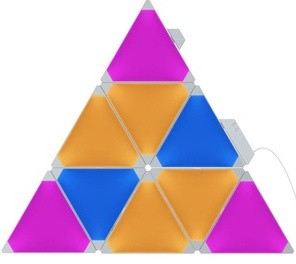
Hi everyone, Here I have presented my try on making Nanoleaf rhythm. The original product is very expensive so I thought to make one by myself which looks similar to that. If you want to learn more please watch my YouTube video attached below or you can also follow steps mentioned here. 3D model is available to download so please go ahead and use it and if you want to point out my mistake in that, please feel free.

Vriksha (Nanoleaf).f3d

Fusion 360 project

f3d - 218.21 kB - 09/18/2020 at 19:58

Download

Vriksha (nanoleaf).stl

STL file for 3D prints

Standard Tesselated Geometry - 5.16 kB - 09/18/2020 at 19:58

Download

  • 1 × Govee RGB LED strip it is packed with so many features. also compatible with Amazon Alexa and has app for easy access.
  • 1 × 3D printed model link is available to download.
  • 1 × 2447 white acrylic sheet
  • 1 × Acrylic cutter

  • 1
    YouTube Video with instructions
  • 2
    Understand original product

    I made my first 3D model on Autodesk Fusion 360. For that I searched for Nanoleaf rhythm online to get information like dimensions, shaoe, LED placement and features like RGB with music sync and DIY scene creation. After taking inspiration from that, I designed the model but question was how to connect LEDs. You can download the 3D model from GitHub.

  • 3
    Panel connections

    For LED connection, went back to original product and saw how they made it. Nanoleaf uses connectors called linkers. It comes in 2 types, rigid and flexible. Rigid is widely used linker type for flat wall mounts. But as the design size grew bigger, Nanoleaf decided to launch flexible linkers to allow users to connect LED panels around the corners and uneven textures walls. (Photos are from official website).

    For that I decided to used solderless connectors with locks, which allows easy replacements and helps to reinforce the whole LED design. For that I left a window of matching size of solderless connector on all 3 sides of my 3D design.

View all 10 instructions

Enjoy this project?

Share

Discussions

Similar Projects

Does this project spark your interest?

Become a member to follow this project and never miss any updates