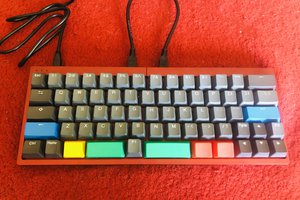
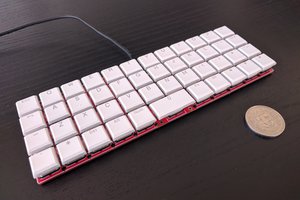
Like Flounder, only bigger.
An ergonomic low-profile 65% keyboard.
To make the experience fit your profile, pick a username and tell us what interests you.
We found and based on your interests.
Like Flounder, only bigger.
turbot-v5.fzzFritzing designx-fritzing-fzz - 542.13 kB - 10/27/2020 at 00:15 |
|
|
turbot-v5.zipgerbersZip Archive - 1.51 MB - 10/27/2020 at 00:14 |
|
I have the switches, I assembled the keyboard and testing can now begin.
First of all, after about a month of using a Planck keyboard, this feels huge. I can no longer reach the backspace or esc keys without moving my hands, which is going to affect my touch-typing a bit, I suppose, unless I remap them to those extra keys in the middle, maybe?
The switches are great, the proportions of the keyboard are fine, and the layout seems to be working fine. All the keys are where I expect them. The right shift could be a bit bigger, but then there would be no room for the arrow keys.
I'm going to use this keyboard for a while now, and see how well it works for text, code, computer games and graphics programs.
I'm also uploading the design files and the ukeeb example for it, in case someone wants to try it themselves. The design files are updated, with nicer, less angular traces and with one missing connection for the center keys added.
The PCBs came, and they seem fine. I decided to add some diagonal strips to one, with a can of spray paint, just for the kicks. Also soldered all the diodes and the chip, so all that is missing are the switches, which are still on the boat from China somewhere.
Also, happy to report that the scale is correct this time.
Stabs, or what normal people call stabilizers, are special levers added under any key longer than 1.5U to make sure that the key goes down evenly no matter which part of it you are pressing. Many keyboard designs avoid longer keys just to avoid dealing with stabs, but here we don't really have much choice: Turbot has 4 keys that are 2U long, and that is already long enough to warrant stabs.
In Flounder I tested several commercially available types of stabilizers, but they were all either incompatible with low-profile keys, or required space on the underside of the PCB — which doesn't work when the PCB is supposed to lie flat on the desk. So I went ahead and made my own stabilizers out of paperclips, using the holes in the PCB to mount them.
This time I didn't make any holes for attaching the stabilizers and I plan to do something else.
Commercial keyboards that use the Kailh choc switches have a very neat solution for this problem:
The tops of the switches have a special groove to hold the lever. Unfortunately, you can't easily buy switches like that, so I decided to try and make my own. I started by using a bad PCB from another project to make a drilling jig:
Using that jig I can drill holes in the case of the switch on both sides, and then put a paperclip through it. Since I only have 2U keys at most, I will not need those extra bits on the sides. I still need something for the paperclip to hook onto, though, but that was already a solved problem in Flounder:
Simply glue some pieces of wire to underside of the key caps, and done.
This project has been a bit unlucky from the beginning. Not only it is a continuation of a failed project, which brought its own problems, but I've been really sloppy with the execution as well. I decided to get mu stuff together a little bit more and give this layout a fair chance this time. So I'm going to make this keyboard, at a proper scale and with known good switches. It will be 2mm higher because of that, but it will be comfortable.
This keyboard is driven by three main goals:
This project was most inspired with something called the TGR Alice keyboard, designed by Yuk Tsi:
There is simply something very elegant in the way he compromised between the available keycaps, the traditional layout, and the needs of ergonomy. I love how this looks, however, I learned that layouts with staggered rows like this make it harder for me to touch-type. I want an ortholinear layout, where the keys are arranged in a grid, or at least into columns for each of the fingers. The original Turbot layout was an attempt to create something like that, mostly based on the Atreus layout and some other ergonomic keyboards, trying to make the gaps between keys manageable by angling each column at a different angle. But if you look carefully at that Alice keyboard, that is not what they did there. Instead, you have three sections of the keyboard, each angled differently, but otherwise following the traditional layout.
So what if I took an ortholinear keyboard instead, but then repeated the operations they did with Alice on that? I came up with something like this:
It's a little busier than Alice, mostly because there are more keys on the bottom row, and because the grids of the ortholinear parts are very strong visual cues, so it is not as elegant, but it should be equally or even more convenient. This time I didn't stagger the columns—except for the ones for the little fingers, which are naturally about half a key lower, due to the angling. That should work well with the fact that the little finger is shorter in most people.
I also removed some of the extra keys Turbot originally had on the sides—since I need a "function" key anyways for Fn keys, I can as well put them on a separate layer, together with all the media keys and such. Thanks to that the PCB also has a much more "normal" shape:
You can tell that I didn't really take my time to route the traces nicely and make them all bend at 45° angle, as they should. The reason is that with the modern fabrication methods it doesn't really matter, and I was in a hurry to add this PCB to an already ongoing order at JLCPCB, so that they can be shipped together. You see, they let you do that, and since there was a National day, my order didn't ship yet, so I used the chance.
I have now made a version of that PCB with nicer traces and with some holes for mounting stabilizers, I will make it available if this PCB works.
I still had some free pins, so I added a single LED and a joystick, with some extra keys in the middle — maybe I will make it emulate mouse too, we will see. In the worst case I will leave those unpopulated.
Note about key caps: I am going to use the same key caps I initially got for Flounder, and they are a bit of a strange set. This layout is designed specially for those key caps. All keys are either 1U, 1.5U or 2U, except for the Ctrl keys, which for some reason are 1.25U. More common key caps usually have more of the .25U keys, since the two bottom alphanumeric rows are staggered by 0.25U, but not on the keyboard those key caps were made for. I have no idea why they did that. The short version is, that if you plan to use any key caps from a normal keyboard, you will have to modify this design somewhat.
Then, since I'm waiting for the PCB anyways, I also took some time one evening to think about the precise location of the keys on the...
Read more »Remember how I mentioned that I like this layout, but the keys could be a bit closer together, and blamed the angles of the columns for them being too far apart? Turns out the columns are perfectly fine, the keyboard is just scaled up roughly 10%.
How did that happen?
Well, for designing the PCB outline, and for marking the desired locations of the switches I used Inkscape. I made sure all dimensions were correct in that program, using the handy unit switching options that program has. But as it turns out, Inkscape was recently updated on my computer, and the new version uses different DPI in the SVG files it saves than the older one, and than what Fritzing assumes on import. But it was consistent, so the part outlines exported from Fritzing didn't get resized, thus the holes for the switches fit fine. The whole keyboard is just larger than it was supposed to be. The angled keys only made it difficult to confirm.
I only discovered this just now, while working on the #Flatreus design. Sure enough, the same thing happened there, so I had to practically re-do all the routing. Thanks Obama.
As promised, a detailed description of what is wrong with those switches and why both Flounder and Turbot are failures thank to them. I just want to say that this is a problem I only have with the sunken low-profile switches from Kailh specifically. I have used their other low-profile switches in a number of different keyboards, and only have good things to say about them. I don't know if this problem is specific to the batch I received or generally to all sunken switches they make. But after this, I don't think I will be getting any more of them any time soon.
Let's start by introducing our culprit. It's the Kailh CPG123201D01 switch. It belongs to the family of so-called "chocolate" switches — mechanical keyboard switches that have short key travel and a low profile. They also differ from regular "box" switches with price — they are almost twice more expensive. But if you want your keyboard to be thin, it's the best you can get. Those particular ones allow you to make it even thinner by making the switch "sunken" — part of the mechanism actually goes into a hole in the PCB, making the whole assembly a millimetre or two thinner still. Of course it makes the PCB design a bit more complicated, as you have to include all those holes, and then route tracks around them, but I decided it was worth the effort.
One interesting thing about all those "choc" switches is that the clicking mechanism (or tactile feedback, for the non-clicky ones) is separate from the contact mechanism. This animated GIF shows this nicely (it's for a non-sunken version):
The spring on the left (called "click bar") is responsible for the clicking, but the actual contacts are on the right. Now, if you look at the datasheet linked from the manufacturer's page, you will find, among the footprints and dimensions, this handy graph representing the force required to press the button versus the travel of the key:
You can also see three points marked on that graph: the "pressure point" is when the click happens, the "operating point" is supposed to be where the contact happens, and "reset point" is where the contact stops. In theory, at least.
The switches I have work quite differently to what this graph shows. They click when you press the key less than one millimetre — so far so good — but then the contact doesn't happen until they bottom out completely — that is, until the reach the maximum travel of 2.4mm.
Sufficient to say that this makes the switches seem extremely unreliable. You are typing happily, hearing the satisfying clicks, only to discover that most of the keystrokes didn't register at all. You have to push the key all the way down to make it do anything. It's extremely annoying.
I don't know if this is just a faulty batch, or if it's something I did with them that made them work this way. Or maybe there is some way to fix them (if you know any, please leave a comment). All I know that as it is this keyboard, and any other I might ever make with those switches, it's completely unusable.
A week has passed, and it's time to see the fruits of my design work and assemble the prototype.
I started with the electronics, so that it will be easier to bodge anything with switches not mounted. It's not complex, so there isn't much work required. This time I re-used a chip with a bootloader already flashed, so I didn't even need to muck about with connecting a programmer (the programming pins are connected to some of the switches, so it's not ideal). I spent an hour or so debugging a faulty USB connector, but finally got it sorted out and it seems the whole board works as supposed.
When I soldered the diodes, I put them in the opposite direction than intended, but they are consistent, so I can fix that in software, no problem. Just scan rows first instead of columns.
Then I soldered the switches with the key caps, and for the first time I could actually try this layout:
It took me a short while to adapt the code I have used for the previous keyboards, because I had to fill in the pins for rows and columns, and account for the reversed diodes. I got it to work, but somehow it felt really unreliable. So I sat down and started debugging it, and in the process I figured out why those switches feel so bad, and why both Flounder and this keyboard are unusable. I will write about this in detail in the next log.
Other than the really bad switches, the layout is actually very nice. I would prefer to make the horizontal spacing a little bit tighter — right now in places it's a bit more than the traditional 0.75", because the columns are angled at different angles. If I were redoing it, I would bring them together a bit, so that sometimes the distance is bigger and sometimes smaller (and not always bigger like now), so the difference was smaller overall. But it's not a big deal.
I also assumed that the large shift keys are 2.75U like on normal keyboards, but of course those Kailh keycaps are 2.5U, so there is a little bit more gap for them, but it doesn't affect convenience.
I didn't make the stabilizers — at this point, with those switches, that's pointless. The keyboard is unusable anyways, and I only sunk more money into that project, instead of accepting that those switches are trash and moving on.
While waiting for the PCB to be fabricated, I started on desoldering the switches from the Flounder keyboard:
The "Engineering" solder suction tool is indispensable for that. Then I broke out the hot air gun, and also desoldered the chip and diodes:
Afterwards I realized that the new design actually has five more keys than the old one, so I also ordered the missing switches. They probably will take a while to arrive, but I can have a few keys missing in the initial prototype.
After exporting the layout as an SVG image, I started to work on a PCB for it. Putting a 0.75" square on top of some keys to see how they should actually reach, I got the basic shape:
Then I imported it in Fritzng, and put a switch footprint into each square, rotating them as needed. Then I exported it to SVG once more, to get all the holes for the sunken switches included in the board outline. Added diodes, SAMD21, and after roughly a day of routing we have the PCB:
This is now ordered, so we will see in one week how well it came out.
I'm still on my keyboard roll, with two more keyboard-related projects. This one is going to be a scavenging on a very successful educationally, but not so much in terms of the end product, project — #Flounder Keyboard. That keyboard is indeed really flat, as intended, but due to me messing around with key spacing and due to poor switches — not very usable. It would be a shame to have all those switches just lying there and gathering dust, though, so I decided to rebuild it into a keyboard with a slightly more interesting layout (and proper key spacing this time).
I have recently built a bunch of tiny ortholinear keyboards, and discovered that touch-typing is actually much easier if the columns are not all jumbled and skewed. In fact, I'm using one of those keyboards, #Dorsch 48k Keyboard, as my main keyboard every day now. It's great, because there is simply not enough room to move your hands away from the home row, so you are touch-typing whether you like it or not. However, there are some small inconveniences still, namely having to keep your hands relatively close together, and one-handed operation being a bit more involved, especially when playing computer games and needing access to the number row.
The first problem has a standard solution: split keyboard. However, from my experiments with #5plit Keyboard Clone I know that when the keyboard consists of two pieces, each of them tend to wander around my desk randomly, ending up in weird positions. It also gets trickier to locate the keyboard after taking my hand from the mouse. So I really wanted a single-piece device this time. But no problem, instead of splitting the keys into two separate keyboards, we can put them all on one keyboard, but in two groups that are tilted and moved apart a little. We get our standard ergonomic keyboard that way. So that's what I want to build. But which layout?
I immediately noticed that I haven't heard about a low-profile Atreus keyboard, even though there is a perfect name for such a contraption: Flatreus. So I started with an Atreus layout, but then having all those extra switches and caps from Flounder, I thought that it would be a waste not to use them all too. So I designed a layout that is basically a regular keyboard, with the middle replace with an Atreus-like arrangement:
I liked the general feel of this, and also the symmetry this design has, but one thing that immediately jumps out at you are the gaps between the slanted and the straight portions. So I tried to smush them together a bit better:
Then I though: why not make the transition a little bit more smooth, like the Alice or Saggitarious layouts, only ortholinear? You know, a bit like those X-Bow keyboards that Hackaday.com wrote about a while ago. Something like this:
I really liked this design, a decided that this is going to be keyboard I'm going to make. But looks is one thing, and actual usability another, so I went back and added the curve known from Atreus that takes into account the fact that our fingers tend to be different lengths. I ended up with the final layout:
This is what I'm going to make.
Create an account to leave a comment. Already have an account? Log In.
Become a member to follow this project and never miss any updates

 Geek Centric
 deʃhipu
