 Lance
LanceIntroduction
In order to update the firmware, you have to access the ISP header on control board. This means removing the top of the oven which is rather inconvenient if you need to do it with any sort of frequency. After running the oven a few times, I realized that I would probably have to update the firmware to add or modify heating profiles so I added an external connection to the ISP header to make this a simple process.
There are some individuals that have chosen to install a USB to UART board in the oven and then have an external USB connection. I didn't feel the need to sacrifice a board just for this purpose so I installed a wire pass through to connect to the pins I needed.
Installation
Design Requirements
I decided on a few design requirements.
- I didn't want loose wires hanging outside the oven so simply running a set of wires through the side wasn't an option.
- I wanted to be able to plug my USB to UART board in directly without additional cables. This meant I needed external make pins as my board has a female header installed.
- The external pins should be protected from damage.
- When plugged in, the external board shouldn't bend the pins and should be supported by the connection.
- The installation should have a clean look.
Design
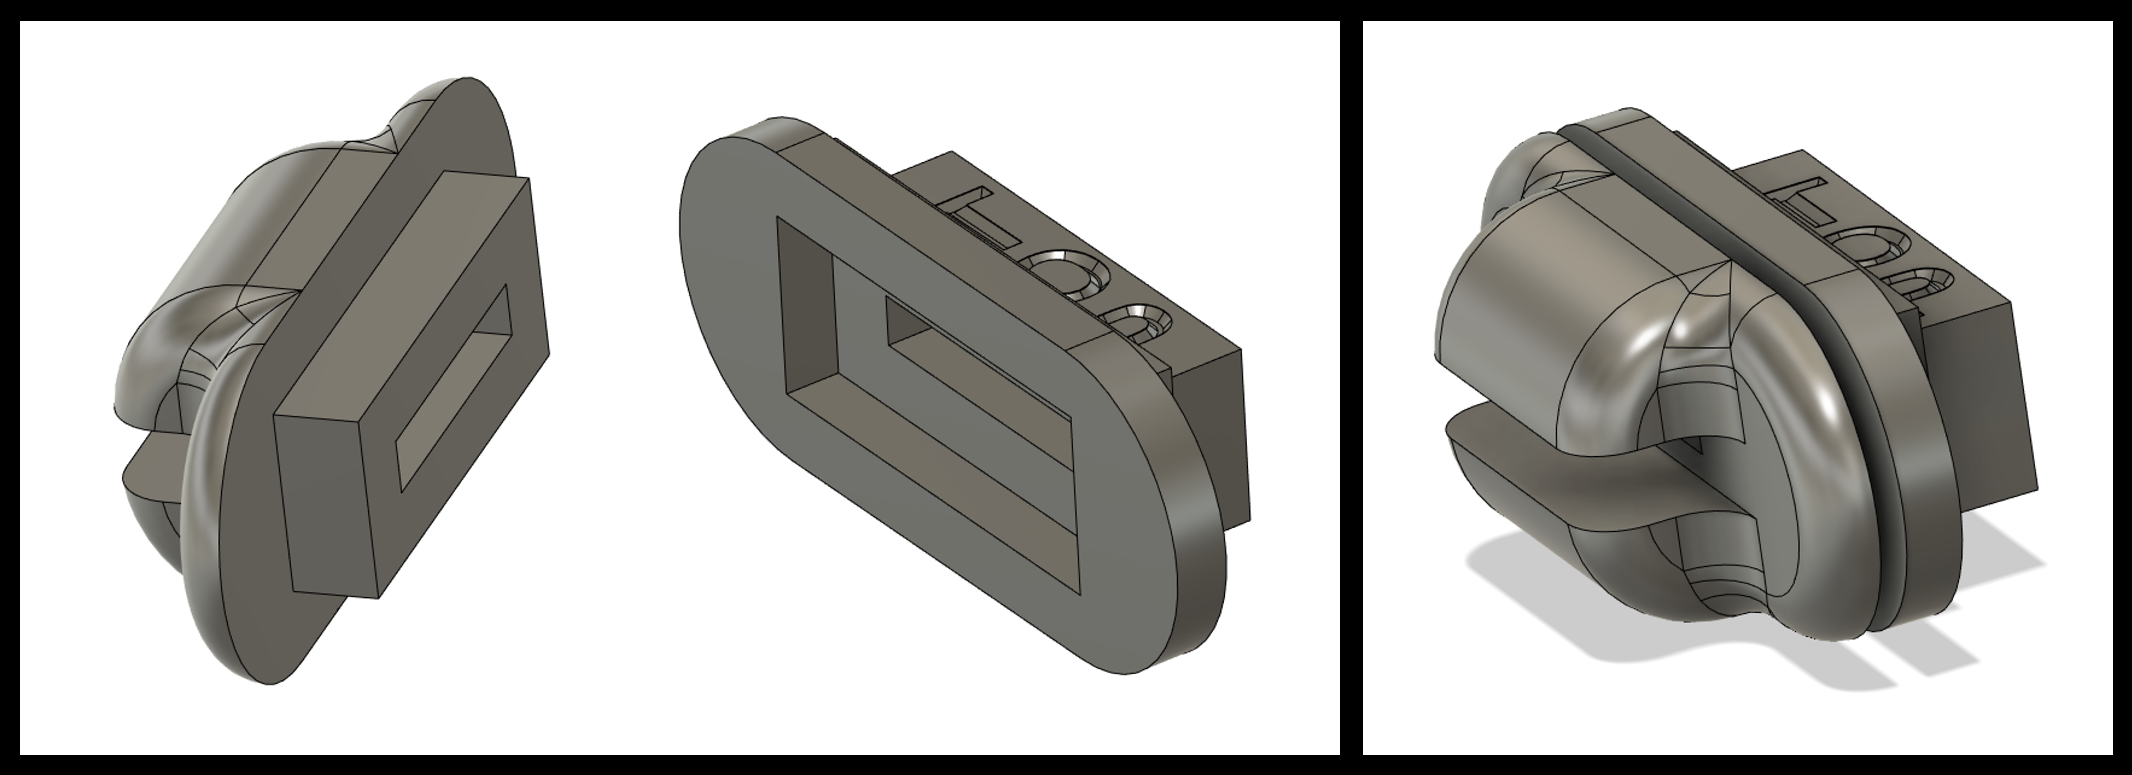
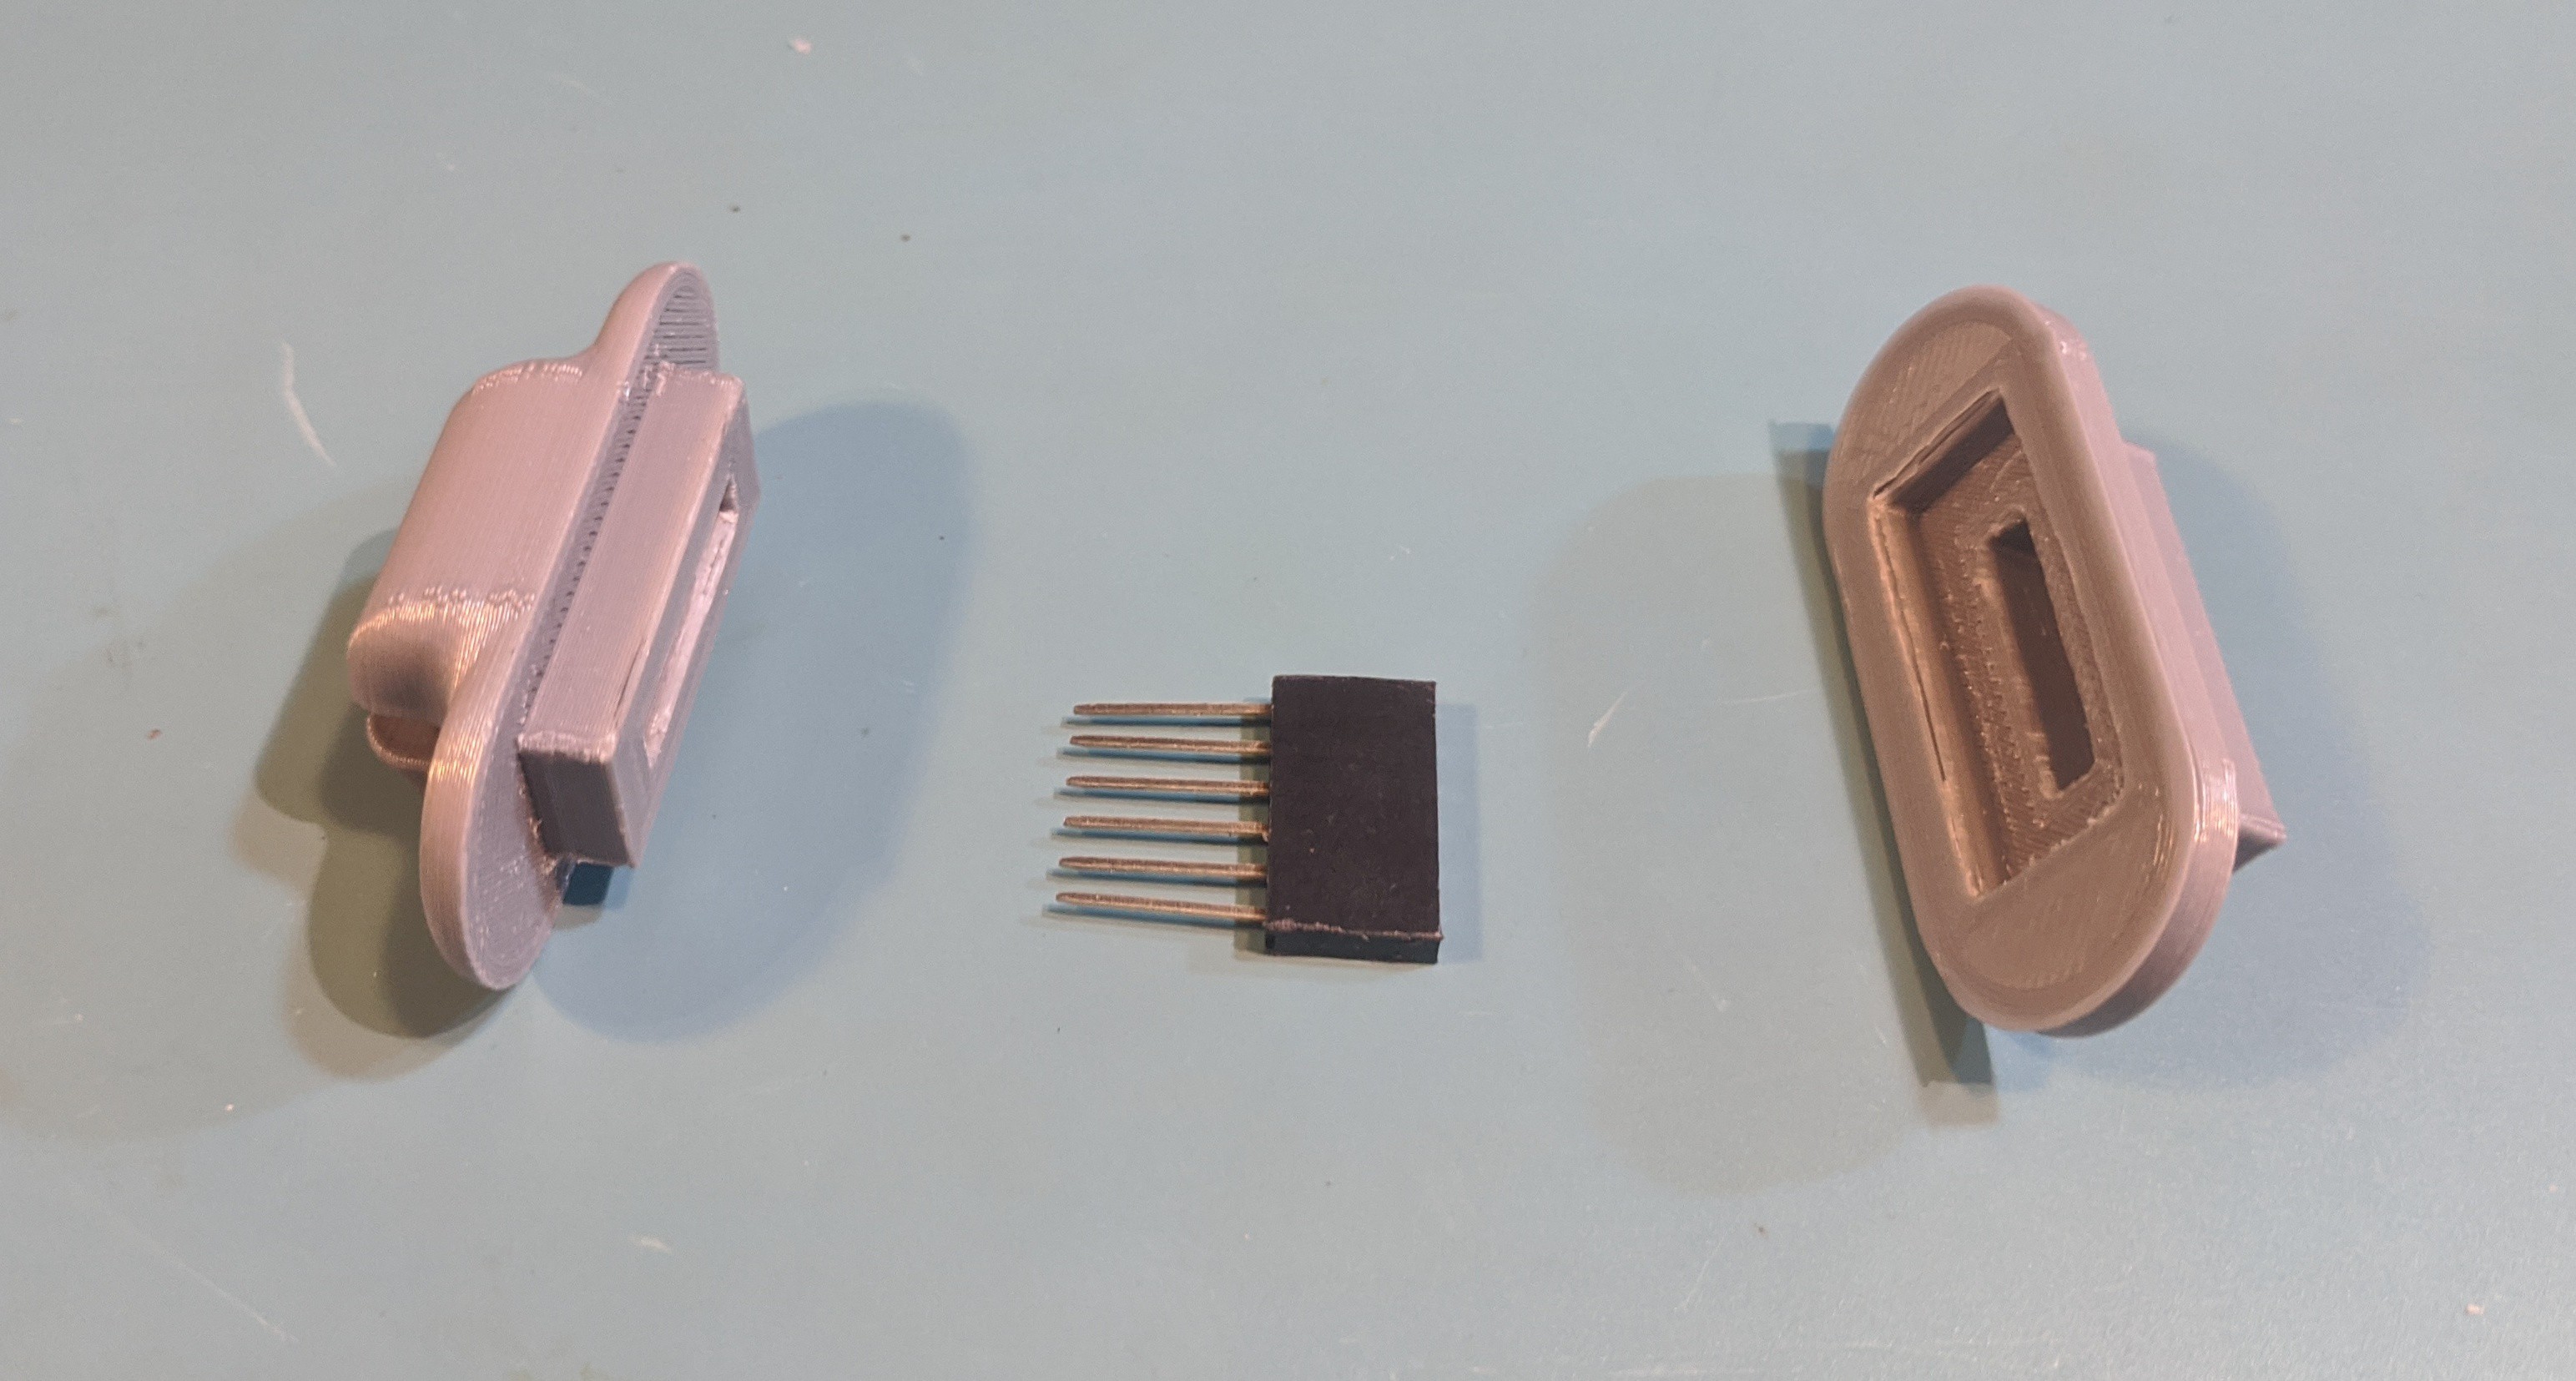
After scrounging around my parts bins to see what I had that could work, I came up with the following solution. A stacking header would be used as the pass through connector. The long pins of the stacking header give it the reach needed to pass through an enclosure and have plenty left over for connected to the USB to UART board. On the inside, a custom jumper cable would be made to go from the stacking header to the ISP header on the oven controller.
The stacking header would be housed inside a custom designed and 3D printed enclosure that could hold the header in place, provide a clean look, and have ledges to protect the pins and provide support for the USB to UART board.
Installation
I used a Dremel with a metal cutting wheel to cut through the tops of 4 vent slats in the side of the oven. The opening was large enough for the center of the outside connector to pass but small enough that it was covered by the connector flanges.
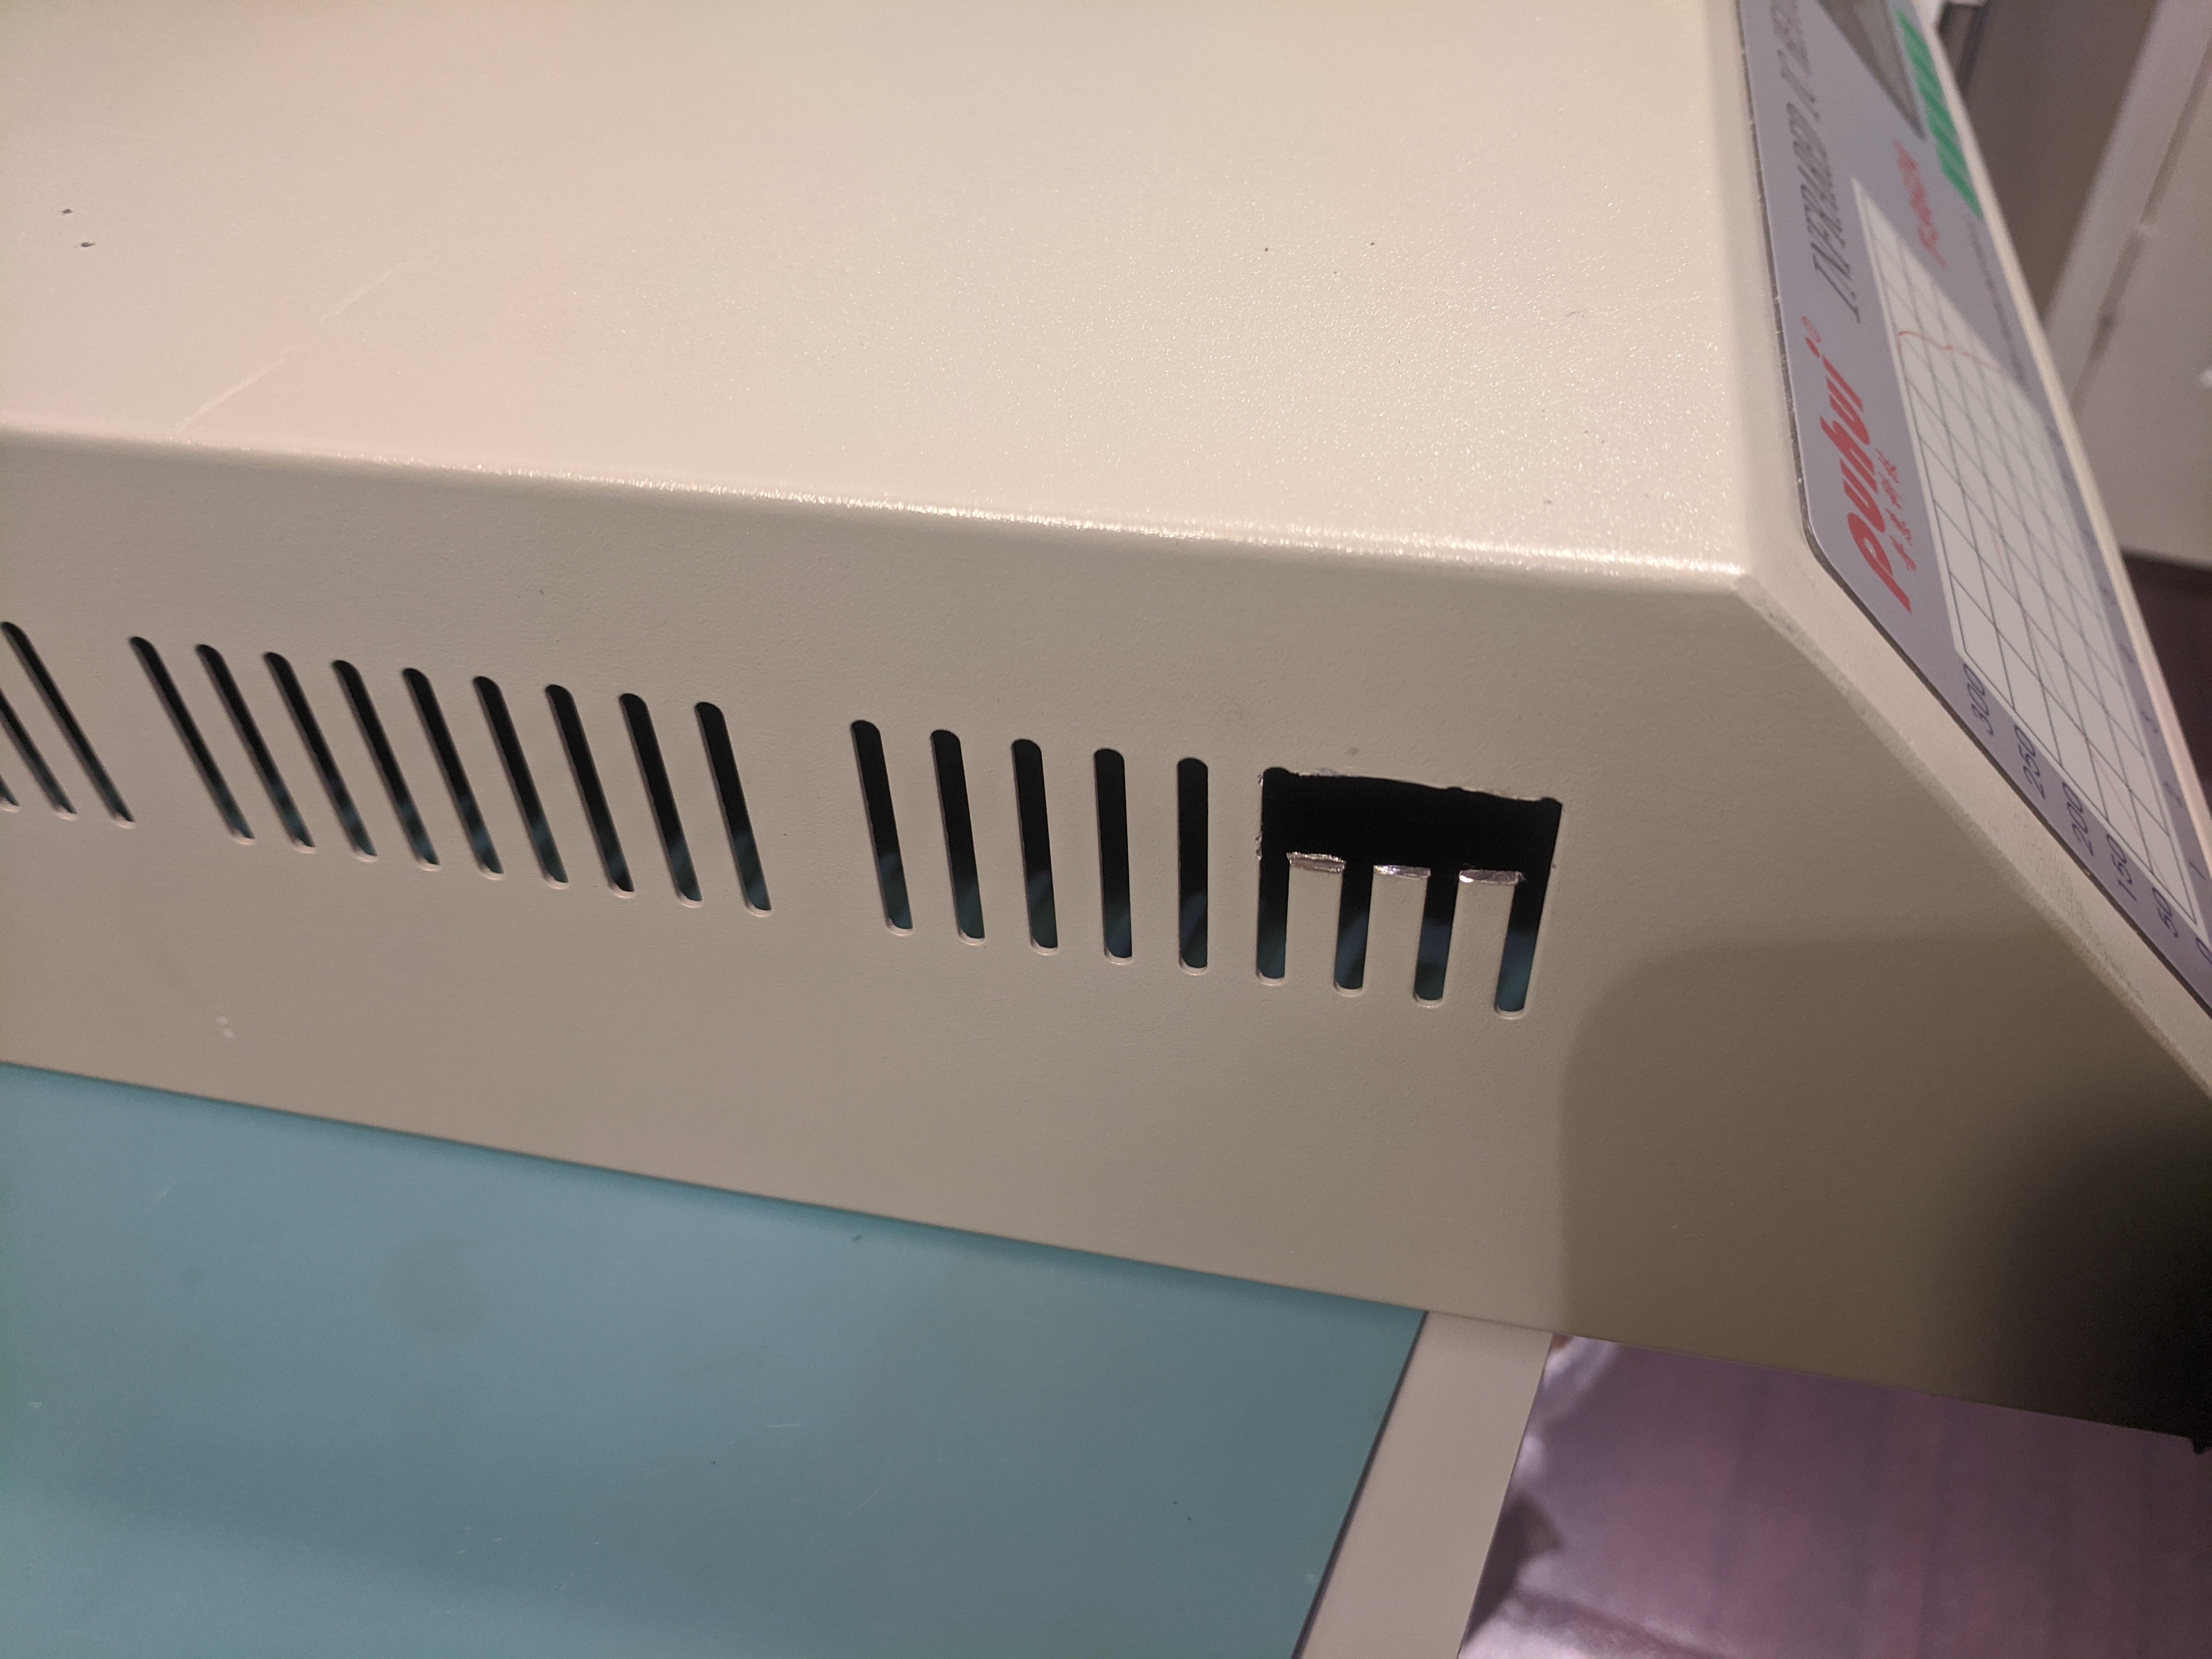
The stacking header was put inside the connector. The two connector halves where sandwiched around the side of the oven and some cyanoacrylate glue used to stick everything together.

With the connector installed, I made a custom cable to connect from the stacking header to the control board. It uses some crimp style JST connectors: male for the stacking header side and female for the control board side.

Resources
If you want to use my connector, you can download it at the link below. You can also access the Fusion 360 file and modify it as you see fit.
There are two "Inside" pieces of the connector and you only use one. One inside piece is general and allows you to access all the pins on the stacking header.
The only inside piece is specifically for use with the Sparkfun board and blocks the unused pins. If you use this piece, it has an orientation and you have to install the side with the "top" text towards the top of the oven. You might be working on the oven lid upside down so don't confuse the orientation.
Connector STLs:
https://www.thingiverse.com/thing:4616526
Fusion 360 Design Files:
Discussions
Become a Hackaday.io Member
Create an account to leave a comment. Already have an account? Log In.