 BlueChip
The Voltage Divider
The AtTiny167 didn't have enough pins for two controllers so, for each port, I made a voltage divider out of three resistors which allows two digital inputs to be read by one analogue GPIO pin. You can see the circuit working here.
You need two big resistors and one small. The small one needs to be "about 70.2%" the size of the large one ...I chose 10K and 6.8K
They are all joined together at one end. One of the large resistors goes to Gnd, the remaining two resistors go to the two pins you wish to read.
If you use different size resistors, you will need edit RG_OHM, and R9_OHM in the source code ...then some unreadable macros will do all the maths for you :)
Microcontroller Support
I forked the Digistump repo, and updated the USB library to obdev's latest USB code. This means Mega2USB will work on most Atmel chips.
WARNING: For some reason Digistump decided that every example would have its own copy of the USB code. So it is ONLY Mega2USB that has the latest USB code!
I also believe I am the first person to make (publicly) a multi-device [TWO joysticks adaptors] USB profile, so you might find some useful code laying around in the main directory :) ...Everything I release is MIT licensed : "free as in free".
3 & 6 Button Controllers
The code will auto-detect both 3-button and 6-button (in both 3-button and 6-button mode) Mega Drive controllers, and all buttons will trigger unique HID Joystick events ...So you can easily test your device with joy.cpl (WIndows) or `jstest` / `jstest-gtk` (Linux)
How do the Controllers work?
It's not trivial, but neither is it Rocket Surgery ...and it is all explained on the Github page, and in Wiring.txt in the example folder - which will open automatically if you use the Arduino IDE to compile the code.
Connector Physical Support
Connecting the Mega Drive controllers takes quite a lot of force - make sure your ports are firmly supported.
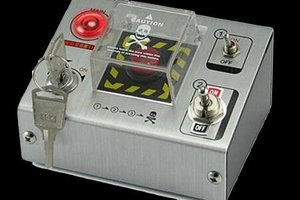
In my device the lower port is braced by the base of the (pressed steel) sweet tin, and the top port is braced with a scored-and-folded coffee shop loyalty card.
I got the sweet tin (with sweets) as a Christmas present, but the barcode is the photo if you want to try and find one online.
The Future
I can think of many exquisitely pointless features you could add:
- Use M on 6-Button to affect auto-fire
- Add das blinken LEDs ...surely this project would be better with an LED to tell you whether you just connected a 3 or 6 button controller!
- Add internal logic for auto-fire and a switch to enable/disable it.
- Add a button to press UP, DOWN, LEFT, RIGHT, A+Start
- Buttons to allow you to press UP+DOWN or LEFT+RIGHT
 Joakim
 Bill Peterson
 Russ Nelson
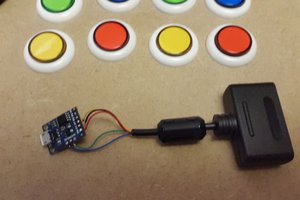
 danjovic