Brian Brocken
Intro
I was thinking about building one for a long time and finally started the design, bought the necessary components and put it together. I'm quite happy with the result so far. However, this bot has never fought so i don't know exactly how well it will perform in an actual game. The 3D-printed blade is great and the aluminium one is even better but i'm not sure how well the 3D-printed armor will hold up. I think this bot might be best suitable for games where only fully 3D-printed bots are allowed.
The total weight of the bot comes in at around 144 grams and it fits within a 4*4*4 inch (101*101*101 mm) box, not flat but this isn't a requirement.
All the rules about antweight battlebots can be found here: https://www.robotwars101.org/ants/rules.htm
The reason I gave the bot the name "Bulldog" is because Bulldog ants or one of deadliest ant species in the world ;-) https://lakenormanpest.com/top-8-dangerous-ants-time/
STL and Fusion 360 source files can be found here: https://bbprojects.technology/collections/stl-fusion-360-source-files/products/3d-printable-antweight-battlebot-bulldog-model
Demo
In the following video you can see how i build the bot and see what it's capable of. In the text that follows i will explain what i did in more detail.
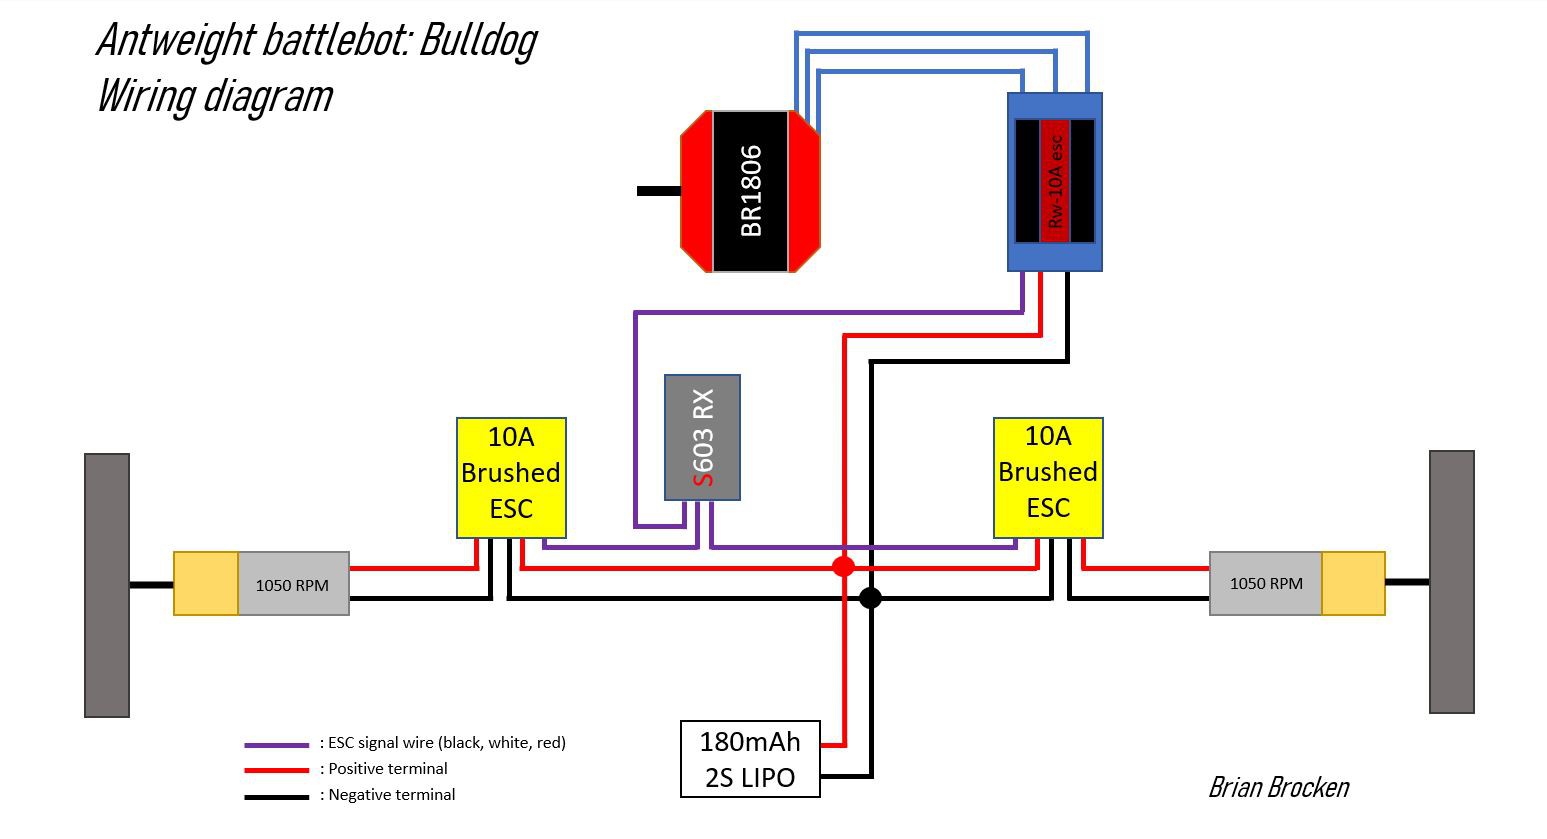
Power system
The bot is powered by a 2S 180/200mAh 25-30C Lipo battery. You need to solder the wires from all the ESC's (Electronic Speed Controllers) together (red->red, black->black) and solder a battery connector onto it. The schematic can be found in the files section and also here:
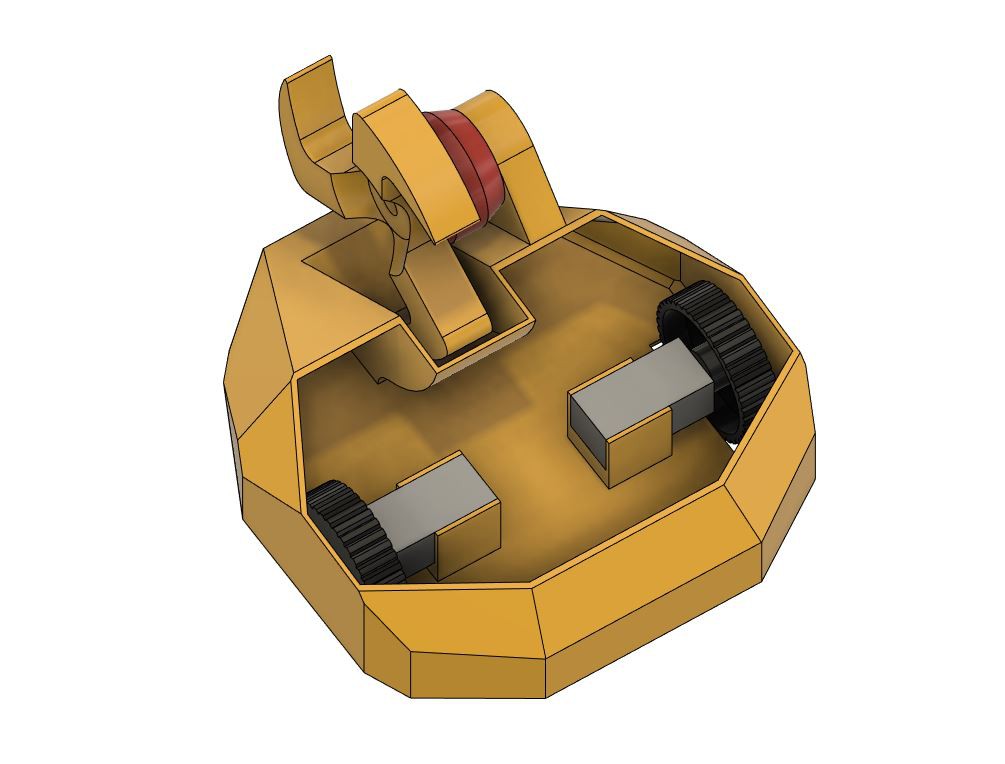
Drive mechanism
For this project i only used off the shelf RC components and soldered them together. All the parts i will mention further down are listed in the 'components' section on this page. To control the motion of the bot i used 2 brushed 1050 RPM motors. I originally used 100RPM motors but these were way to slow. In my opinion the 1050 RPM motors are the sweet spot. They can make the bot move very quickly while still being very controllable.
The motors are are hold in place with hot glue, of course there are better options out there but this is just a fast and easy sollution. In case of a total loss of the bot, the motors can be salvaged quite easily.
The 2 motors are being driven by 2 10A car ESC's without brake. The 'without brake' part is very import because ESC's with brake make the bot almost uncontrollable. ESC's with brake require you to make make a double action with the control stick to reverse the direction of the motor, so forget about quickly changing direction when using these ESC's
The wheels consist out of 2 parts. The 'rim' is printed with regular PLA or similar and the tire that fits around this is made out of a flexible filament like TPU or similar. The TPU tire gives the wheels some grip although the bot could use a little more. I'm looking into using rubber tires to give the wheels some more grip to give the bot more chance at winning.
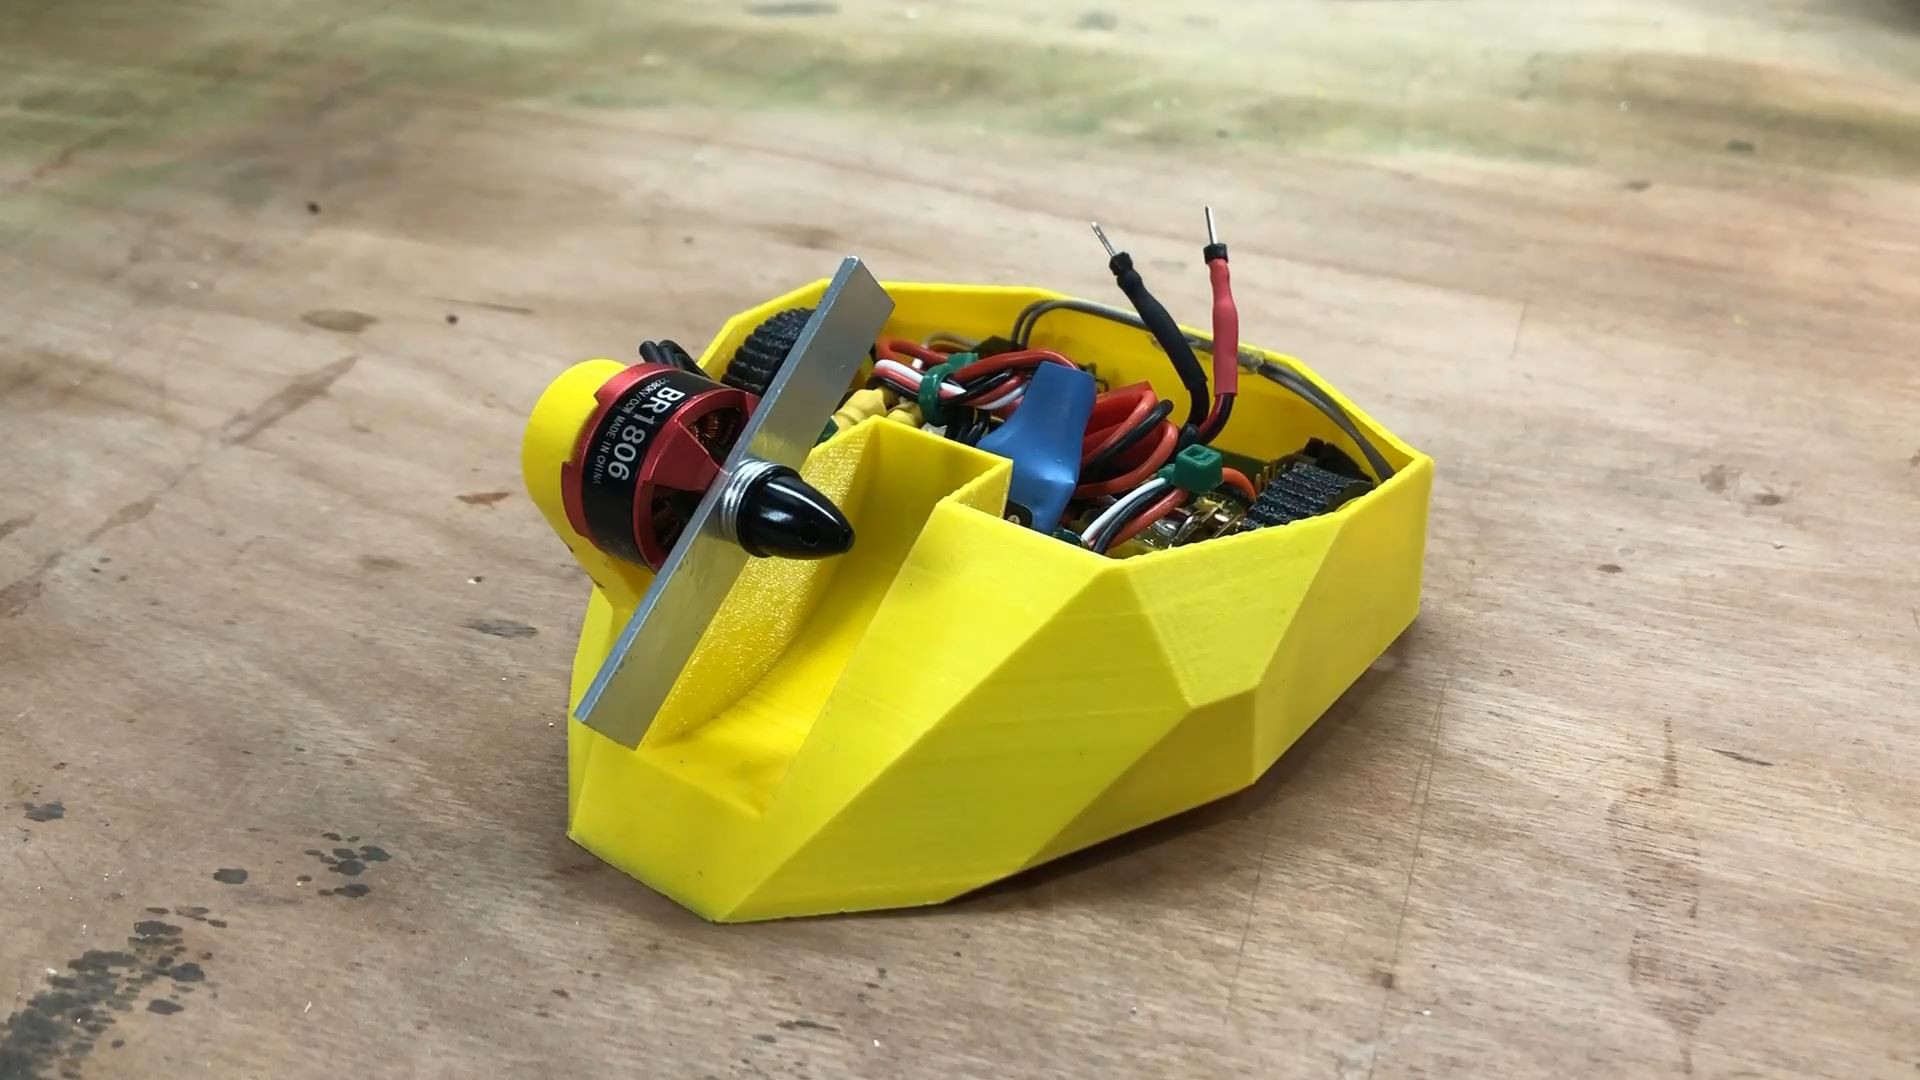
Weapon
To drive the main weapon i decided to got with a Racestar 1806 2280KV 1-3s brushless motor. These motors are normally used for race drones so they are very lightweight and can reach very high RPMs, perfect for an antweight battlebot. To drive the motor I used a regular 10A brushless ESC.
When you're choosing the motor for your weapon for this bot, please make sure you choose a counter clockwise version CCW (the thread is also counter clockwise) or else the weapon will undo itself on the first impact it makes.
The first 3D-printed weapon i tried (the one with the 3 arms) wasn't very effective because of the small gaps between the arms. The weapon just pushed away the target and made a lot of wind and noise. The second 3D-printed weapon (the beam with the pointy ends) was a lot more effective at hitting a target and doing some demage while staying fairly well intact. The last weapon i tried was a 60x10x2mm aluminium blade which was just nuts. This thing does a lot of demage and i trully recommend using this one if you're allowed to do so.
Transmitter and receiver
I use a Spektrum DX6 transmitter for all my projects just for the fact that it can store a lot of different rc vehicles with all it's settings, which is very convenient when you have to switch between models. Of course i understand not everyone needs a transmitter like this so i listed a basic flysky FS-I6 of around 50 dollars to the components list which will be more than enough for this project. Basically any TX RX system with basic channel mixing will do for this project.
In order to properly setup this bot you need to load up a new model in the transmitter as a fixed wing aircraft. once you've done this you need to enable elevon mixing. This mixes the aileron and elevator channel with each other which will enable you to control the 2 motors properly. With the elevon mix enabled you can move the bot forwards, backwards, left and right with the right stick of you transmitter (in case you have your transmitter set up as mode 2 which means your throttle stick is on the left side).
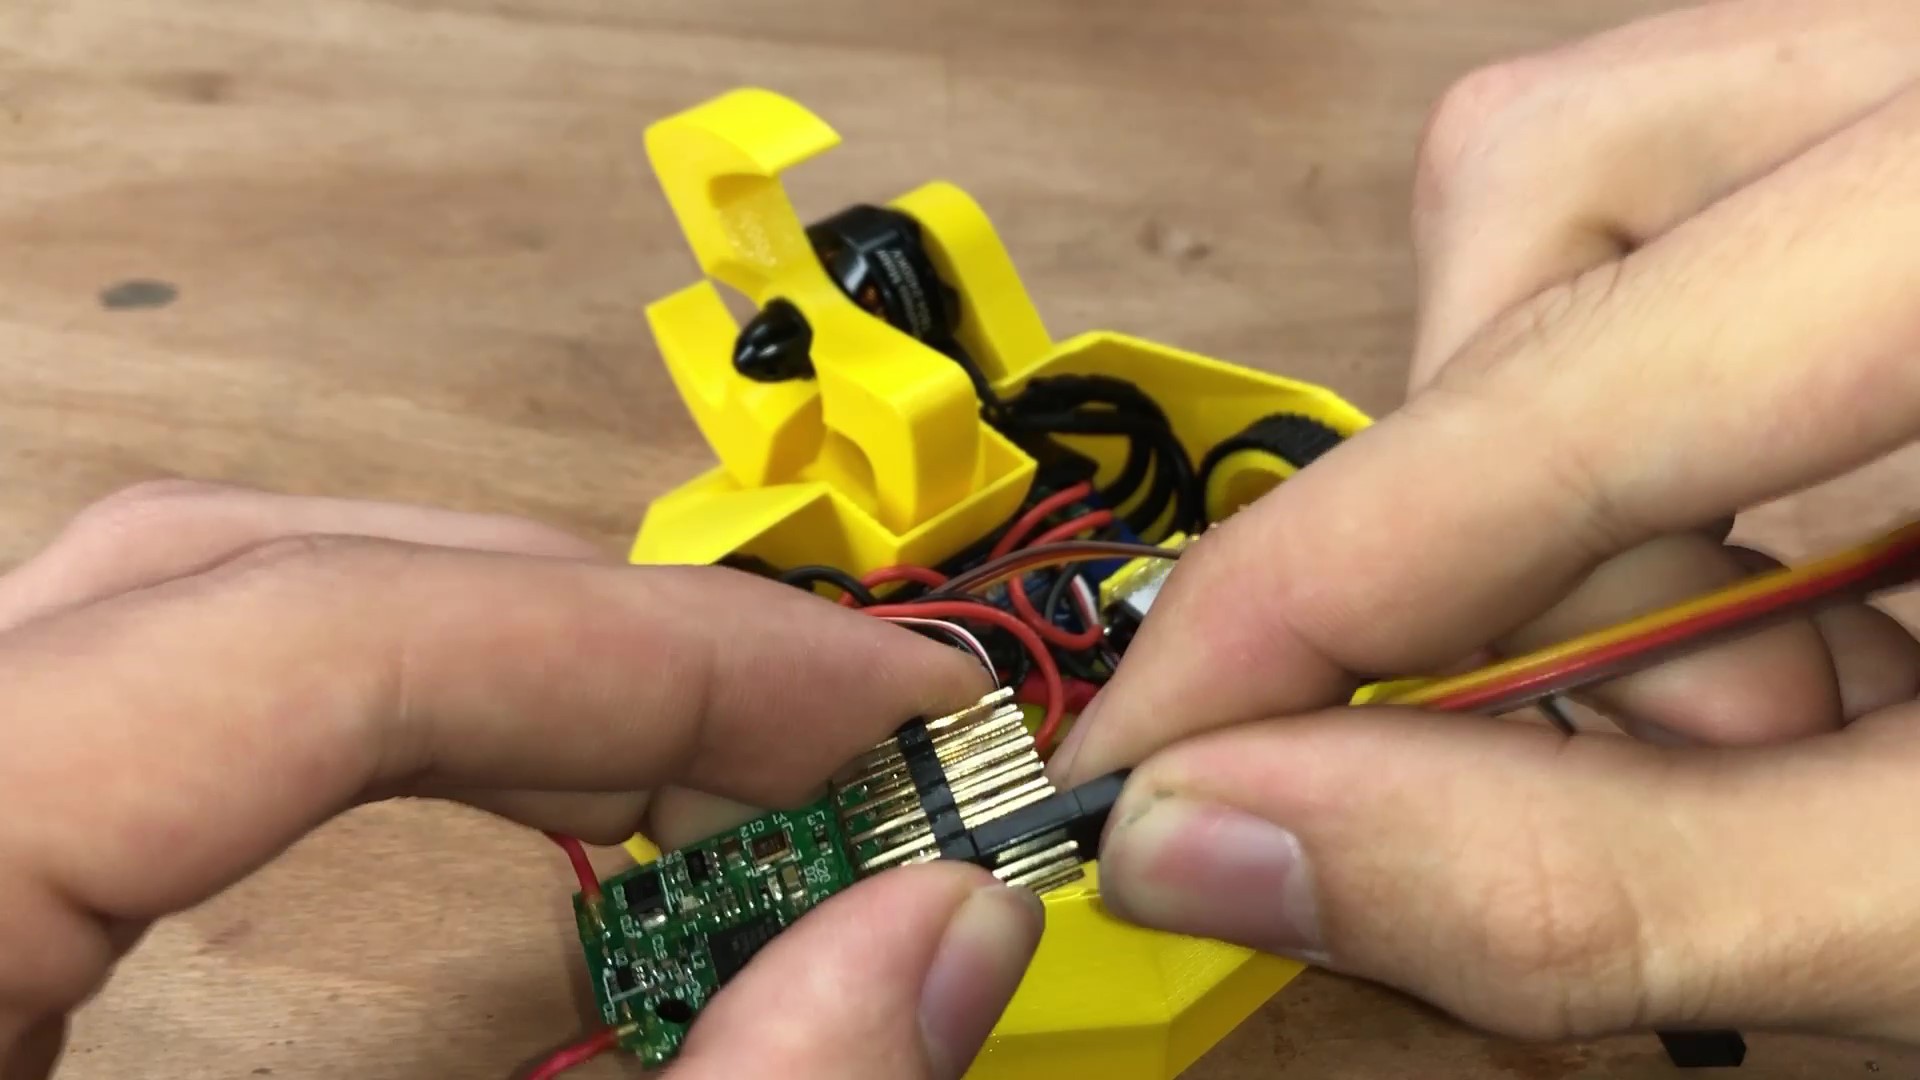
The servo wire from the ESC of the weapon will be plugged in into channel 1 of the receiver (throttle). The to servo wires from the 2 brushed motors (wheels) will be plugged in into channel 2 and 3, you might need to swap these 2 to get your bot to move the way you want. It's also possible you might need to reverse one of the 2 or both the channels as well to get the bot to move properly.
You might also want to remove the casing from the receiver to save some weight and space.