 romaindurocher
It’s a glue up of a 3 x 2,5 inch by a 1/4” piece, with 1/4" square strip, to hide the end grain. Another row of 1/4 strip is used to make a housing for the connector and hide the connection to the brass frame.
Then some holes and a coat of flat varnish, and that’s it!


As I said, my goals was to use a wifi processor, play with an alphanumeric display, and add some feature like a proximity sensor, a light sensor, RGB led … for the first time !
I choose to use the following components to keep the assembly easy, and the final sculpture simple and compact, it could be contained inside a 3-inch cube.
So, the brain is an Adafruit Feather HUZZAH who features an ESP8266 wifi processor. Very easy to use, well designed board! I only remove the bulky JST connector, as I will never use a battery with this board! (but didn't throw it away, because I said that I will never use it, I will need it someday ..)
Here the product page on adafruit site : HUZZAH with ESP8266
The display is also an Adafruit Feather, the Featherwing display with 14 seg displays. (I love the ease of use of the adafruit I2C backpack, and anyway, there’s not enough GPIO on the processor ..) A 14 seg display is not necessary to this project, but as all the component, I took the opportunity to play with it for the first time!
Here is the product page : Quad Alphanumeric FeatherWing Display
The proximity sensor is a Sharp sensor, on a Polulu board. It works perfectly, but is quite expensive .. I use it as a contactless button, to switch between information to display. It is connected to an interrupt pin, and made me discover that the pin 16 can't handle an interrupt (guess on which pin I firstly connected the sensor output !? ) As suggested on the adafruit product page, I added a big capacitor on his power, because I experience some trouble using it.
Here is the sensor datasheet : GP2Y0D805Z0F
A light sensor is used to dim the aplhanum brightness regarding to the ambient light. It is connected to the Analog input of the ESP 8266. But as the input have a range of 0-1 V, on 10 bit resolution, that's why I made this voltage divider. (Some board using this processor have an internal circuit to already divide the tension, but not the adafruit)
Here is the datasheet of the component I use : HW5P-1
(this one is not a light dependant resistor, so it needs the pull down resistor, but you can find some sensor who looks the same, but are only resistor)
And eventually, an RGB led, because why not ! I've never play with them before, and it's quite challenging to get the color you want ... I ended by making a test code where I can move each color value to get the color I wanted !
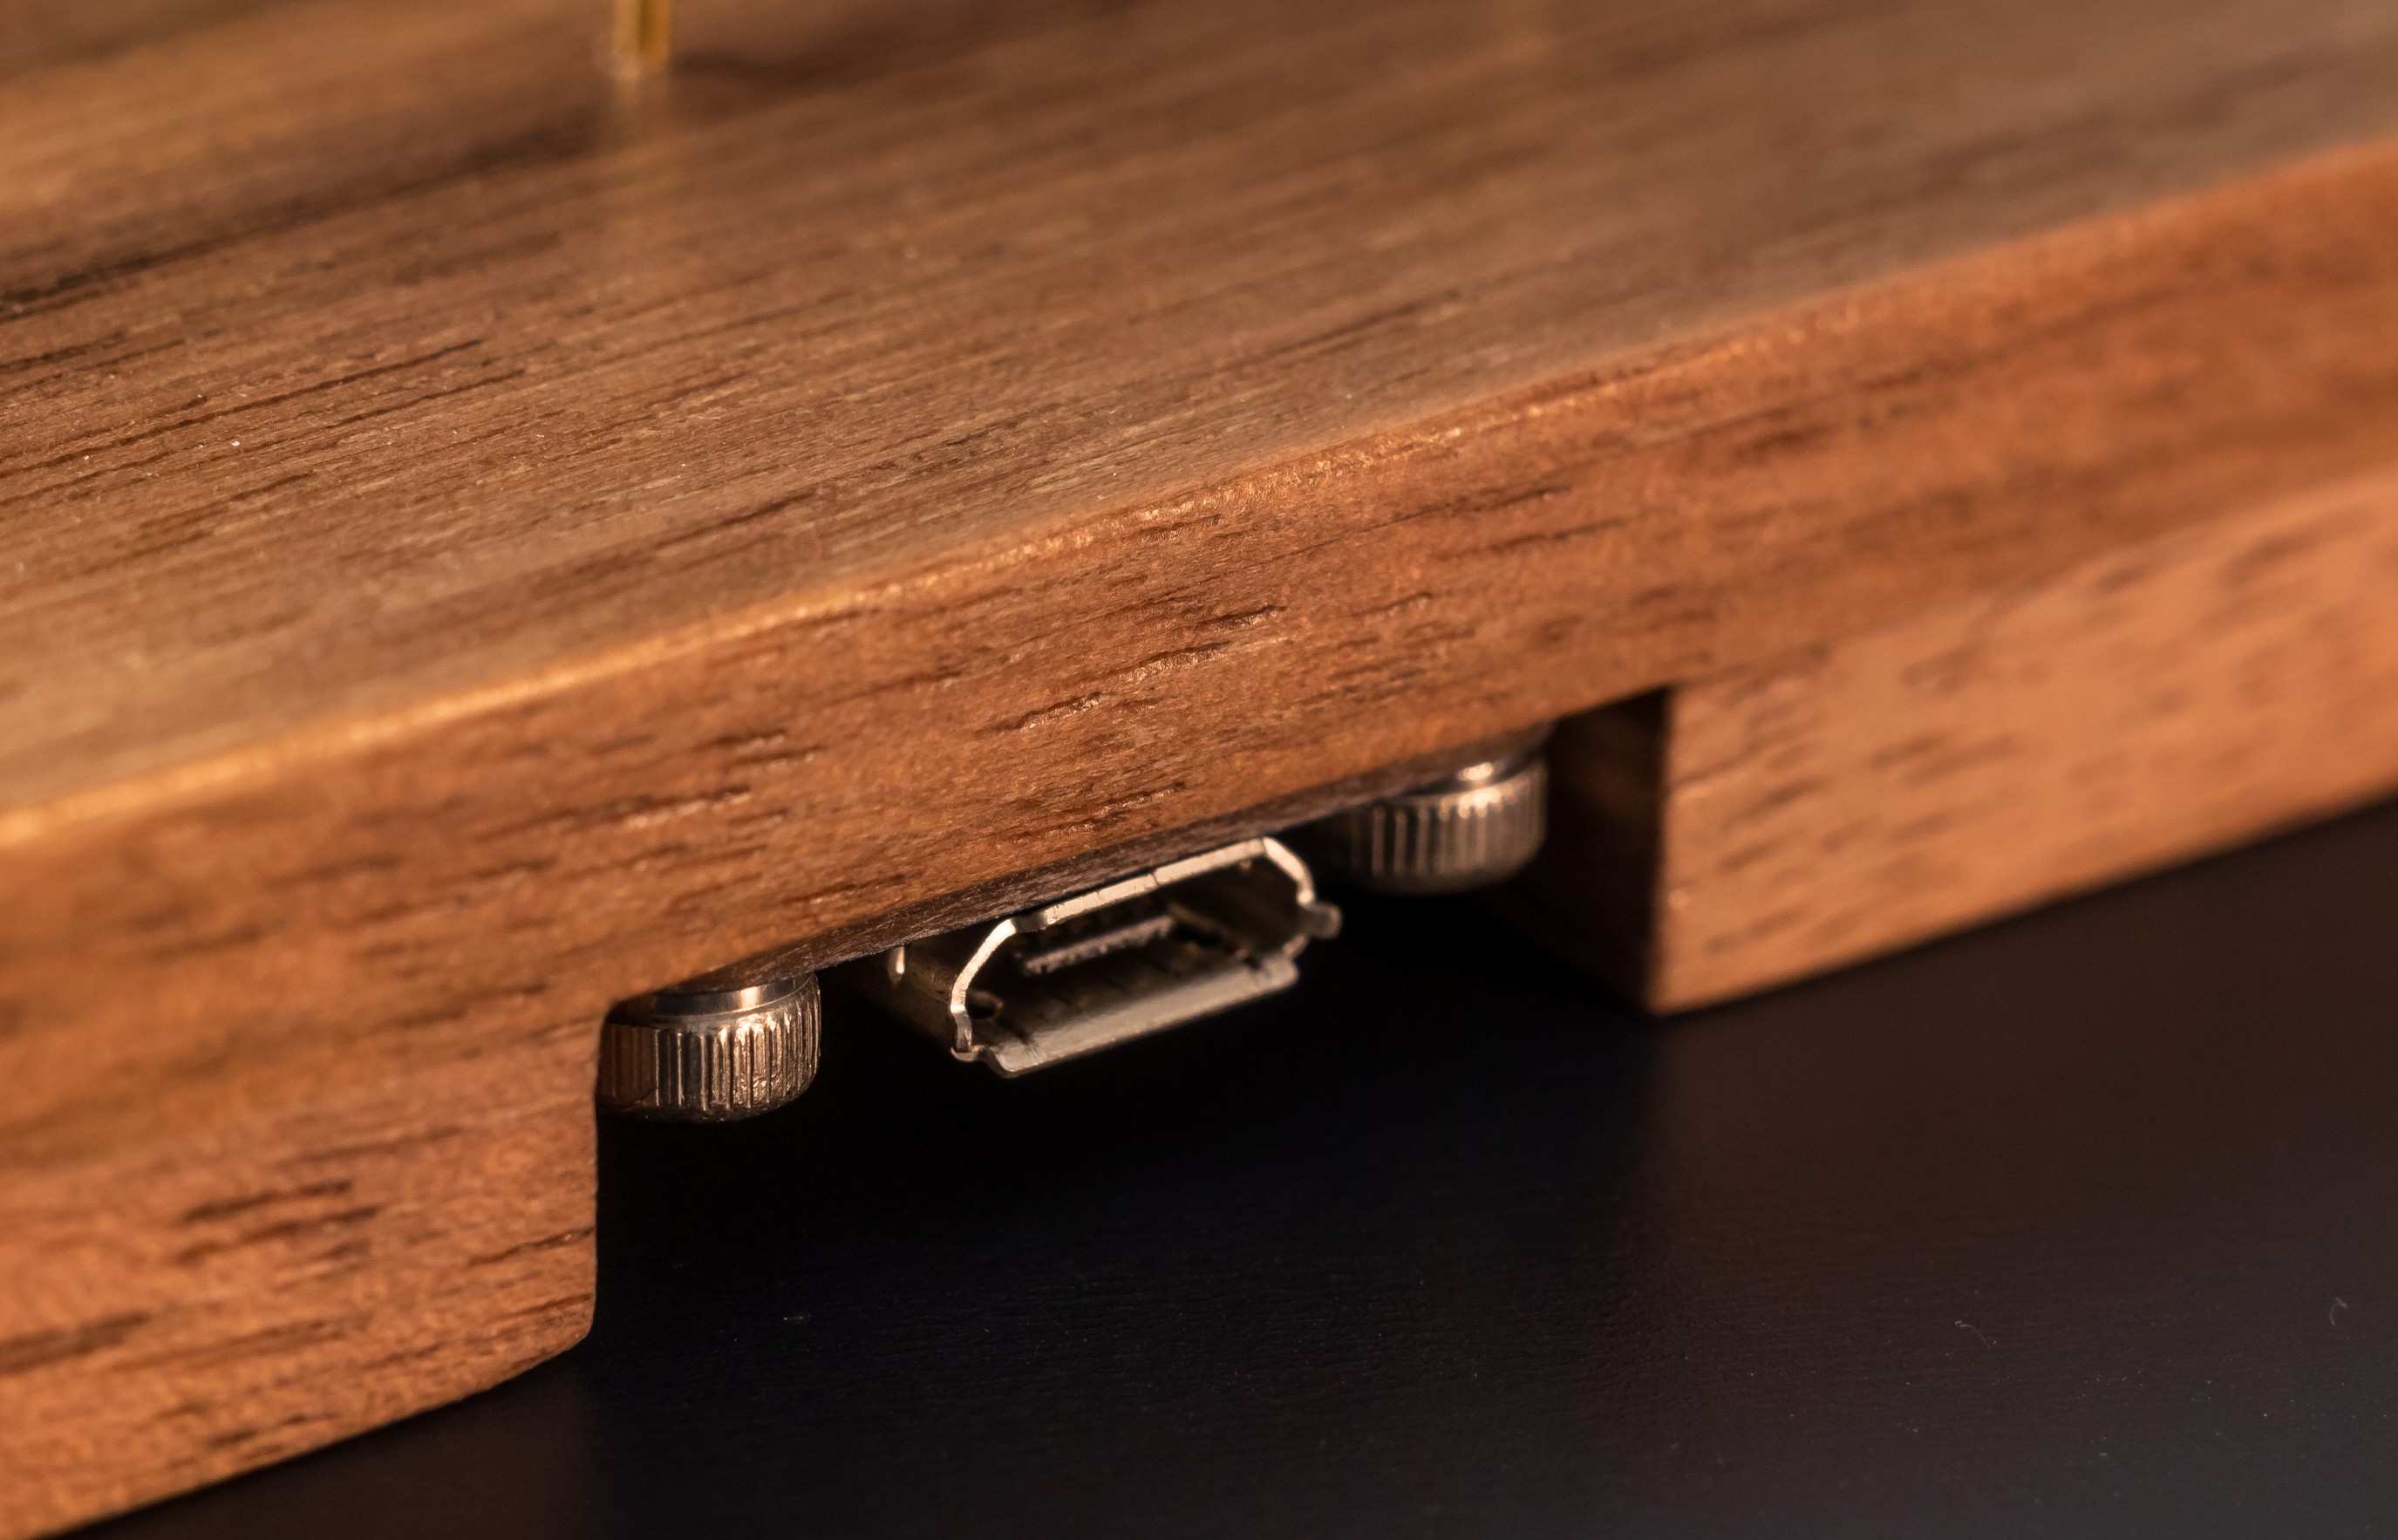
The sculpture is powered by a micro usb connector nested into the base.
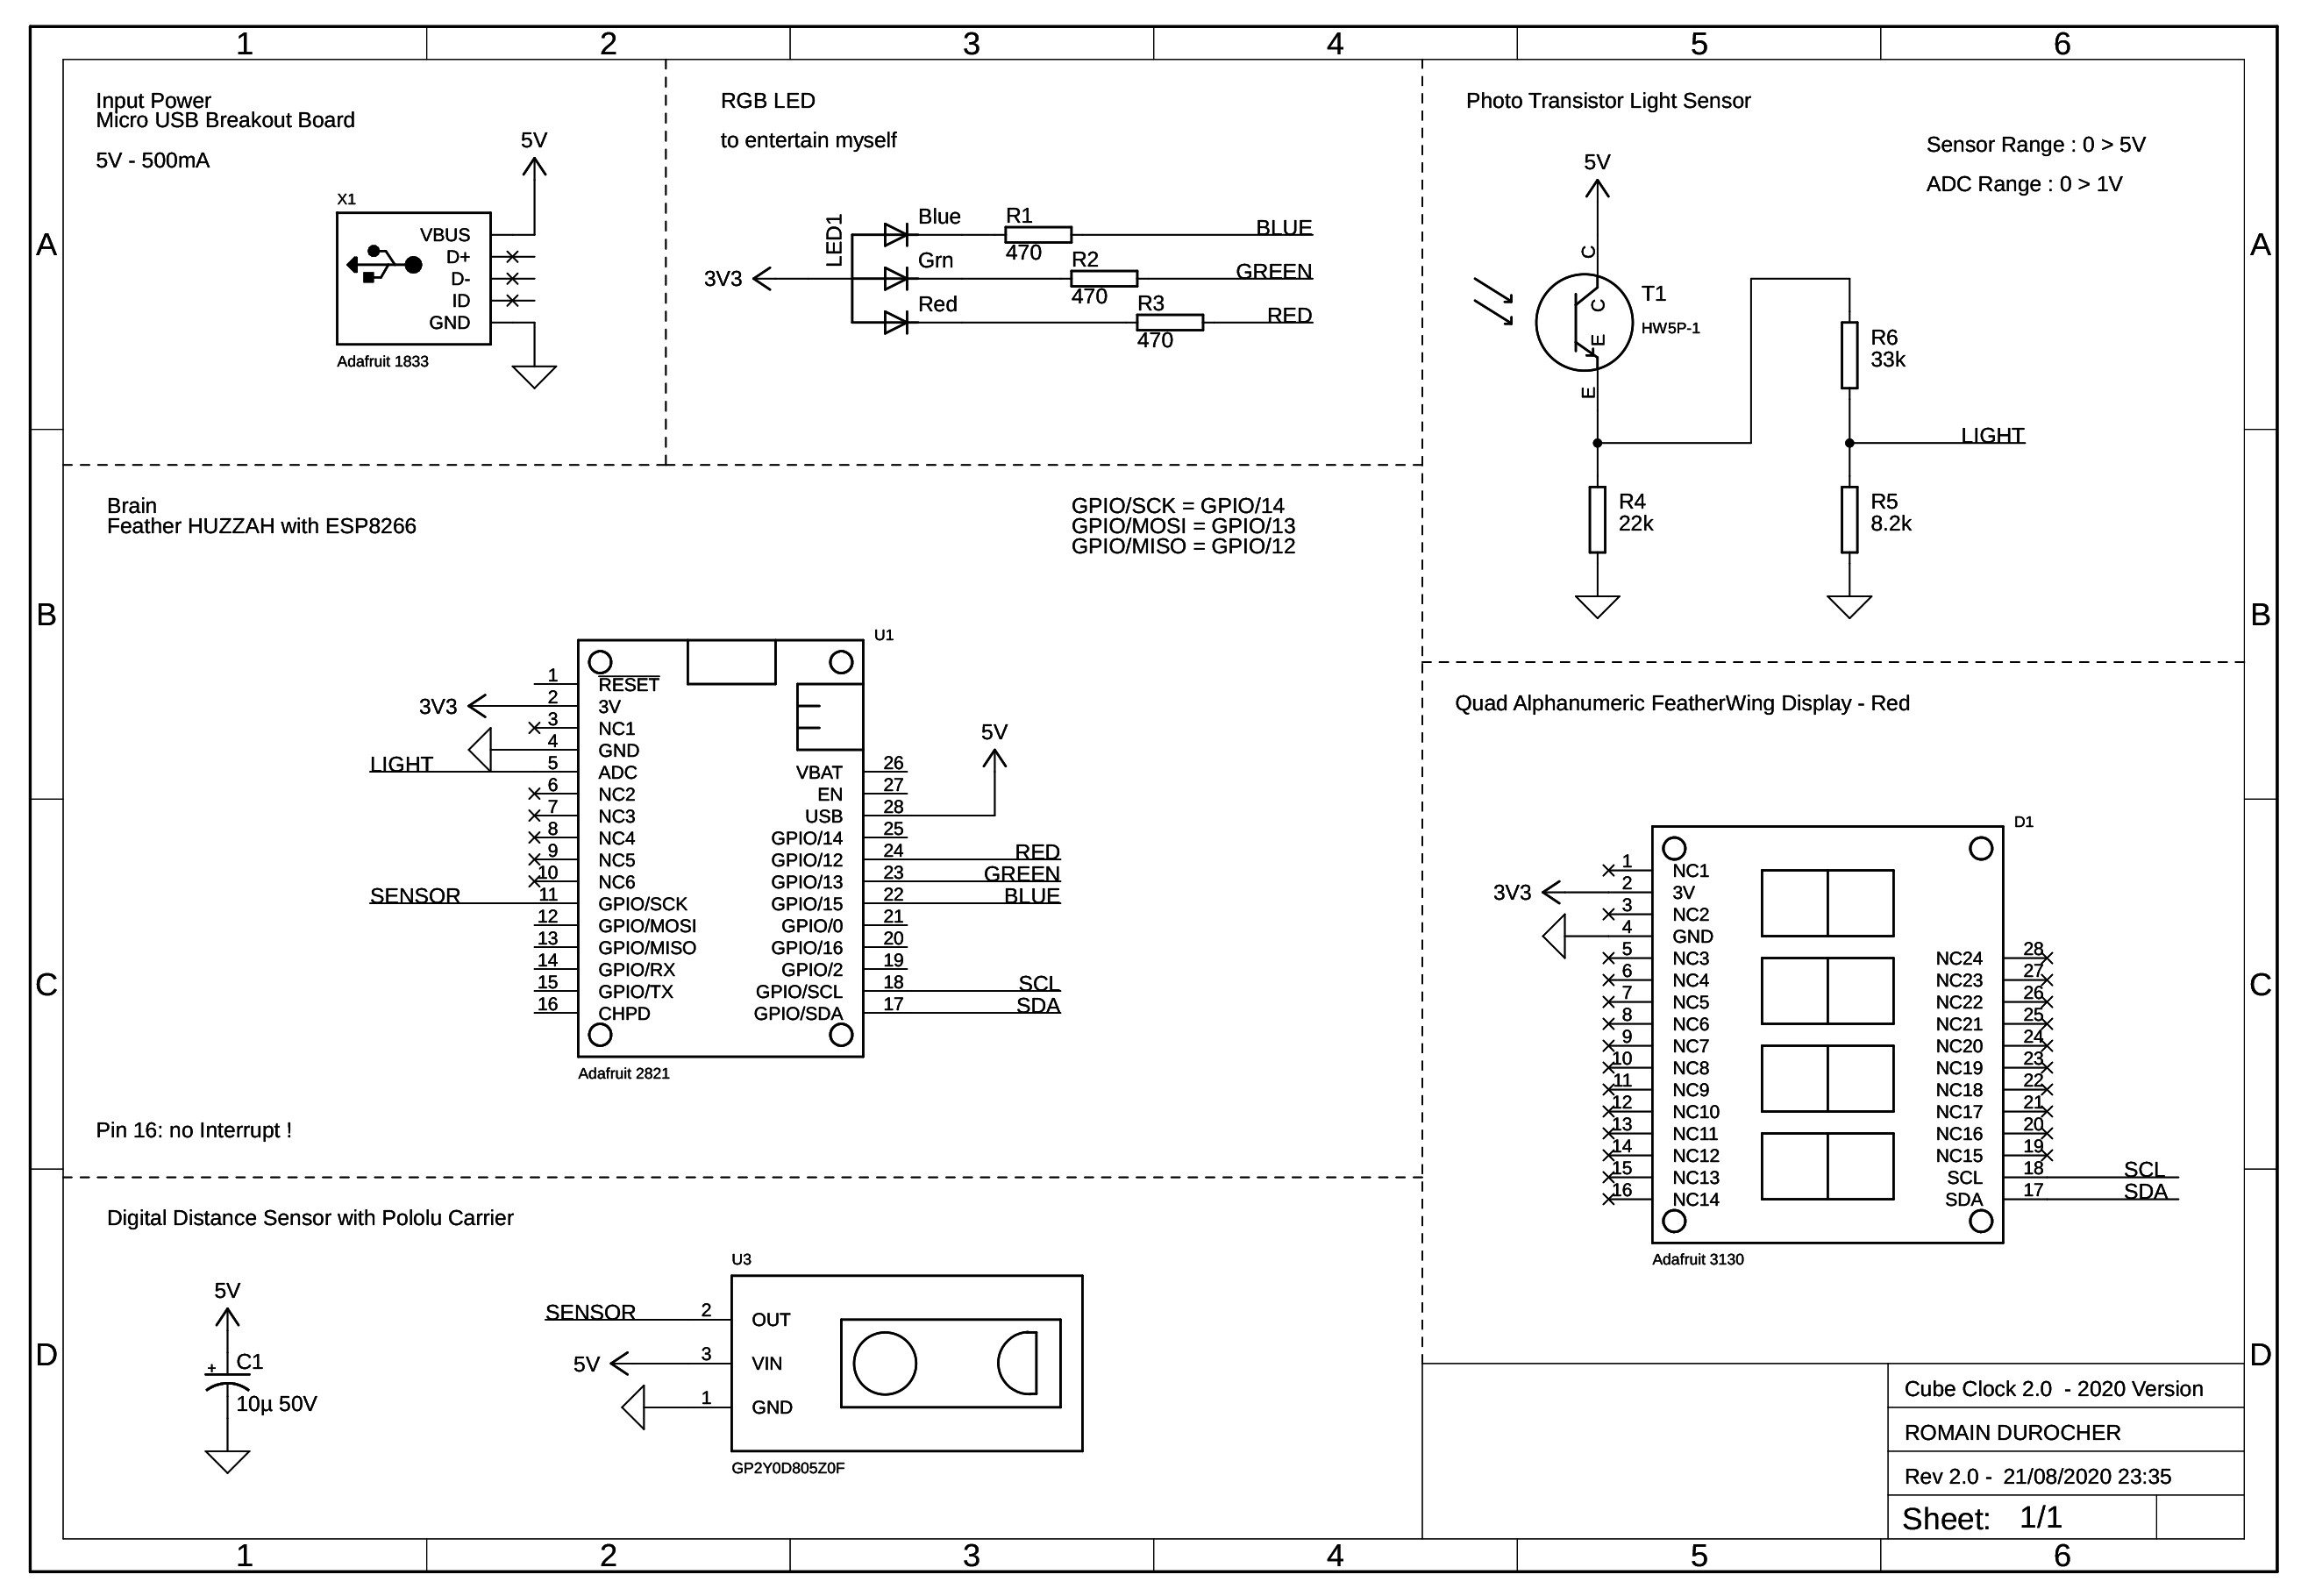
The schematic displays only the necessary connection, not the real one, as the 3 led pins goes thru the Feather 7 seg pin to connect the processor to the component. But as 90% of the external pins are not connected, that made my like easier !

All the components are connected using 0.8mm brass rod, who act as the electric circuit and as a structure. I used K&S engineered brass, it's not on the cheap side, but sooo much easy to use. I believe I use something like 4 or 5 rod of 30 cm long on this project (so an entire pack, who cost around 3 CAD).
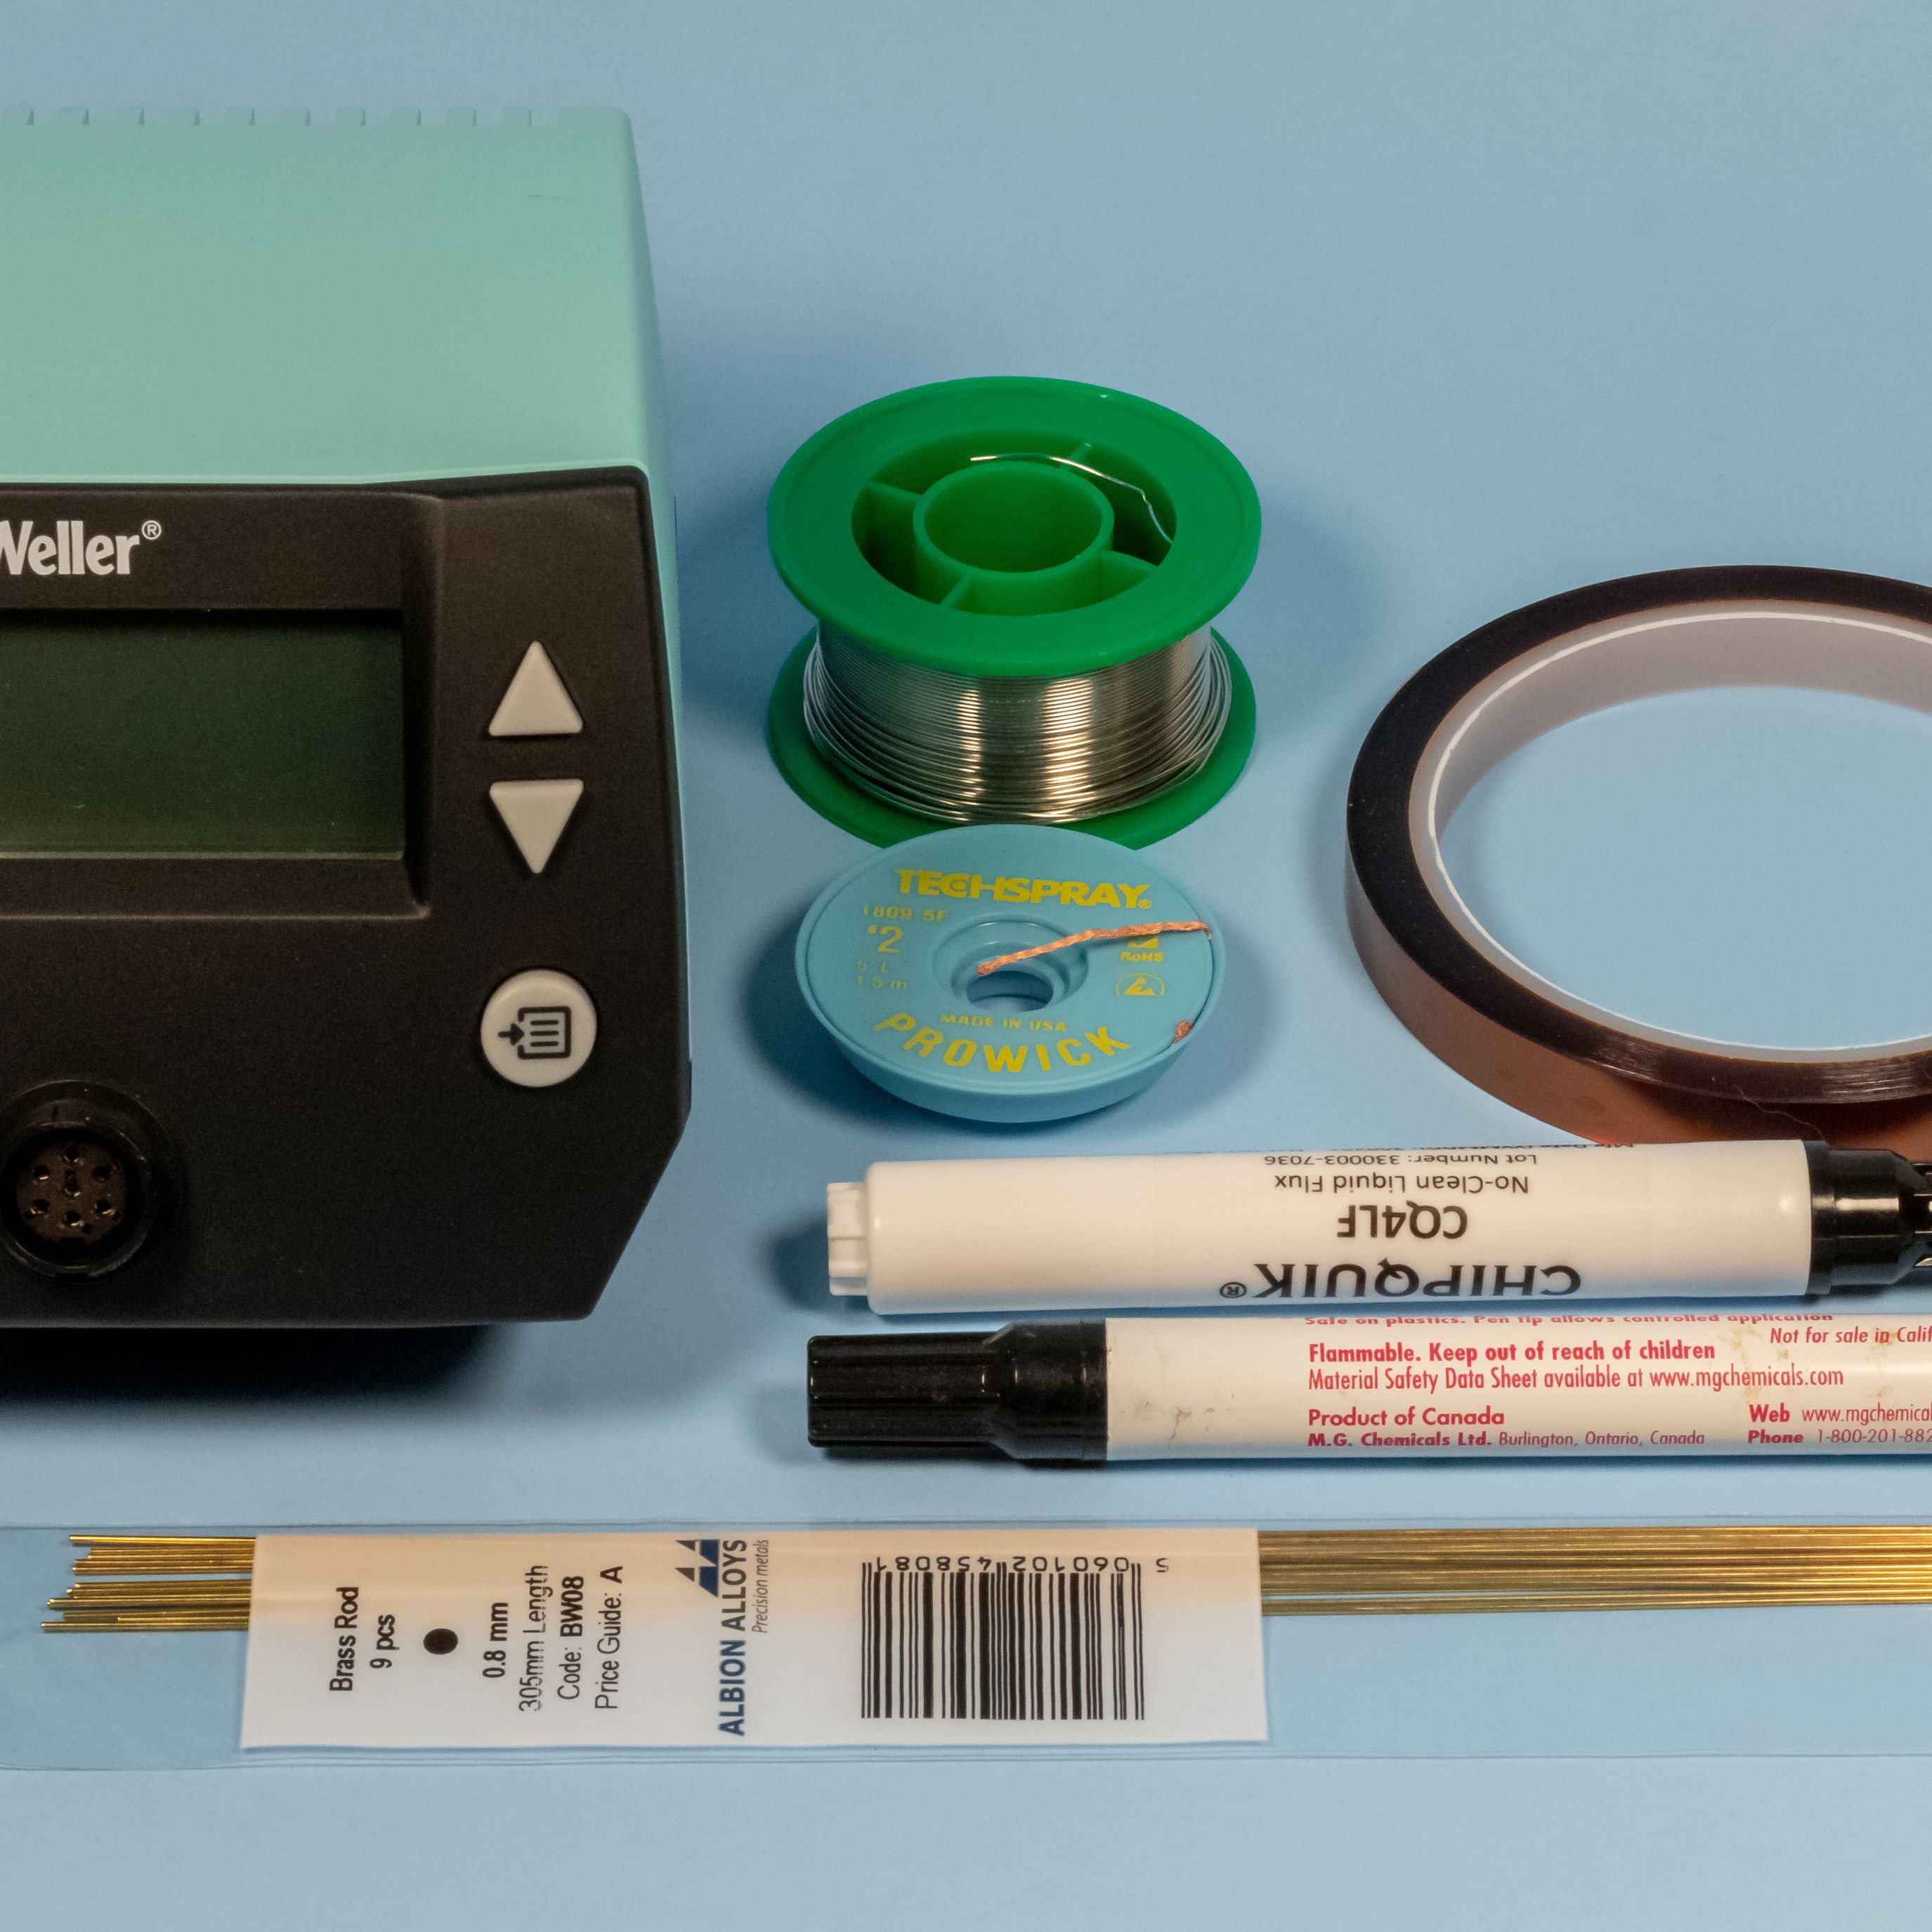
Let's do a quick talk about the tools I used :
- a good soldering station (I use a Weller WE 1010NA, it's the brand workhorse)
- lead free solder wire
- flux (the most useful thing here !)
- solder wick
- flat pliers & flush cutters, again I use a tool recommended by Mohit, a Xuron flush cutter
- something to measure precisely – I use a caliper – (to avoid ending up with a crooked sculpture ..)
- tweezers …
- All sort of clamping devices, like Kapton tape (at least something that will not melt during soldering). I recently began to use 123 blocks as squares or to clamp my parts, it’s quite expensive, but so useful !


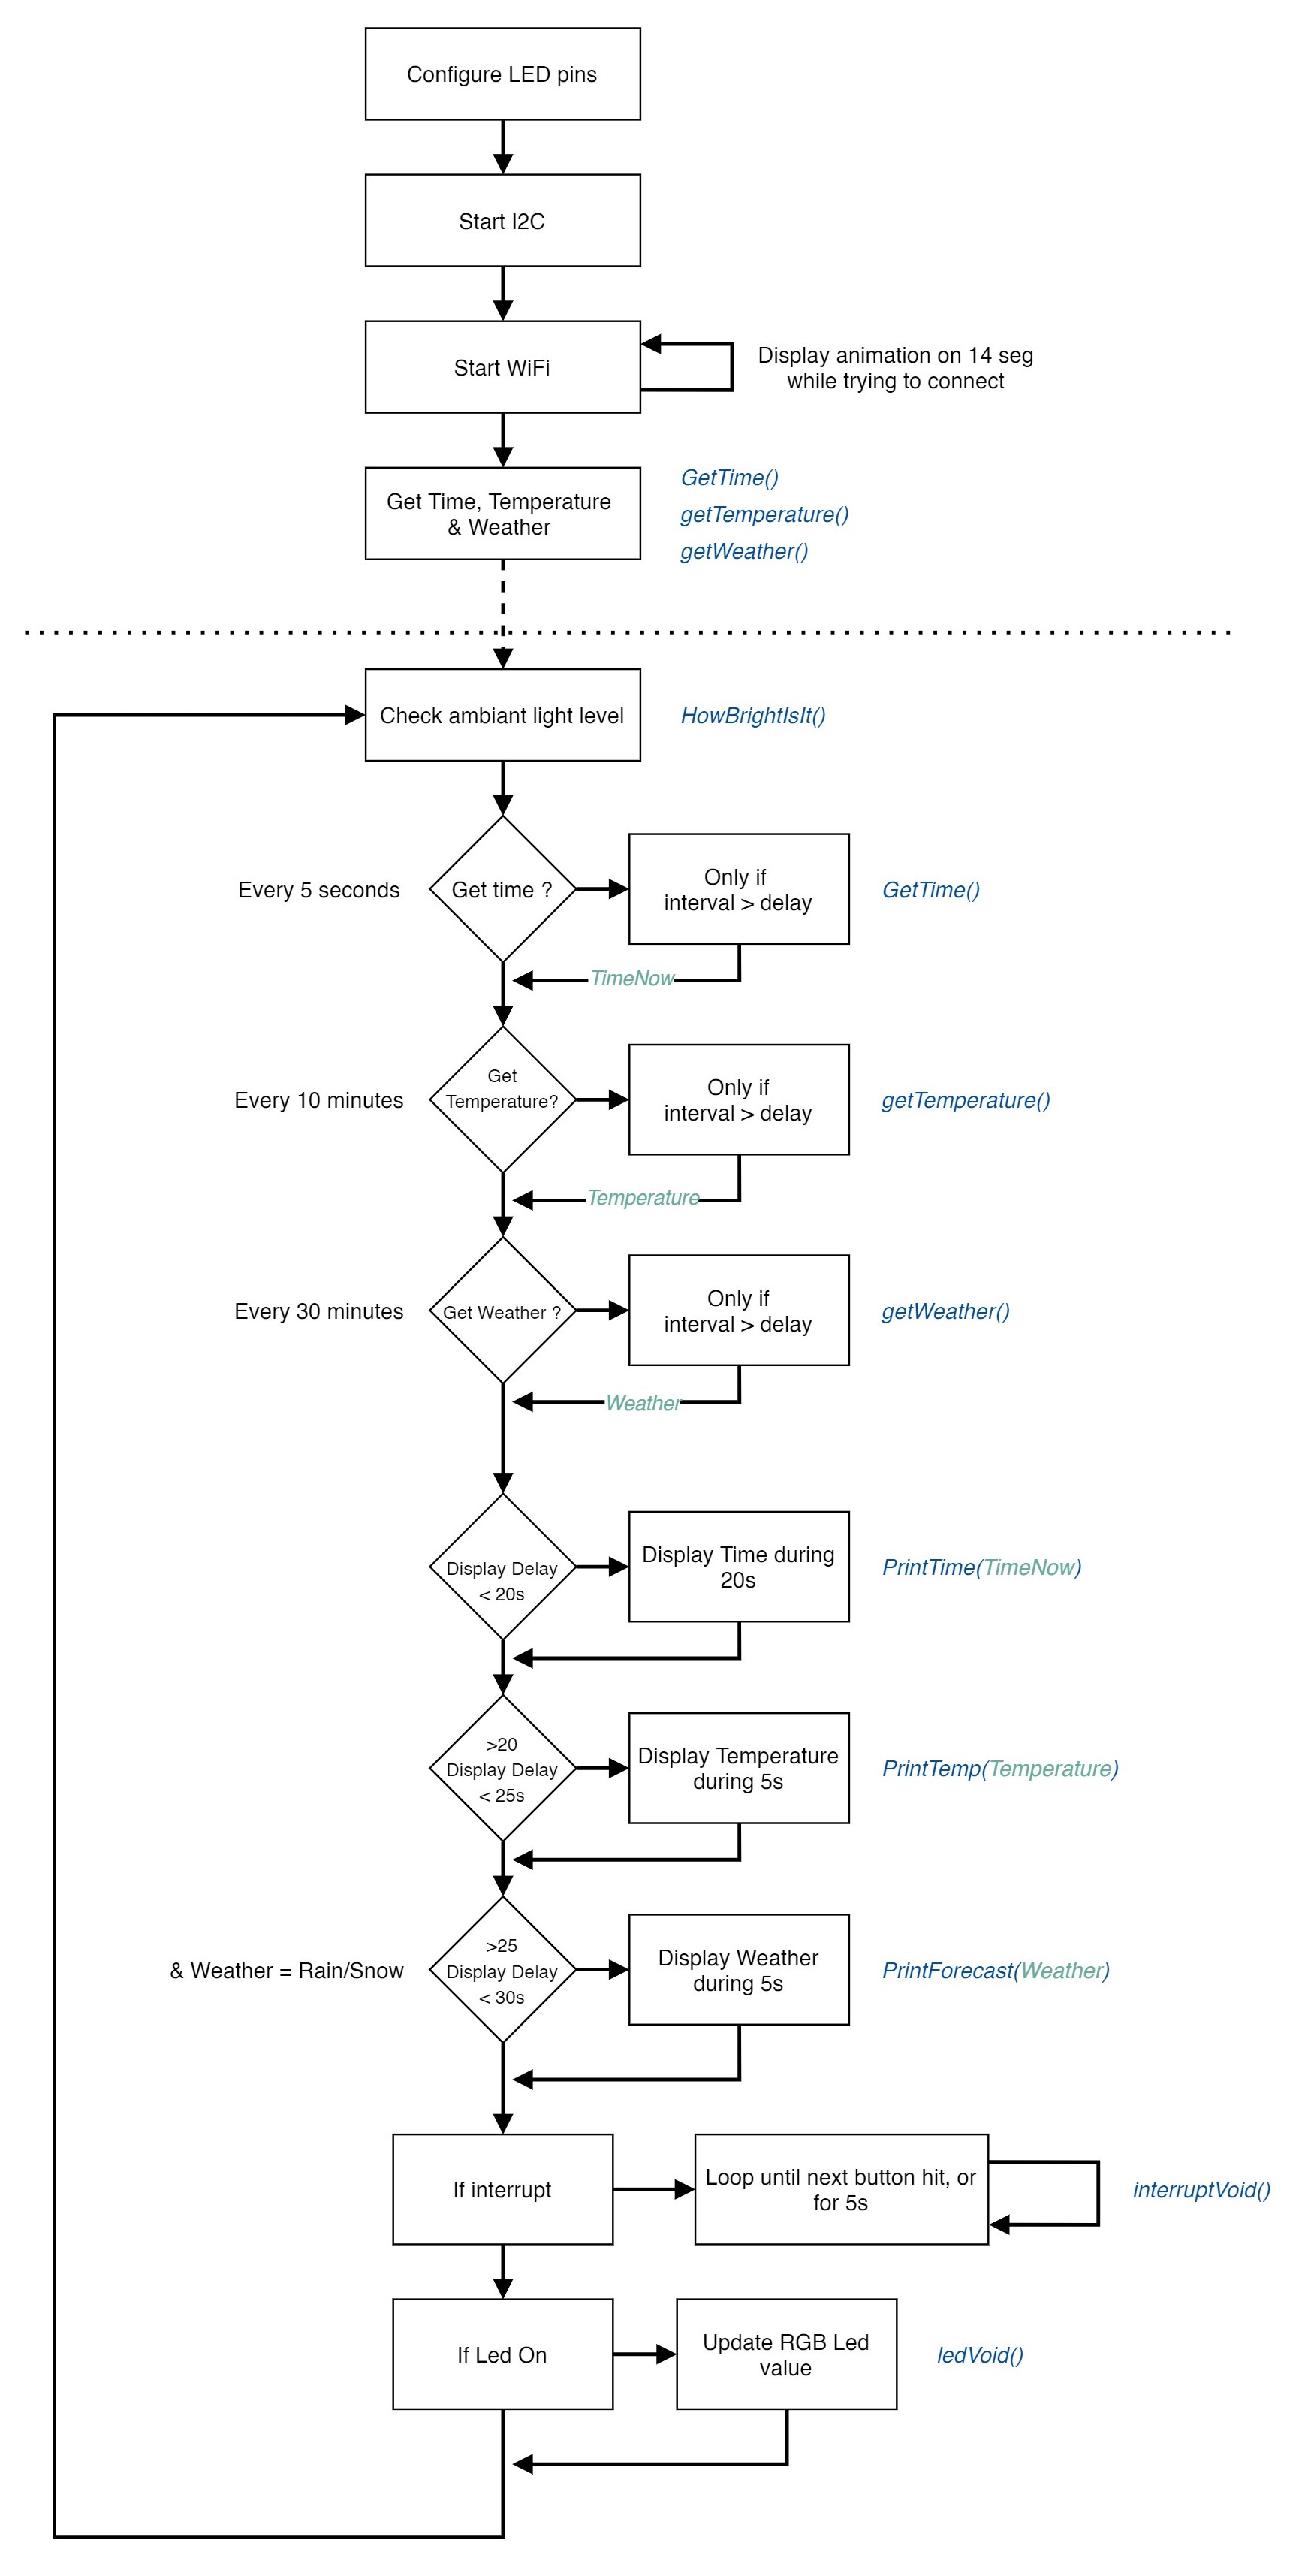
The main code loop make the WiFi processor to retrieve the current time, weather and temperature at intervals of 5s for the time, 10 minutes for the temperature and 30 minutes for the weather ... thanks to the openweather API .
This information are thus displayed in a loop, except for the weather forecast, which is only displayed in the event of rain or snow !
Time is displayed for 20s, then Temperature for another 5s, then Weather is displayed, only in case of rain or snow.
But it is also possible, via the proximity sensor connected to an interrupt, to vary the displays. It can display more information:
- first "hit" : display date
- second : display Temperature
- third : display Weather, including Sun this time
- fourth : display a smiley (see image below)
- fifth : turn on/off the RGB LED.
Here is a small synoptic of the code, full version and more information on my Github
And here is what I called smiley (also heavily inspired by Mohit chintoo sculpture.

(I can't post a video player anymore, so here is the link : Video )
Thanks to the Adafruit libraries, GitHub and StackOverflow for making this code happen !
And thanks to you to read all of this, hope it is entertaining and helpful !