 Tom Janssens
Very beginning:
I started out with actually having no clue what to do. So, during a little research, I came across some great projects, who showed the soldering of brass rods with adhesive tape as a fixation. Nice!
Right from the beginning, I wanted to keep the whole process as flexible as possible. Therefore there was no actual design for the remote station. But I roughly knew what it should look like.

1. Schematics served as a guide.
Nevertheless, I needed some more help to get things started. So I came up with this little guy, who is mainly inspired by a mitre box. A mitre box enables sawing wood in different angles and my tool enables me to mainly solder right angles or intersections of 0.8 mm brass rods.
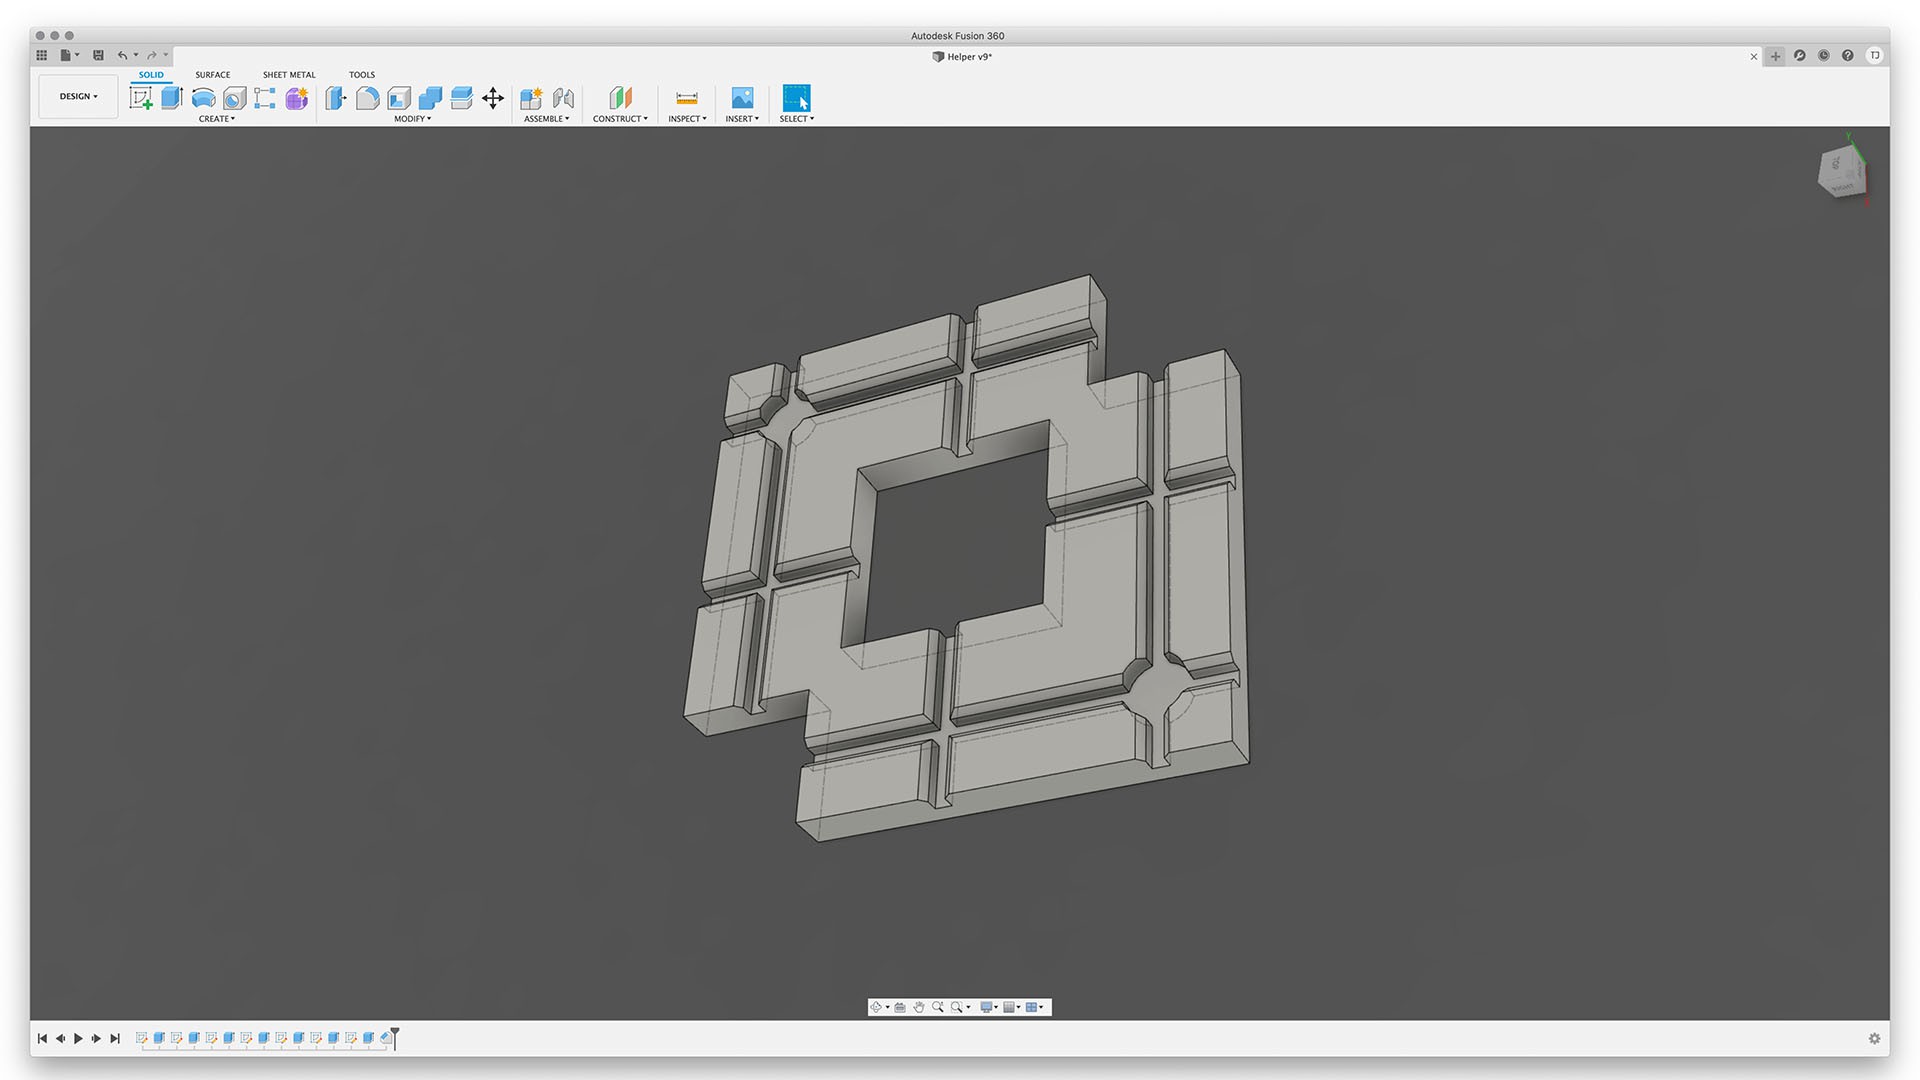
2. Helper jig.
Now I was ready to start out by soldering all the parts together.
Building process:
Doing the very first soldering with the help of my freshly printed jig was fantastic. It worked exactly as I expected. Starting out with the basic form of the remote station, I quickly received good results.
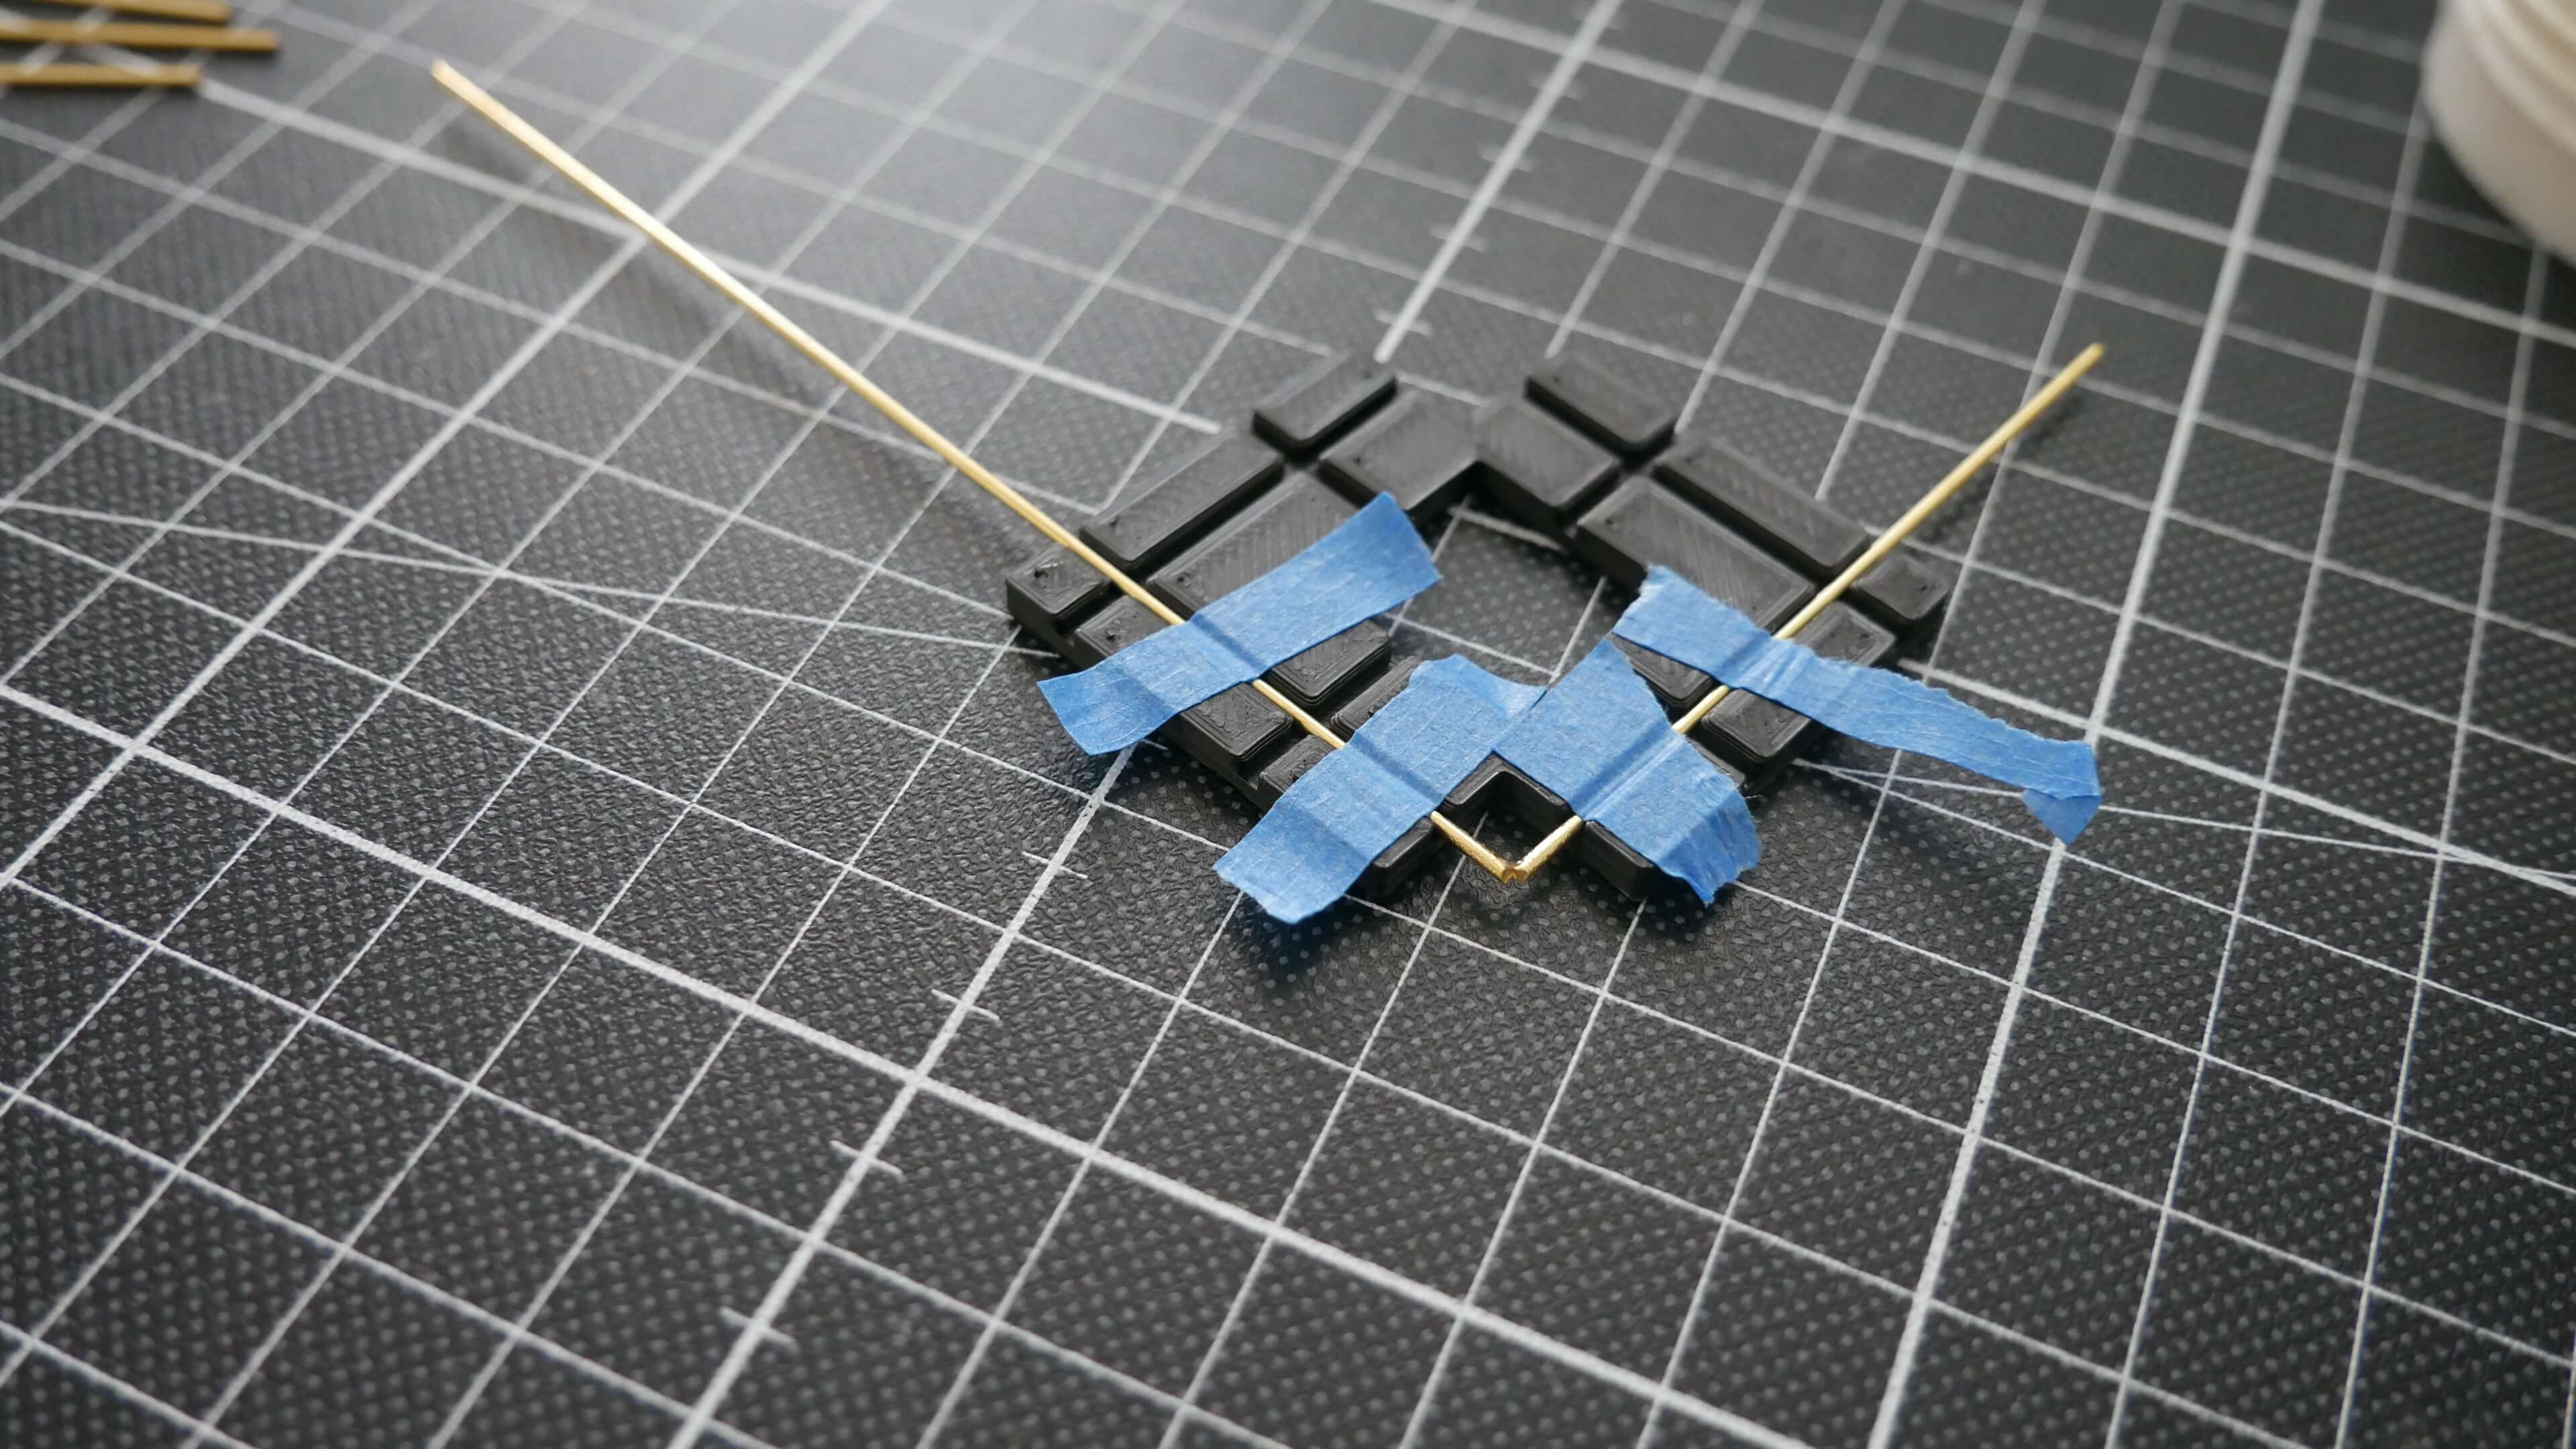
3. First result.
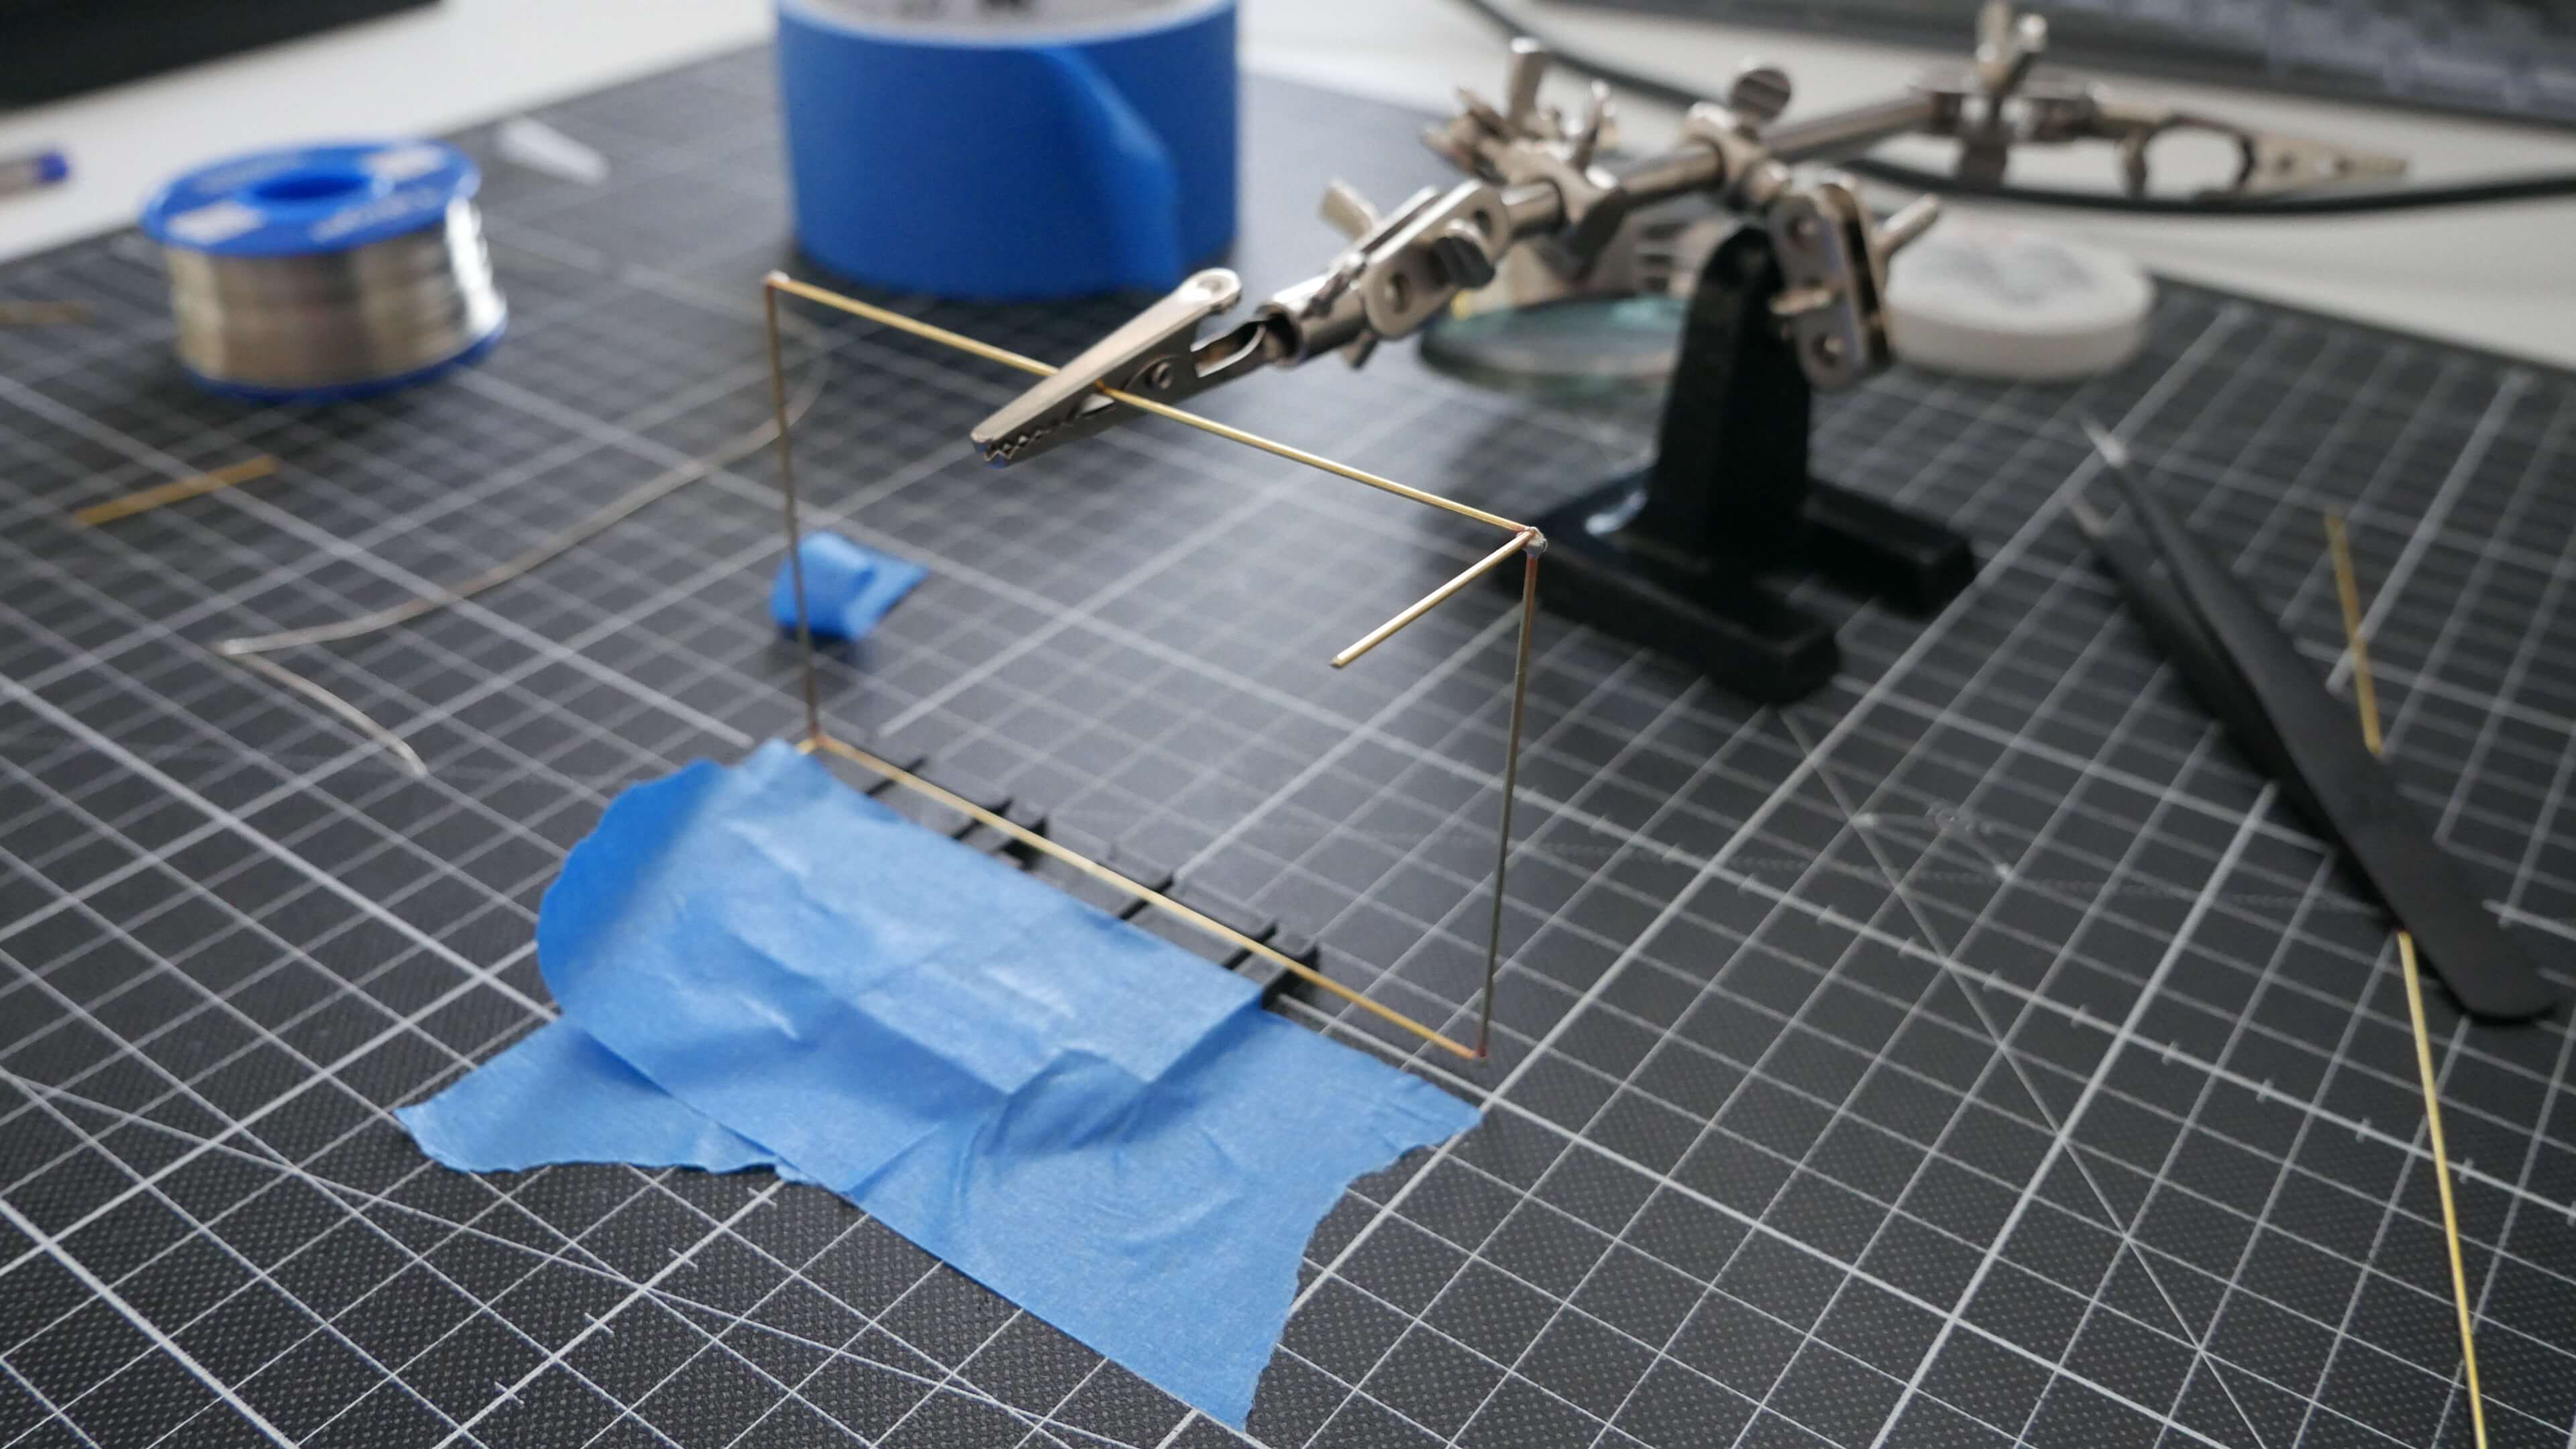
4. Starting out with the basic form.
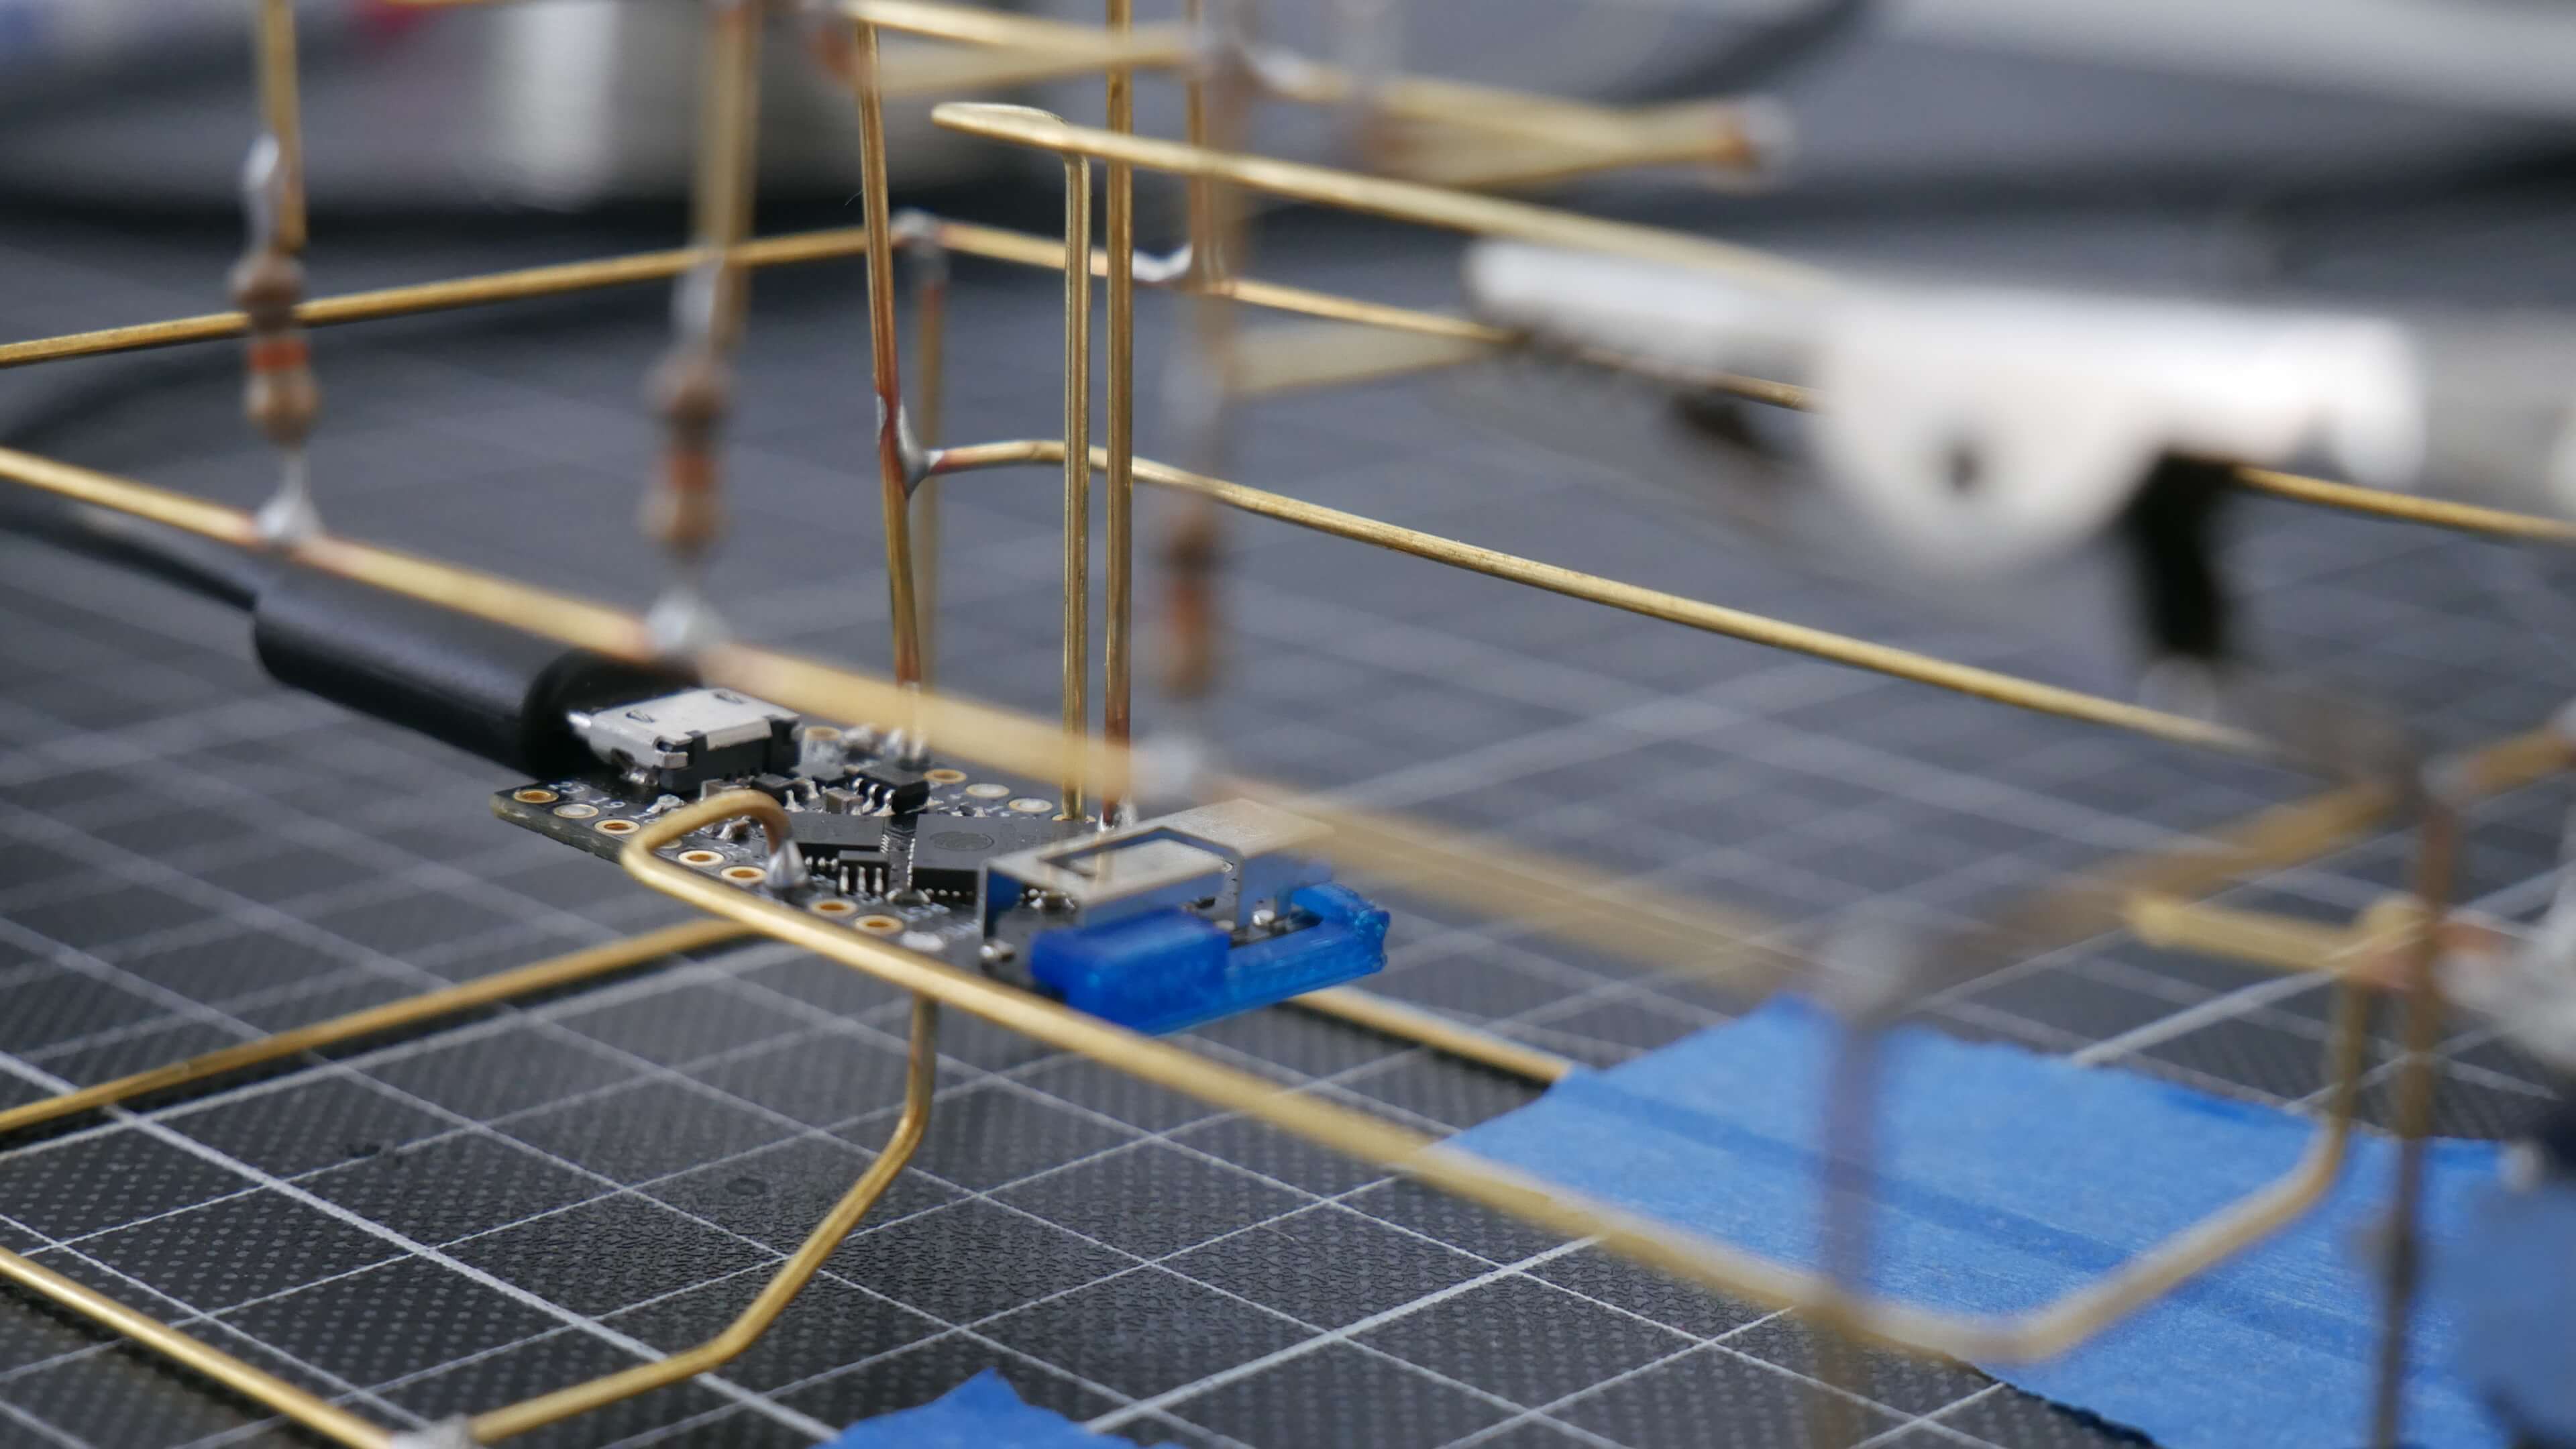
And now, let’s get down to the nitty-gritty. The next thing for me was, how do I implement the TinyPICO into the sculpture structure? There were a few constraints to keep in mind. The microcontroller had to be in a position so that all the pins and the USB port would be freely accessible. Another constraint was that I had to ensure that all components were supplied with voltage and common ground in order to work.
So I chose to implement the controller as my common ground pole. This allows for a lot of flexibility and enables me to place the remaining parts freely because all of it is now grounded.
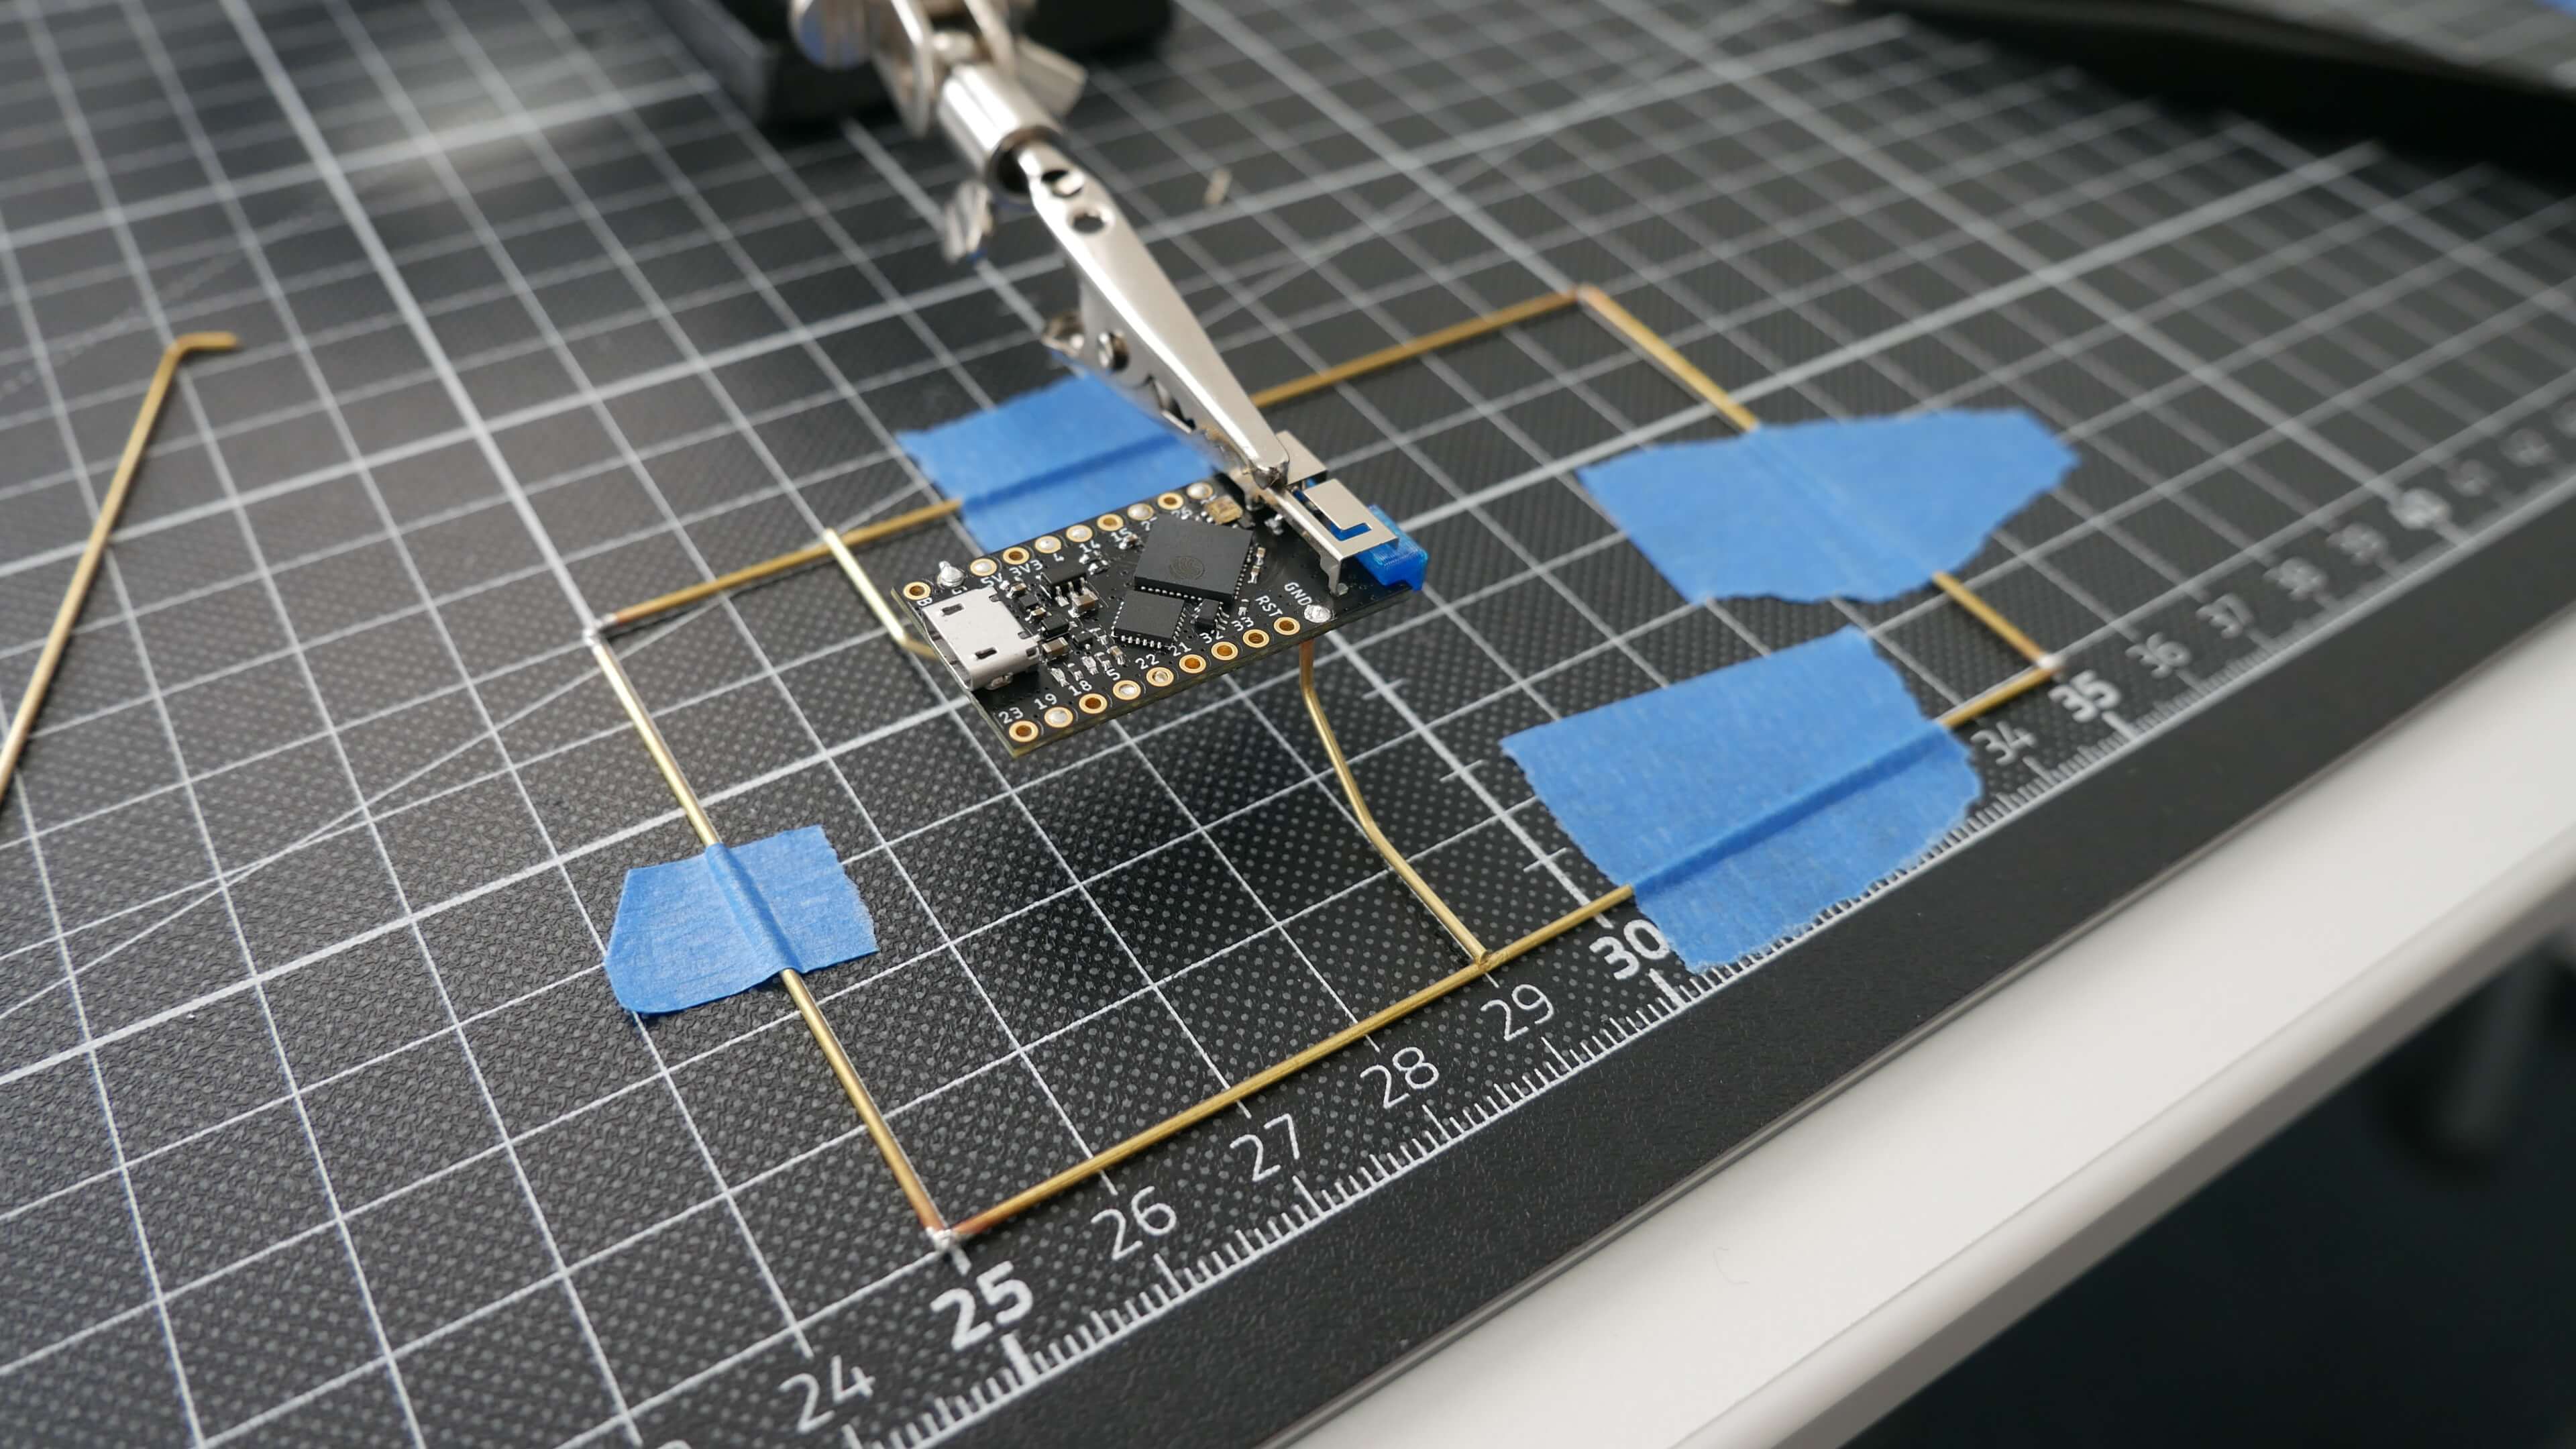
5. TinyPICO as my common ground.
This leads me to explain some design decisions to you, I made during this process.
Design decisions:
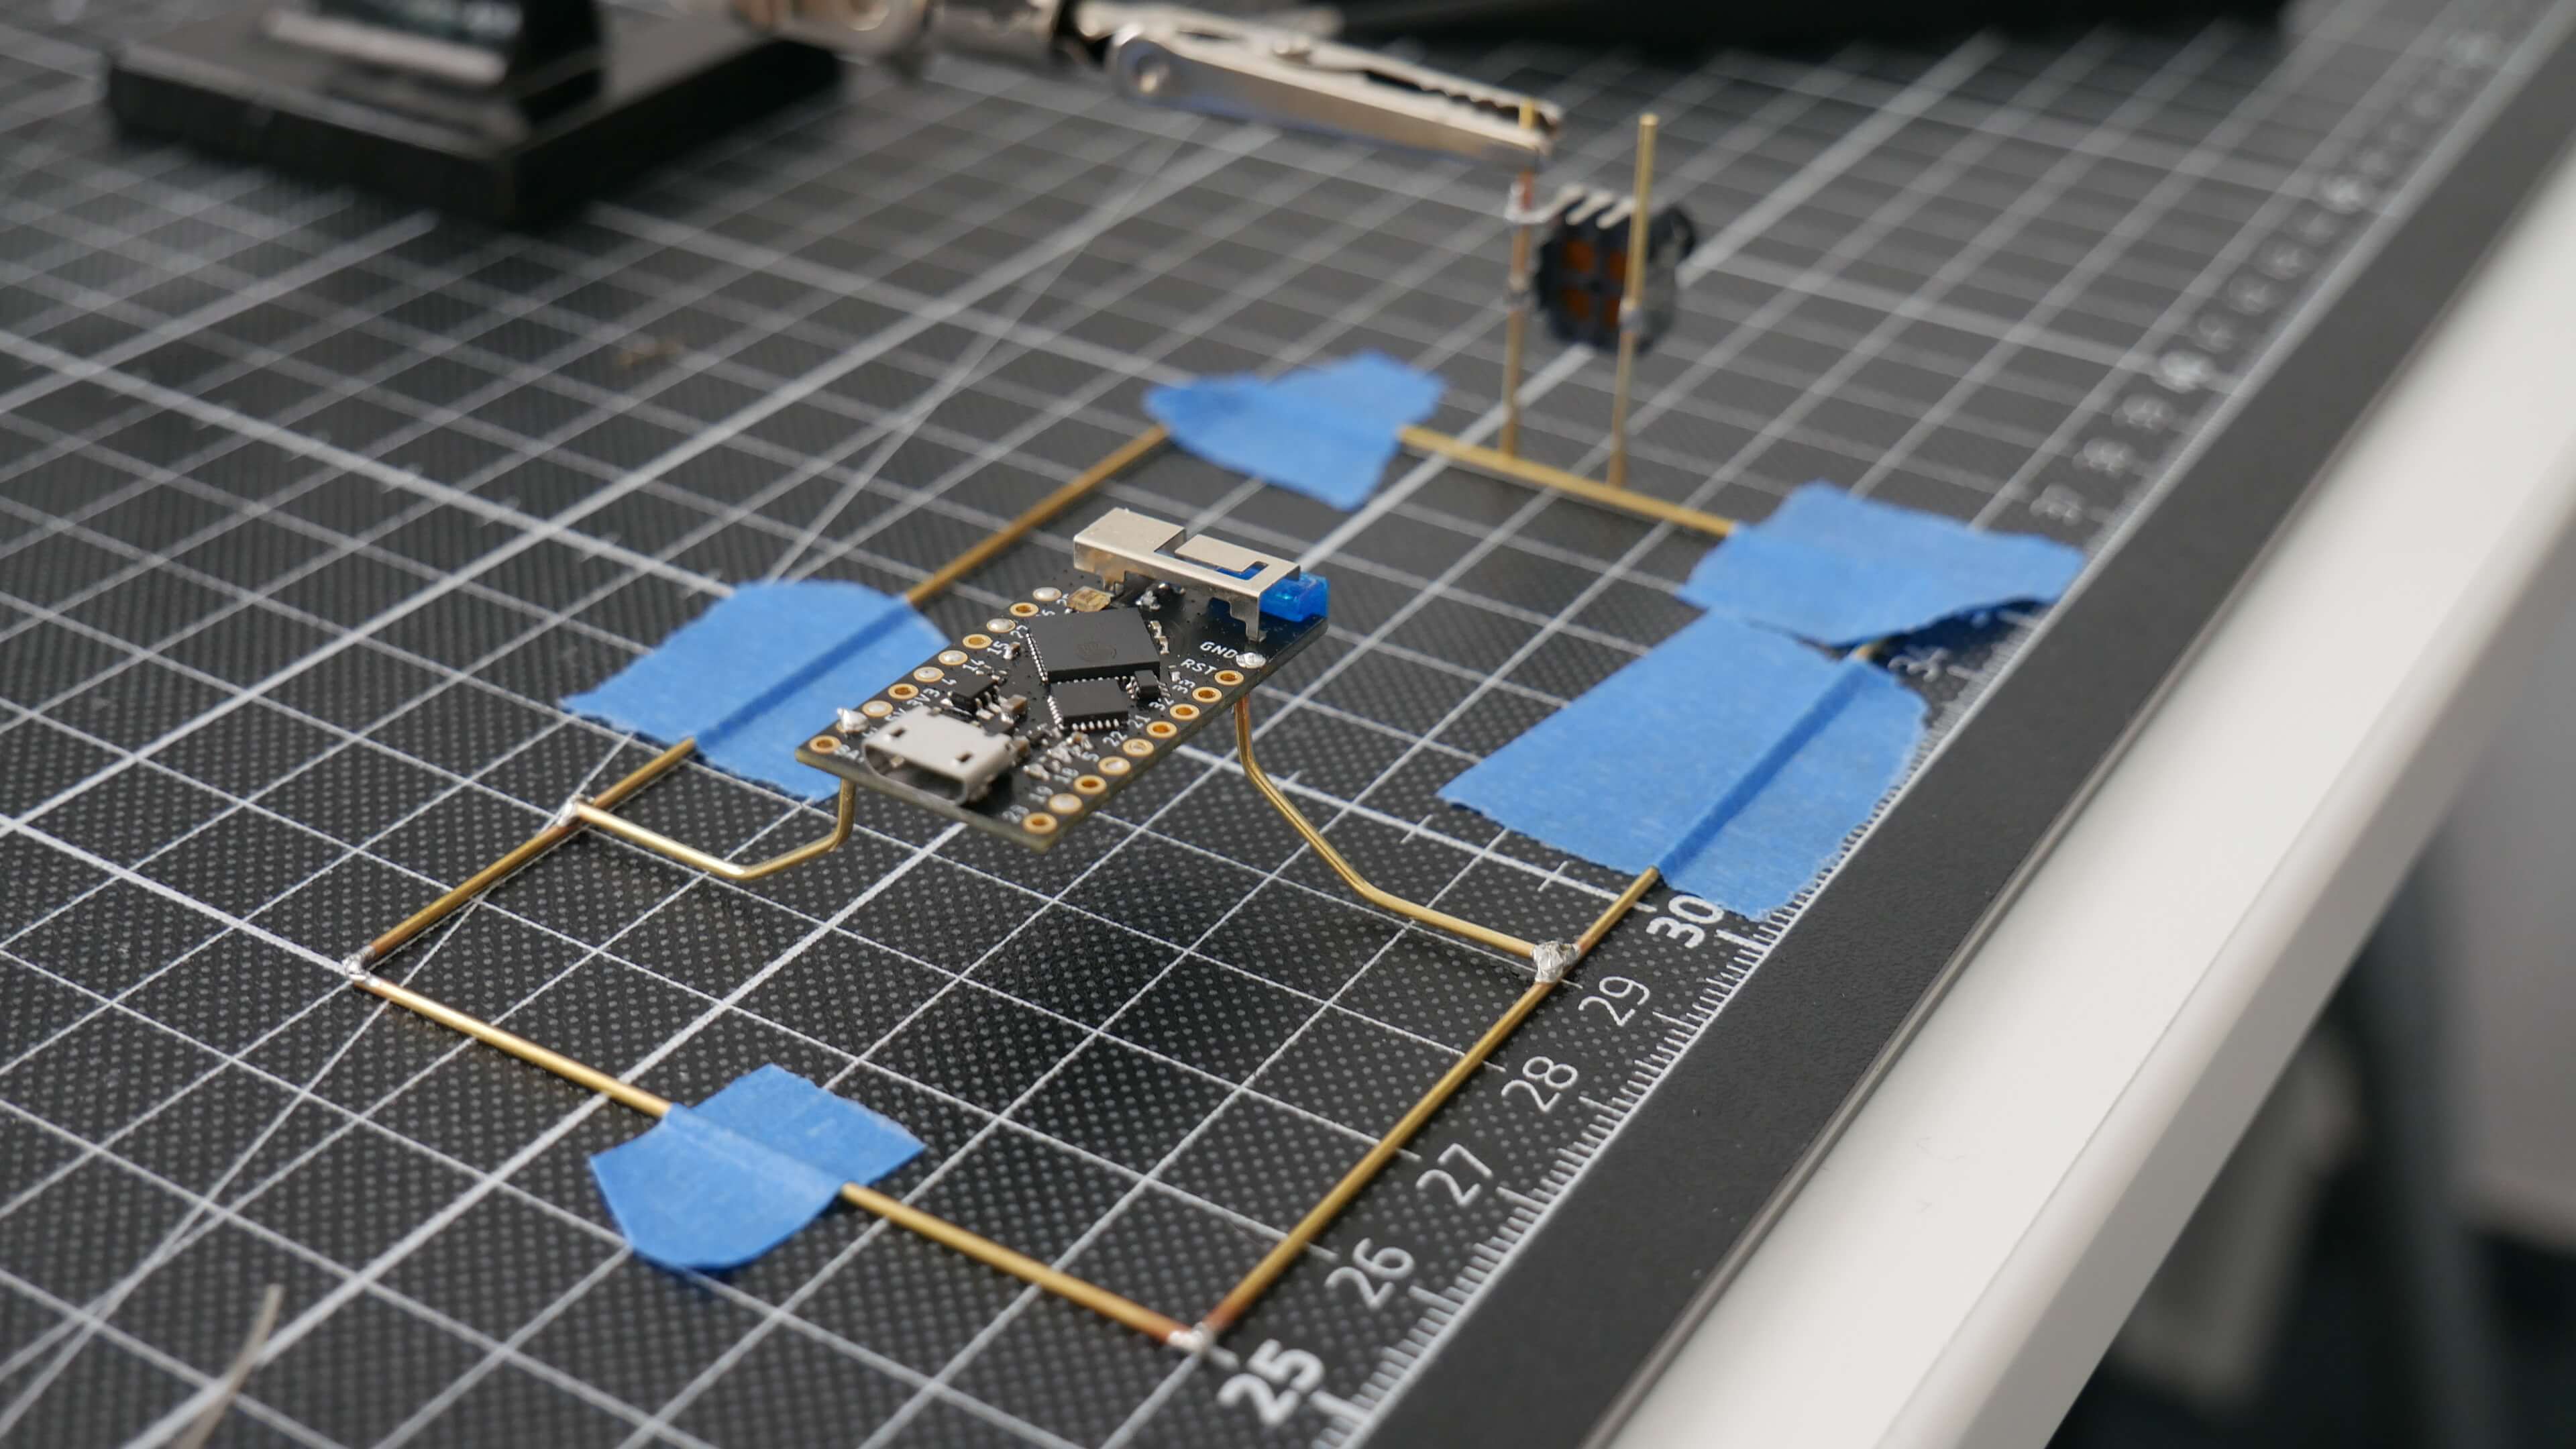
The whole appearance of the Sonos Remote Station is designed to stand in a designated place. Maybe on a sideboard or a work desk. It’s powered via a USB cable and is required to be placed near a power source. Unlike a “normal” circuit sculpture that may change its place more often, the Sonos Remote Station should remain in its place.
6. The appearance (detail shot).
Let me say a few words about the actual volume control. I wanted to use a simple potentiometer to control the volume. Because a potentiometer’s voltage output is based solely on position, which is great because I needed to be within a 0-100% range. Another great feature of a potentiometer is that its actual position is always clear to the user.
I decided to install the potentiometer right on the side of the Sonos Remote Station to enable the user to gently control the volume. During the developing process, I encountered a couple of problems with the volume control. Occasionally it would jump up to maximum volume, which was pretty annoying. So I decided to map the potentiometer’s full range to 50% of the actual possible system volume in order to avoid unpleasant surprises.
7. The potentiometer.
Let’s move on to the tactile switches. The way they are placed is subject to a specific reason. So imagine you’re pushing down a tactile switch, which is facing up, soldered onto a very easily bendable brass rod. Too much pressure and the material would bend, or worse, solder joints would break.
So I placed them in a position facing the user. Now the user has the capability to press the tactile switch with two fingers. Mostly with the thumb and the index finger. With this approach, I avoid too much pressure and possible bends on the station. Play tracks, pause tracks, and also skip or jump back to previous titles describes their main functionality.
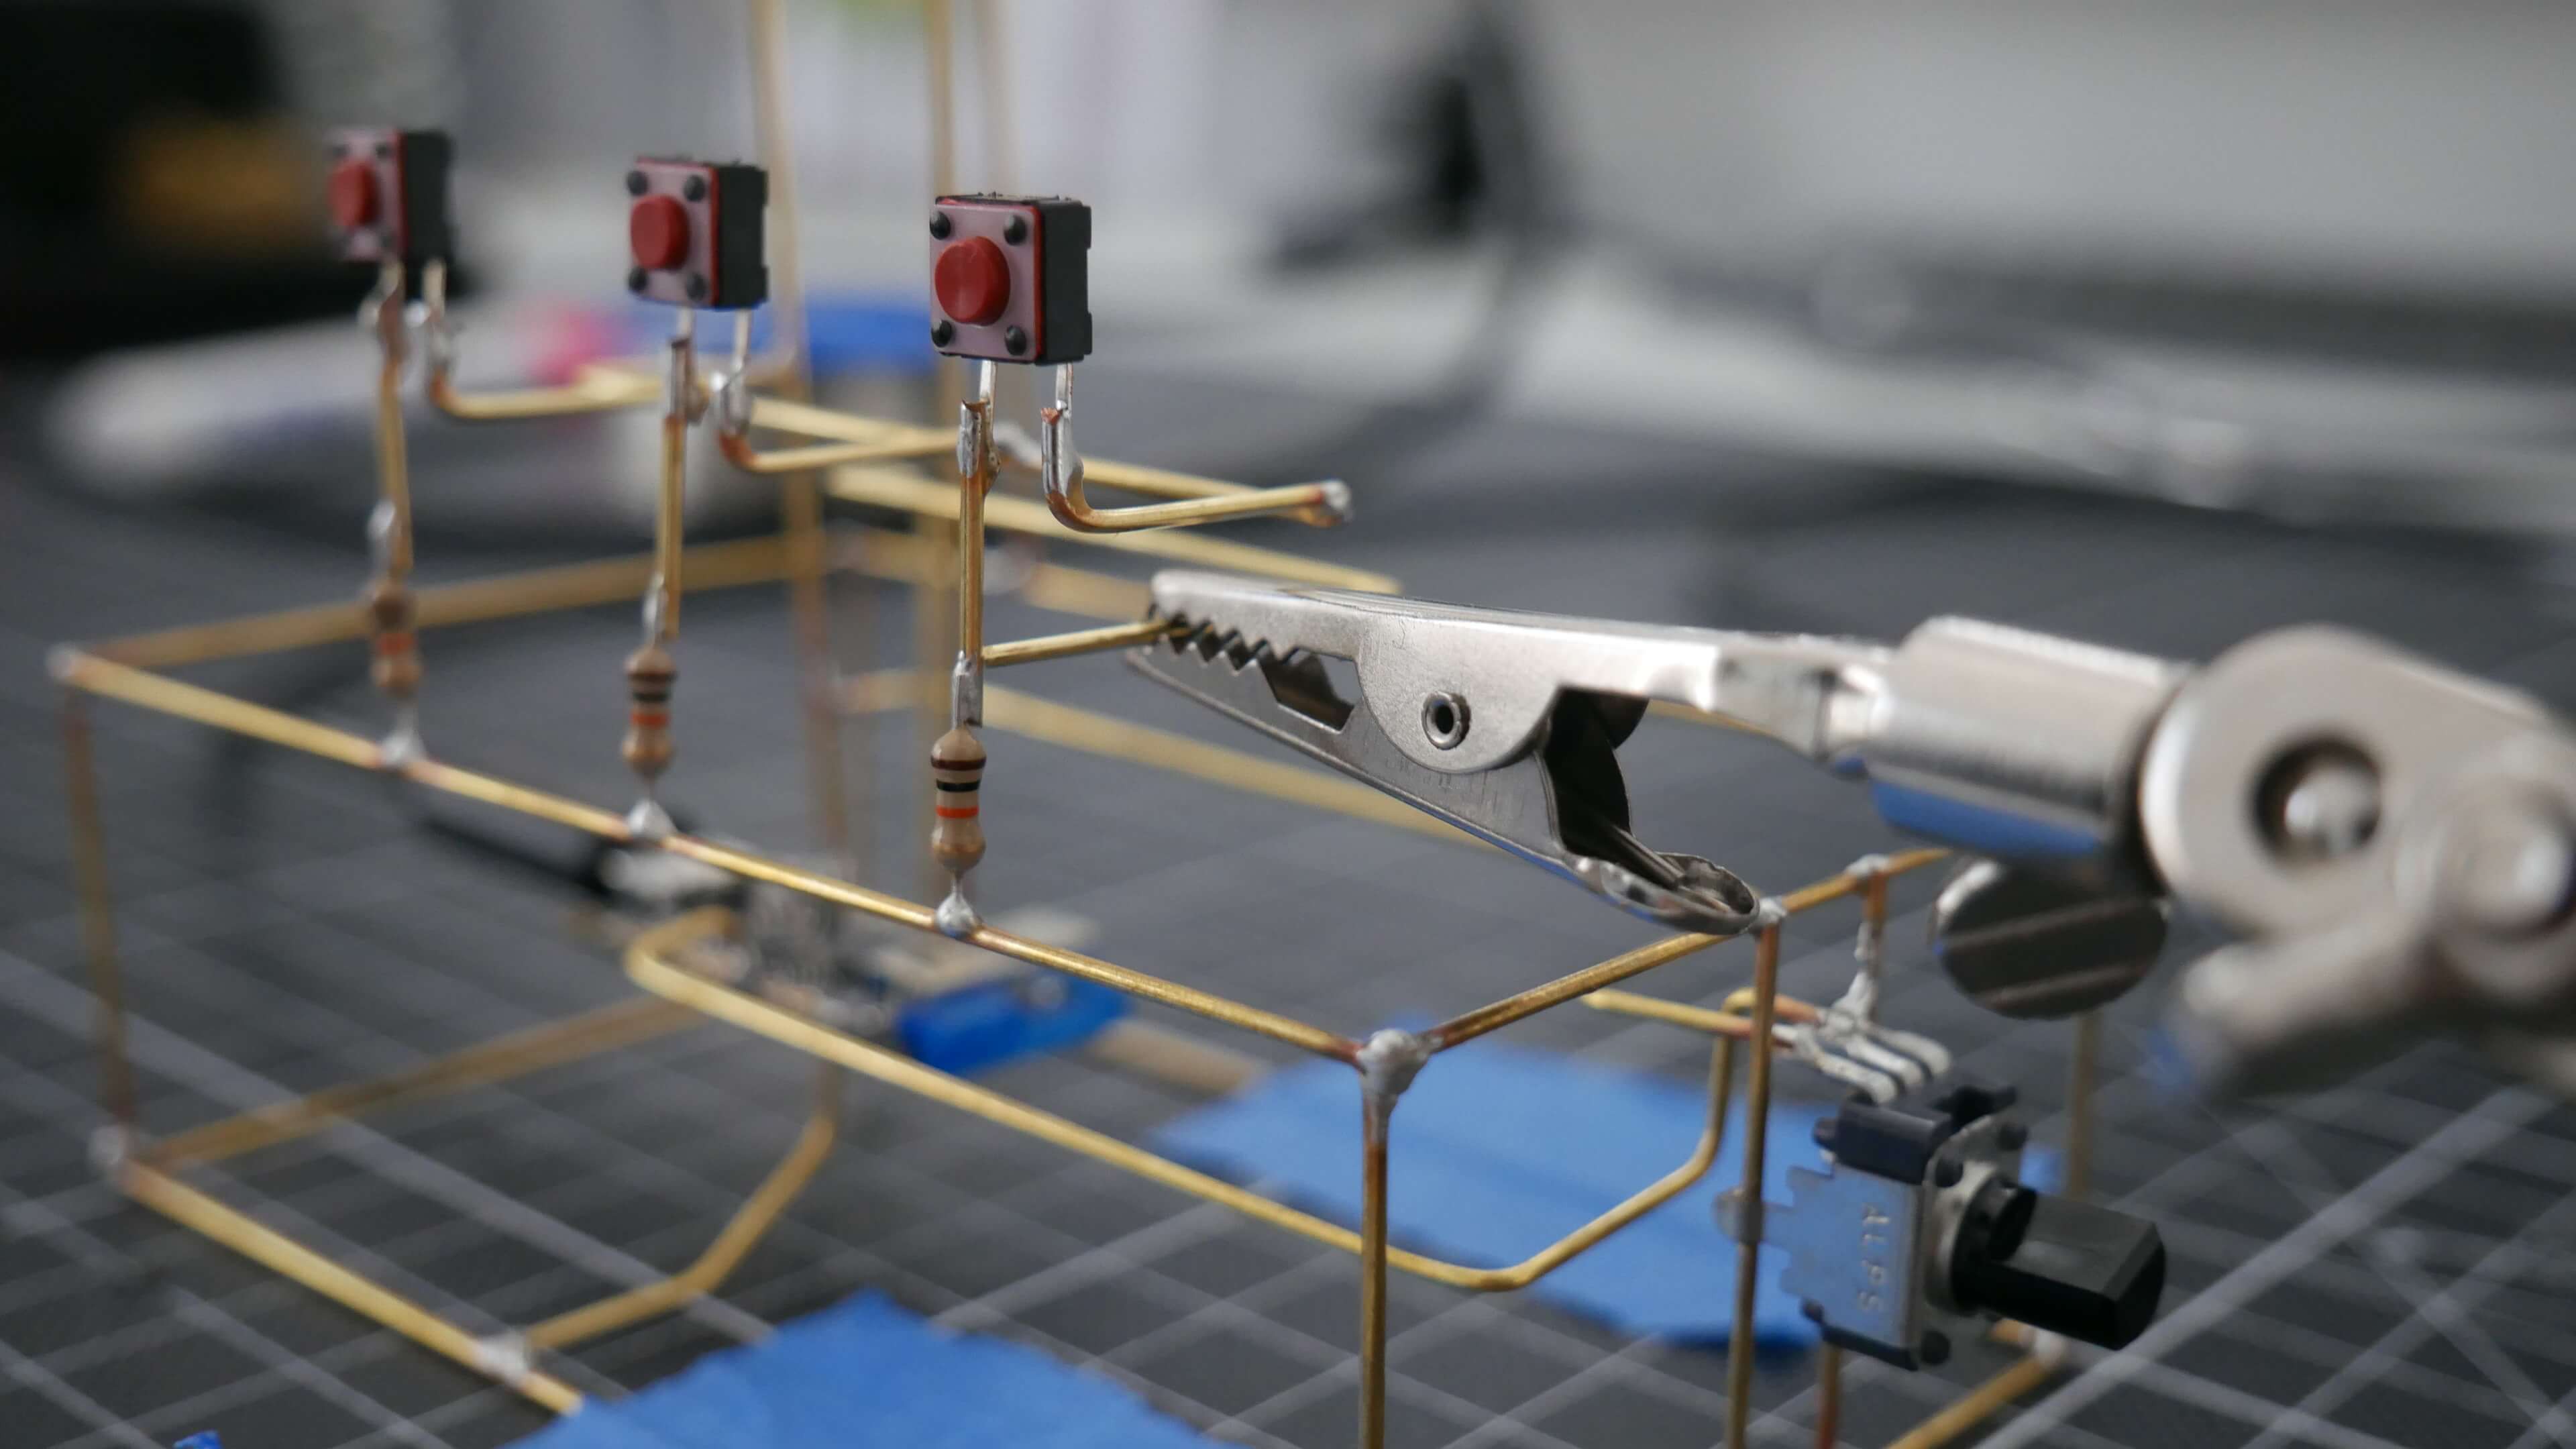
8. Tactile switches enable the user to play tracks, pause tracks, and also skip or jump back to previous titles.
The NeoPixel stick. There is not much to say about it except that it also points in the direction of the user.
Wrap up:
Let’s quickly...
Read more »
 Casual Cyborg
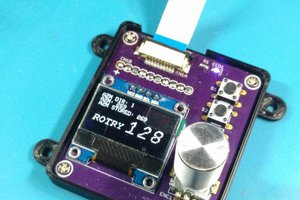
 CriptasticHacker
 Alvaro Villoslada