 Gradivis
The LEDs were one of the easiest parts so far, other than deciding placement. I wanted two LEDs - one for camera power, the other for providing information on camera status.
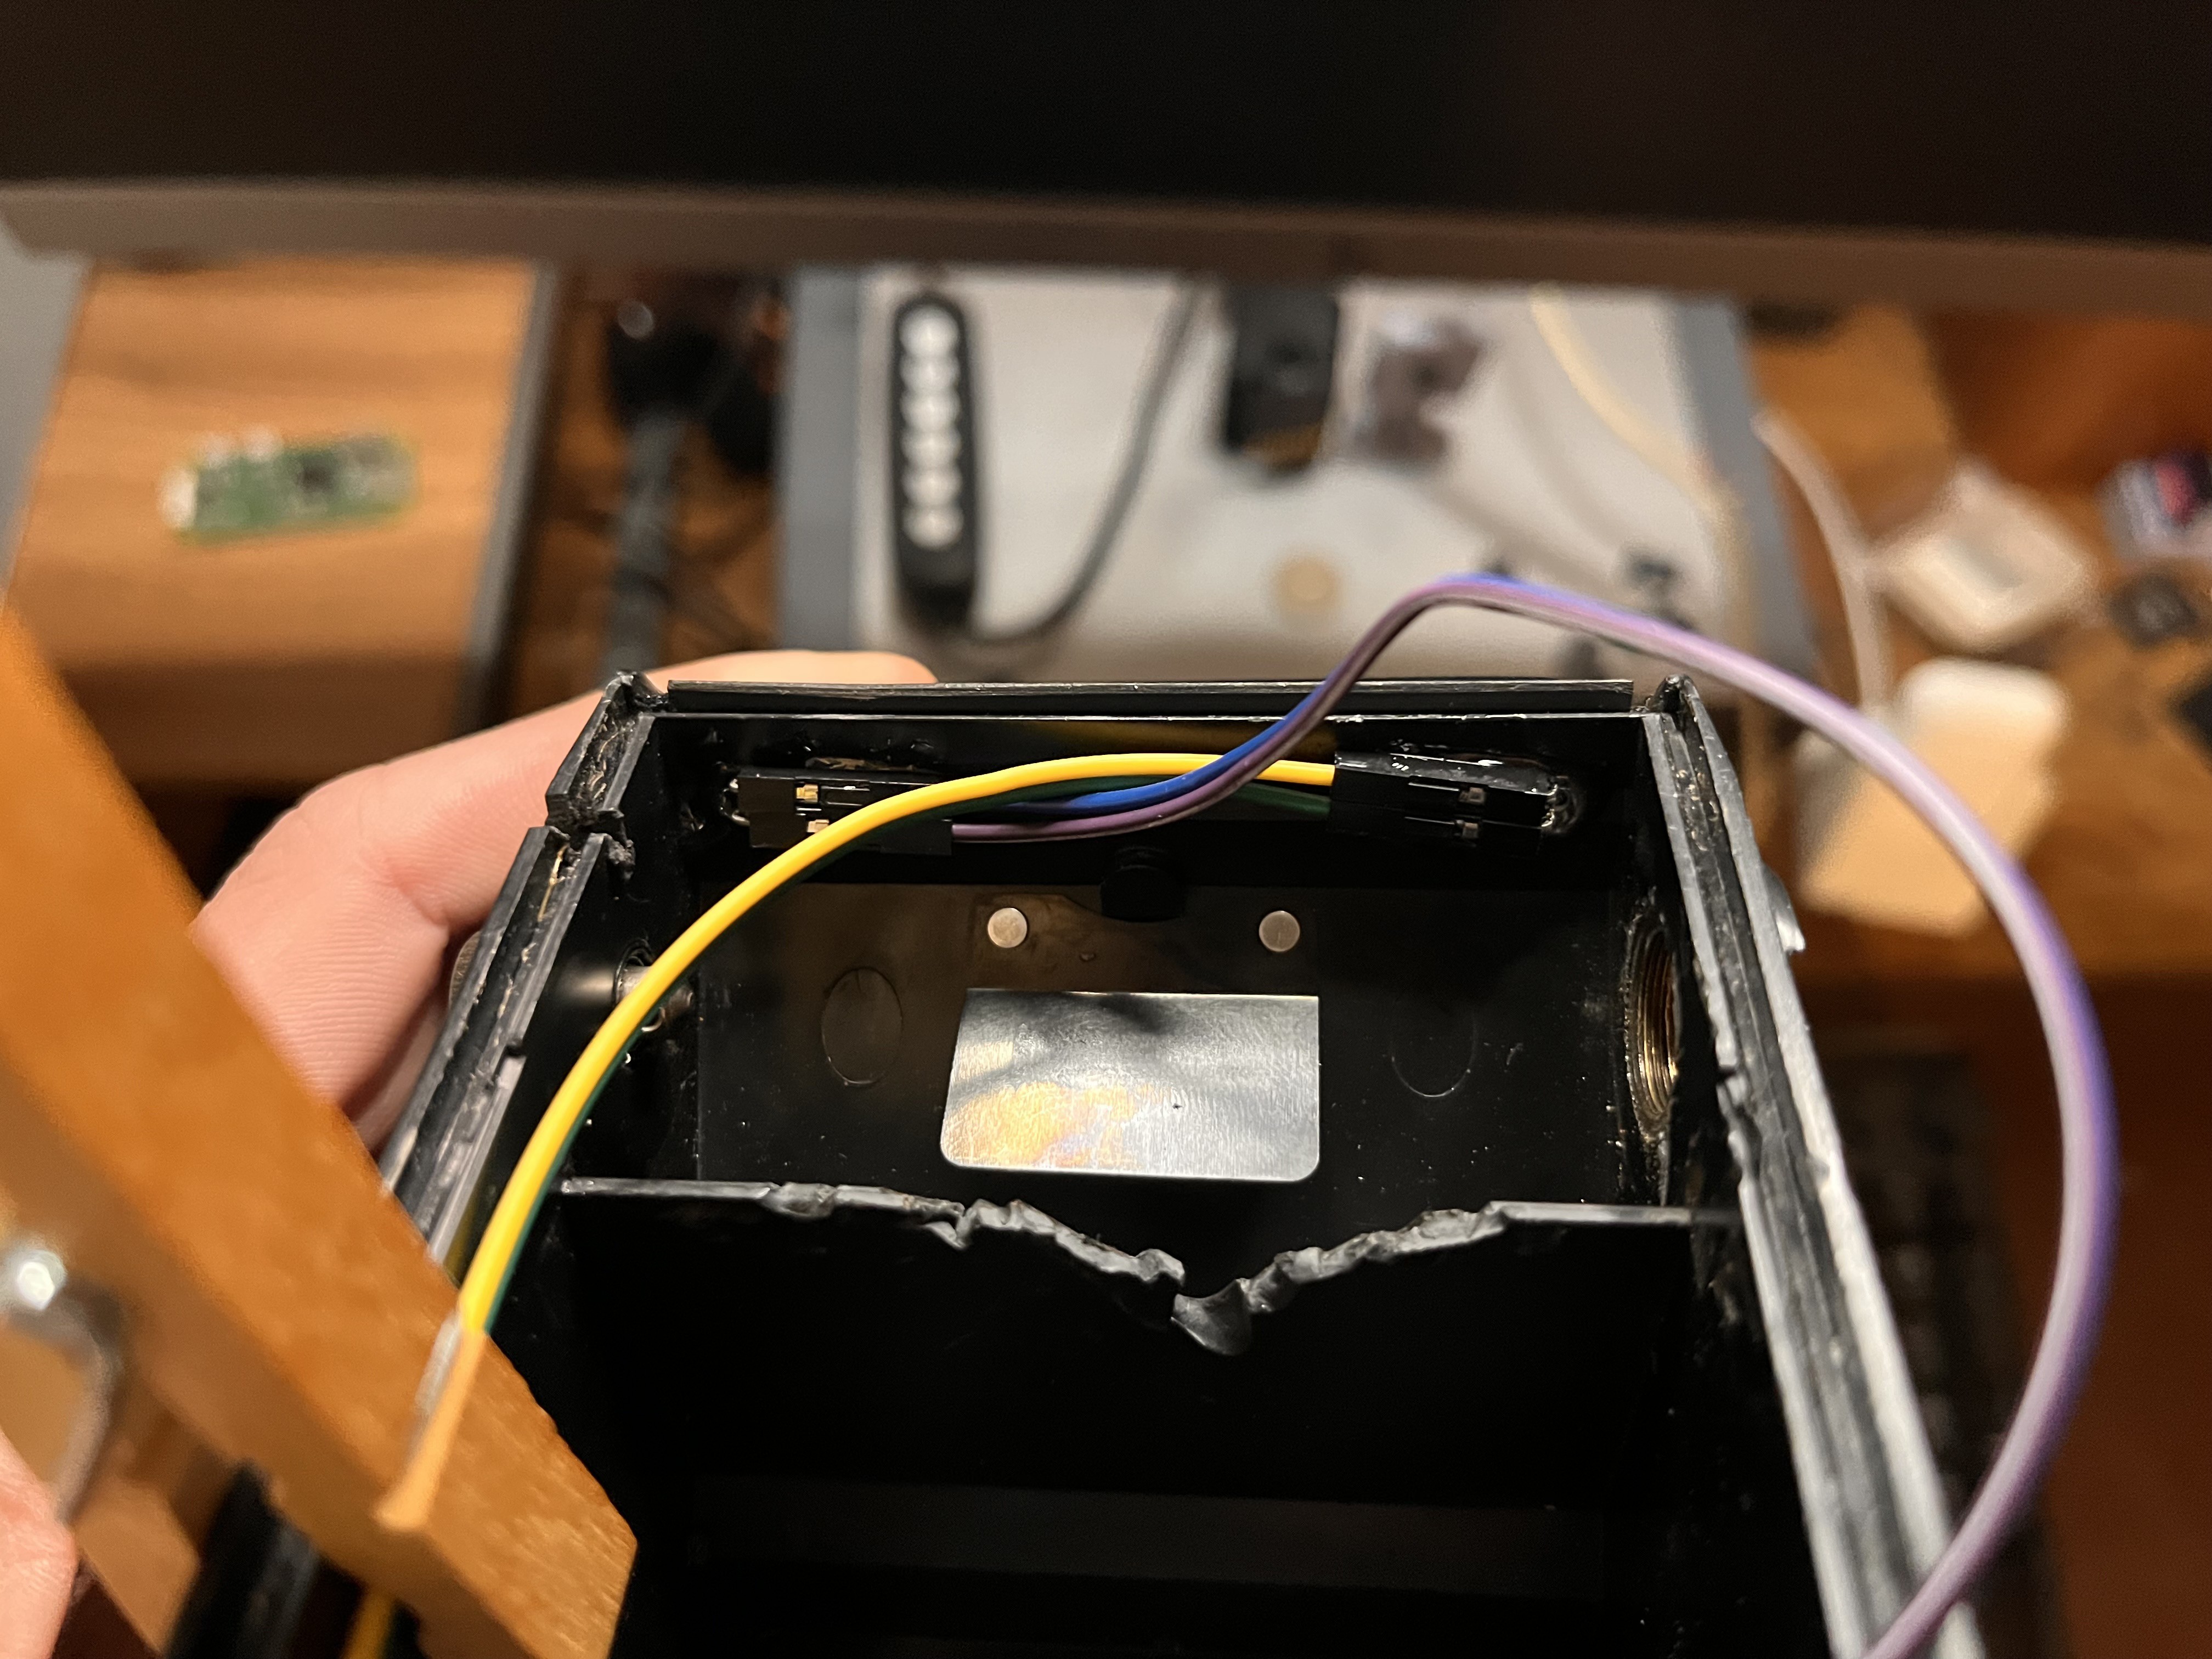
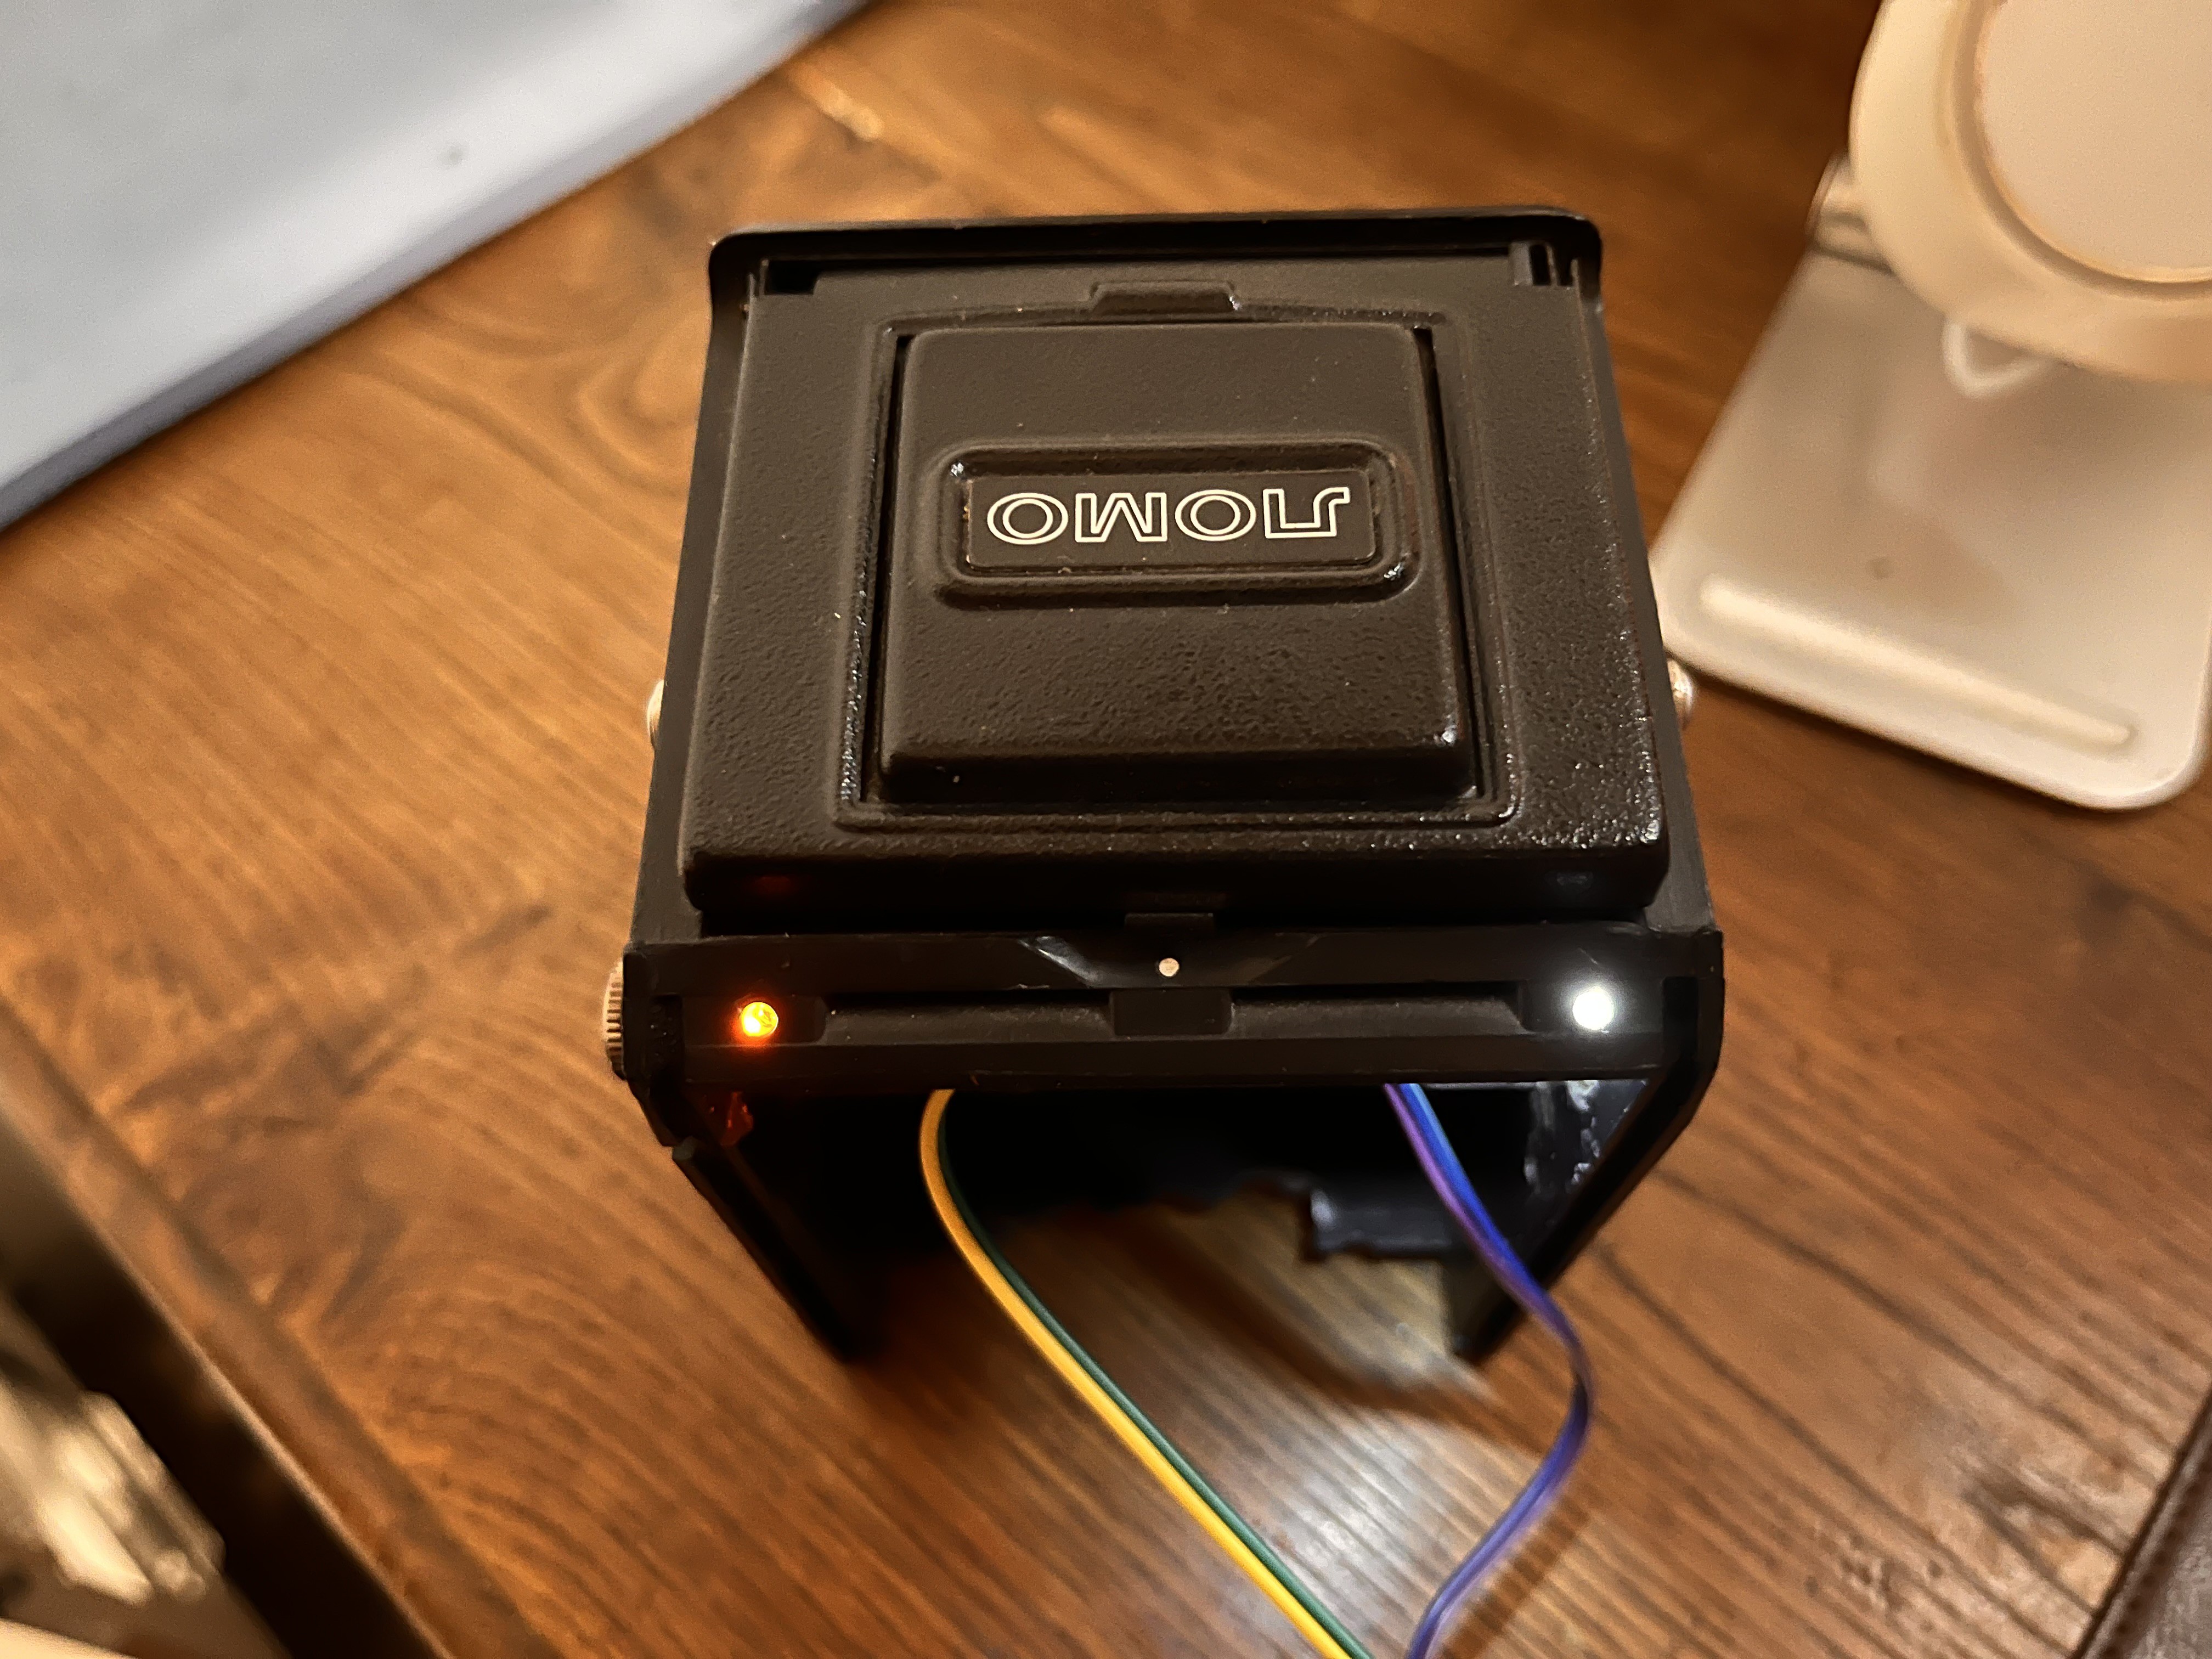
I decided to re-use two small holes that were already in the back of the camera and facing upwards. This would allow me to frame a shot and get feedback about when the image or video had finished saving, without needing to move. I had to drill out a bit from the inside for the LEDs to nestle inside, but some epoxy later and they're solidly in place, and out of the way of the RPI:
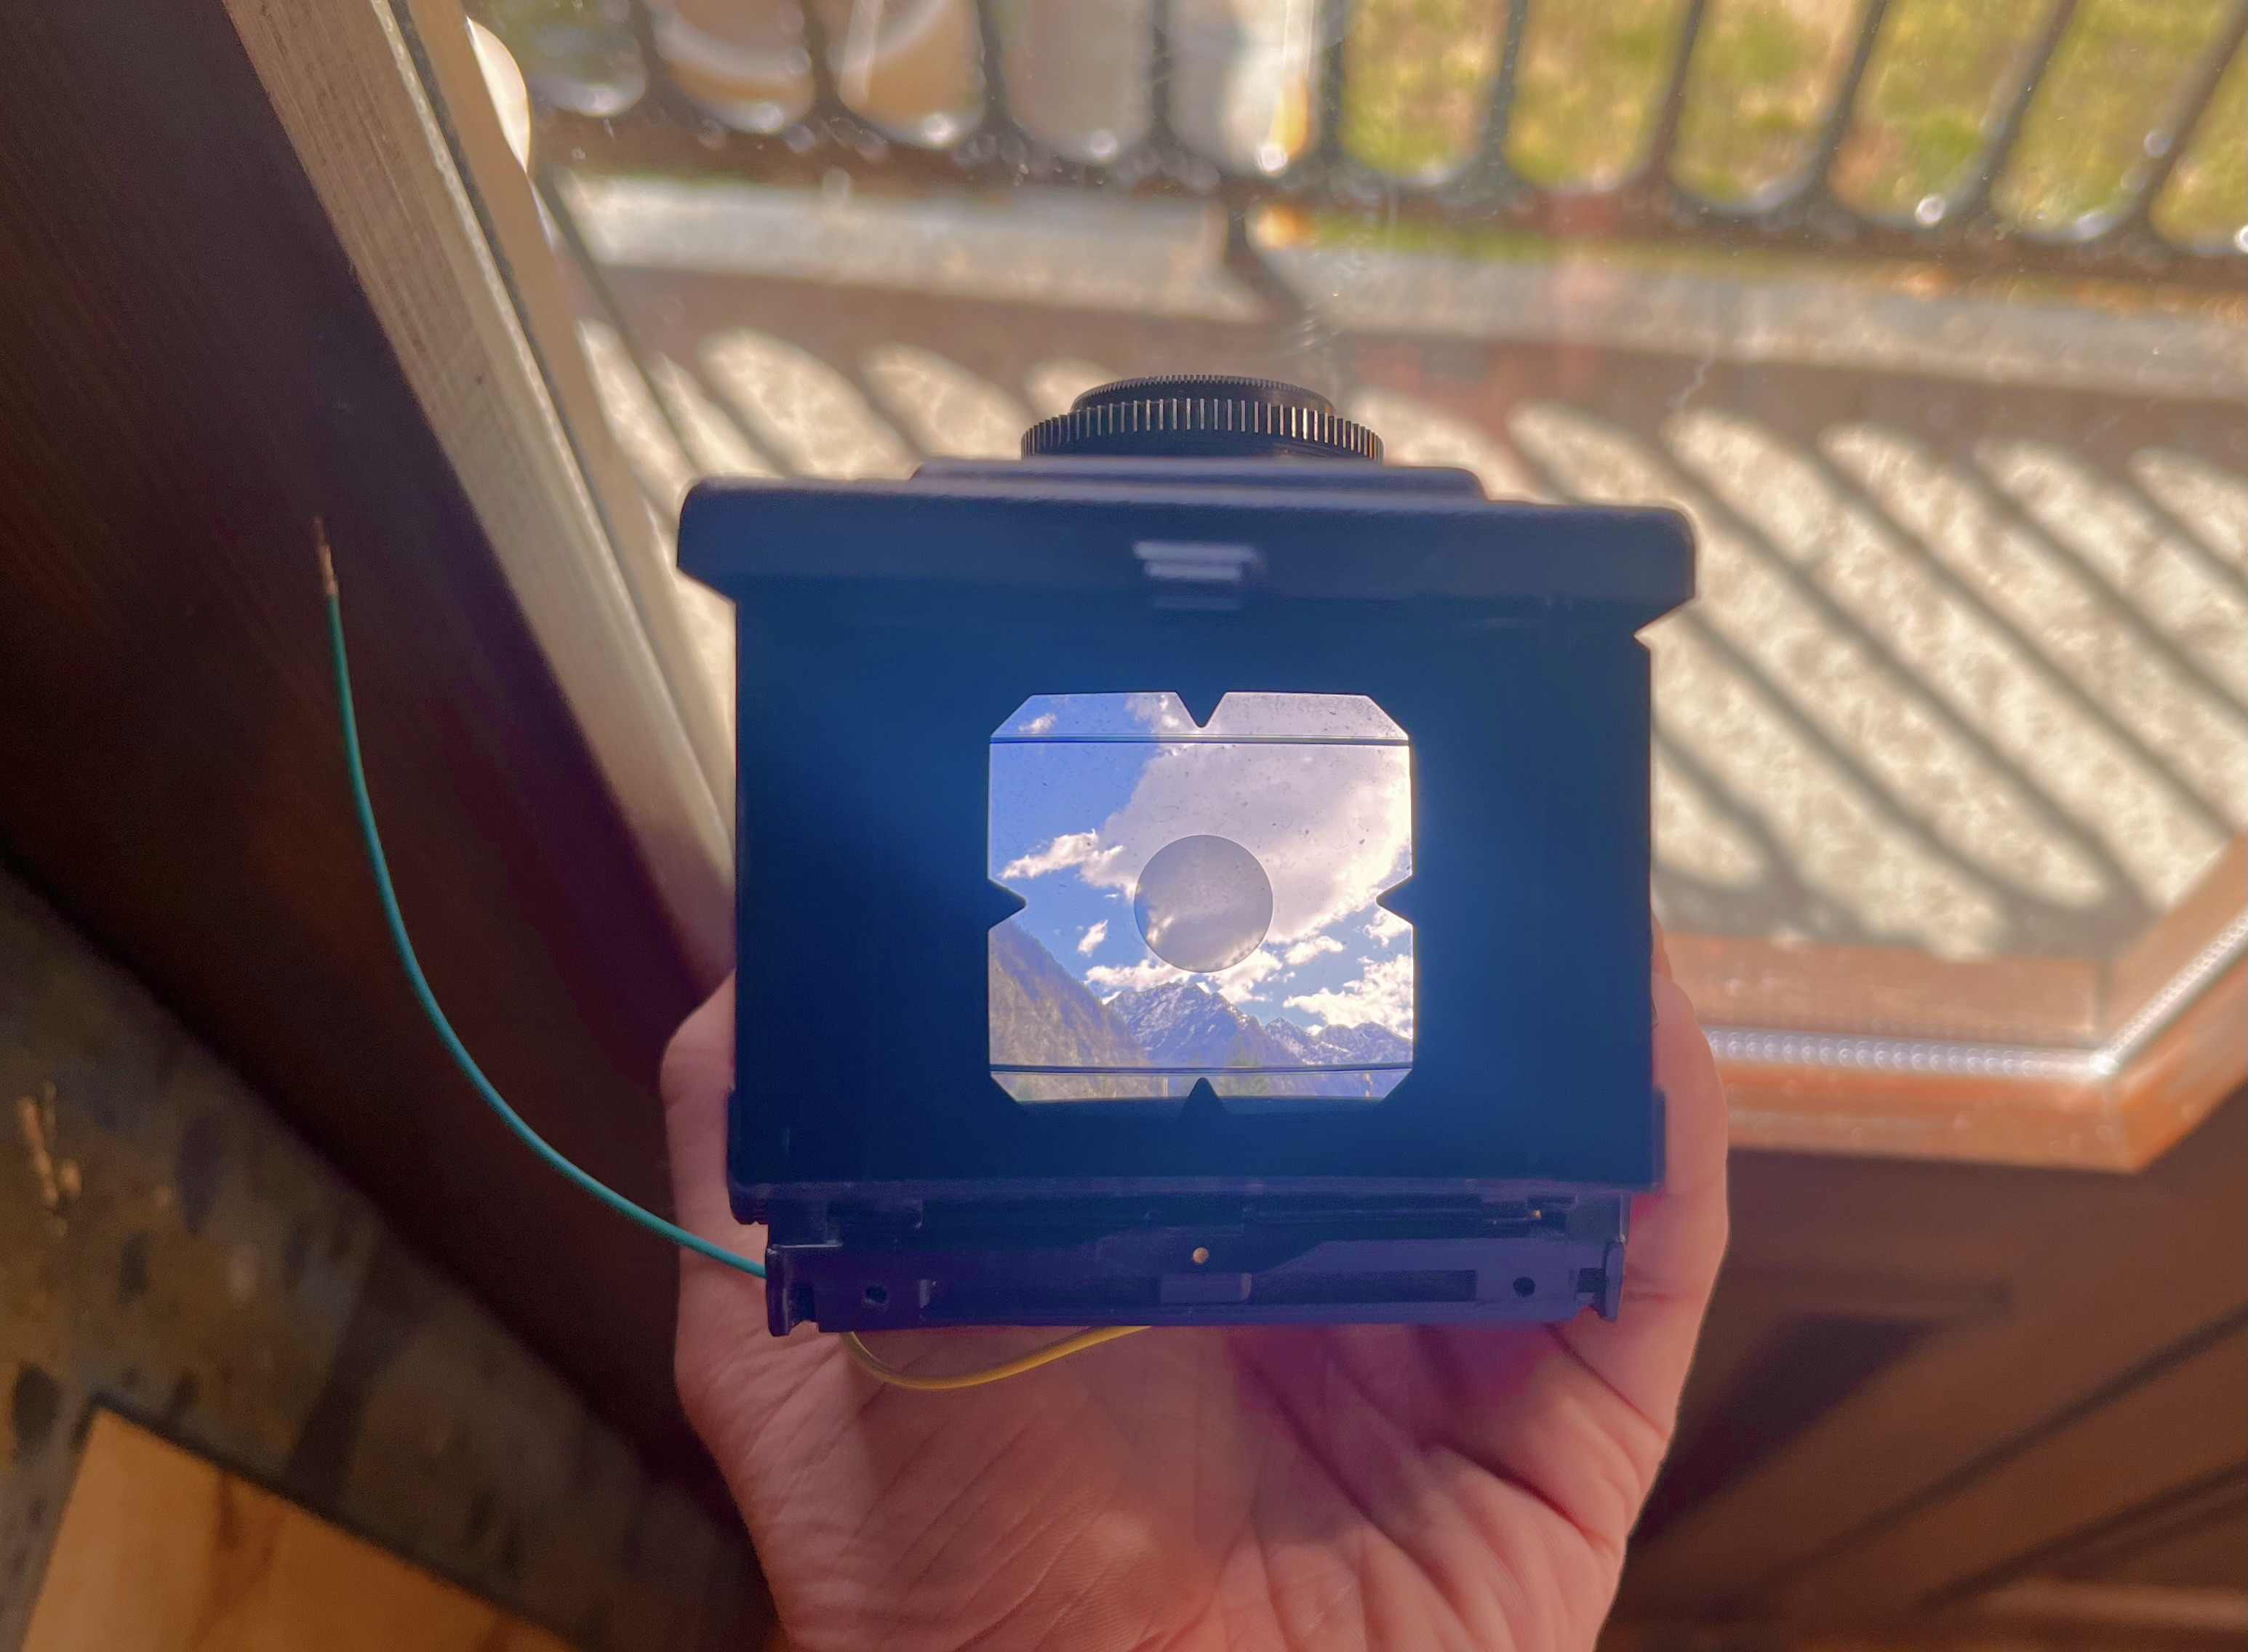
As I might have mentioned before, I've kept the viewing lens and screen untouched, so that you can shoot from the waist and frame your shot just like you would with a film TLR! The LOMO screen is nice and bright - here's a demo from my balcony:
Camera power was easy - once I had inlined a resistor into each negative wire, the anode was directly attached to one of the Pi's 3.3V GPIOs and the cathode to ground. That way it would come on when the RPi was turned on, and as I was going to have a switch between it and the battery power would be totally cut and it would turn off. For the status LED, I hooked the anode up to GPIO16 and the cathode again to ground, right below it.
I have a pretty demanding job in a tech start up that I love, but it leaves me with very little spare time to learn Python. With the little that I already know, I wrote a tiny script to test the LED - making it a blink a few times as if it were taking and saving a picture. I can at least manage that much ;)
I'm still deciding whether I want separate photo and video buttons, or whether I do short and long press to determine which the camera should take. In the mean time, I decided to test out ChatGPT (3) for some python code with two buttons and a status LED. It wasn't great - the first attempt was going well until it stopped halfway through. Asking it for the remained of the code missed a big chunk of defining button functions. The second attempt went better from what I can tell but as mentioned Python isn't my forté - I'll have to try it out and see how it goes!
For those interested, here's what it gave me:
import datetime
import os
import subprocess
import time
import RPi.GPIO as GPIO
from picamera import PiCamera

# initialize GPIO
GPIO.setmode(GPIO.BCM)
GPIO.setup(16, GPIO.IN, pull_up_down=GPIO.PUD_UP)  # button for image capture
GPIO.setup(18, GPIO.IN, pull_up_down=GPIO.PUD_UP)  # button for video recording
GPIO.setup(12, GPIO.OUT)  # LED

# initialize camera
camera = PiCamera()
camera.resolution = (1920, 1080)
camera.framerate = 30
camera.rotation = 180

# file path for saving images and videos
file_path = '/home/pi/Lomopi_TLR'

# function for capturing an image and saving it to the file system
def capture_image():
    # turn on LED
    GPIO.output(12, GPIO.HIGH)

    # capture image
    image_name = 'Lomopi_TLR_{}.jpg'.format(datetime.datetime.now().strftime('%Y-%m-%d_%H-%M-%S'))
    camera.capture(os.path.join(file_path, image_name), quality=100)

    # turn off LED
    GPIO.output(12, GPIO.LOW)

# function for recording a video and saving it to the file system
def record_video(duration):
    # turn on LED
    GPIO.output(12, GPIO.HIGH)

    # start recording
    video_name = 'Lomopi_TLR_{}.mp4'.format(datetime.datetime.now().strftime('%Y-%m-%d_%H-%M-%S'))
    camera.start_recording(os.path.join(file_path, video_name), format='h264', quality=25)
    camera.wait_recording(duration)
    camera.stop_recording()

    # convert video to mp4 format and delete original file
    mp4_file_name = os.path.splitext(video_name)[0] + '.mp4'
    subprocess.run(['ffmpeg', '-i', os.path.join(file_path, video_name), '-c:v', 'copy', '-c:a', 'copy', os.path.join(file_path, mp4_file_name)], check=True)
    os.remove(os.path.join(file_path, video_name))

    # turn off LED
    GPIO.output(12, GPIO.LOW)

# function for starting continuous video recording until button is released
def start_continuous_video():
    # turn on LED
    GPIO.output(12, GPIO.HIGH)

    # start recording
    video_name = 'Lomopi_TLR_{}.mp4'.format(datetime.datetime.now().strftime('%Y-%m-%d_%H-%M-%S'))
    camera.start_recording(os.path.join(file_path, video_name), format='h264', quality=25)

    # wait for button release
    while GPIO.input(18) == GPIO.LOW:
        camera.wait_recording(1)

    # stop recording and convert to mp4 format
    camera.stop_recording()
    mp4_file_name = os.path.splitext(video_name)[0] + '.mp4'
    subprocess.run(['ffmpeg', '-i', os.path.join(file_path, video_name), '-c:v', 'copy', '-c:a', 'copy', os.path.join(file_path, mp4_file_name)], check=True)
    os.remove(os.path.join(file_path, video_name))

    # turn off LED
    GPIO.output(12, GPIO.LOW)


# main loop
while True:
    # check for image capture button press
    if GPIO.input(16) == GPIO.LOW:
        capture_image()
Discussions
Become a Hackaday.io Member
Create an account to leave a comment. Already have an account? Log In.