 Miroslav Zuzelka
This will probably sound like (bad) romantic hollywood movie, but 3 and half your ago I met love of my life. Do not worry this will not be another story where everything is perfect, but you have to know where I took my inspiration.
We met with Lucia when I was looking for someone who will come with me to the "Night of the churches" which is one night where many churches are open for public and you can come, stay for a while or just look around and go. I ´m not religious man, actualy I beleave that there is something more than us but I would not call him/her God, but I like old architecture and churches are very beautiful type of buildings. There is so much work and passion to them, at least for me. After that night, we met few times again and after while we started dating. Long story short, we have beautiful son and we got married this August (2020).
When I saw this heart by Jiří Praus I knew that I have to make it for my fiancee and this is story about that.
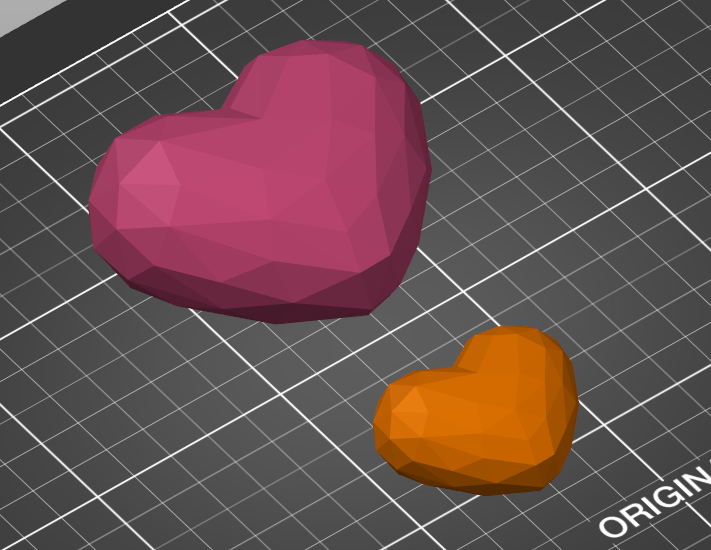
I have to say that everything what Jiří does look so simple, clean and beatiful and this heart is no exception. One thing which I did not like was the size of the heart. First time what I saw it, I thought that this would be awesome necklace, but it have to be smaller.
I had this idea in my had for few days and I was thinking how to make this simpler. I ordered same modules from Aliexpress as Jiří used and I also ordered just sensors from same site. My plan was make PCB which would be in the middle of the heart and it would act as a core of the heart but also it would connect both sides of the heart together. When modules and sensors arrived, I already had my mind somewhere else and had not time to design this board so this never come to life.
Everything changed when my fiancee and son left to her parents prepare our wedding. I though that this would be very nice gift to our wedding and maybe she could wear it at our wedding. I had about 2 weeks to make this real.
When I wrote that everything what Jiří does looks so simple, I could not be more far from true. Maybe for him is simple, but for me it was real challenge. I did one of his heart earings last year but this was much more complex than that. Luckely for me, Jiří also make great tutorials and also share his designs. If you want to get tutorial and files for this heart, you have to become his Patreon, but it is worth it.
As I wrote his heart for me was to big to be necklace so I load it to the Prusaslicer and made it smaller. Original size is at the top and my version is 60% of the original.
I do not know how Jiří printed his one, but my heart had side, which was facing printer bed, in really bad shape and I could not attach any double sided tape to it because it was too rough so at the end I printed 2 hearts on different sides so I had one side OK and I could work on it. I can not share picture from Jiří´s turorial with you but build process was like this:
1) attach double sided tape to the heart
2) attach brass wire to that tape
3) attach another brass wire to the tape and connect both wires with solder
4) repeat step 2 and 3 until you will have complete heart frame
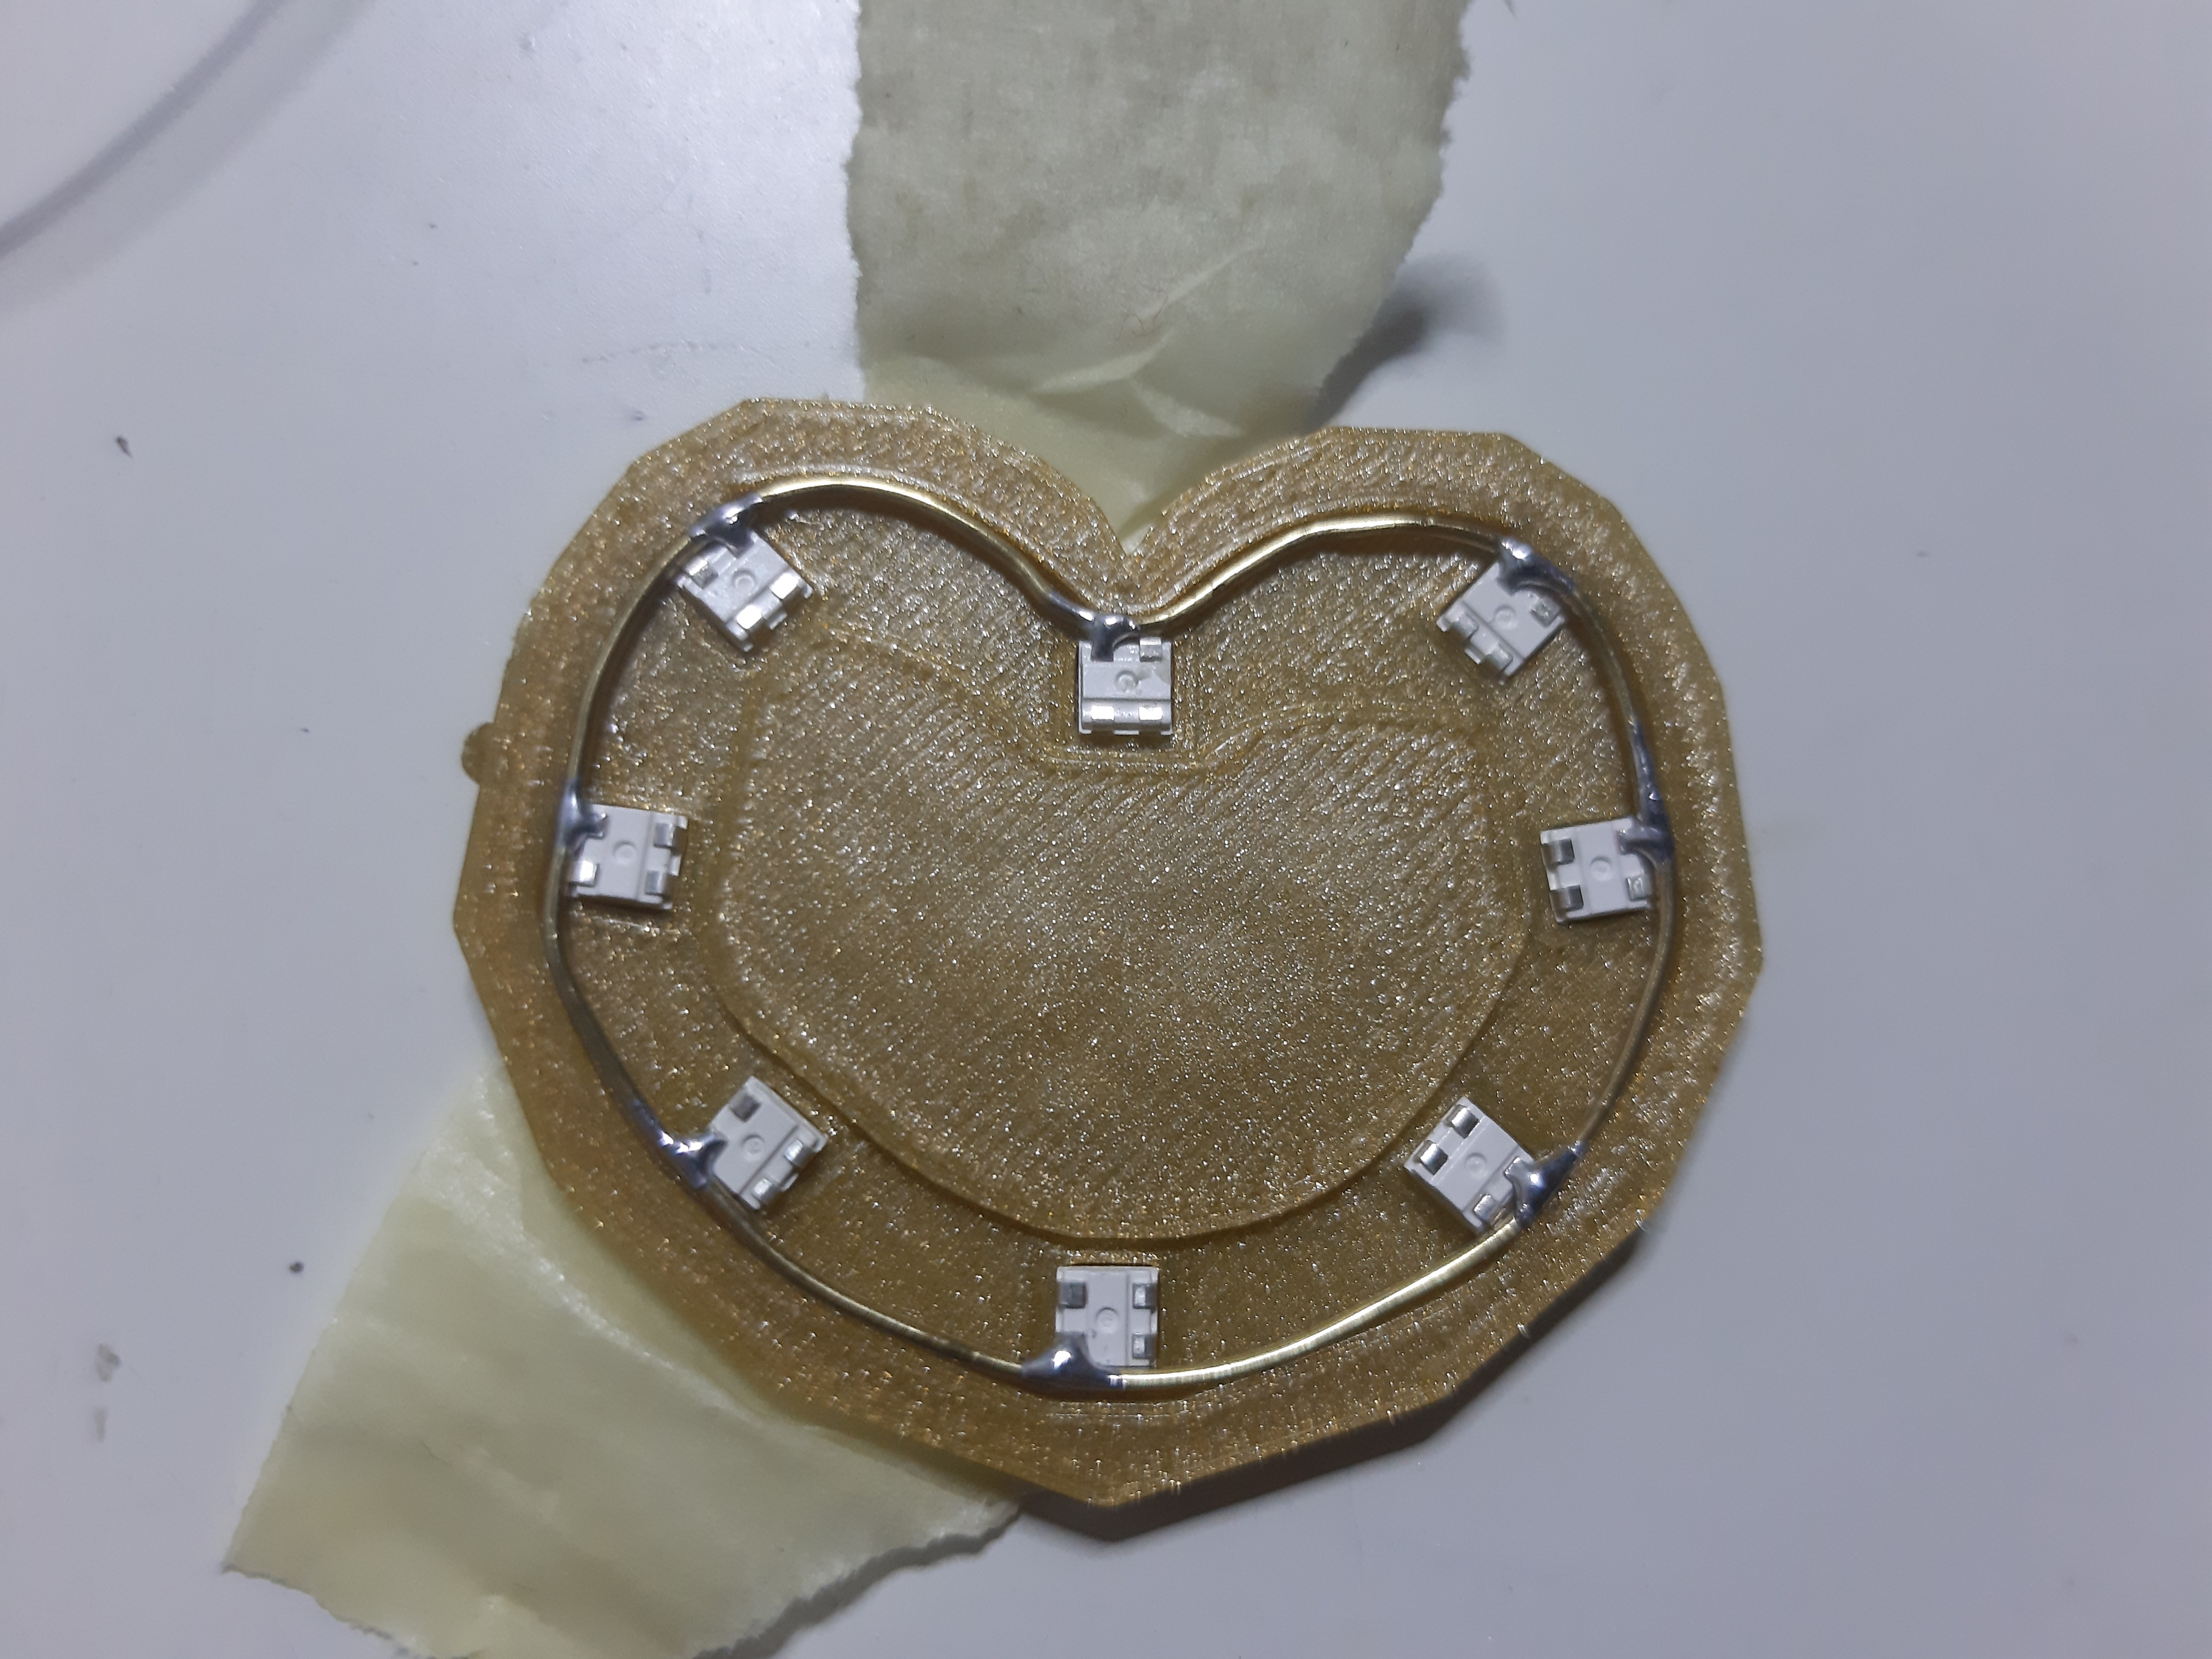
I decide that I will not completely follow his tutorial and that I will start with inner heart which contain RGB LED´s. Jiří had in his design RGB LED WS2812B in 5050 package (5x5 mm), but because I have my heart smaller, I have to use smaller LED´s. I had some WS2812B in 3535 package (3,5x3,5 mm) from some project at home so I used those in my heart. Jiří supply picture with LED´s and wire diagram but I can not use that as picture would not be in right scale when I would print it. Instead I loaded STL file of the heart to the Fusion 360, scale it down to 60%, cut it in half and draw shape of it to the new sketch and print this one instead. Here you can see LED size comparison with that shape.
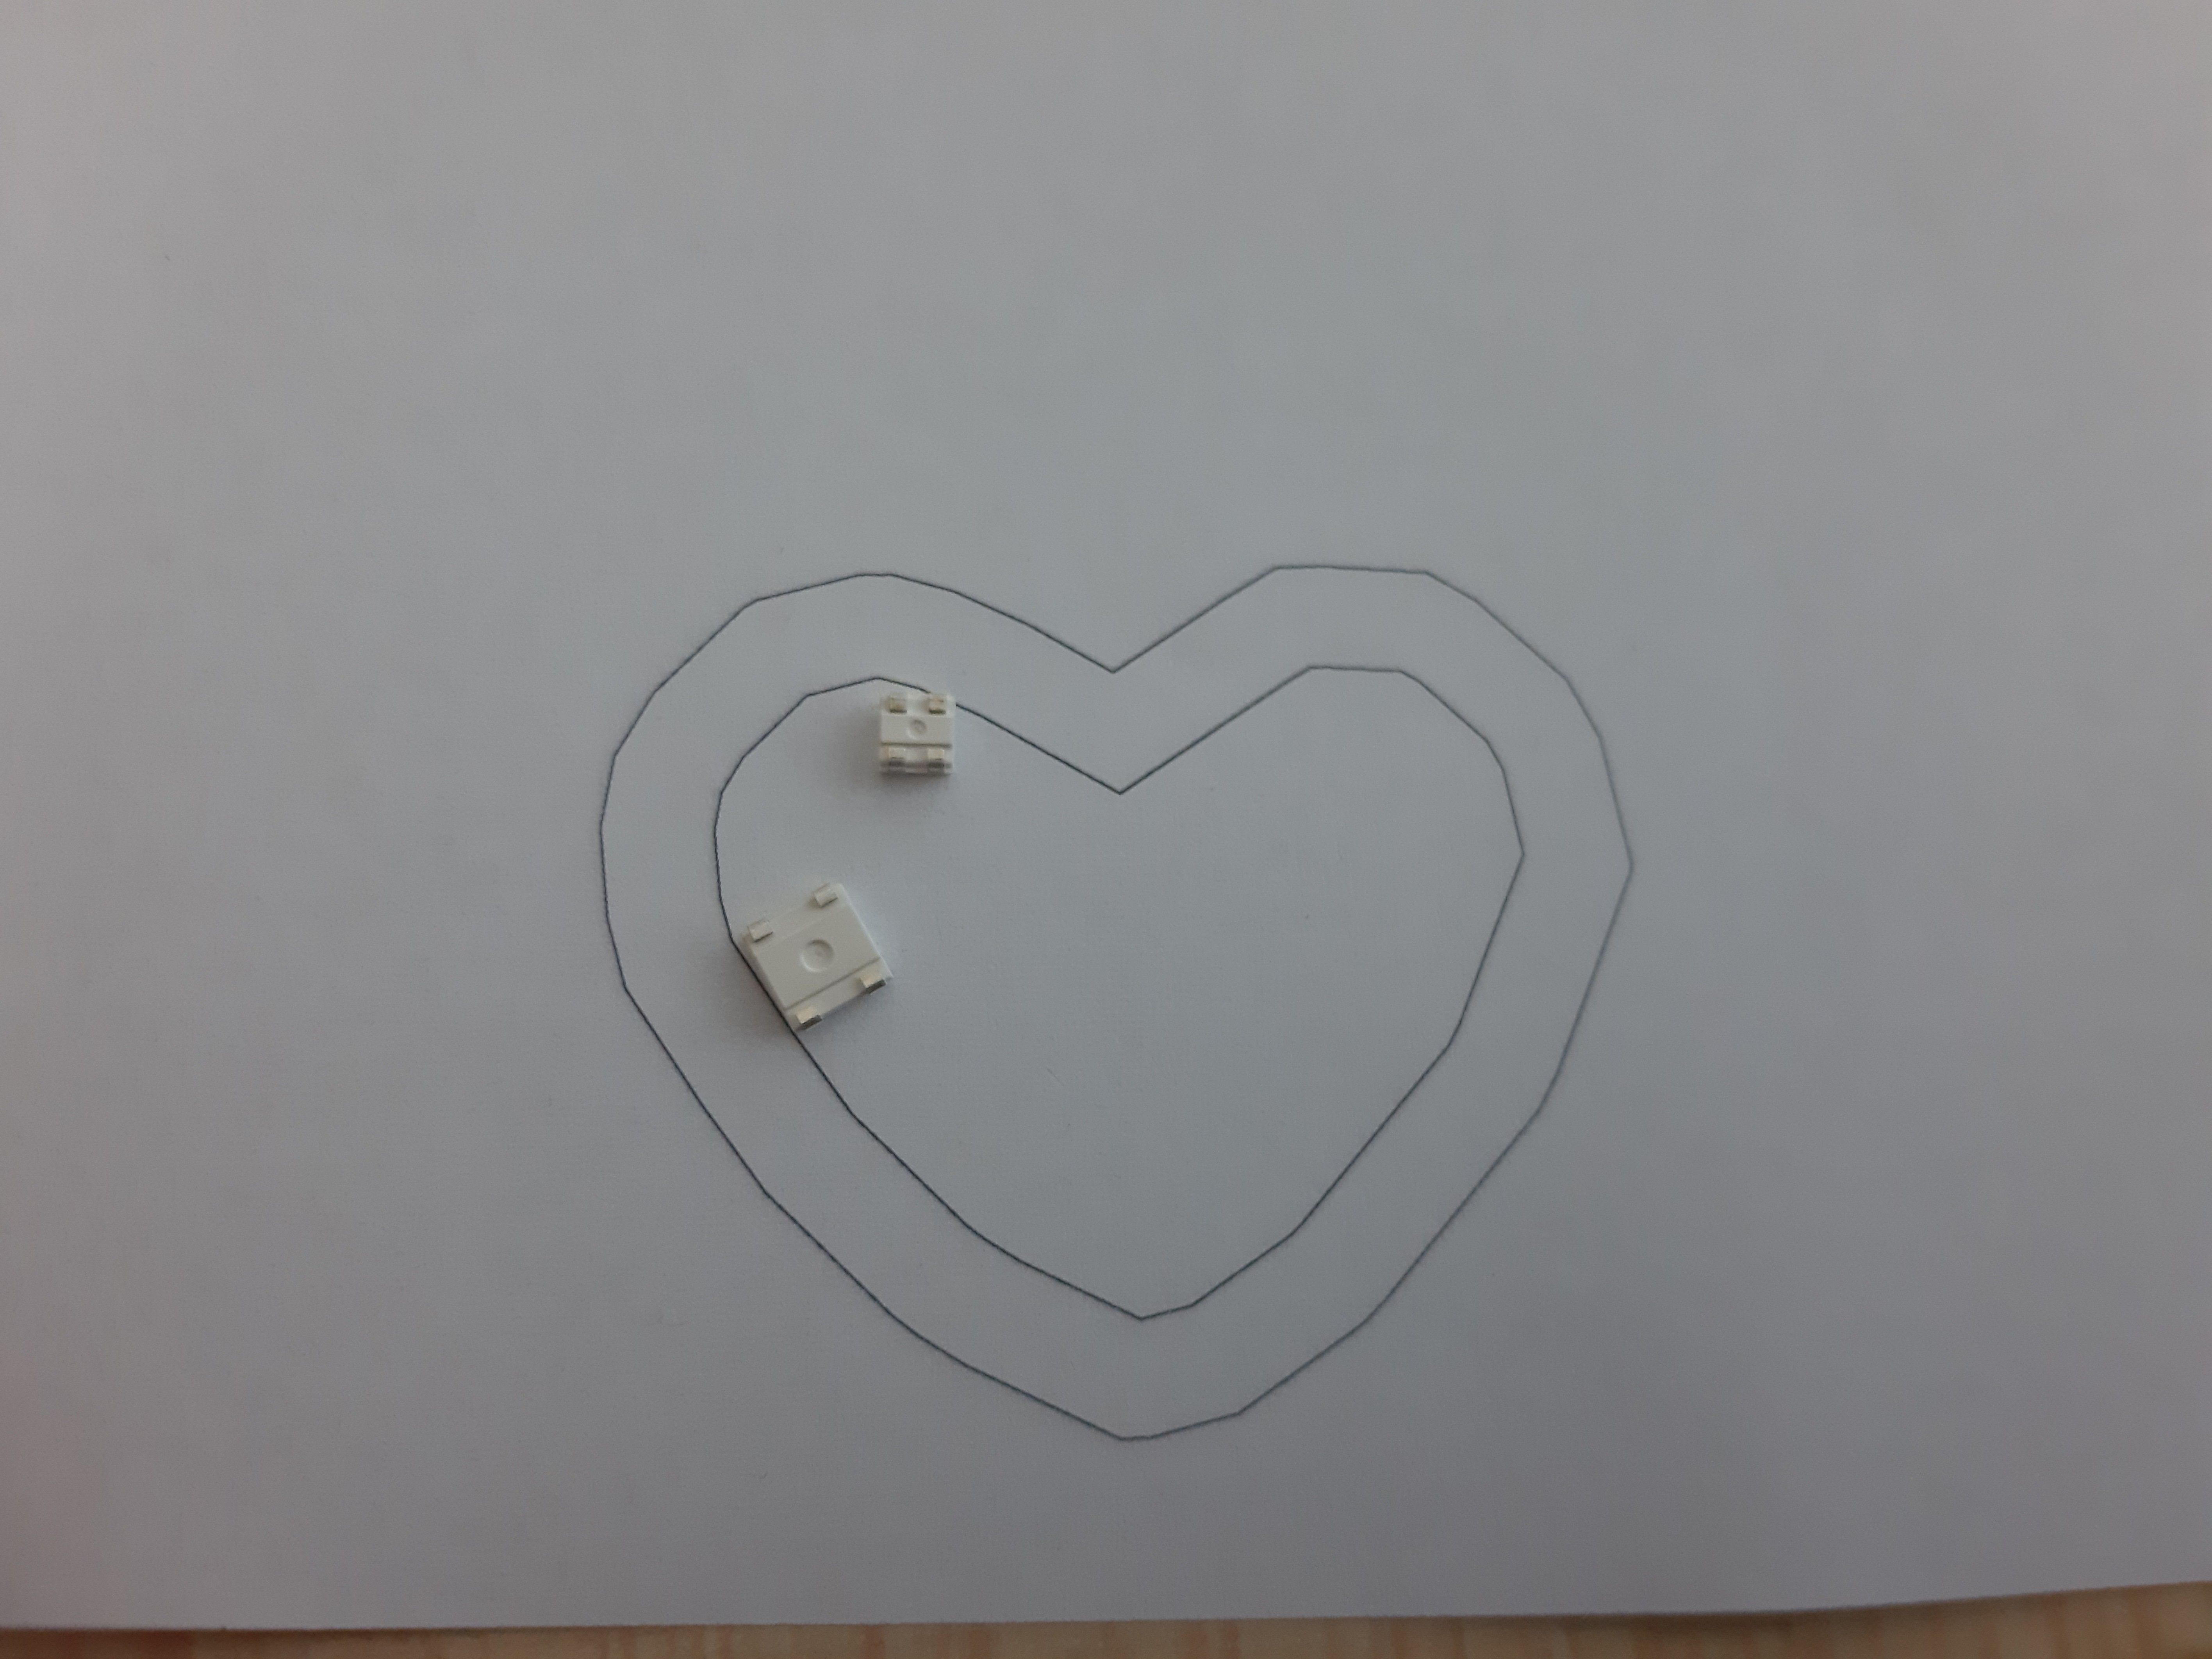
Build process for inner heart was very similar to body heart shape. You have to stick double side tape to the paper, put LED´s on that tape and connect same all 3 pins together for each LED. Something like this, but with right type of the wire (this is copper, not brass) and with right heart shape. Yes, I made mistake in CAD and draw wrong shape, which was to wide and would not fit to the body.
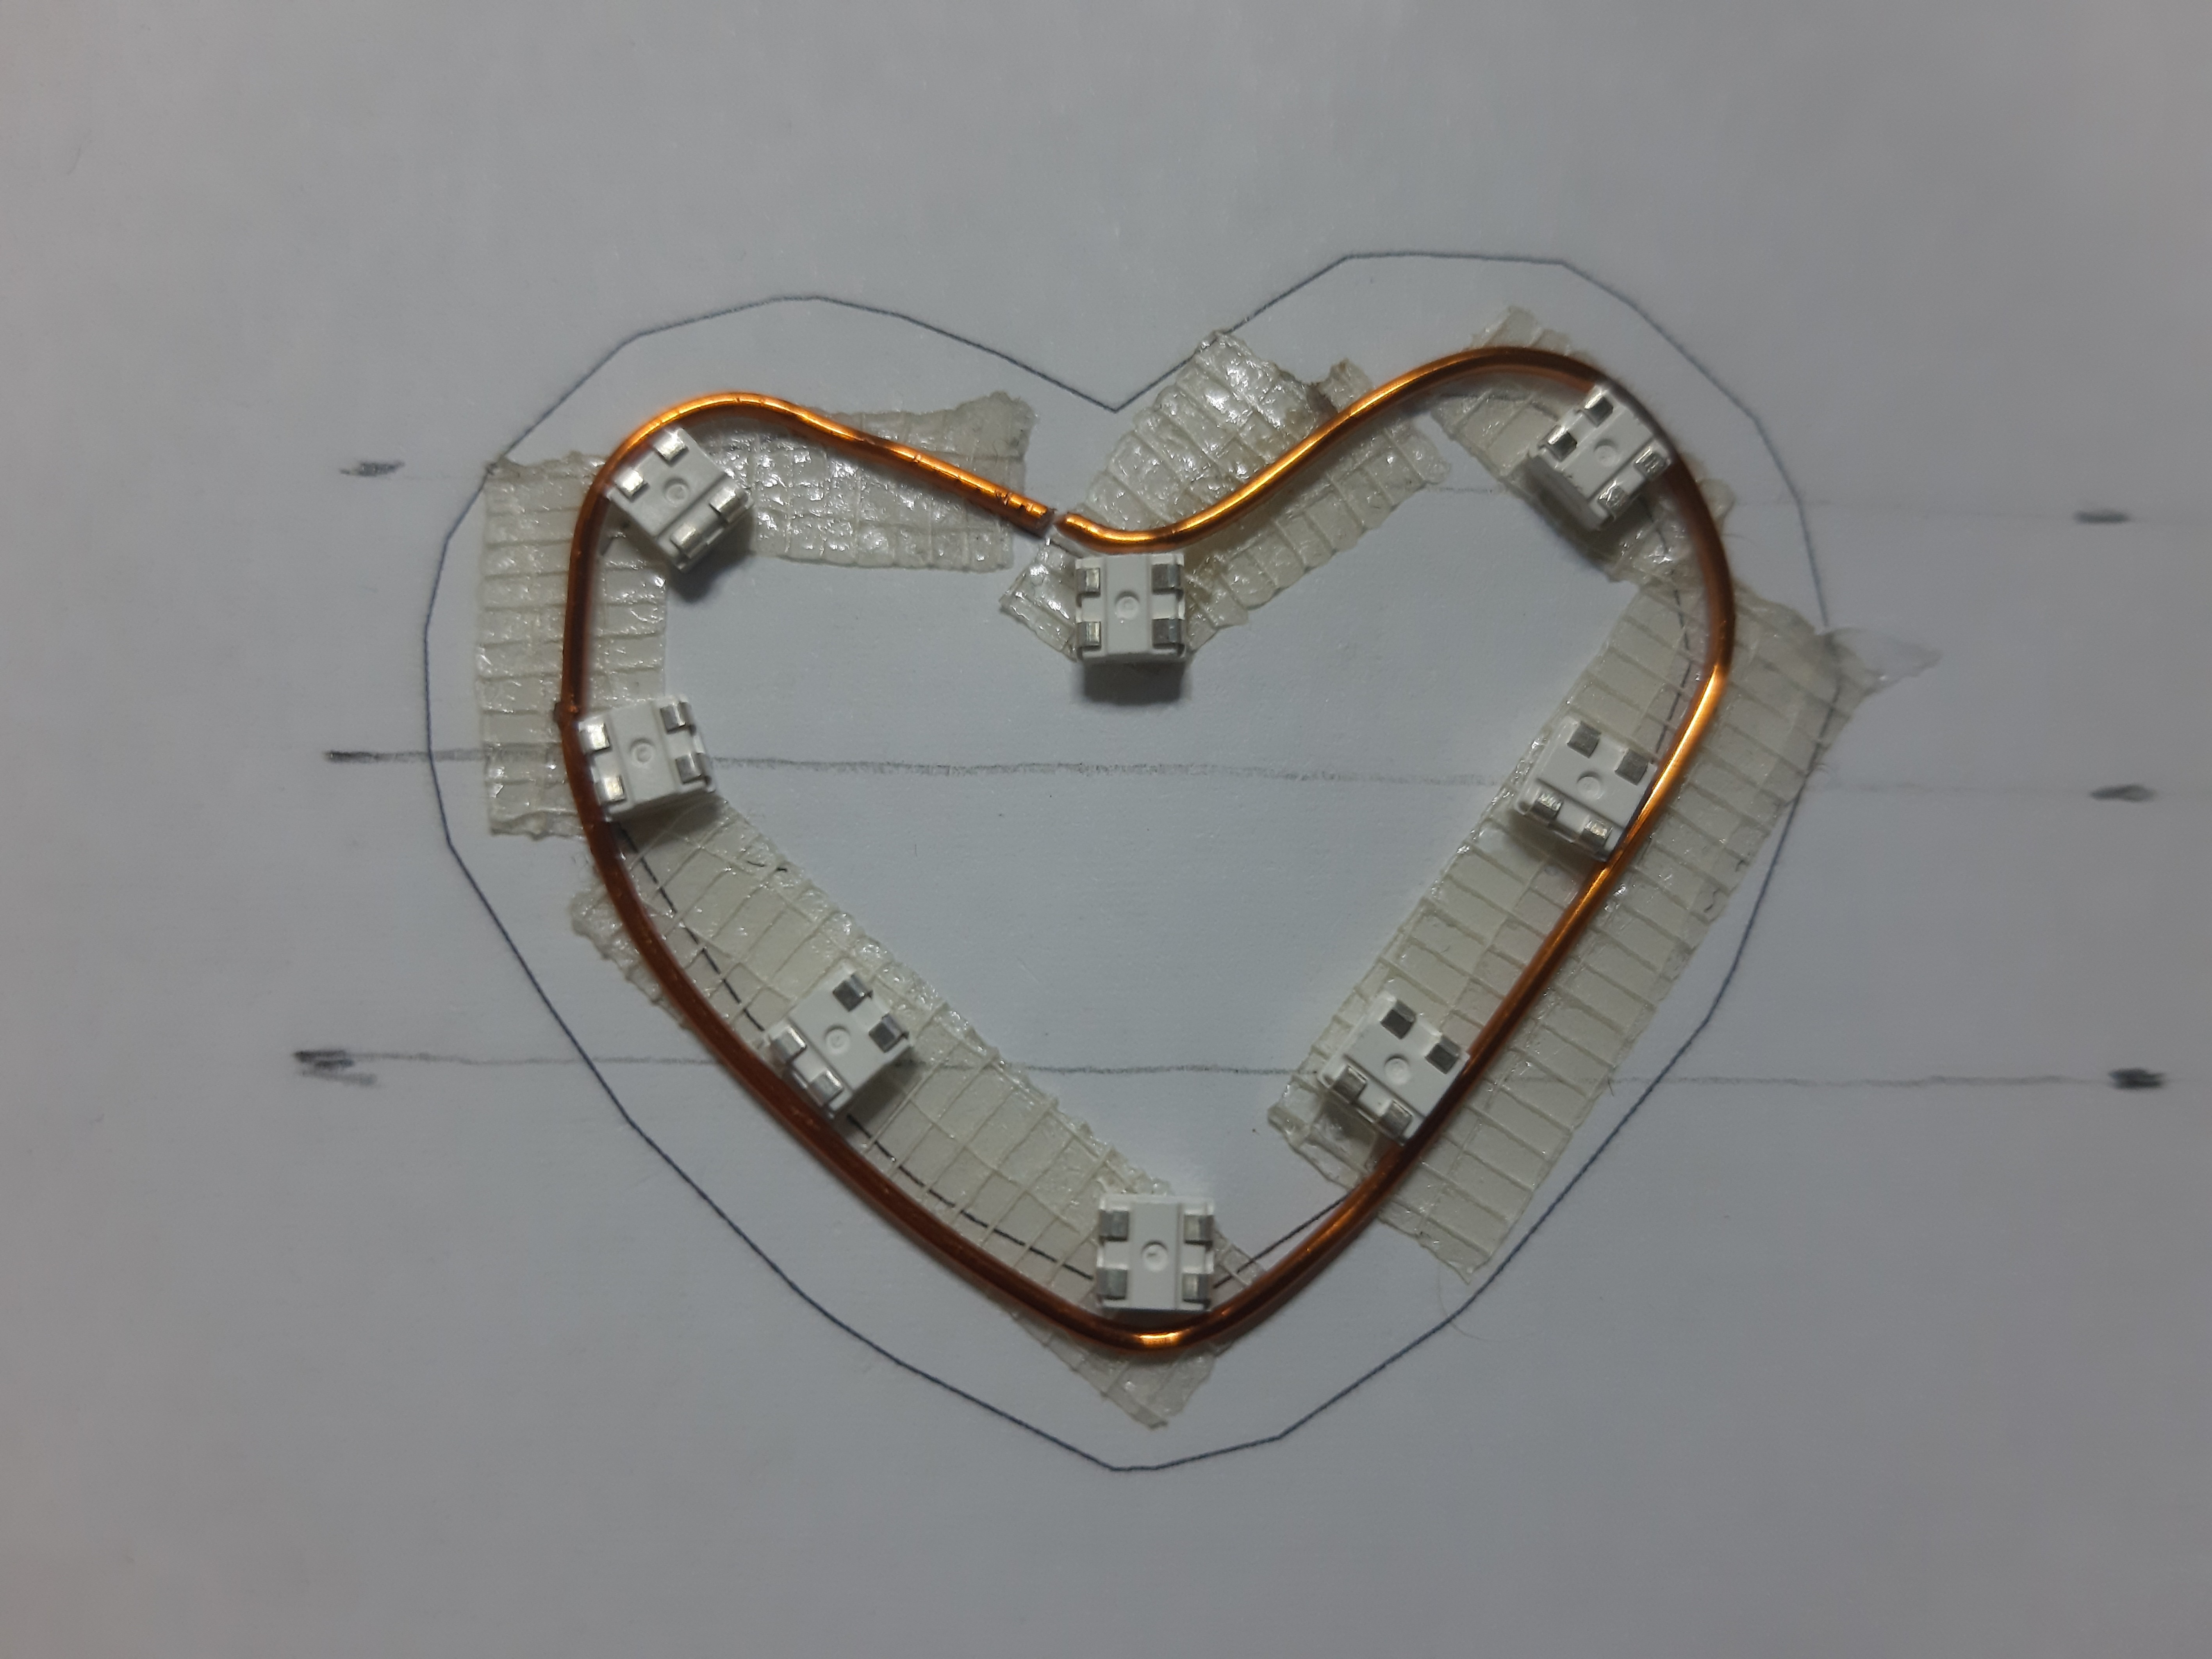
This process with double sided tape was not usable for me so I end up with 3D printed piece which worked as holder for LED´s and drive the shape of the heart.
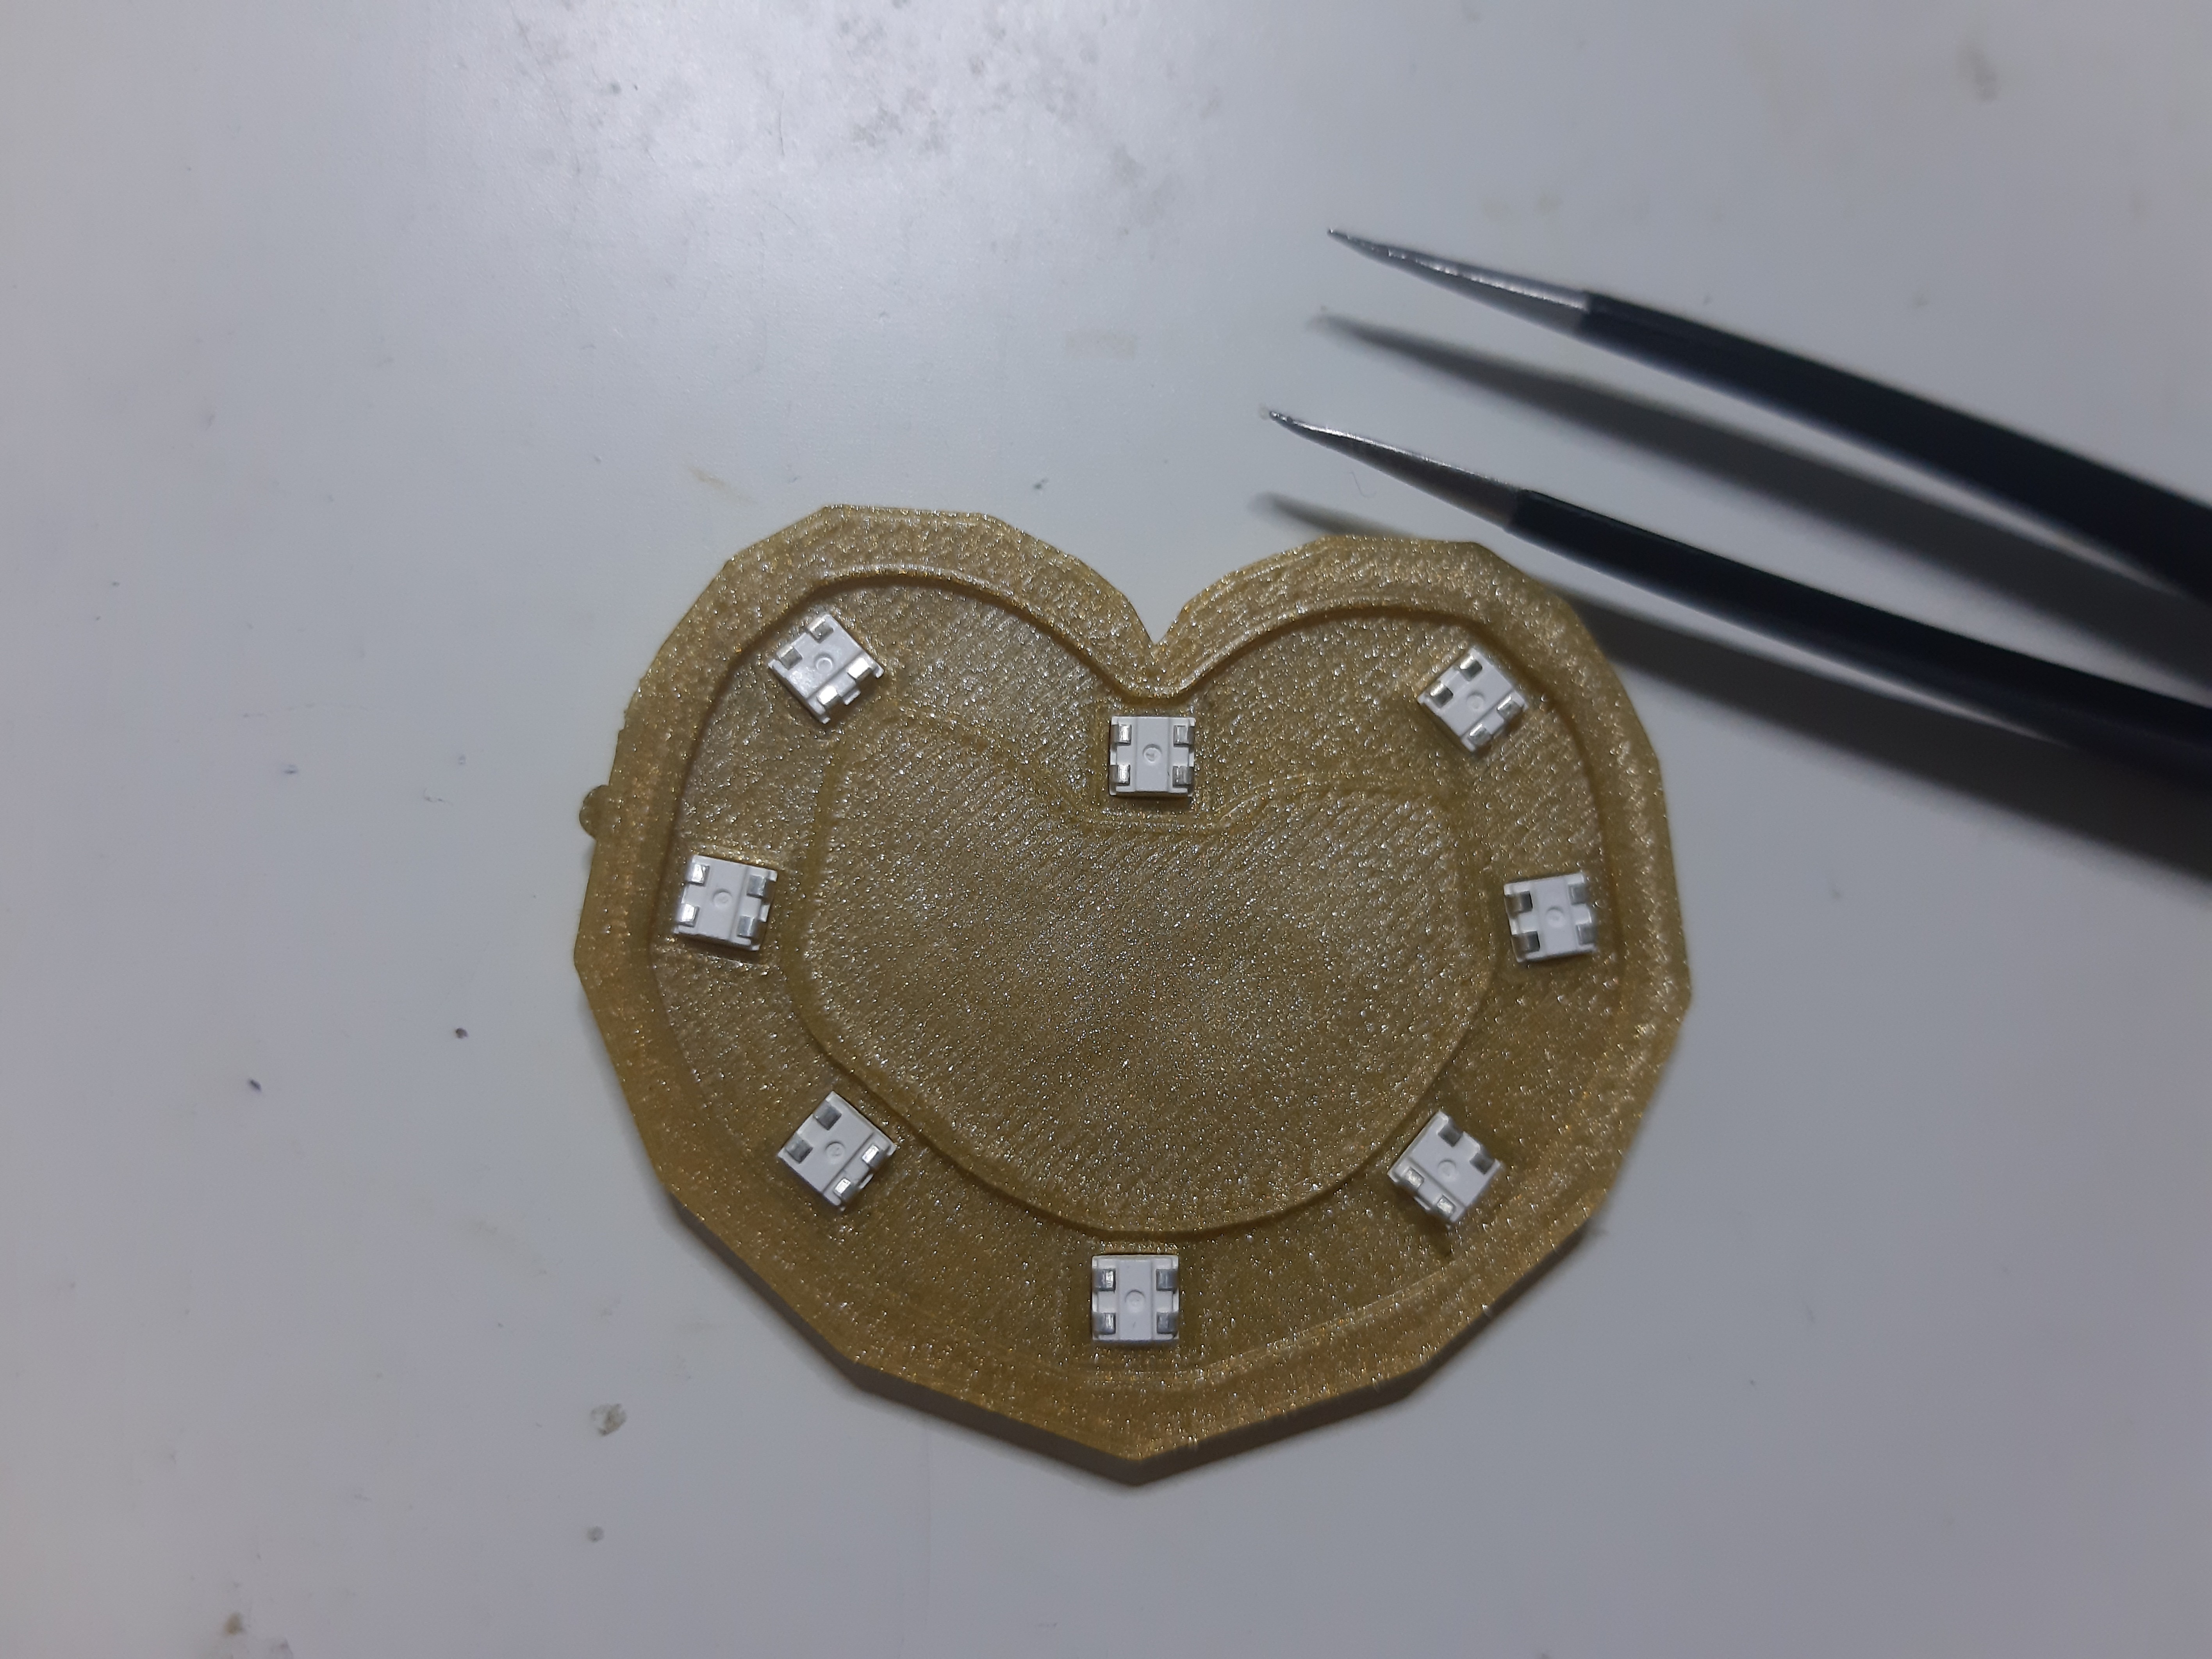
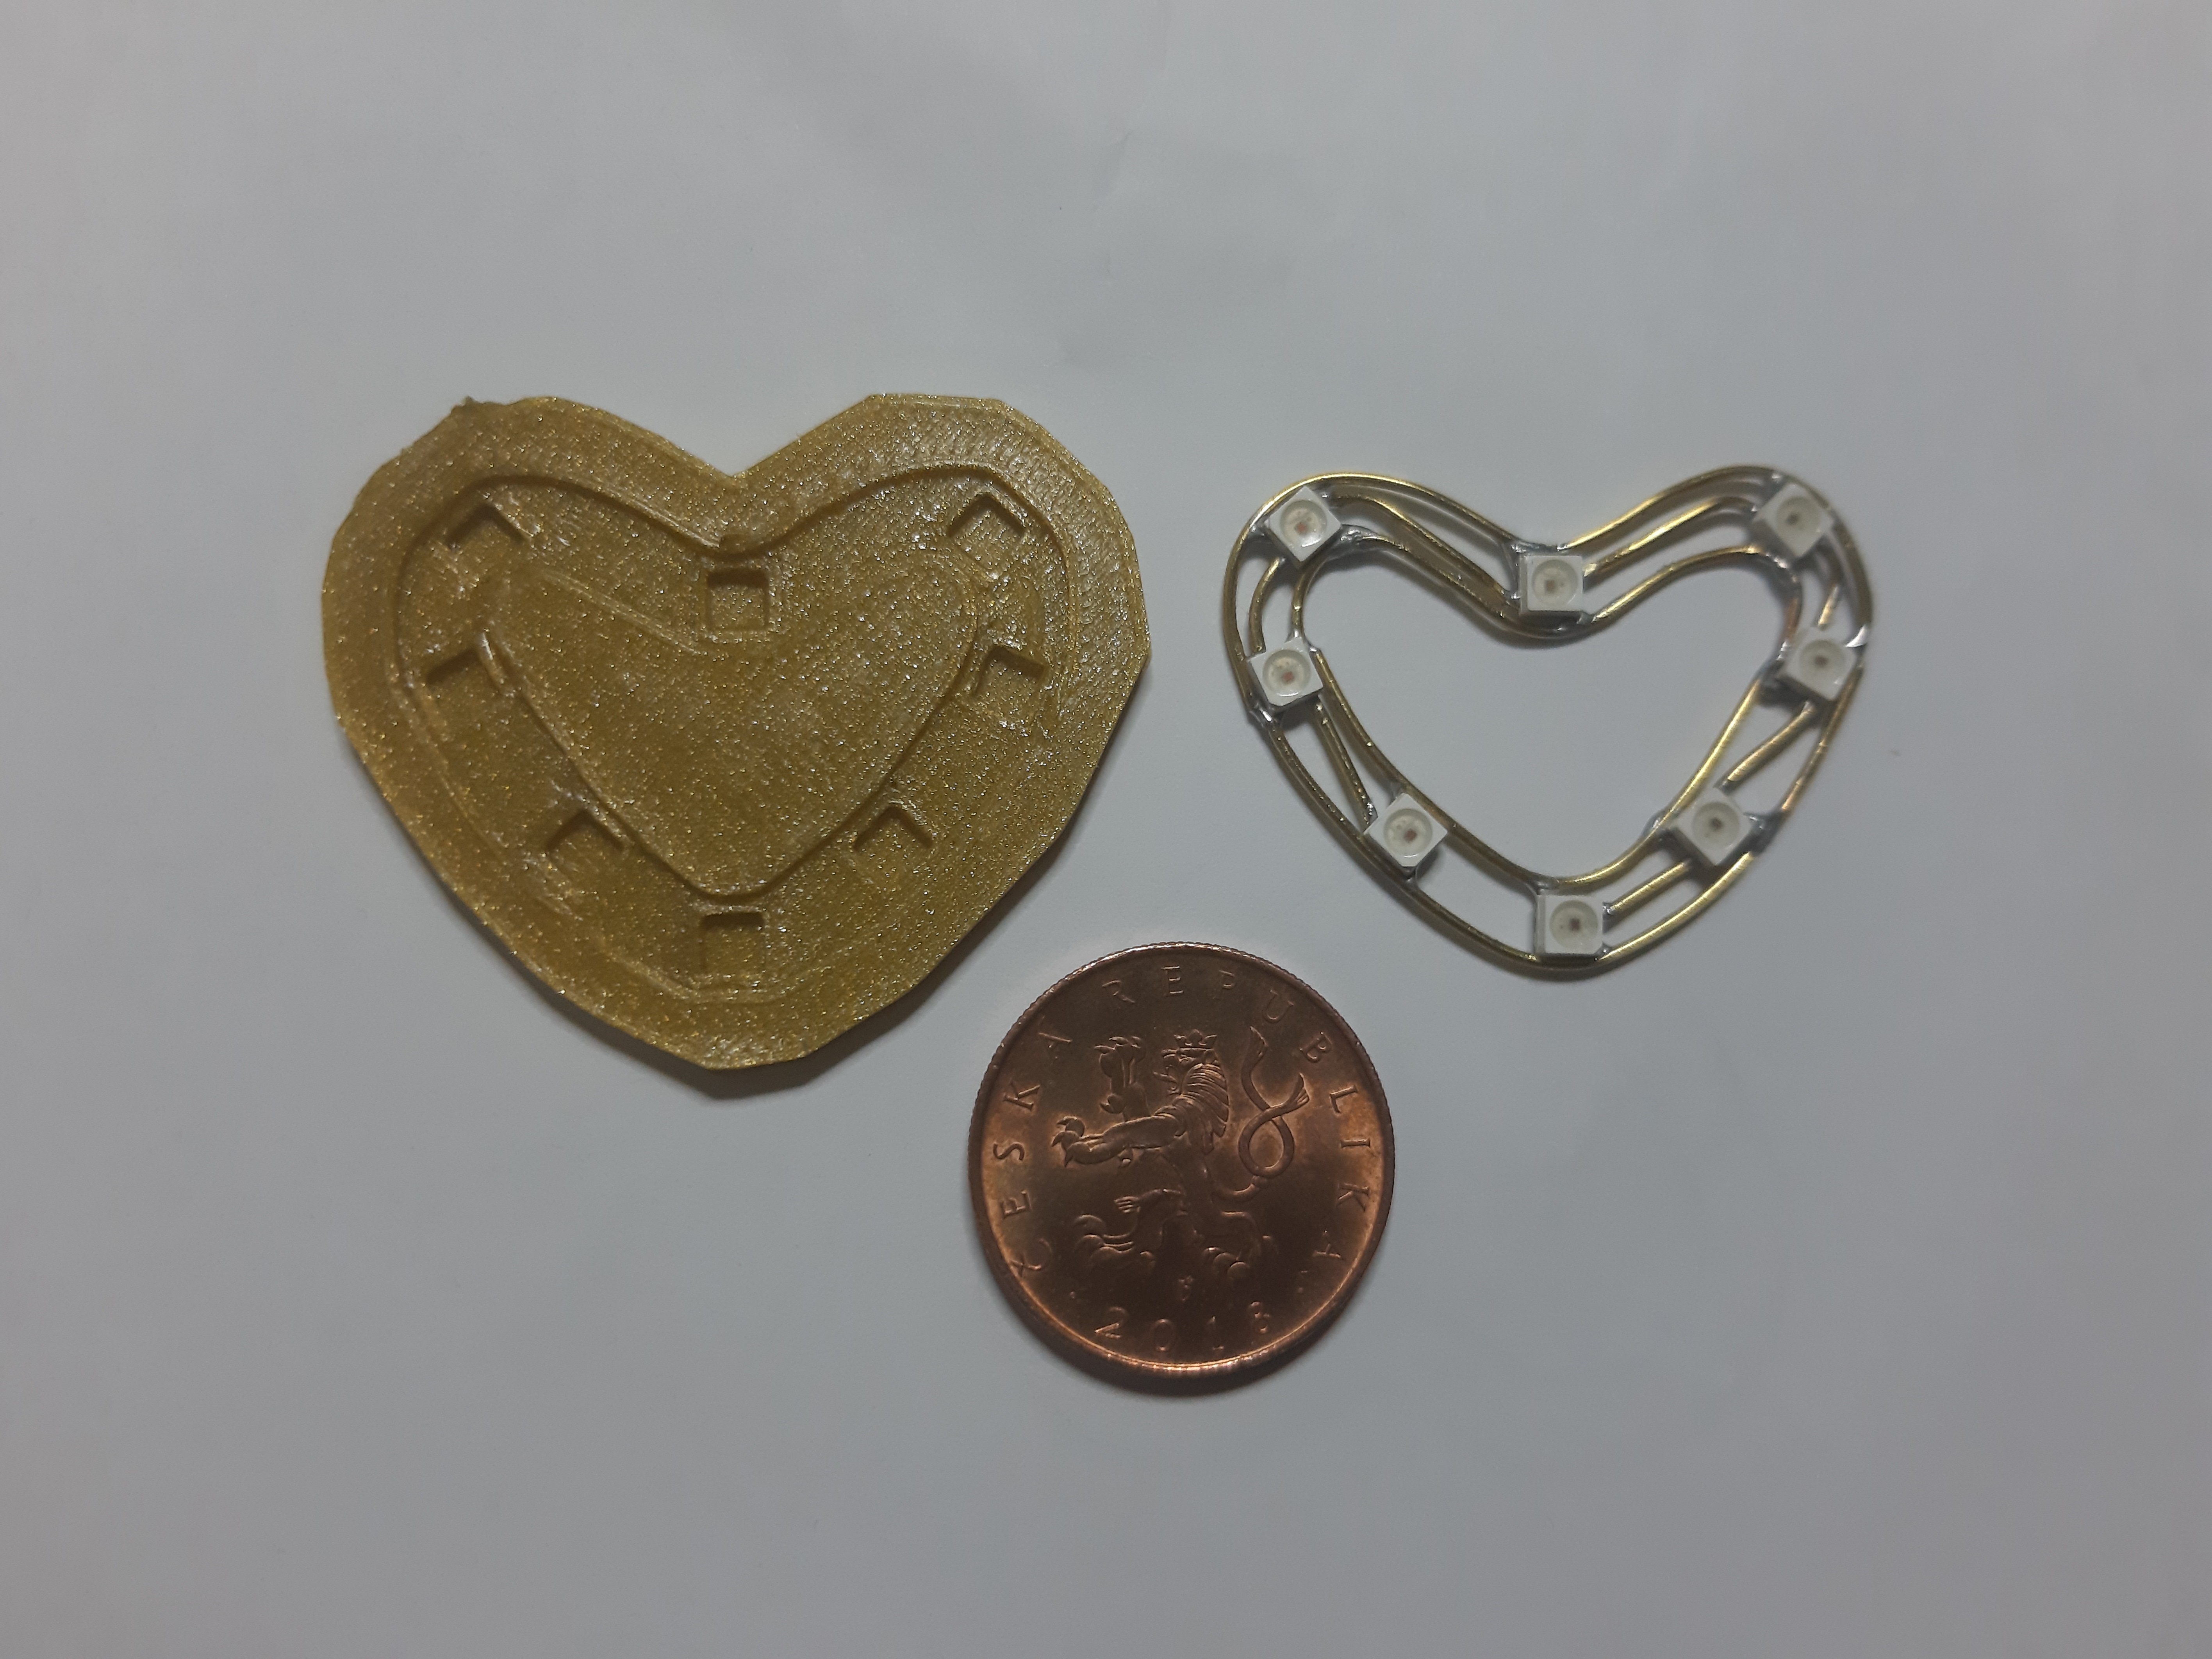
I luckely found this when I finished outer ring for heart so I redesigned this template, printed it and used it to make this, which is final piece for finished heart. 10 Czech crown coin for comparison (24,5 mm).
To be sure that I have this OK, I hooked it up to the MAX30102 heart rate sensor, ESP32 module and loaded it up with sketch from Jiří and it worked!
Now to the hardest part - heart body.
I tried to follow tutorial from Jiří, but wires did not stick to the tape and really soon tape losted its stickyness and did not hold wires at all. I was thinkink how I would replace tape and I tried something like "blue tag", which holded wires very well.
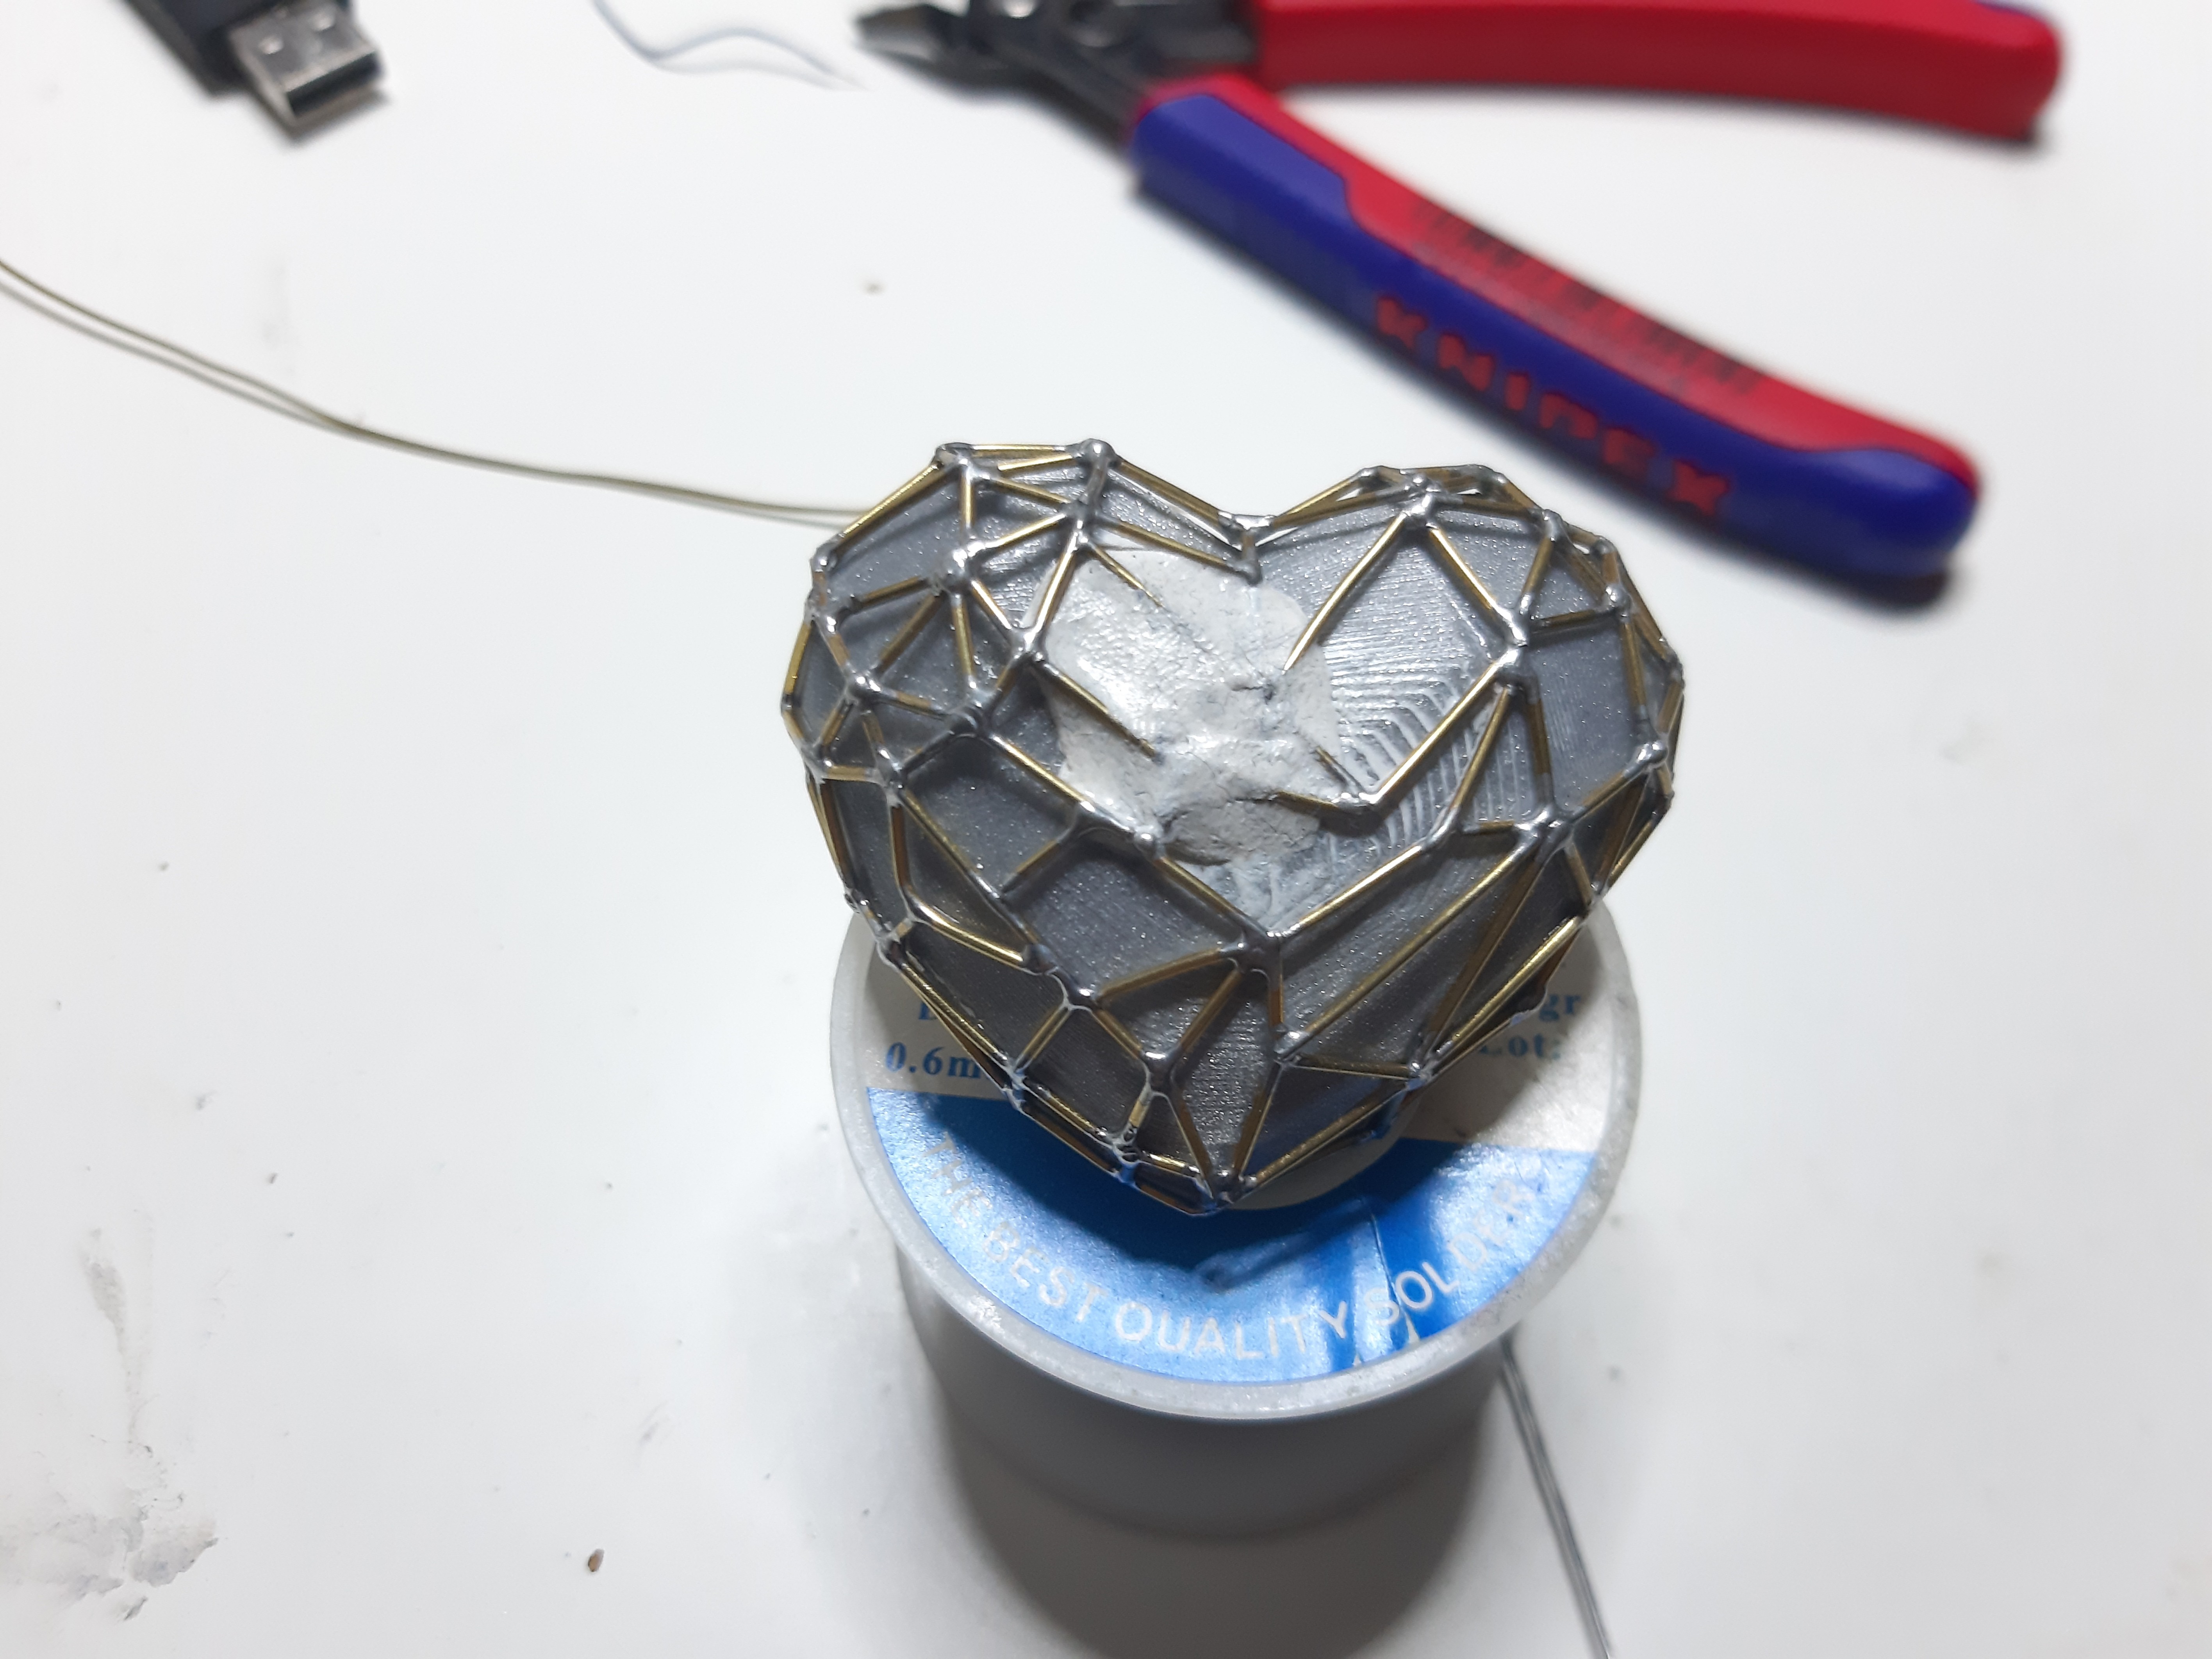
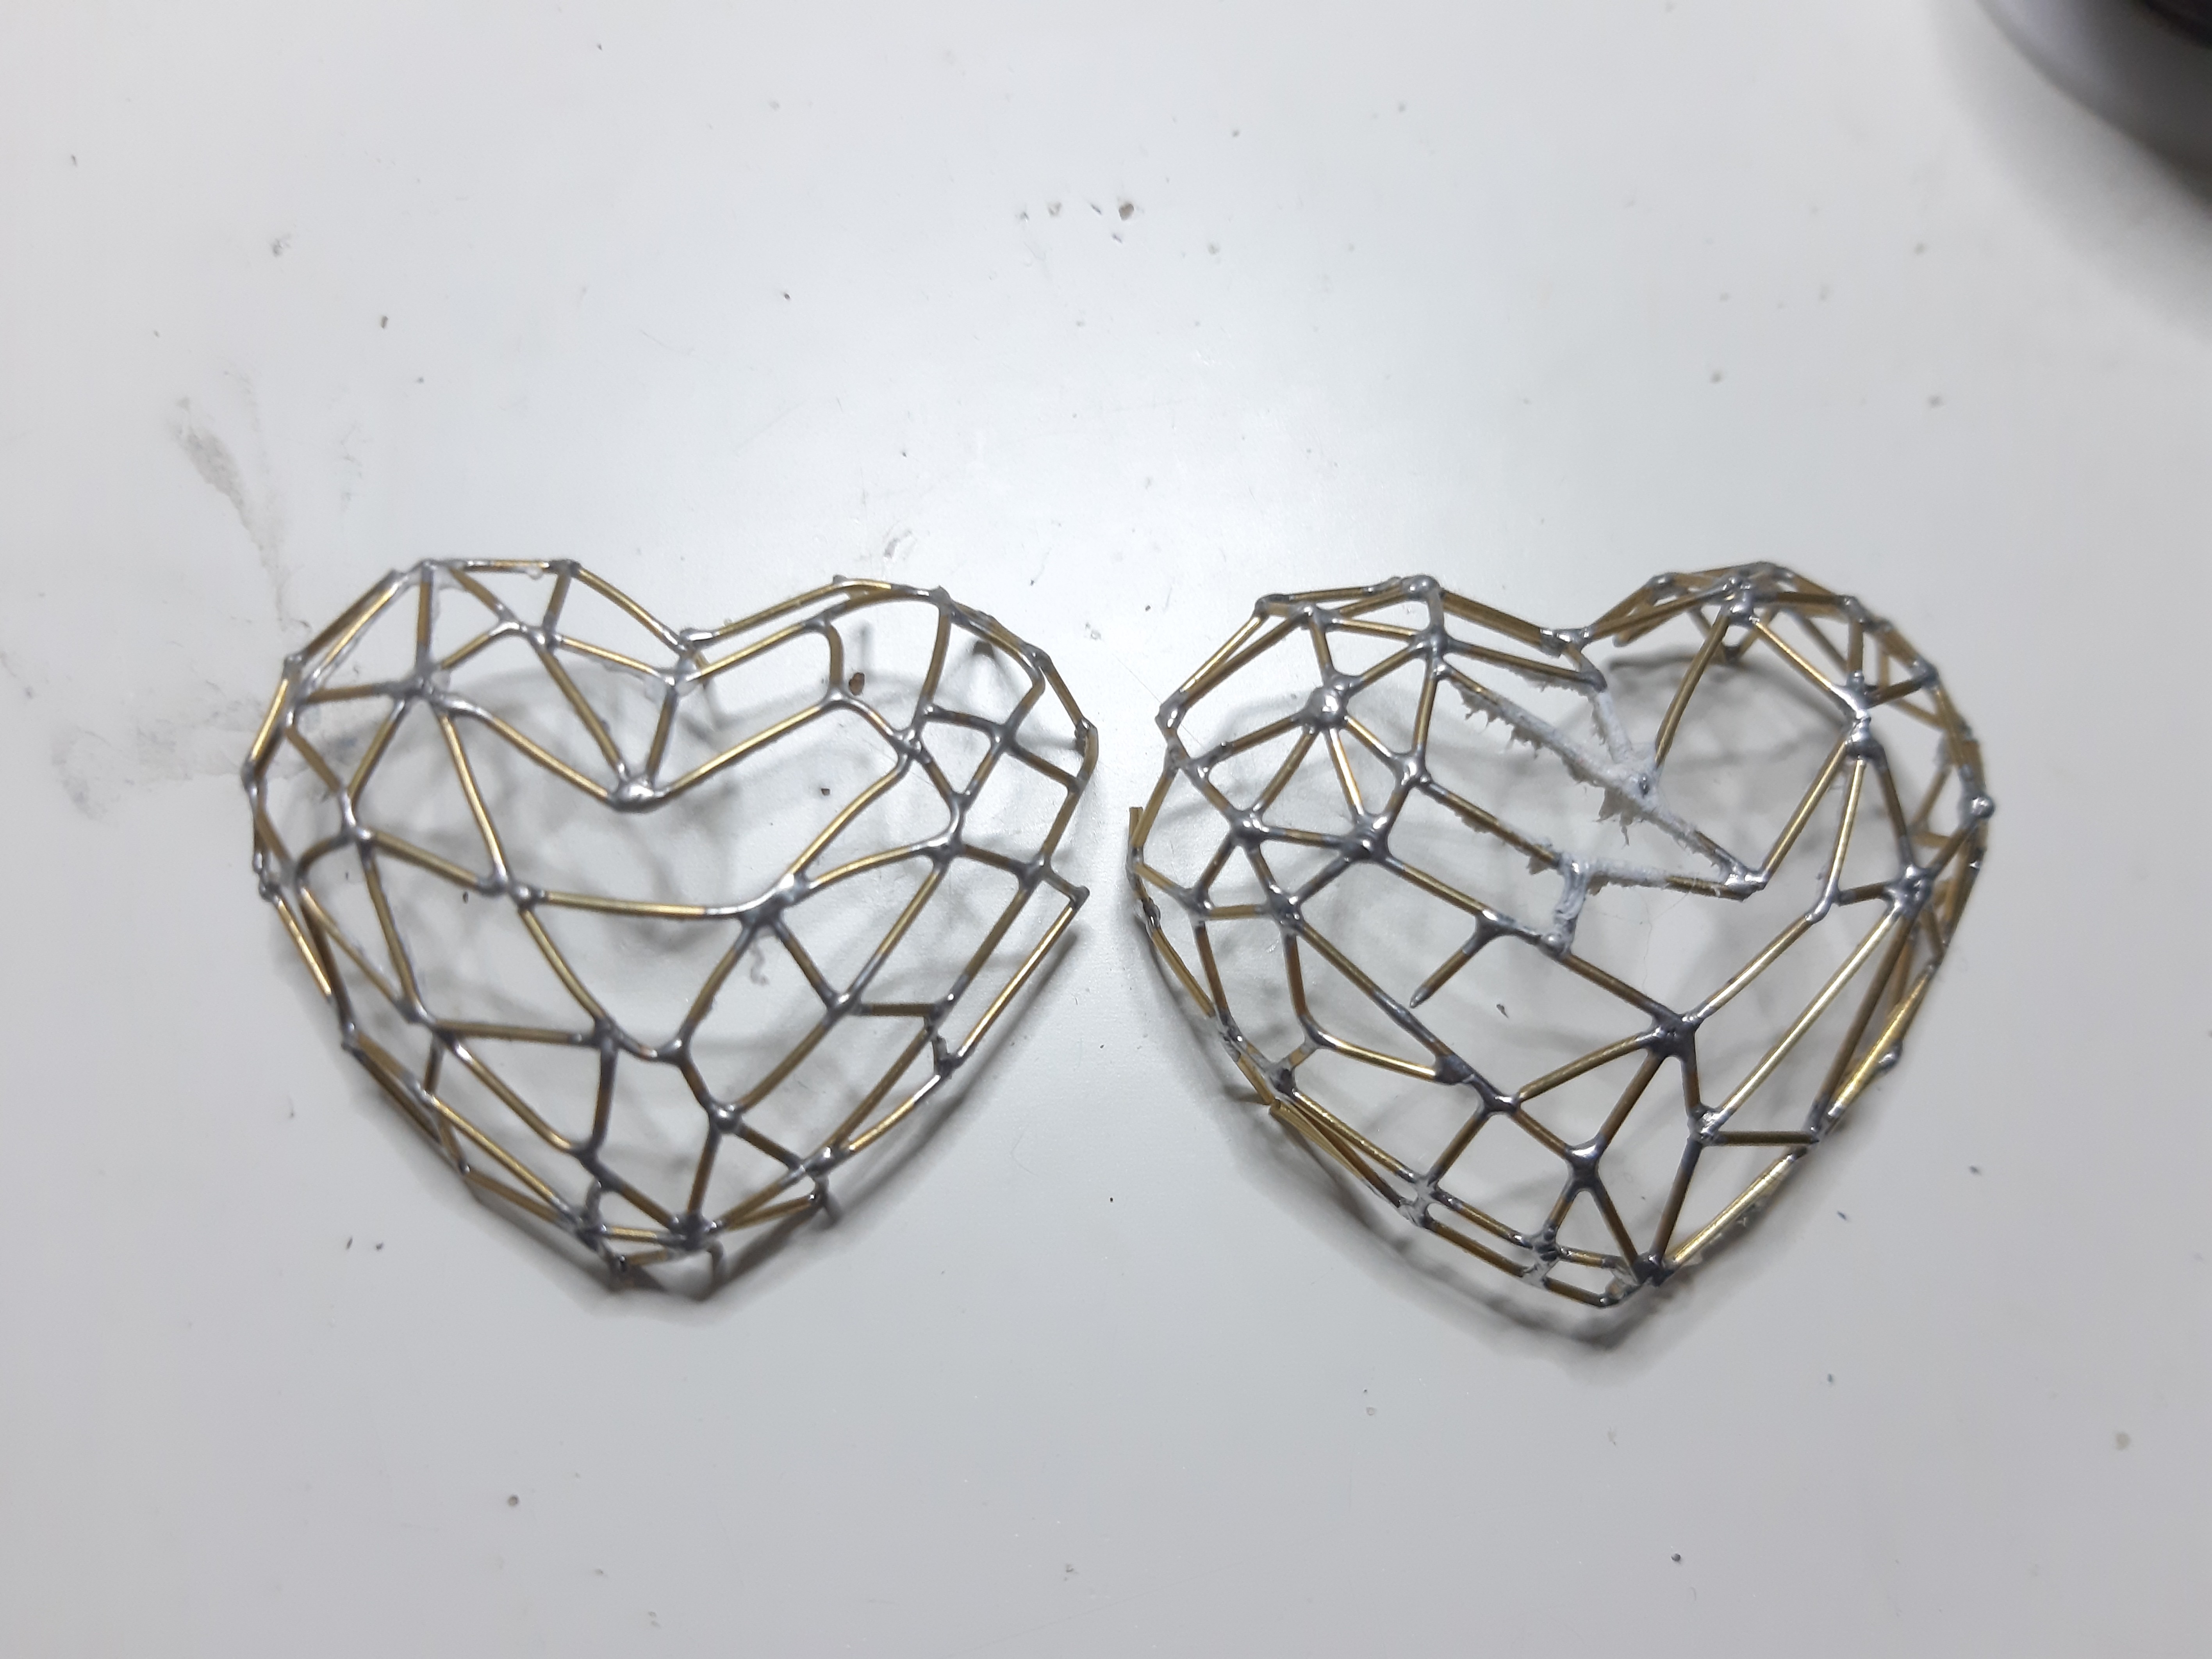
After many hours of really slow work, I finished both sides. They did not exactly match each other, but this is free form so there is still room for changes :) .
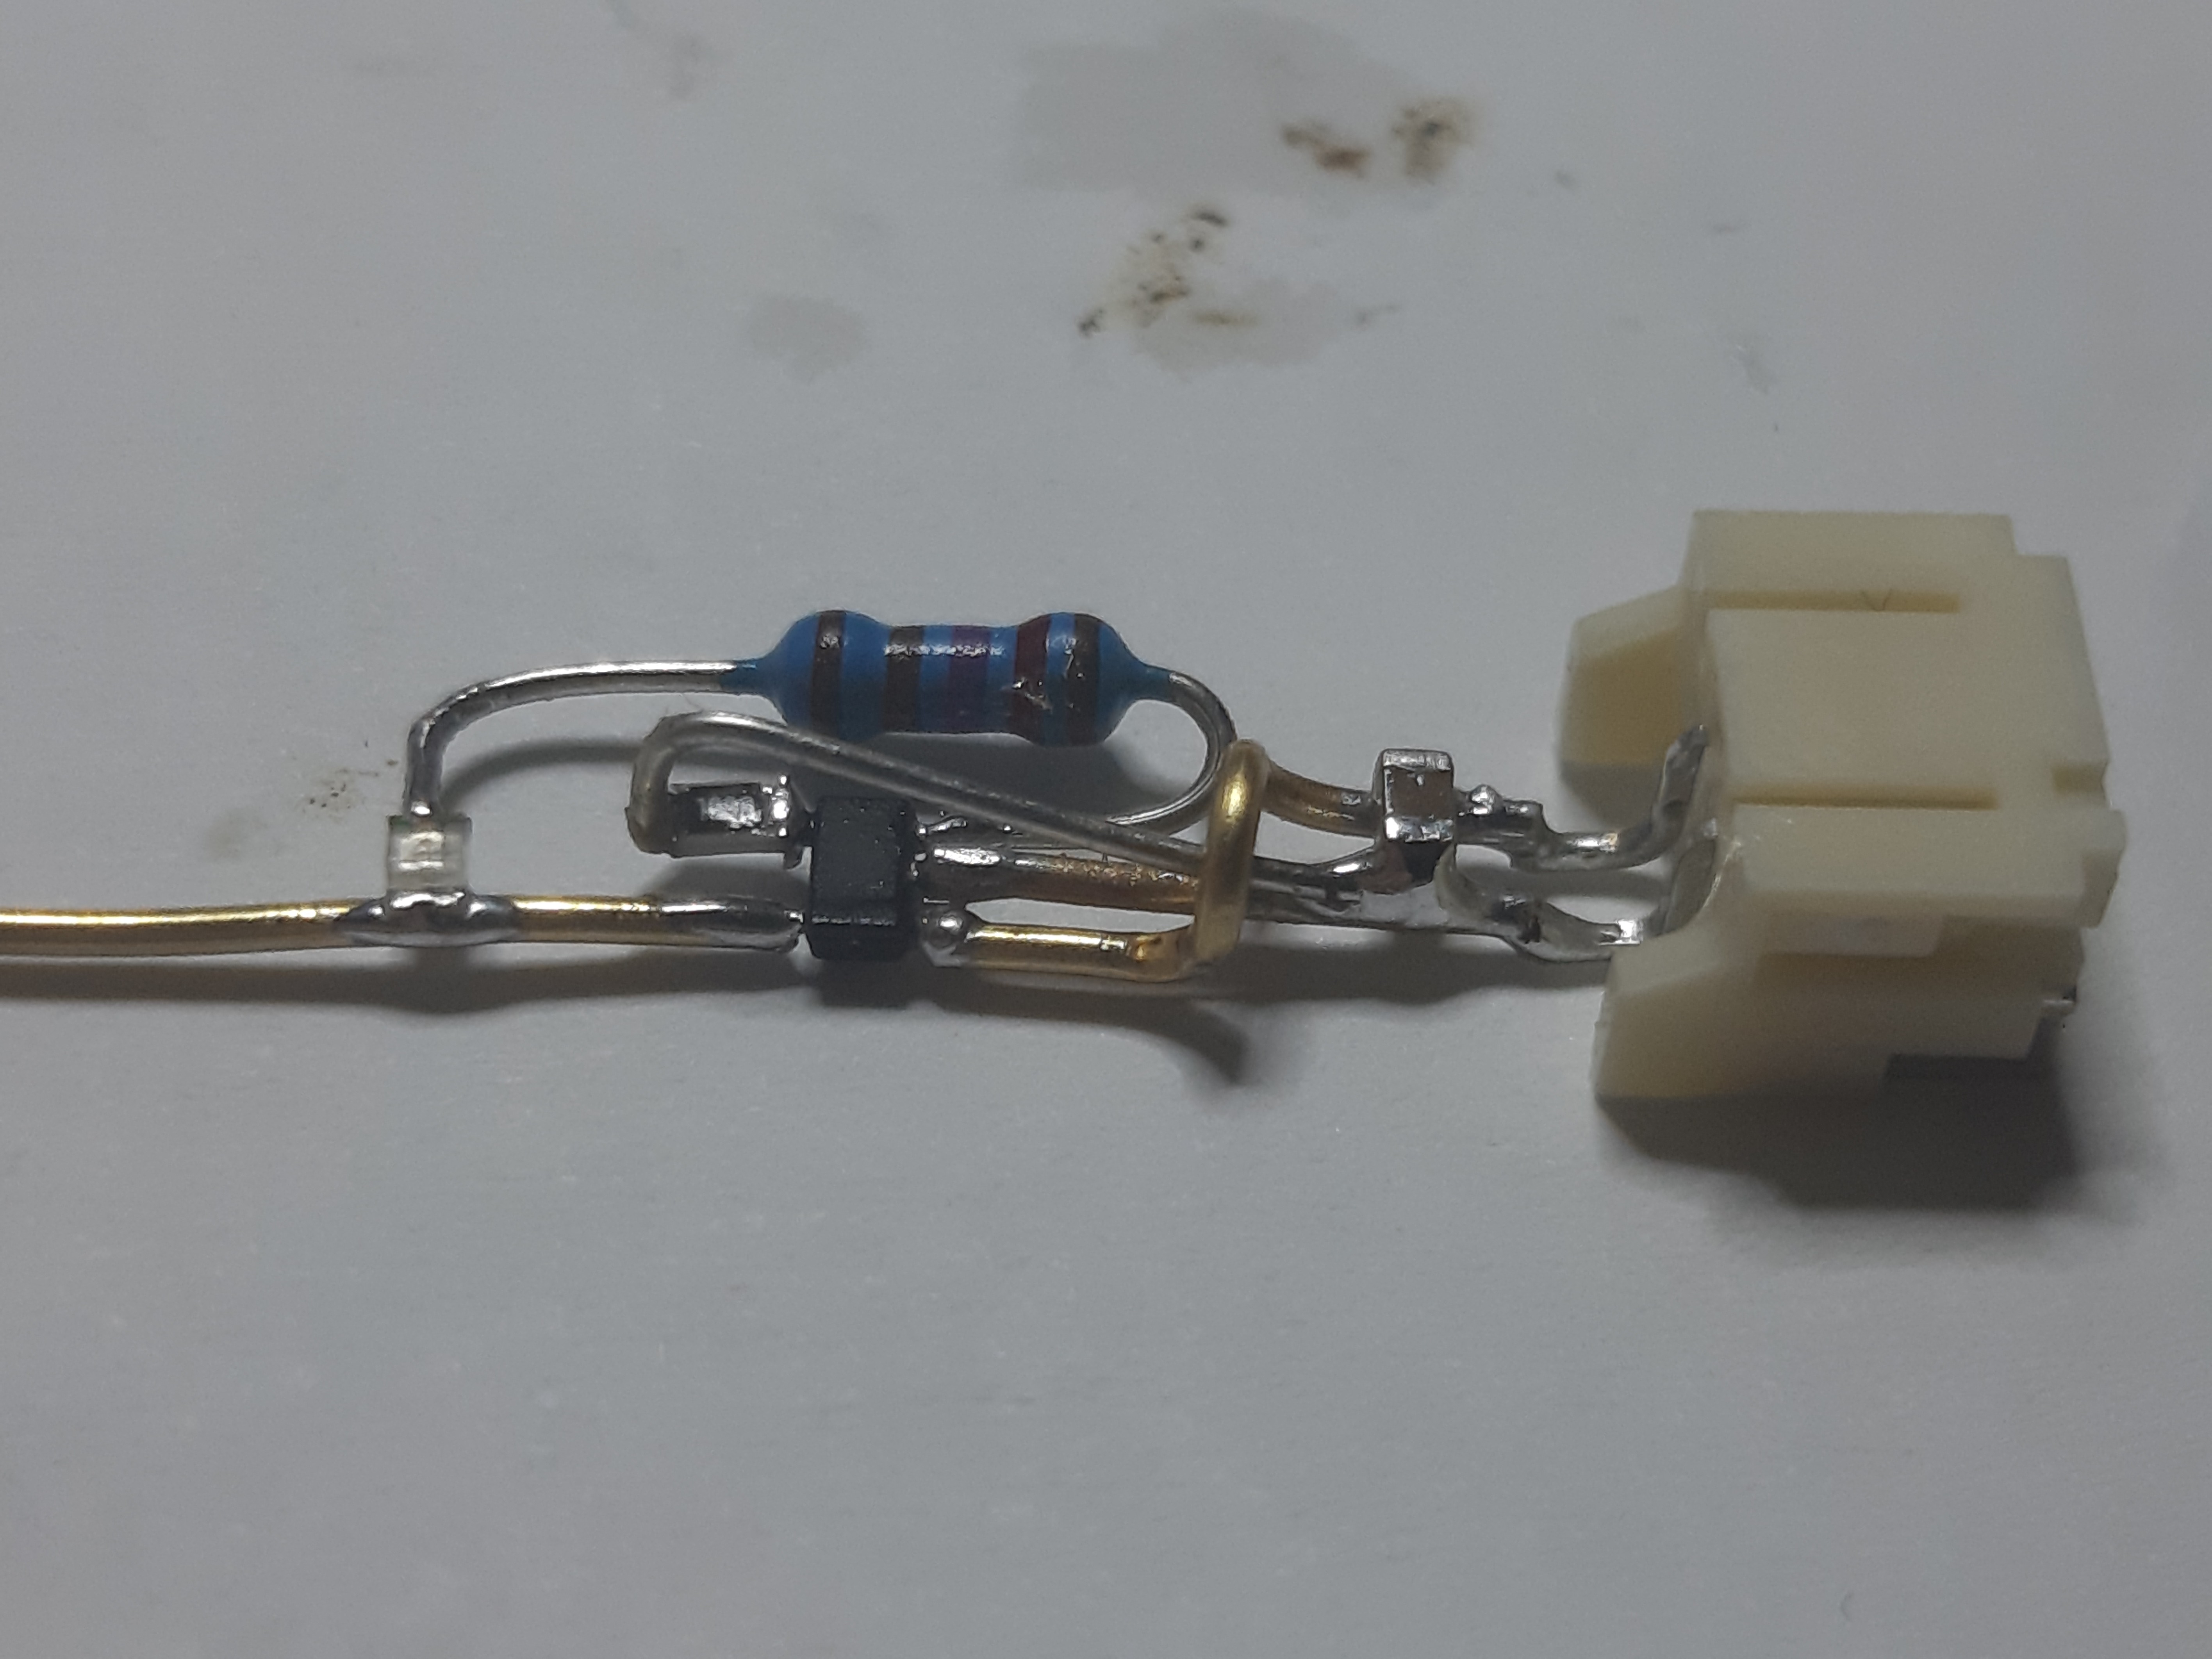
Because I wanted that this heart would become another item in jewerly box of my fiancee, I had to make it rechargeable. Jiří used TP4056 module but I had no room for that so I had to improvise. I took MCP73831, JST connector, 0805 LED and some resistors and made free form integrated charging circuit.
With this done it is time to start putting this together.
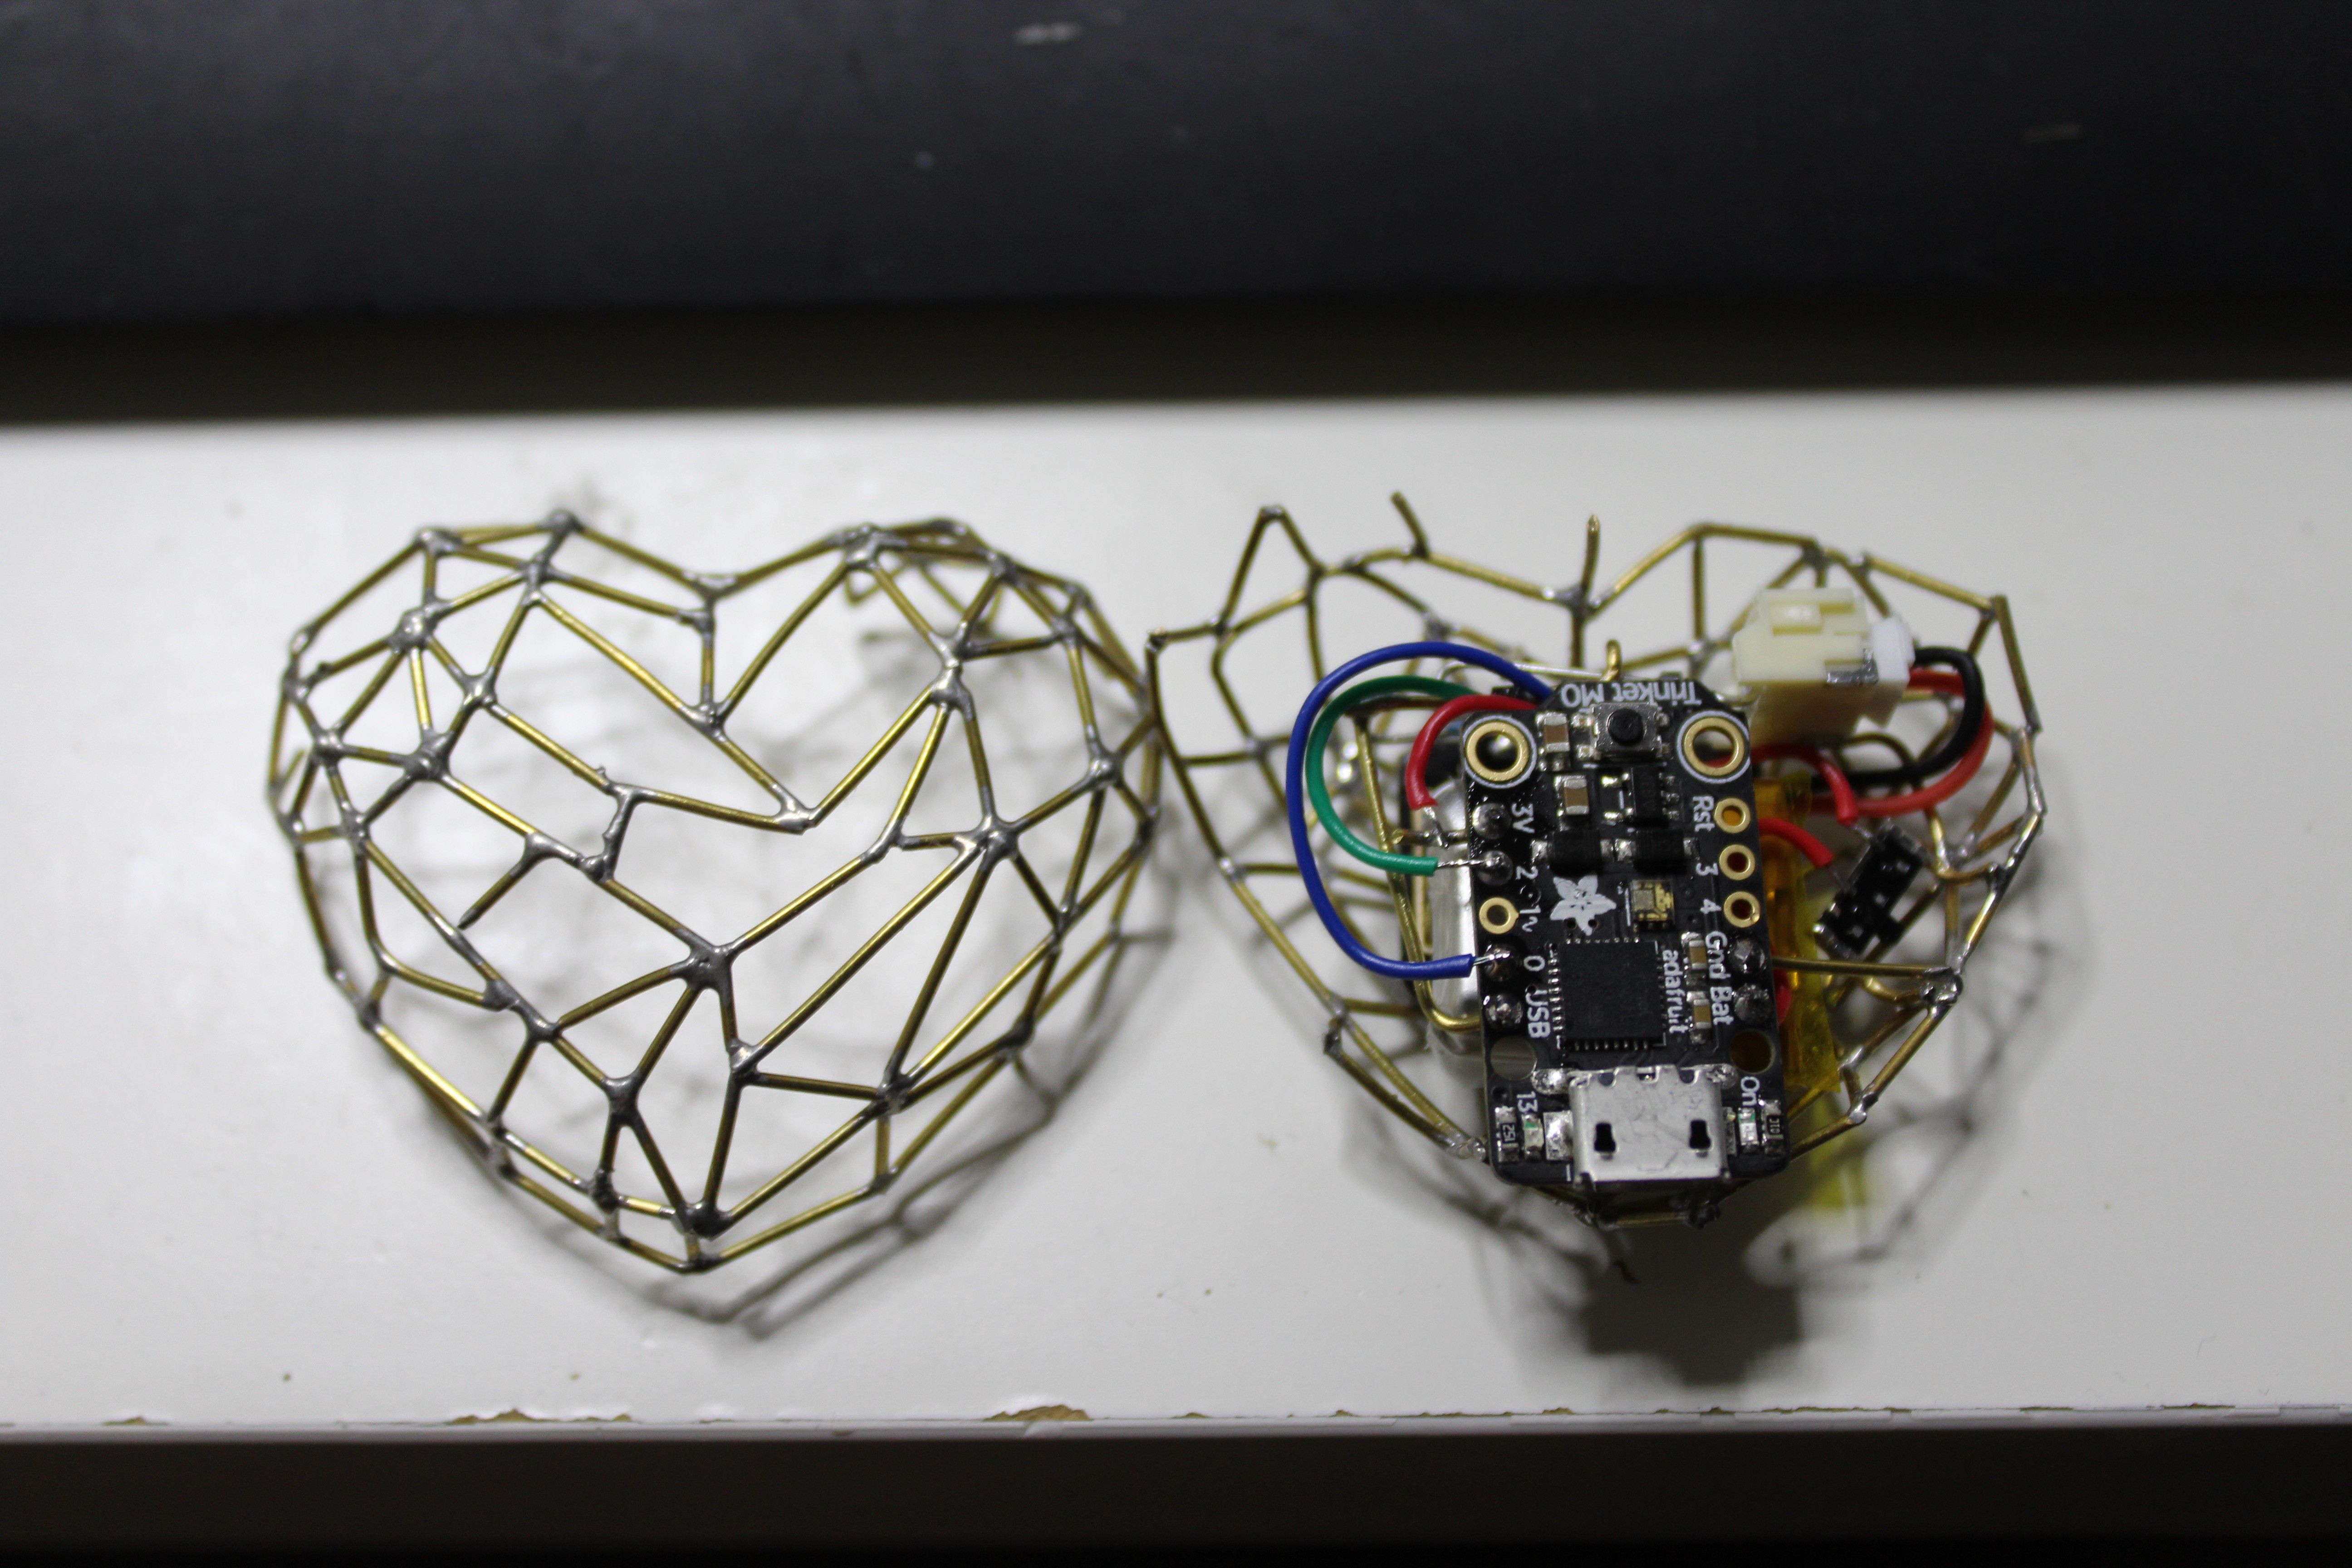
Firstly I soldered MAX30102 module to the "back" piece of the heart, put thicker duble sided type on it and squished small battery on it. Soldered small switch to the side of heart rate sensor and connected positive wire from charger to it. I sticked another piece of double sided tape on top of battery and stick Trinket M0 on top. This will be "brain" of the heart. I had Adafruit Trinket M0 laying in my drawer for long time and I really had no idea for project where I could use it. Until now..
After that I connected GND wire to the back piece of the heart as whole heart will distribute GND signal for all components. Here is result ans quick test with example sketch for MAX30102 sensor.
At this point, I had bit problem with code as loading part of the code would not run at SAMD21 (I do not remeber why now), so I had to make hardcoded animation with millis function which is not smooth as original code, but it worked.
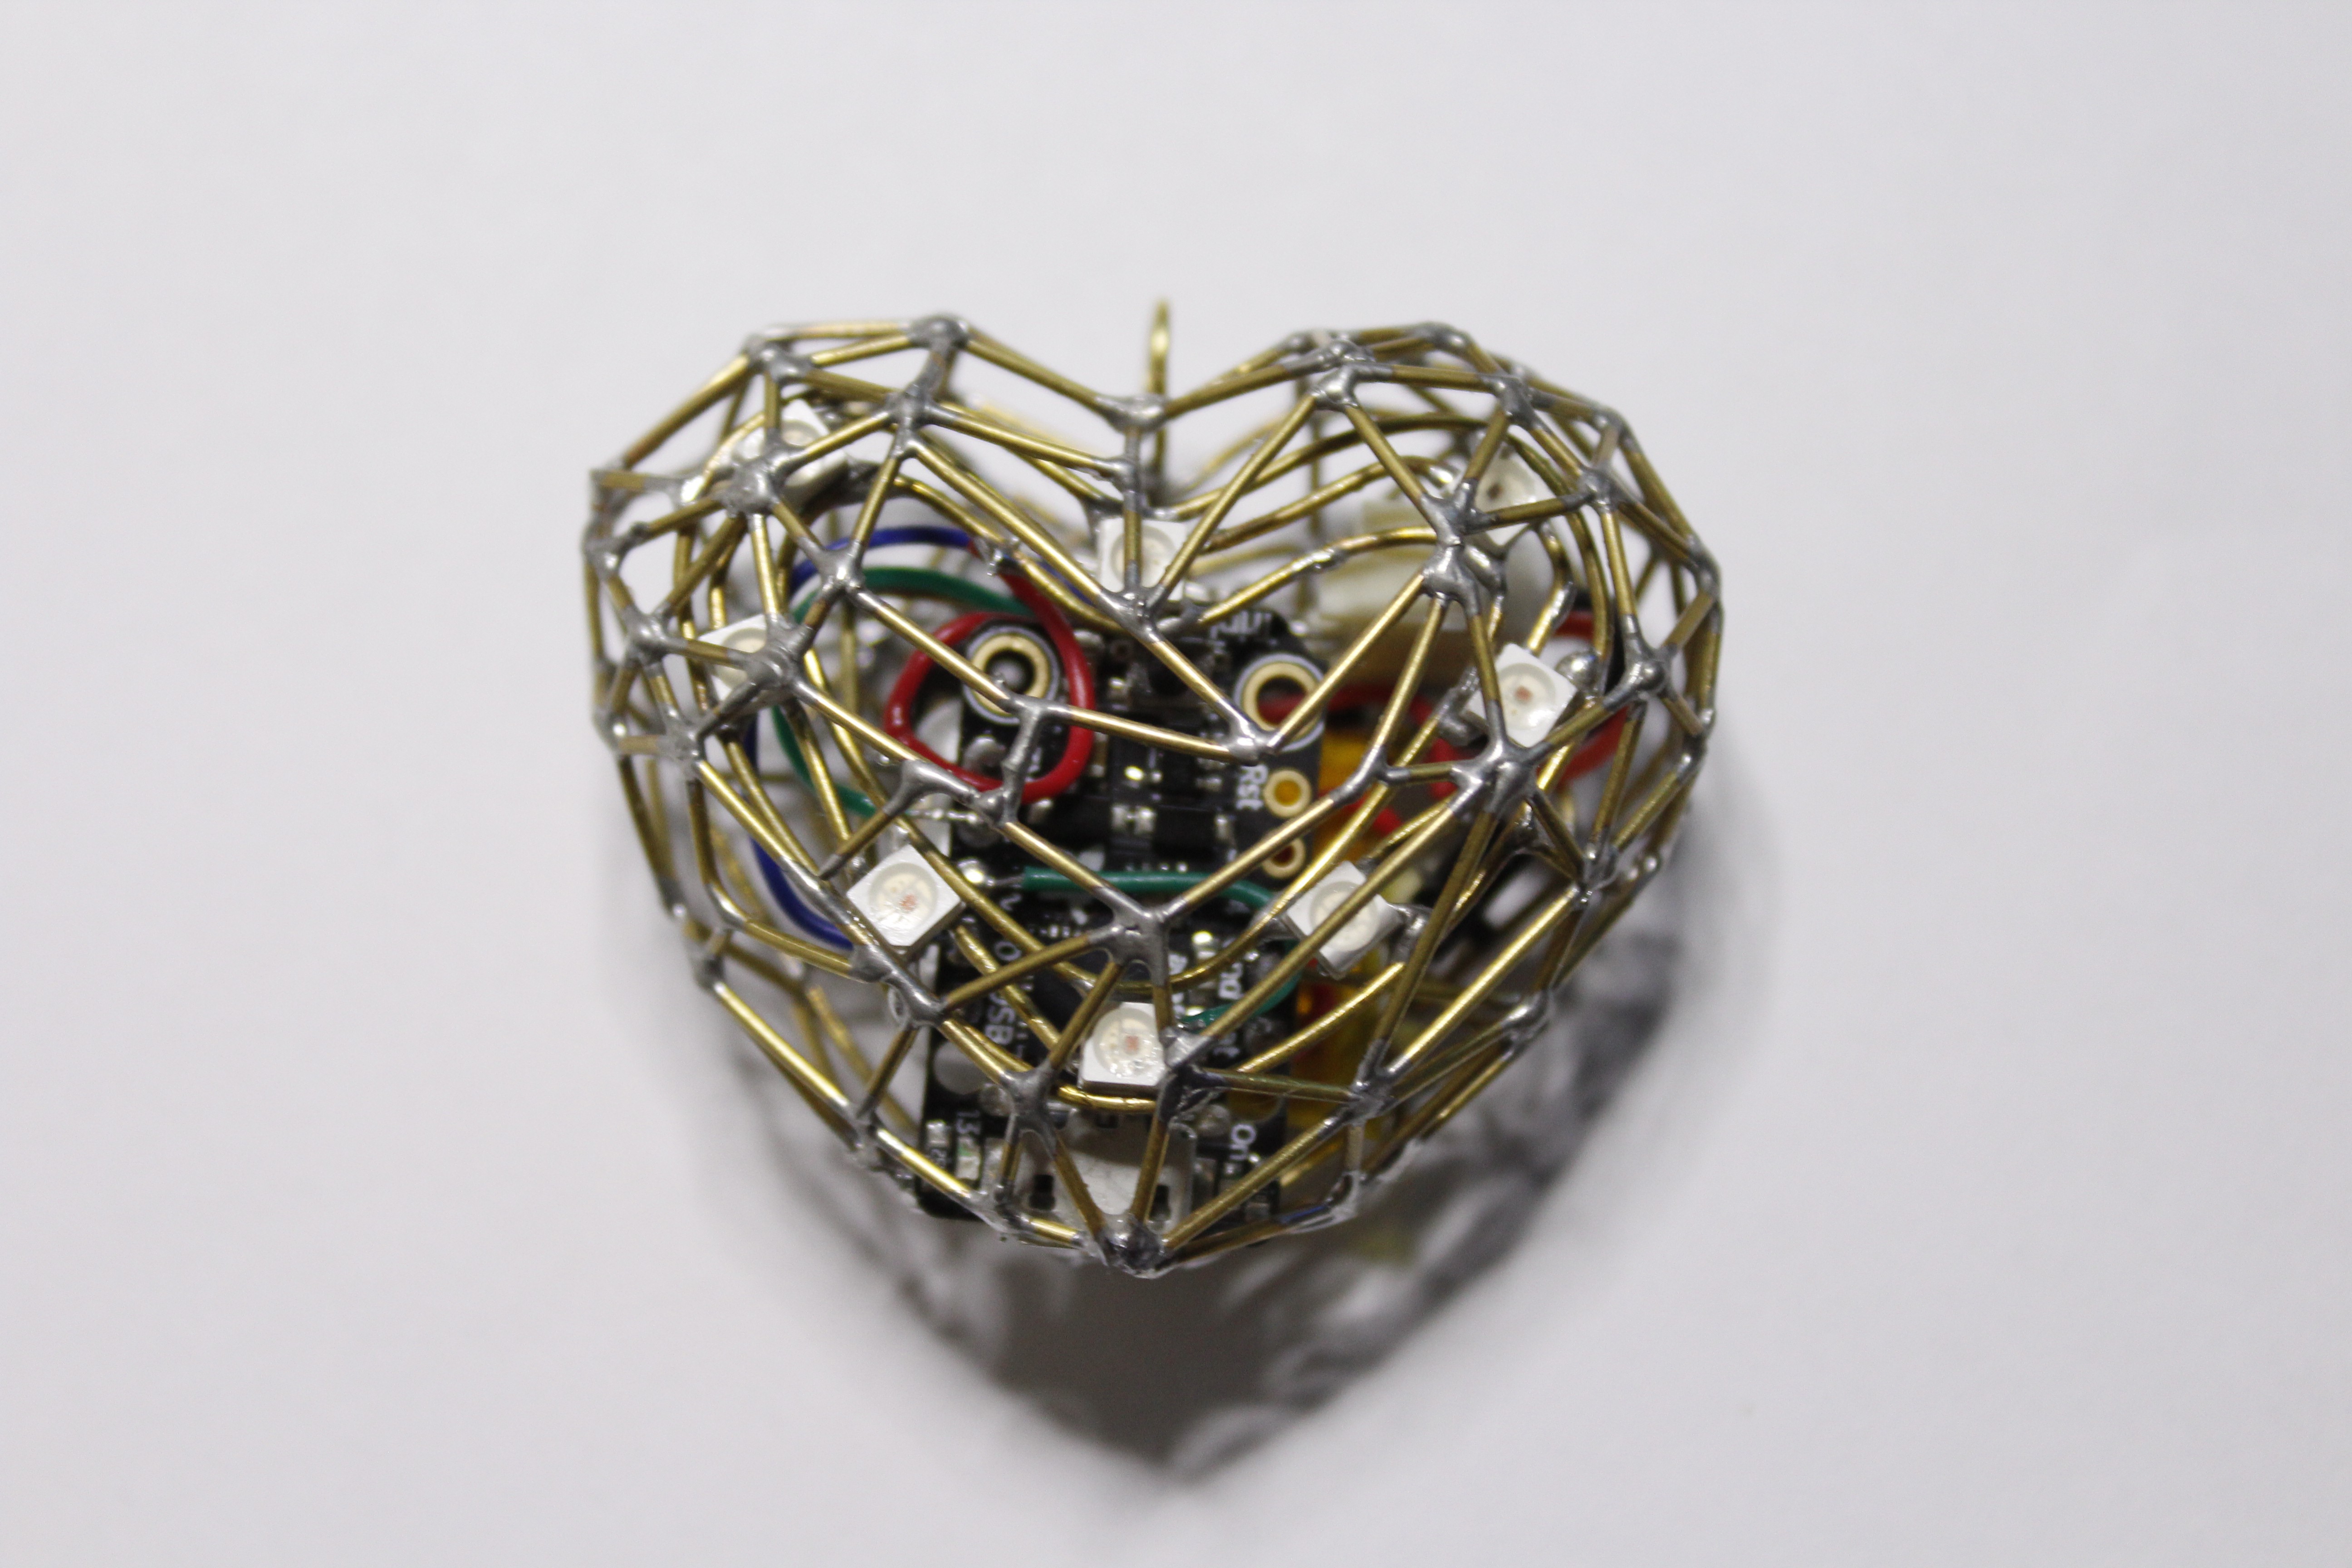
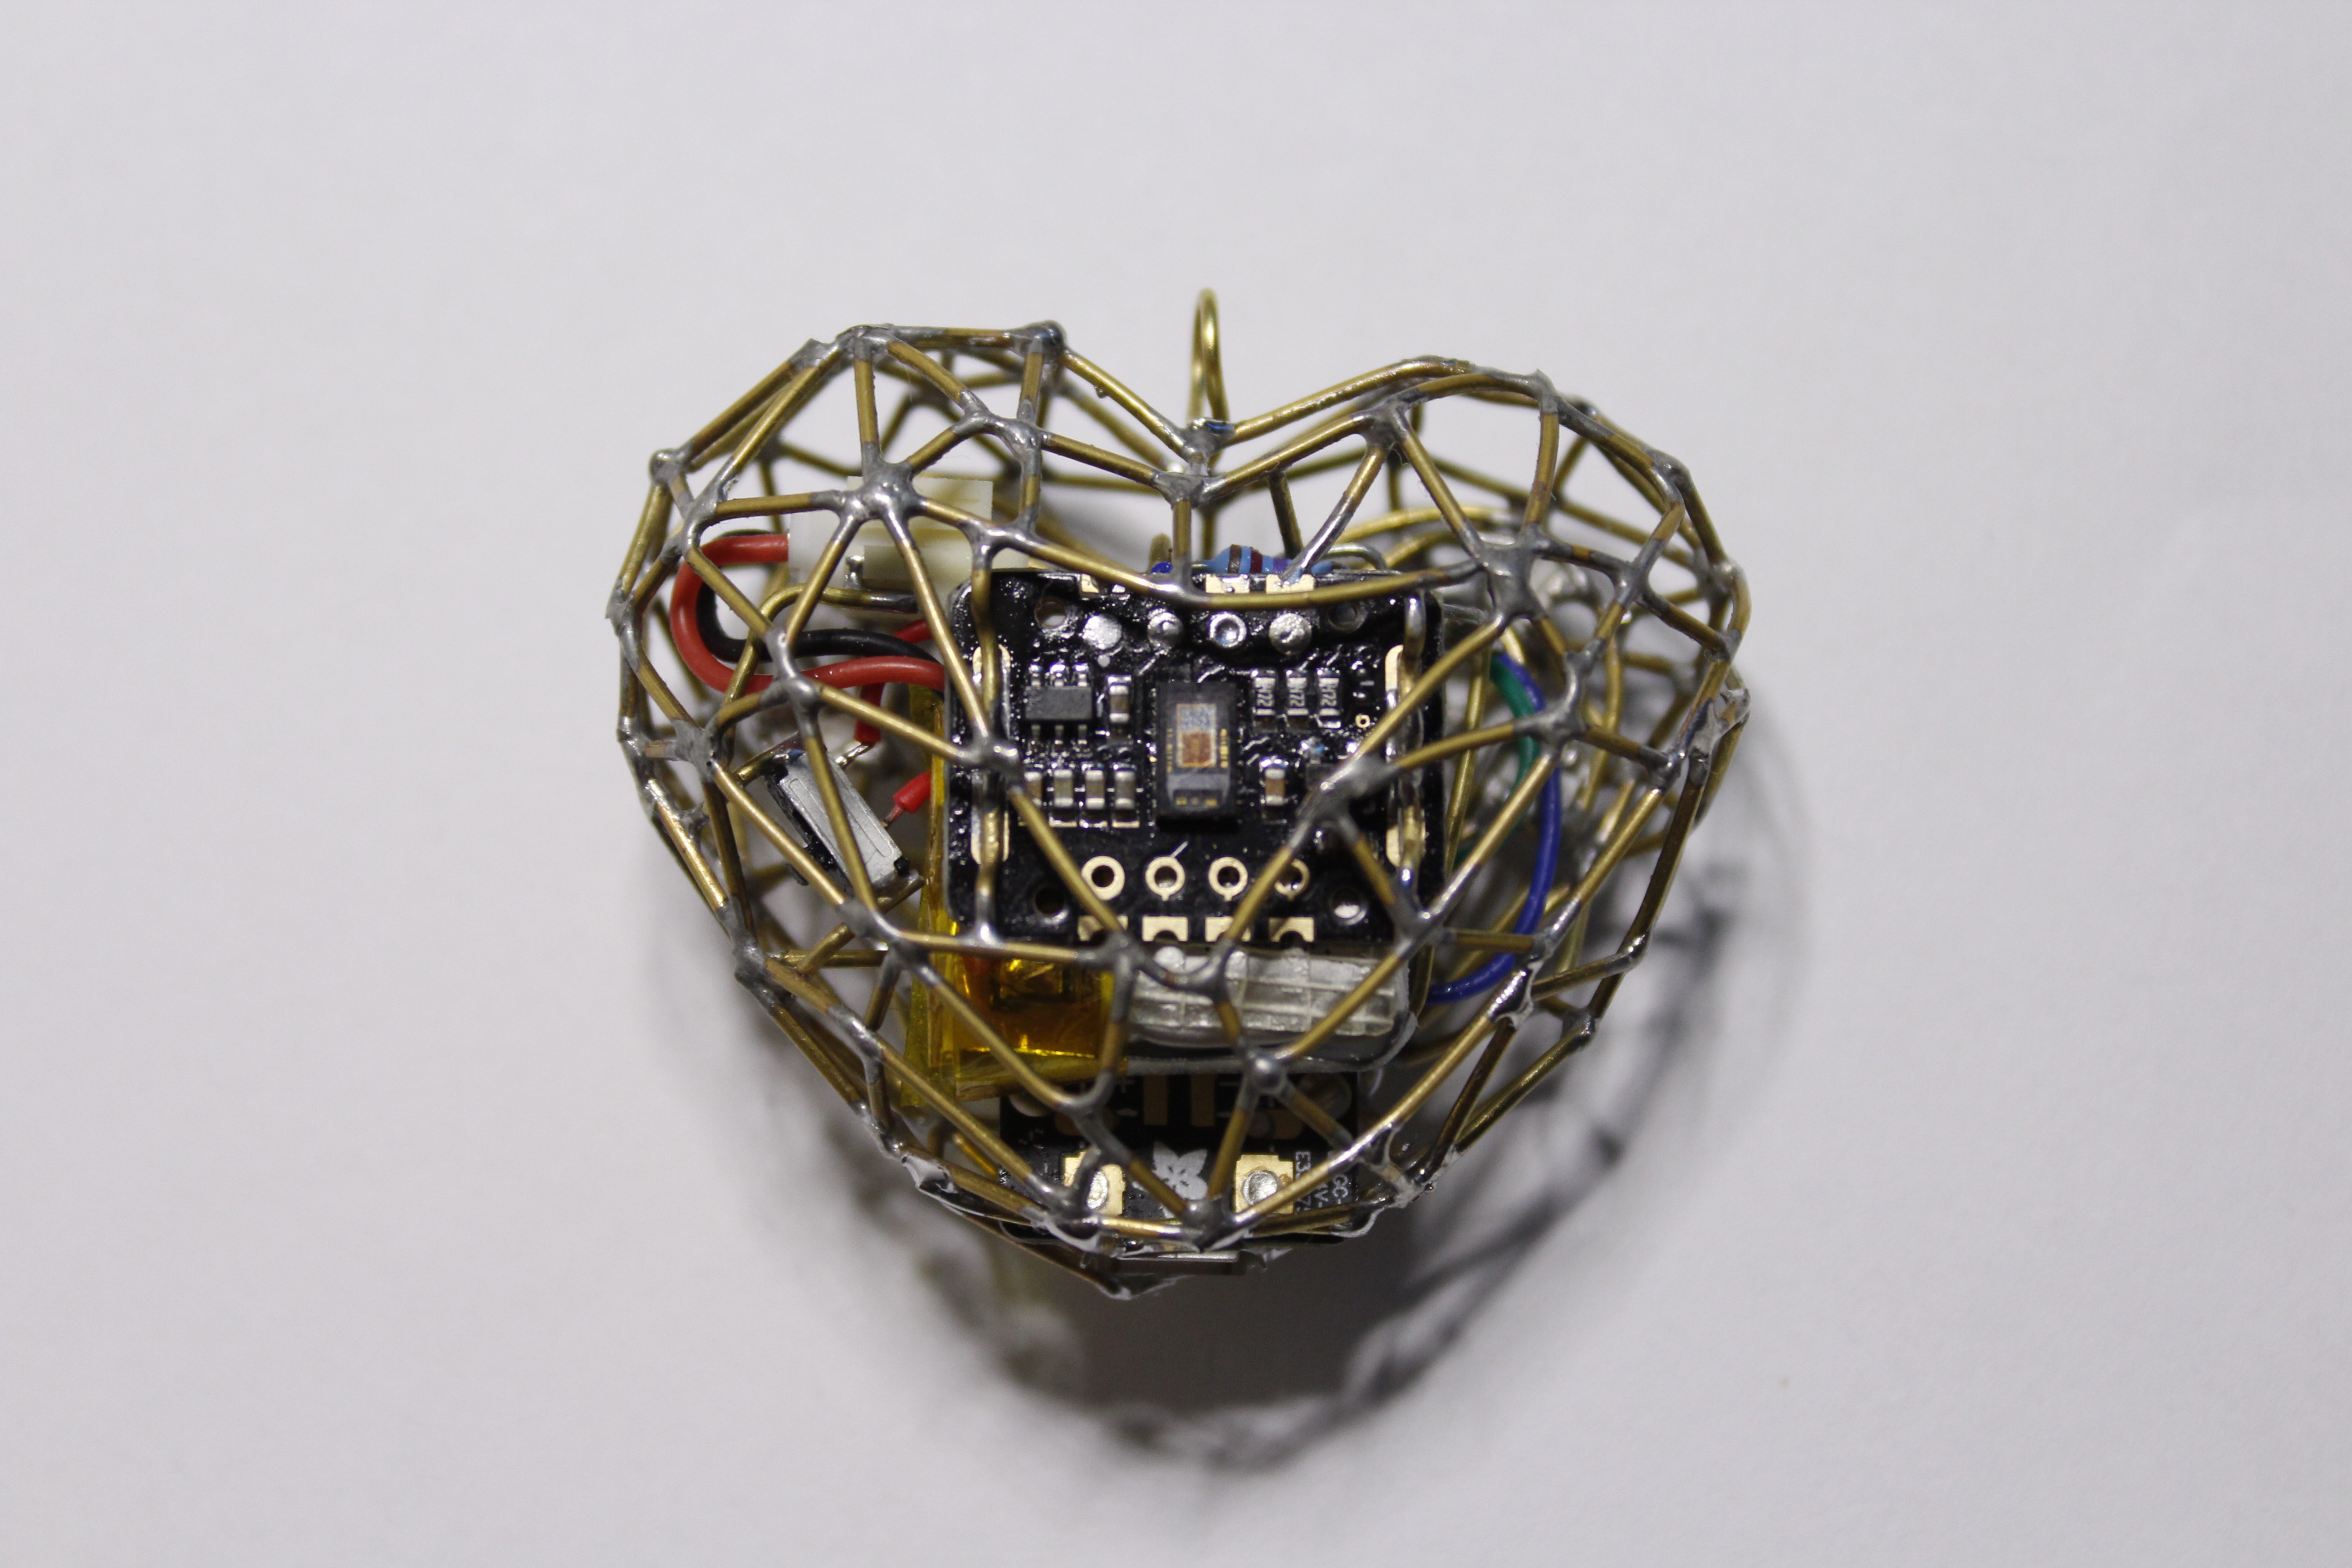
Here is last test before I started to put both sides together...
Last part of the build was to put both sides together and do not brake any connection inside. It was very slow process (I think about 2 hours) where I connected wire here, tested if it works, replaced short wire here, tested if everything works and so on..
.. and sudenly heart was finished.
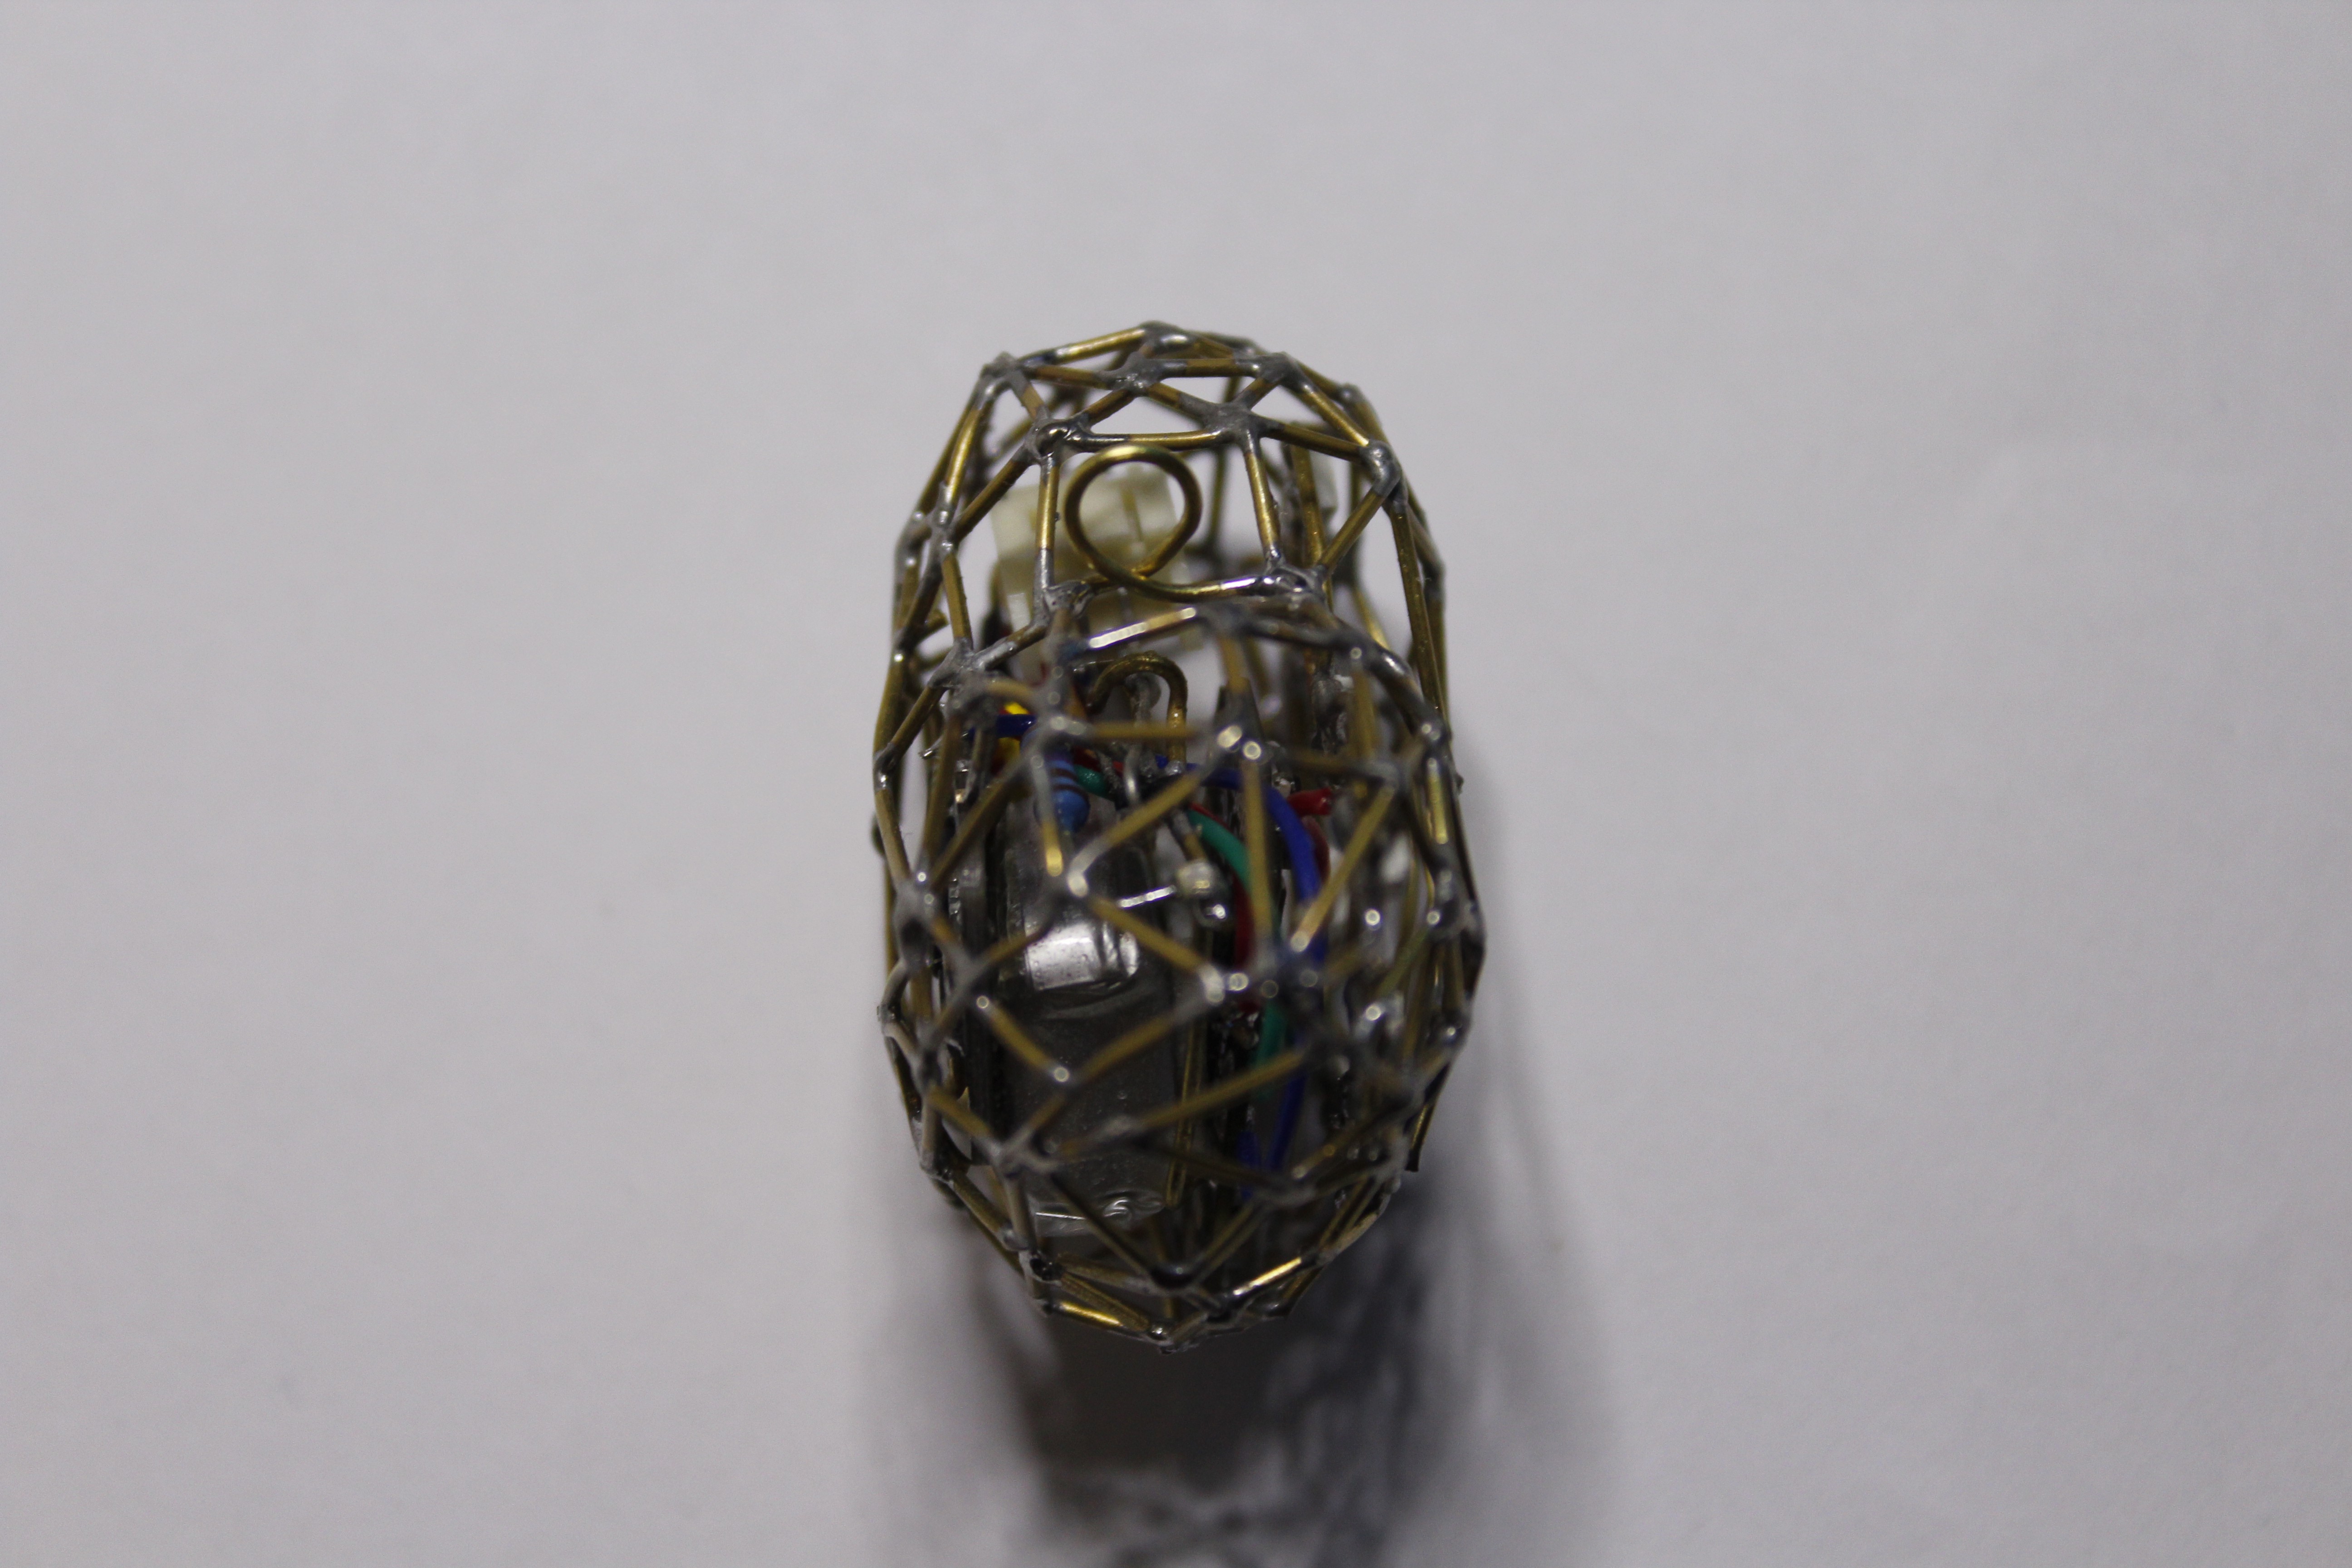
I was releafed and happy. This is so far most beautiful thing which I made and I made it because of and for my love one. I know that for you it is just few pieces of wire and some electronics parts, but for me is passion and love and I wanted to share that with my soon-to-be wife.
So this is story of my brass heart. I hope that it was interesting for you and maybe will inspire your hacker/maker heart to make something which you will be proud of and it will made you happy as this project made me!
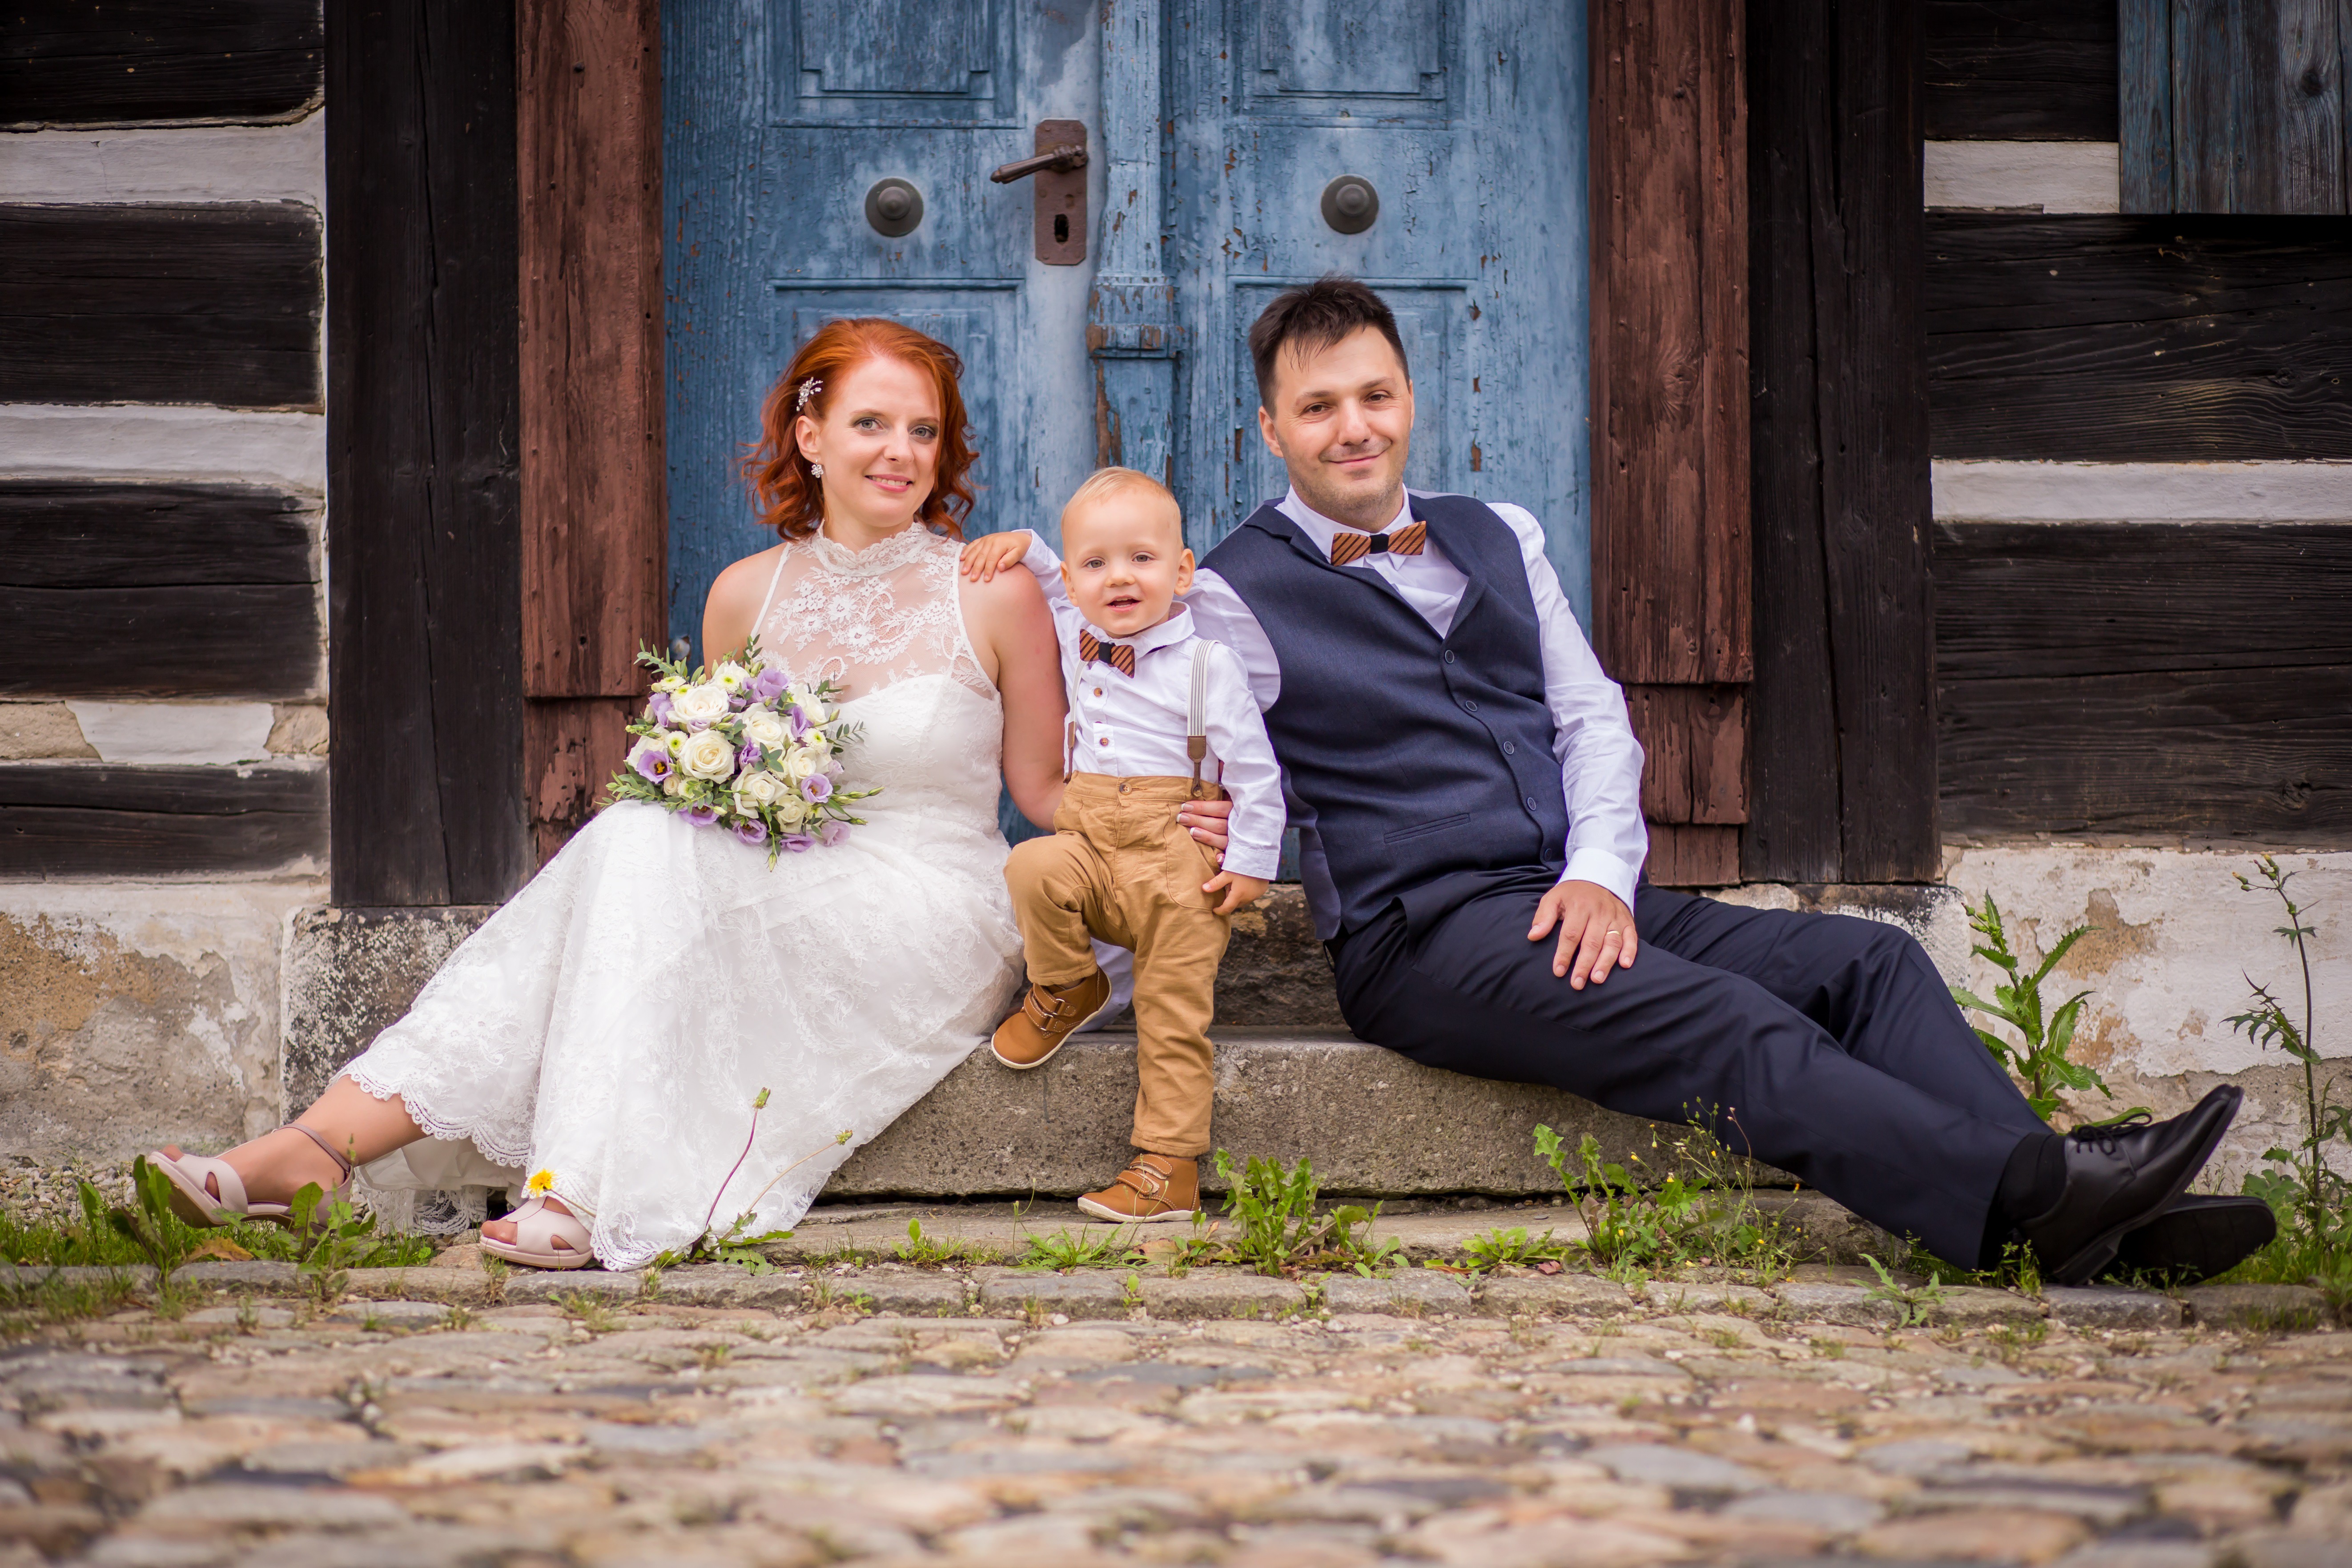
And did my wife wear it at our wedding? No she did not because she had her neck covered with dress and it would not look good. What do you think?
Discussions
Become a Hackaday.io Member
Create an account to leave a comment. Already have an account? Log In.