I never did make a proper post on how to setup a grbl shield. I don't know that this one will be proper either, but hopefully it helps out a bit.
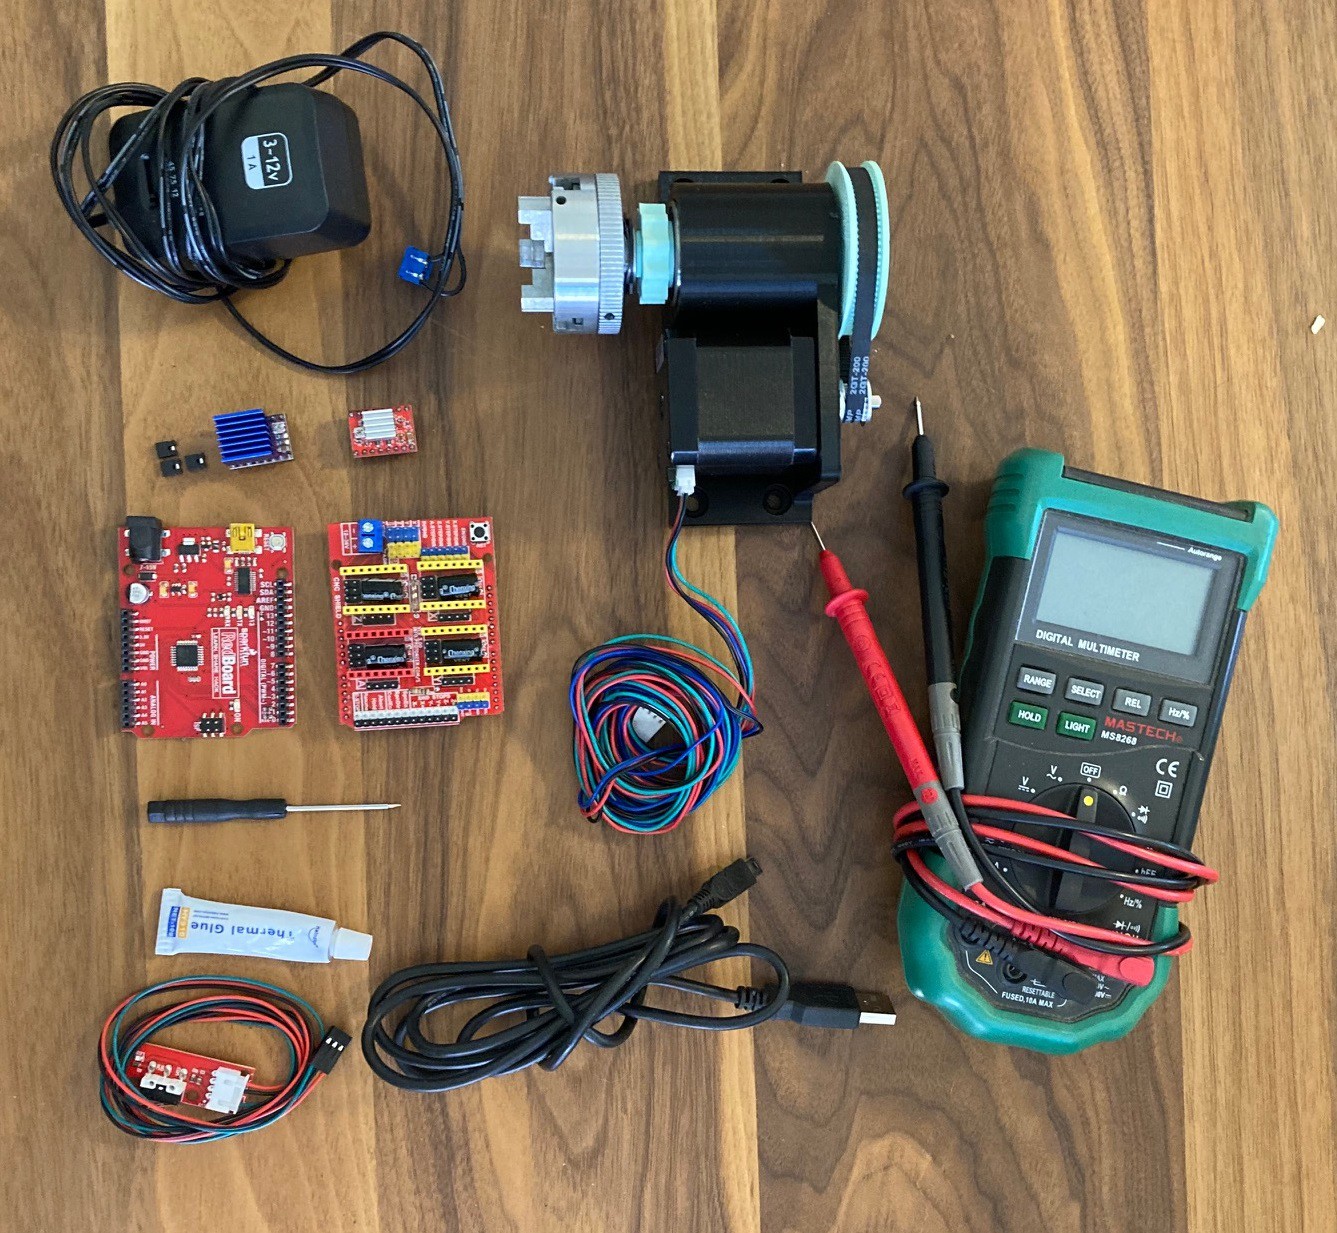
To get grbl running you need an arduino uno, a grbl shield to make connecting all the wires simpler, a stepper motor driver, a stepper motor (of course), a 12-36v power supply with enough amps to drive all your stepper motors (24v 3amps is a good minimum) and optionally some limit switches.
In addition you will need access to a volt meter and a small screwdriver for setting the reference voltage on the drivers. And if you don't want the heatsinks to fall off then some thermal glue to glue them down with.
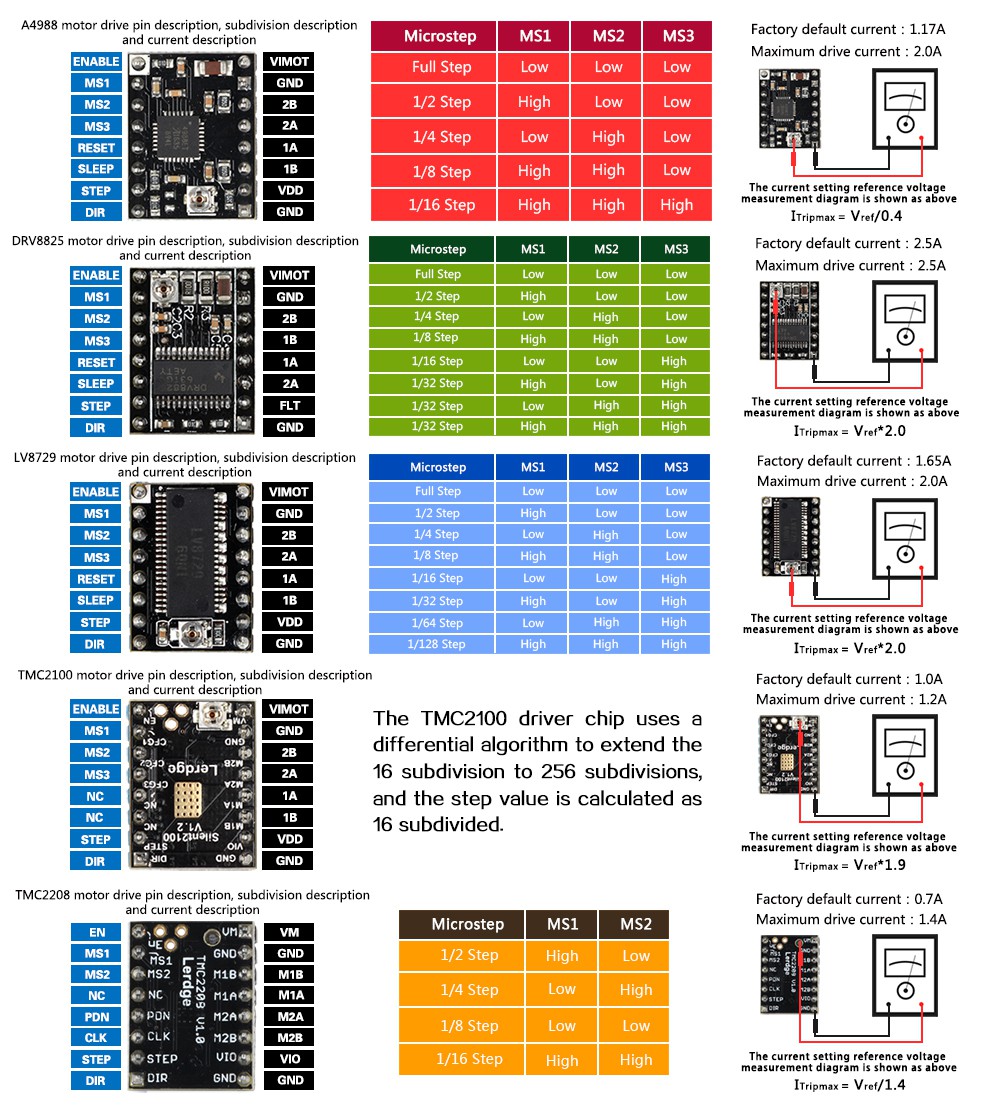
There are several different stepper motor drivers you can get. I won't go into all the details of them but if you want a quiet driver then look at the TMC2208 or higher, if cost is a factor then look at the A4988.
Modern drivers can run with different amounts of micro stepping. This is where the driver carefully mixes the current goin to each coil to hold the motor partway between poles to increase the step resolution and to smooth out the motion. I tend to run my stepper motors at 1/16 steps, this is a nice compromise between too rough and too many steps.
The above chart can be used to work out how best to setup the jumpers for micro stepping, in addition it shows you the preferred orientation of the board. If you get confused look for the enable pin on the board and cnc shield and make sure they line up properly.
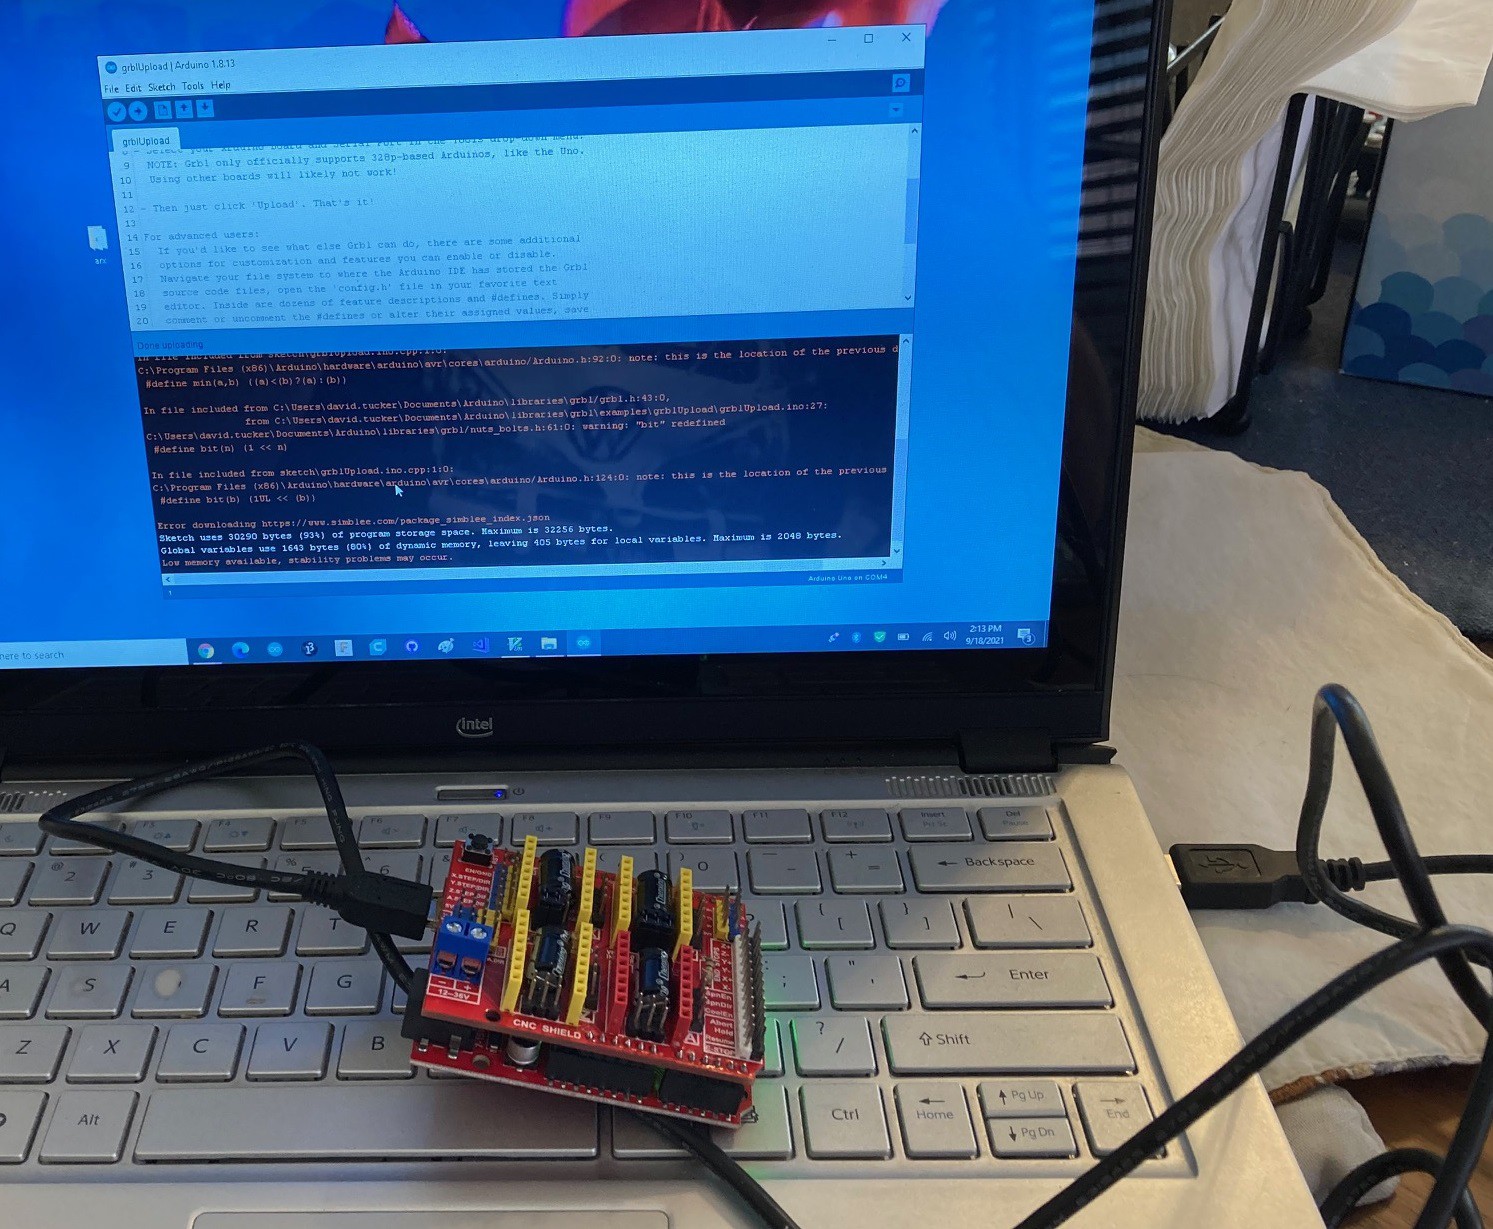
The first step once you have all your parts is to download grbl and install it. I won't go into all the details, but basically you install the Arduino ide, unzip the grbl package, and compile the grblUploader project to send it to your Arduino uno. I recommend you do this before attaching the grbl shield to your Arduino, this way your not fighting with any issues the shield may have when trying to install grbl.
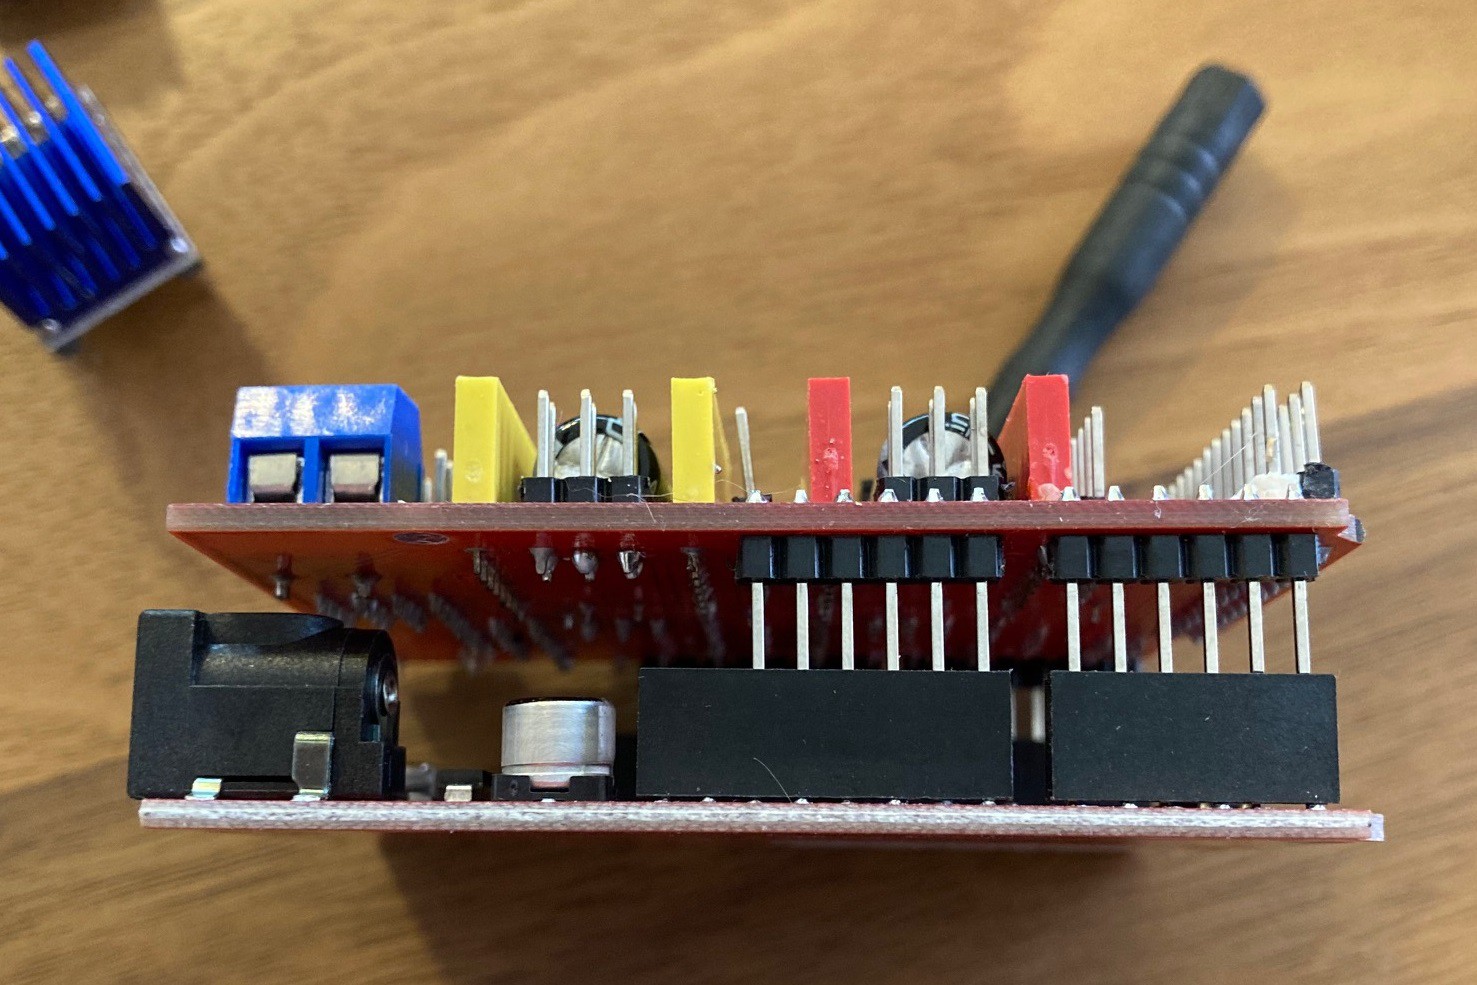
Next we can attach the shield to the Arduino. Unless your Uno is really old you will find it has more spaces for pins than the grbl shield. Look for the gaps between the pins to make sure you are lining it all up correctly.
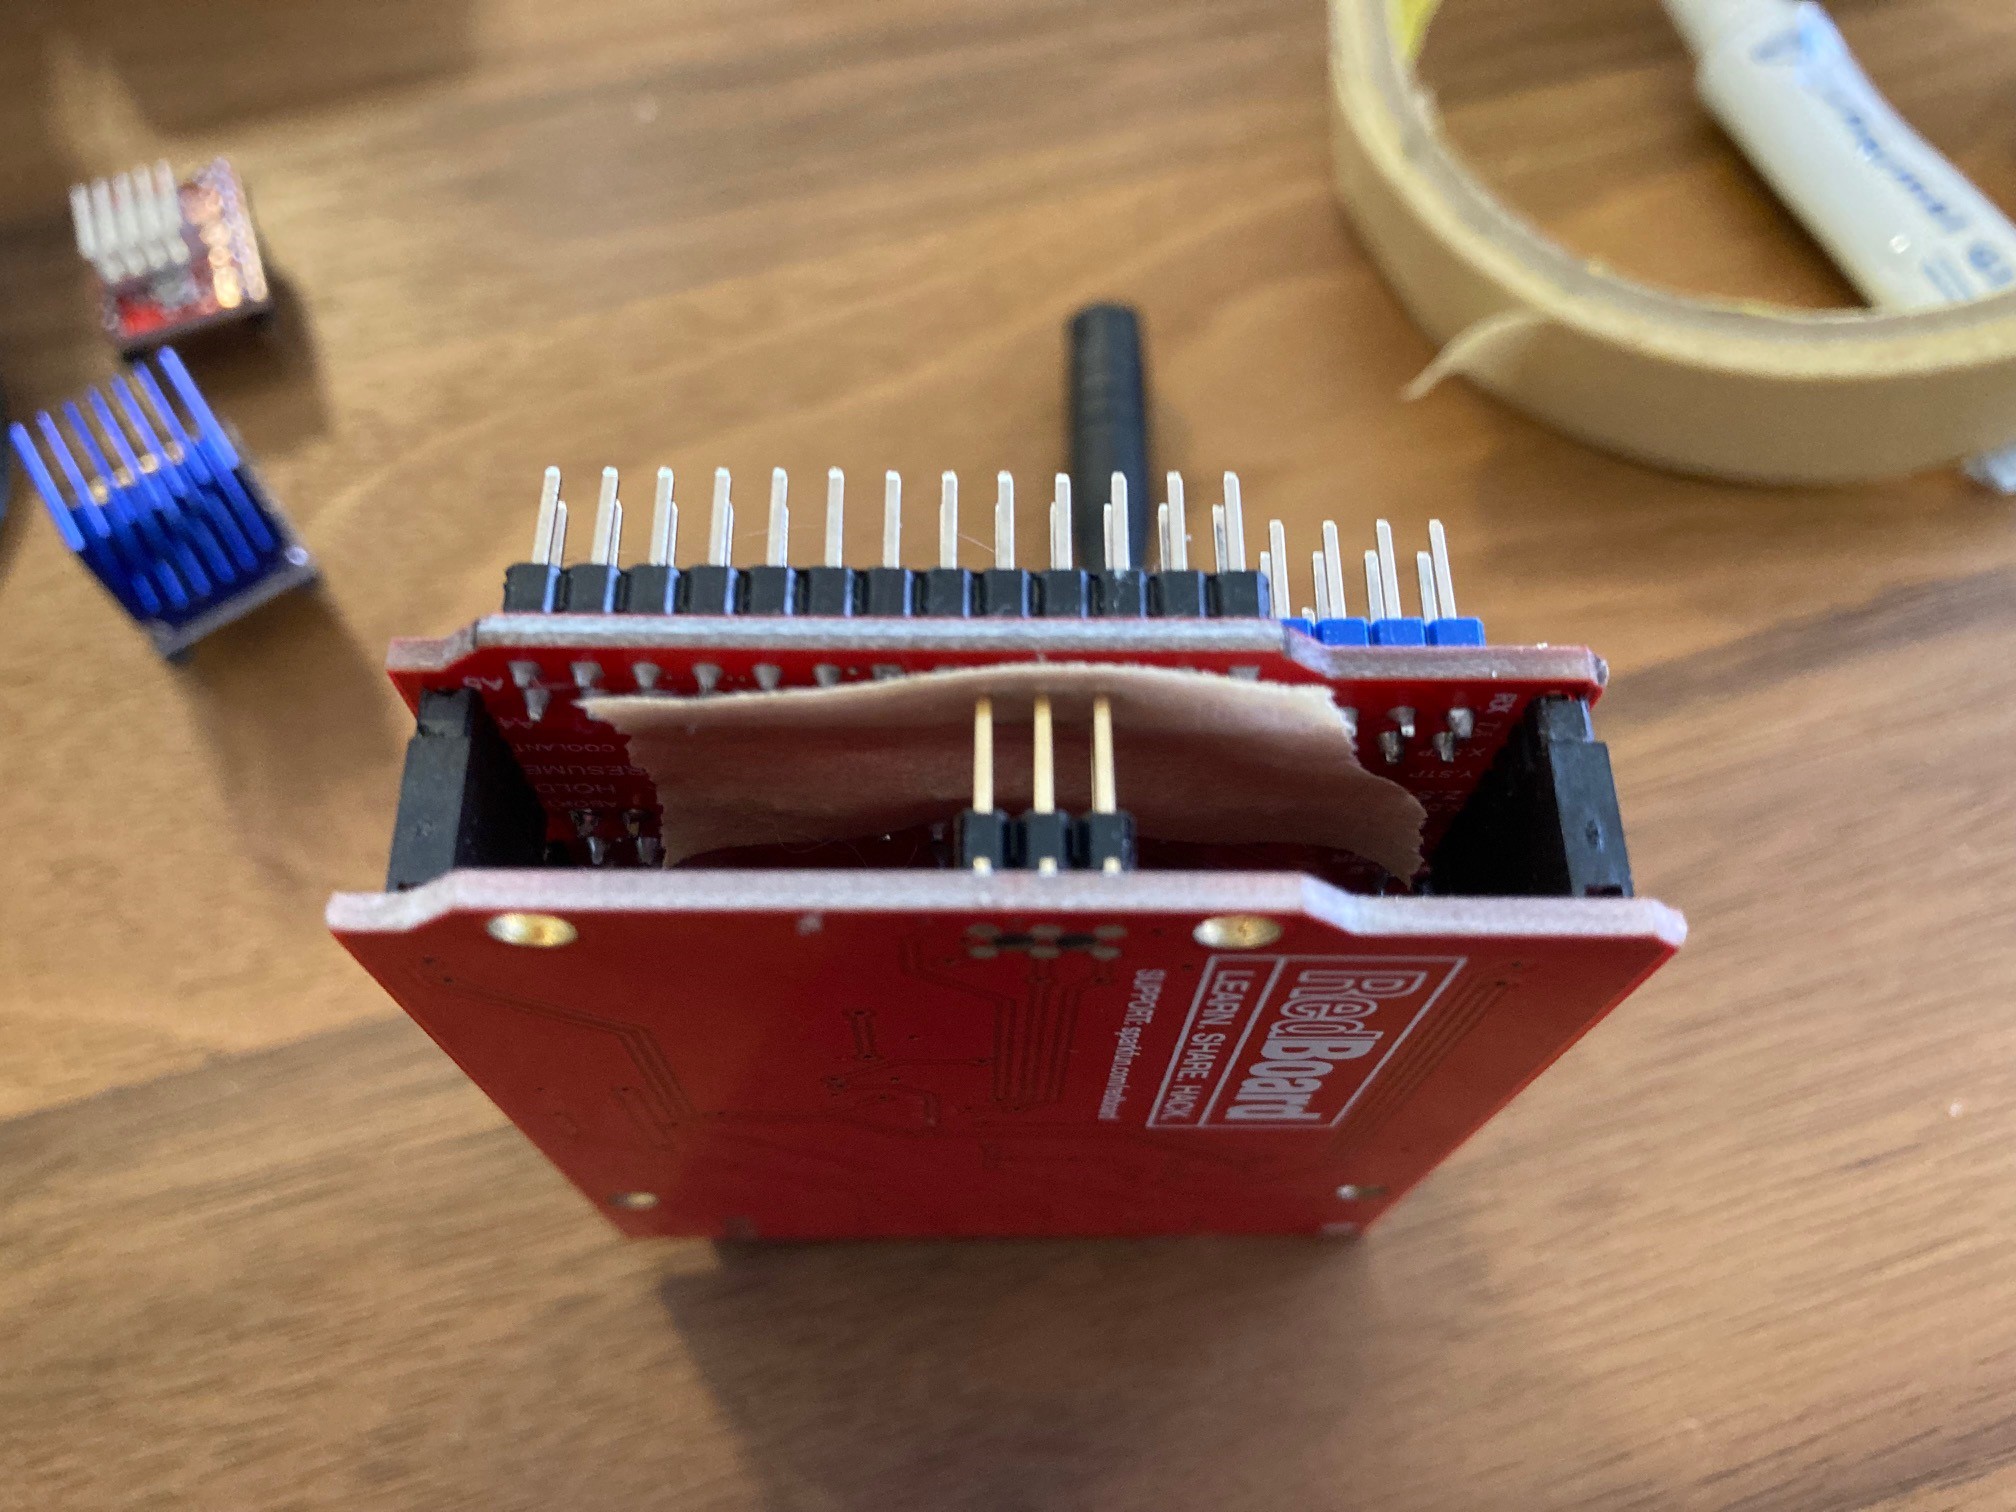
Some boards have extra SPI header pins on them that can come into contact with the bottom of the grbl shield. A piece of tape can help keep the pins from shorting out. Also watch the USB plug on older uno boards that have a full sized usb jack.
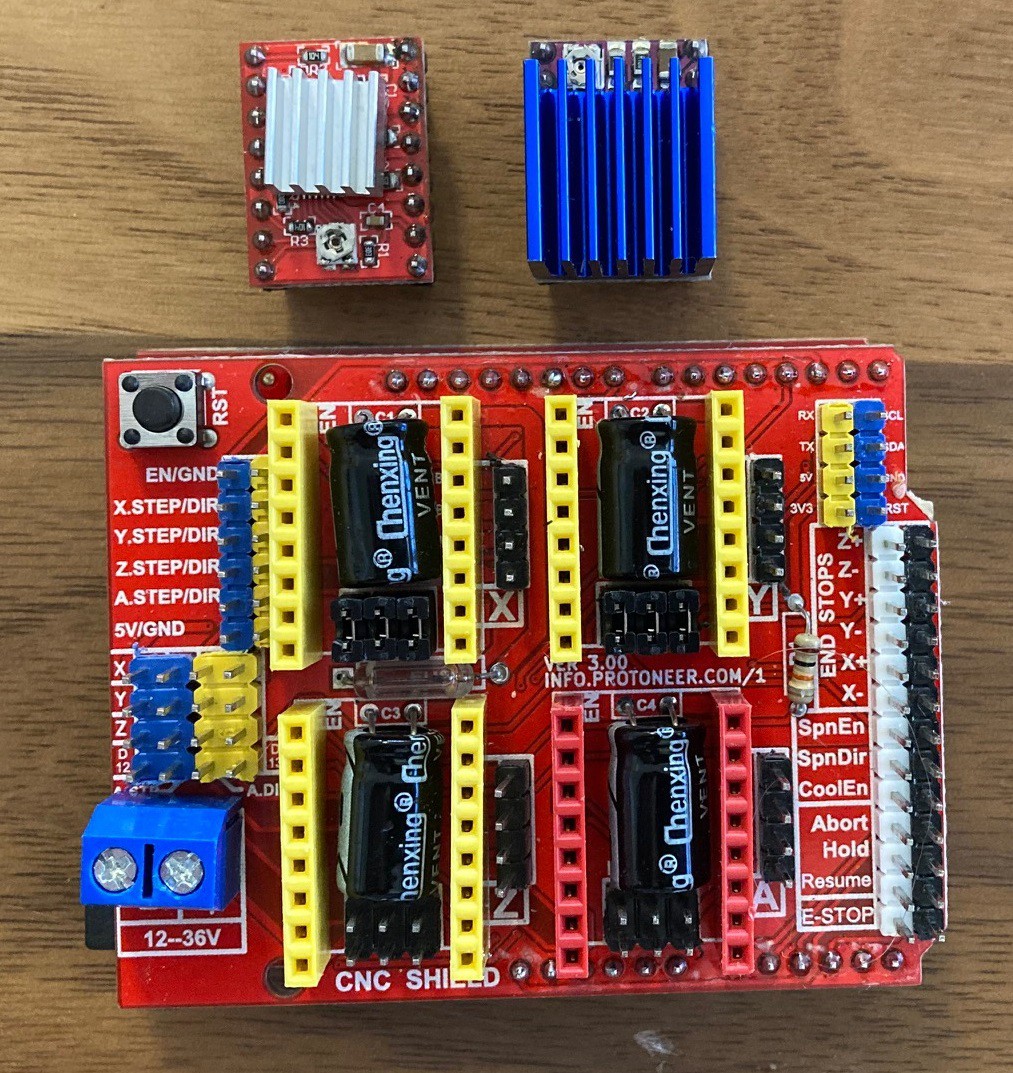
Following the diagram above, set the jumpers between the yellow headers to match your microstepping. Sown here are the proper jumpers and driver orientation for both a A4988 (left) and DRV8825 (right) driver. Go ahead and plug in the drivers in the appropriate slots (usually x/y/z) for your needs. Remember to line up the enable pins on the grbl shield and drivers or you could cause damage to the driver.
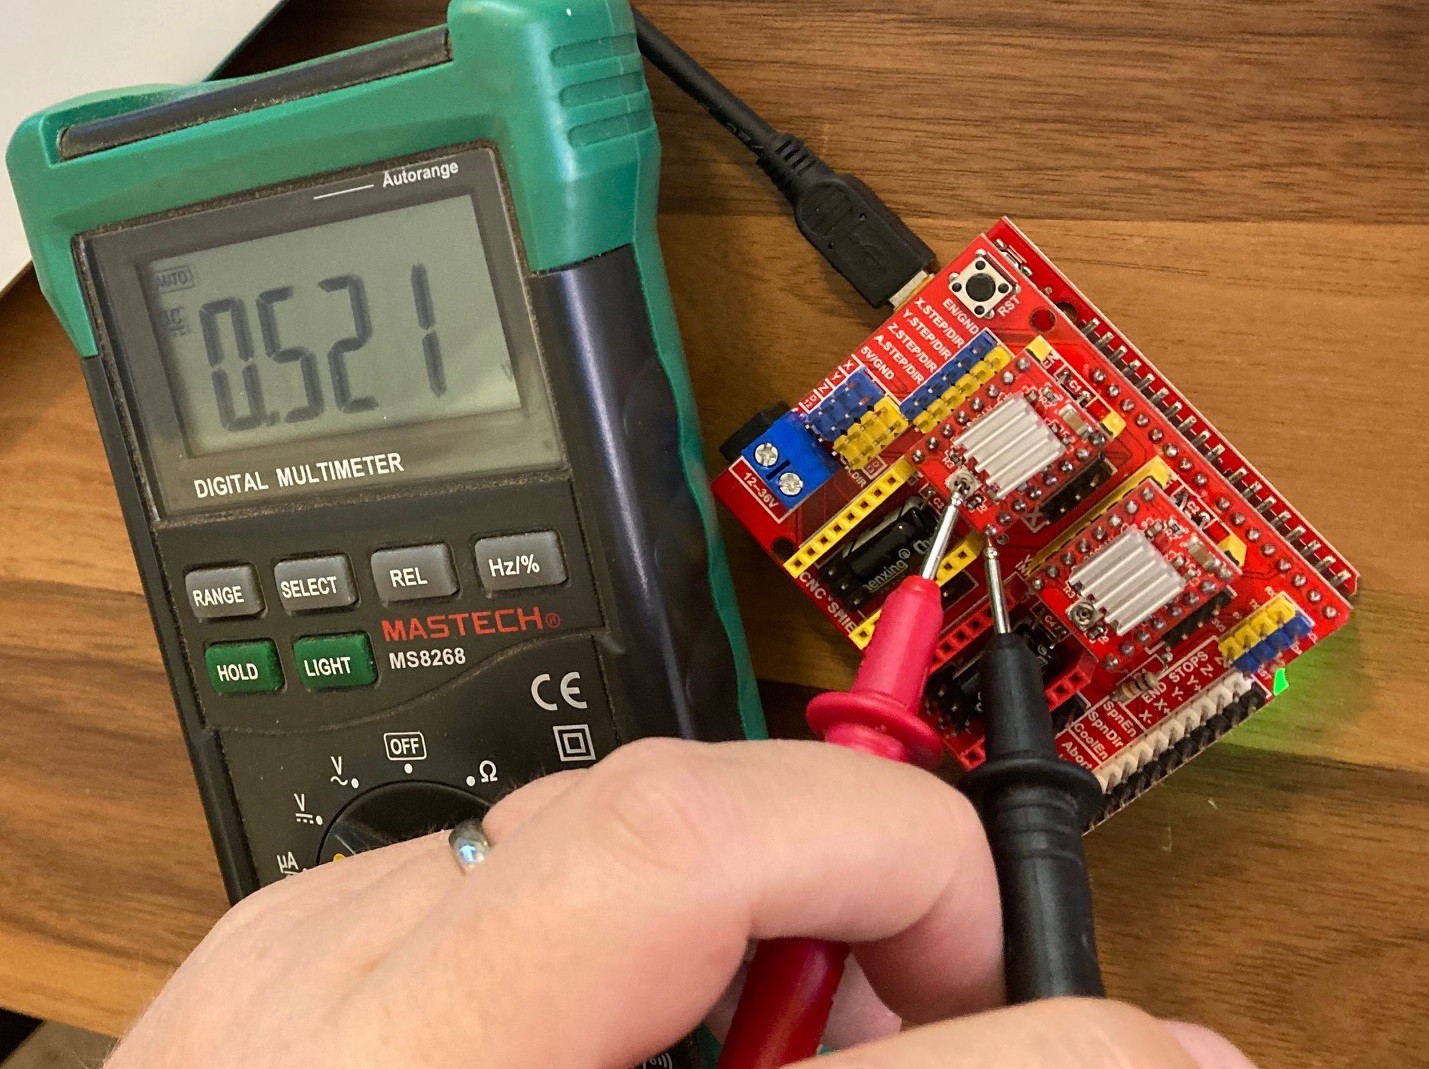
We need to make sure the current is set right for the drivers or we won't get the torque we were hoping for and may cause the driver to overheat. With the stepper motor and stepper power supply disconnected, use a multimeter measure the dc voltage between the trim pot on the driver and the ground pin. Use the above diagram to guide you on where each are located. With the voltage recorded we can use the formulas in the diagram above to work out the current.
For the A4988 the recommended current is 1.17 Amps, but you can try to drive it up to 2 amps, if you provide active cooling. The equation given says that current equals voltage divided by 0.4. In this case 1.17 amps = v / 0.4 or v = 1.17 * 0.4 or roughly 0.5 v.
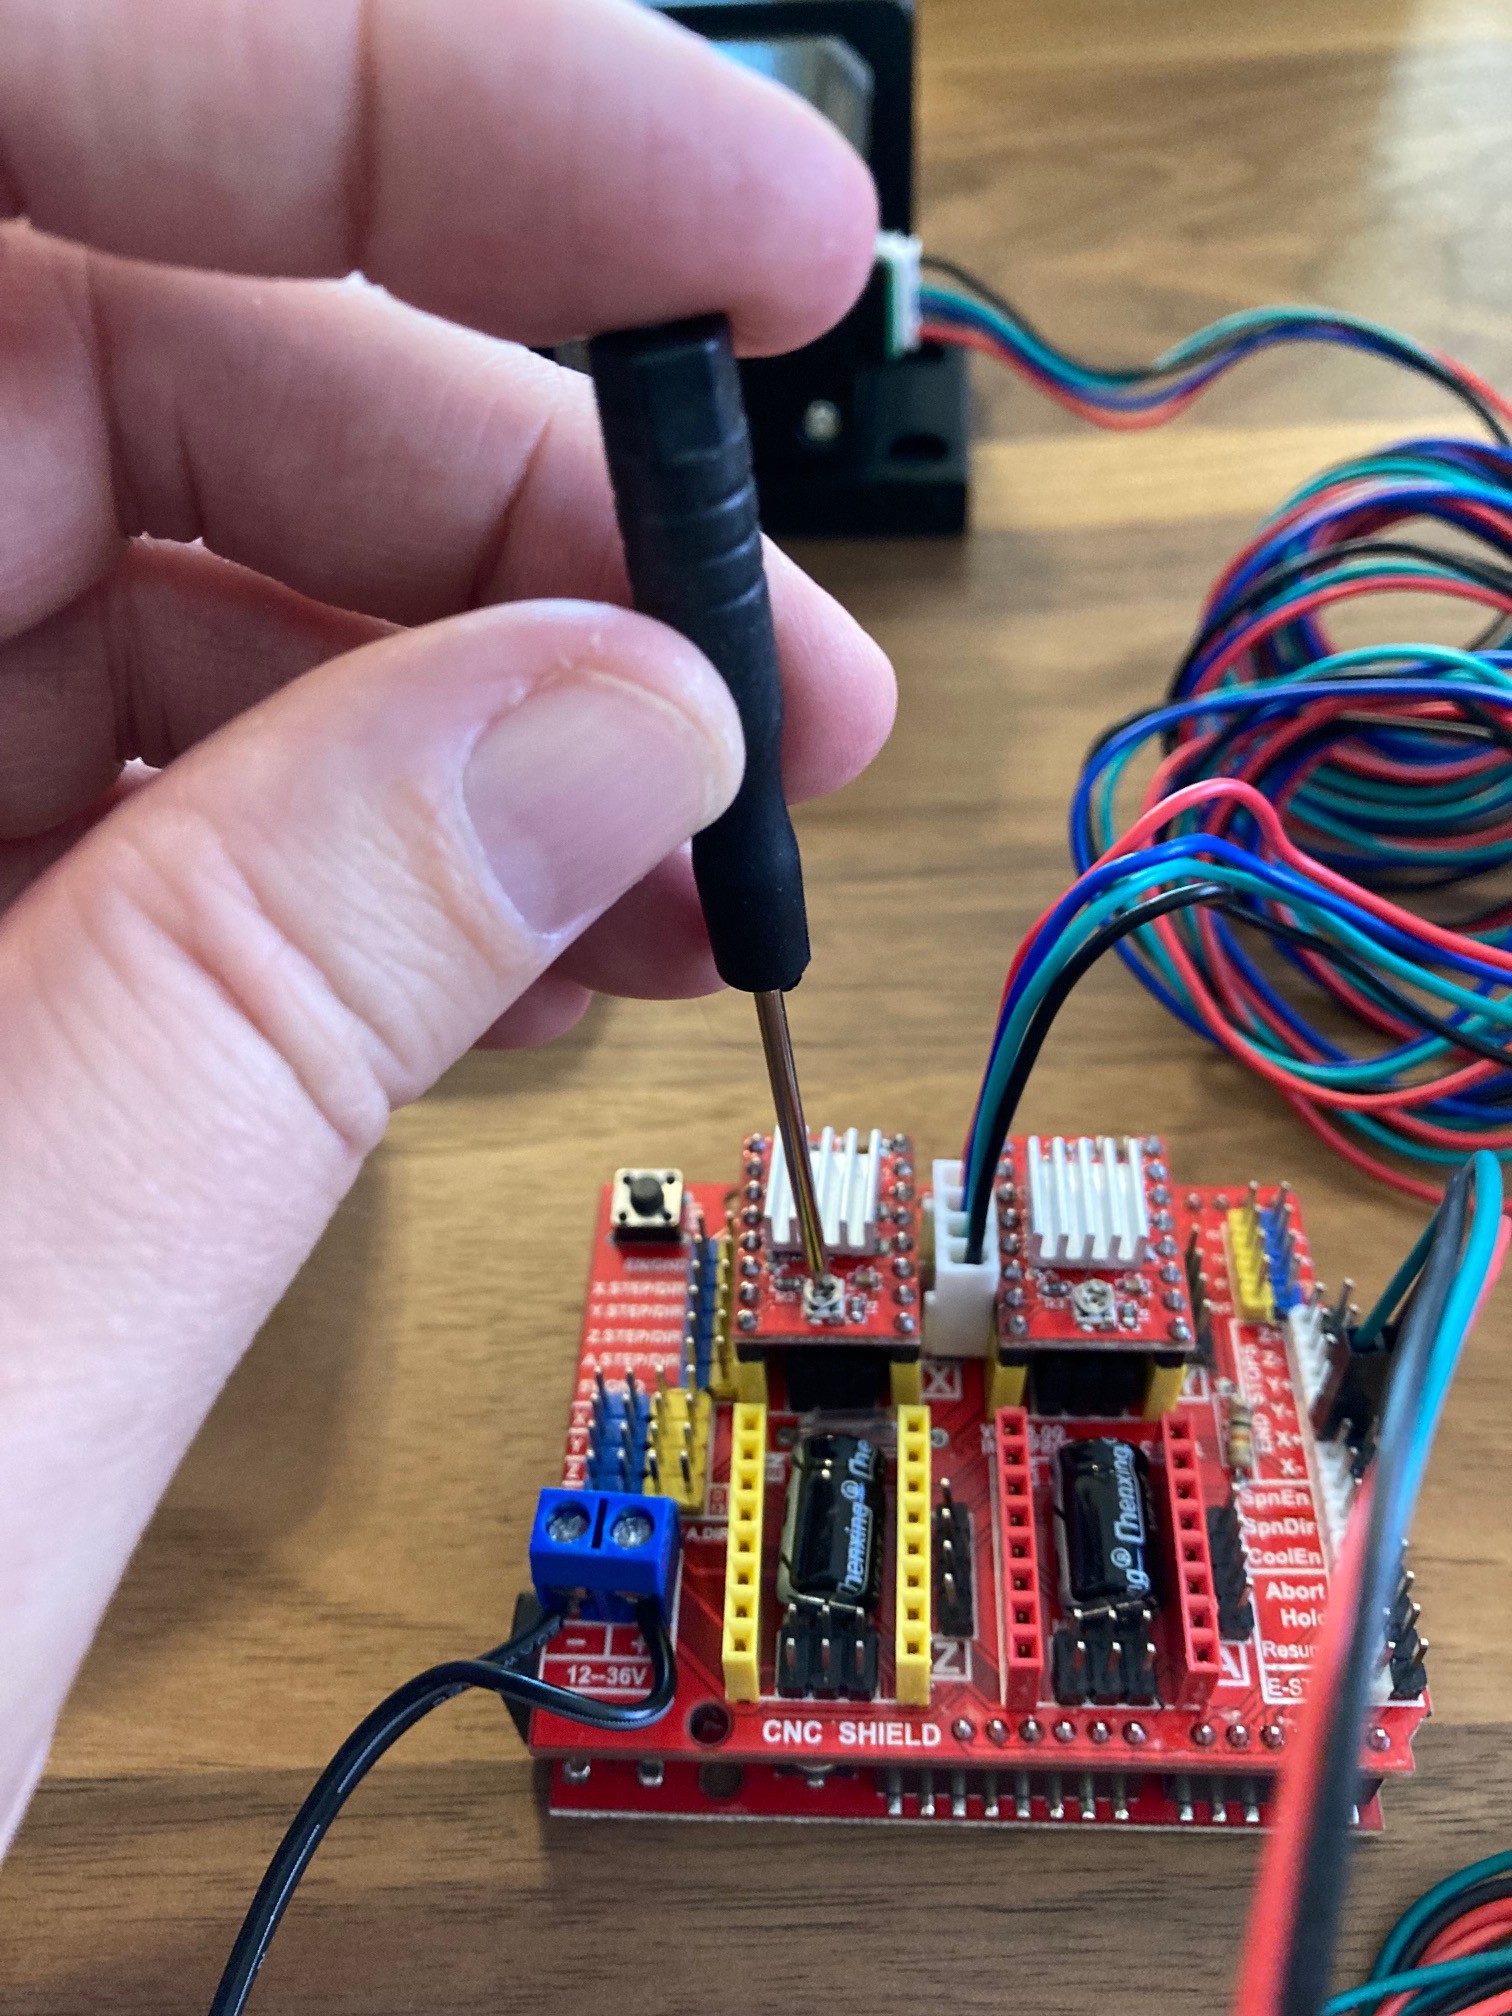
If you need to adjust the voltage, find a small screwdriver and gently turn the trim pot left or right, double checking the voltage as you go. be careful not to damage the pot, or to turn it past its limit of travel.
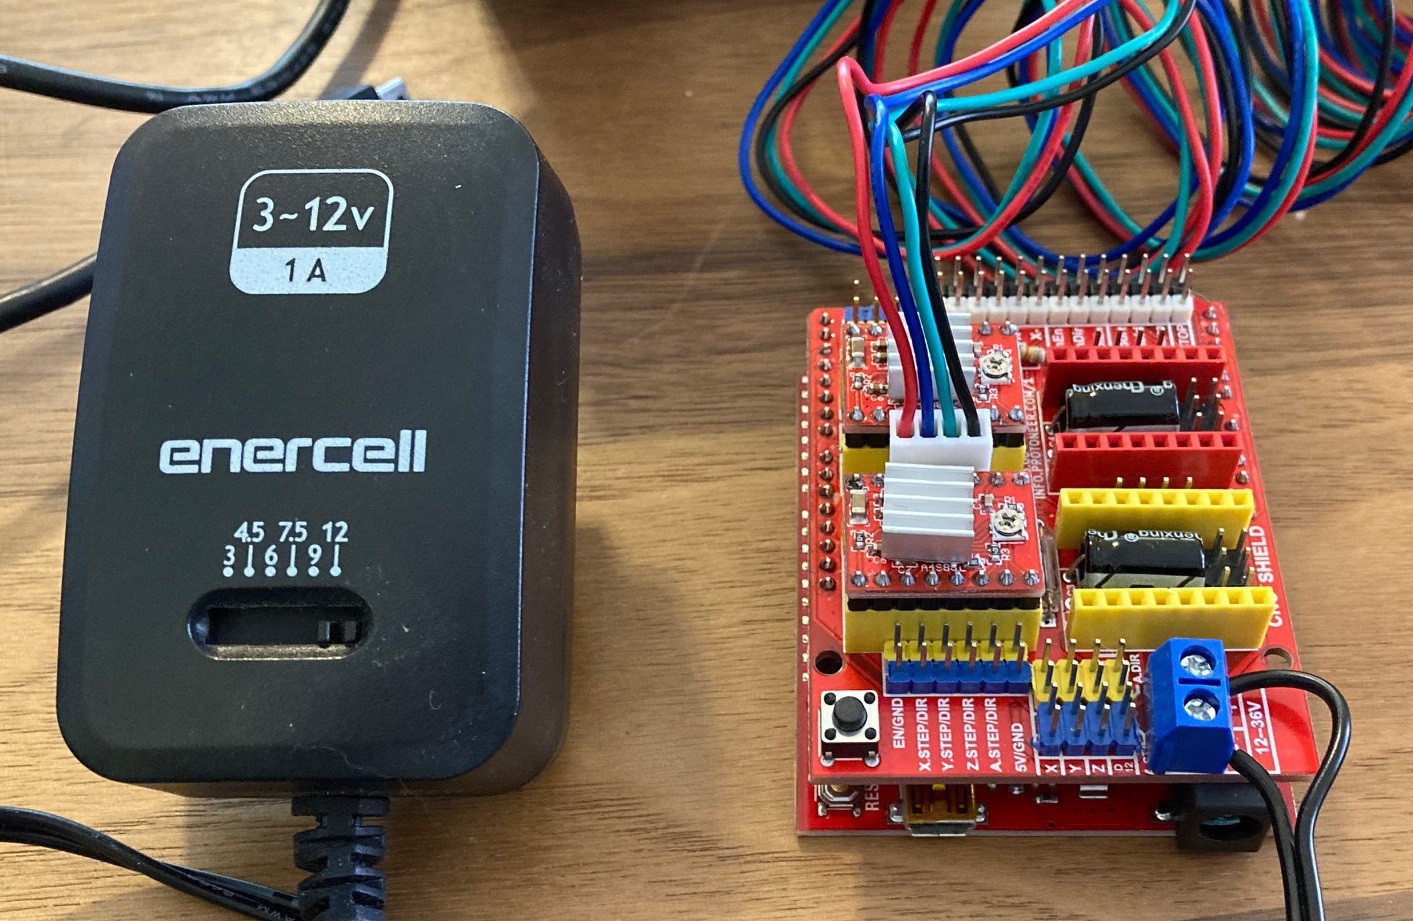
With the drivers all set up we can wire in our stepper motor power and plug the stepper motors in as well. Be sure to double check what lead is positive on you power supply. A word of caution, if you need to remove the stepper motor or driver, be sure to unplug the power supply first or you can cause permanent damage to the stepper driver or uno.
Plug it all in, bring up universal gcode sender, and run the setup wizard to make sure your steppes are working.
Note, the power supply shown here is much too small to really run a steppre motor. It claims to be a 12v 1A power supply, but being a variable power supply it really is a 3v 1A supply, at 12v it can only produce 0.25A, well below the power requirements for even one stepper motor. I can easily stall this stepper motor out with my hand using this supply. You really want at least 3 amps, and ideally 24 volts as well to ensure the stepper motors keep there power when spinning faster.
 David Tucker
Discussions
Become a Hackaday.io Member
Create an account to leave a comment. Already have an account? Log In.