 David Tucker
So I needed a tailstock for my rotary axis so I can use my spindle with it. I came up with this over engineered solution that is working well but is way overkill for what my small rotary axis needs.
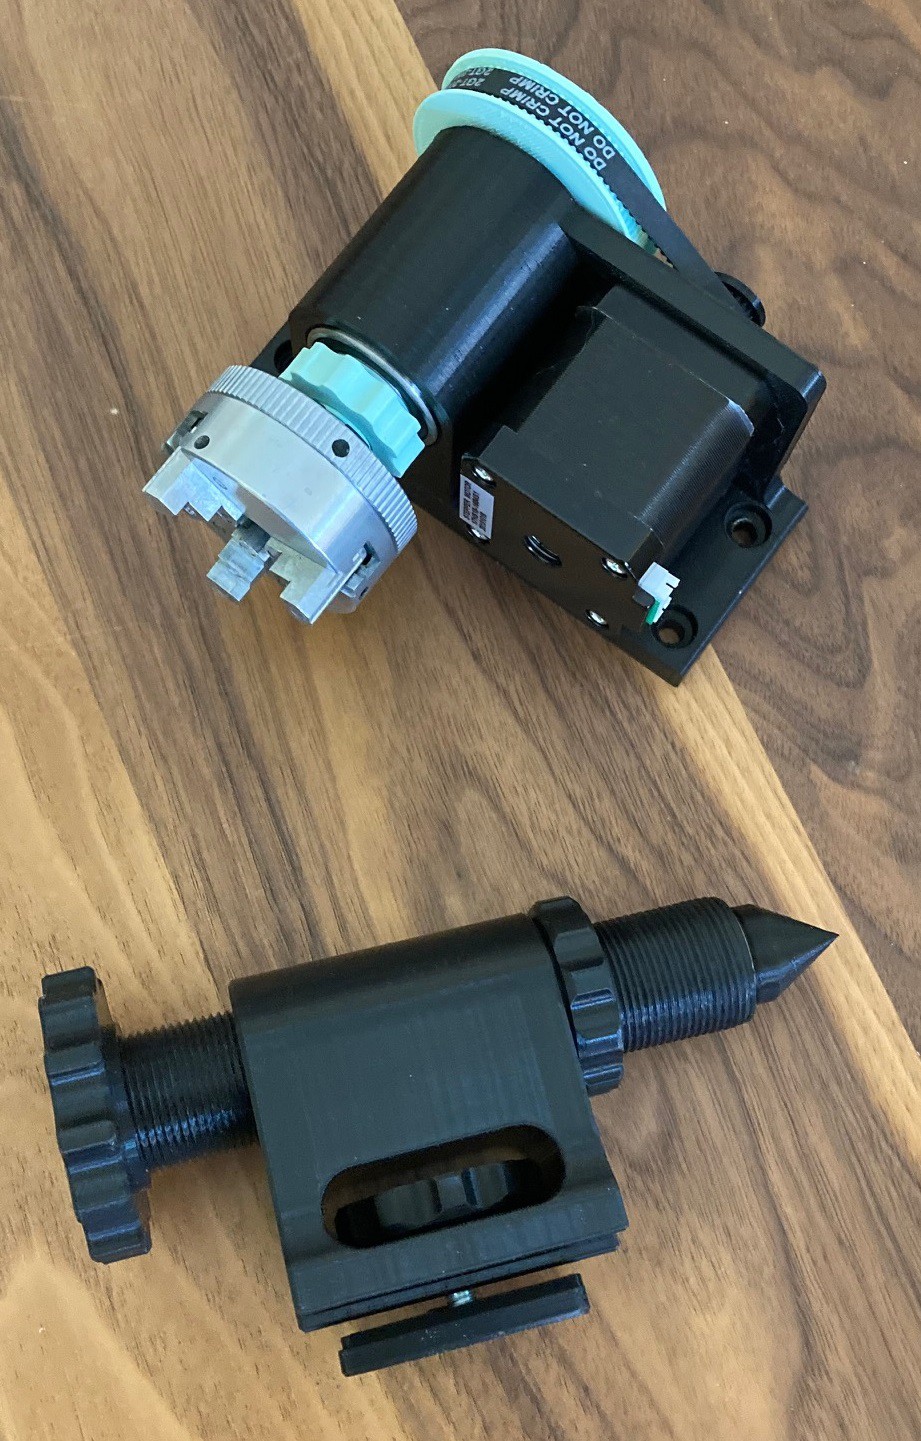
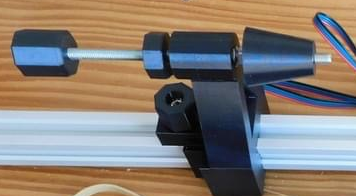
This is truly 3D printed with only one M6 bolt/nut and a skateboard bearing in the tip. The whole thing is very solid, all but the quill at least.
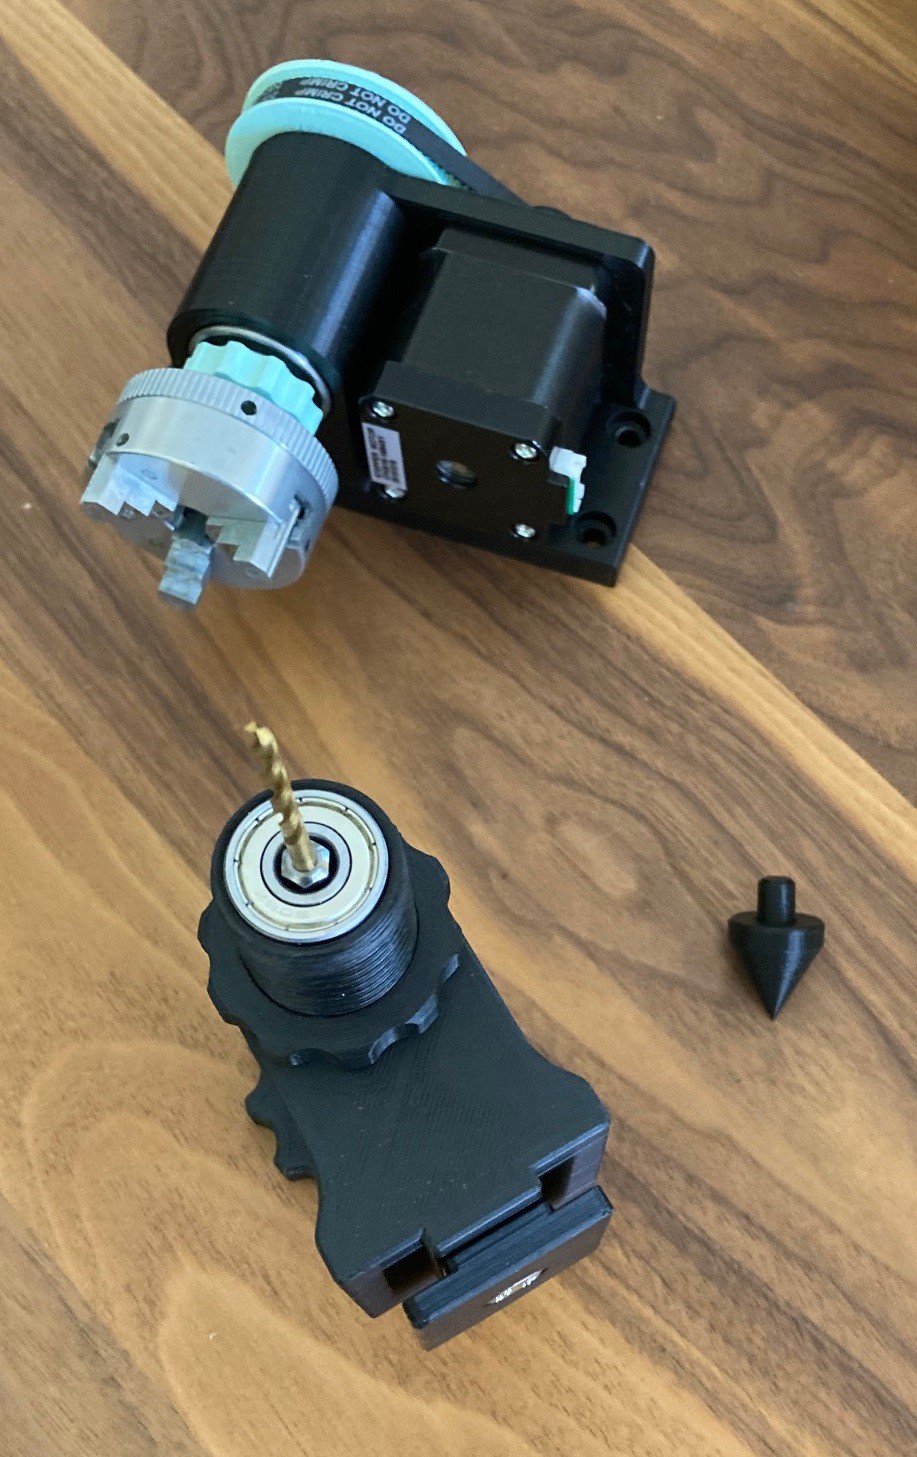
One unique idea is that there is a small (3D printed) socket hidden behind the quill so you can insert hex driver accessories in place of the quill.
The big downside here, other than just being rather large, is that the 3D printed threads are a big pain. They are fiddly to clean up and they tend to get sticky. If you lightly heat them with a hair dryer they will reform as you thread the parts together, that can help a bit. The key is lightly, only heat for a few seconds at a time, it is easy to over do things and ruin the part.
---
Anyway this would be great if you had a small wood lathe you were working on, but it needs to be slimmed down to go with my rotary axis. In particular the rotary axis does not have a whole lot of holding power and does not spin very fast.
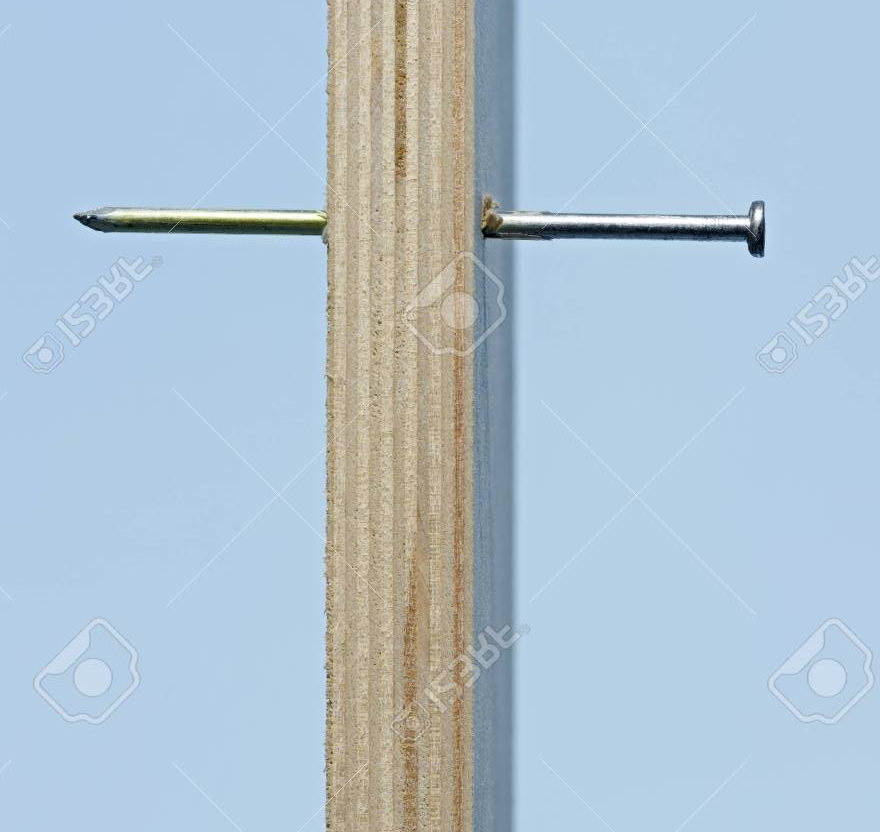
The simplest idea is to just put a nail through a board and use the tip as a rest, or any similar setup with a pin and holder. This works because our rotary axis is not rotating fast so we don't have a lot of friction. This is by far the cheapest and simplest solution. It does have three downsides however.
- The tip of the nail will wear into the material over time, causing the connection to become loose.
- Because we don't have a fine adjustment we are relying on just sliding the tailstock next to the workpiece for support. There is no way to add in any extra clamping force. That will require a deeper hole in the workpiece to make a solid connection.
- Swapping the workpiece out becomes a laborious effort without a fine adjustment, we essentially have to setup the whole operation every time, making repeat operations cumbersom.
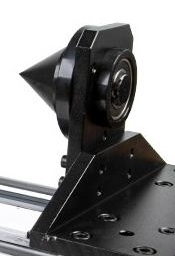
The next idea is to add in a proper quill and bearing to the setup but not use any sort of a fine adjustment. That takes care of the first problem of wear on the end of the workpiece but nothing else. This adds only a small amount of complication, we have added a bearing and have to fabricate multiple parts, but it is still relatively minimal.
The last step is to go all in and add a fine adjustment to the setup so we can apply a clamping force and quickly release the tension and swap workpieces without needing to readjust the base and risk messing up the alignment. I like the idea of using a threaded rod or bolt for this setup, I will try to find something tomorrow to act as the base. That should give me the same precision and stability as my 3D printed solution but hopefully in a smaller package.
Discussions
Become a Hackaday.io Member
Create an account to leave a comment. Already have an account? Log In.