Close
0%
0%

2600 Magazine Storage System

I could never find a good way to store issues of 2600, so I made one.

Similar projects worth following
I've been subscribed to 2600 since the early 2000s, and recently decided to bite the bullet and buy all the back issues to 1995. That meant I needed a way to securely store 100+ issues of a magazine that comes in such an odd-ball size that nobody actually sells anything to put them in.

I wrote a letter to 2600 asking what they did store their own back issues internally, and they responded with "You don't want to know". So I was left with no choice but to design and build my own storage boxes. I wanted something that would keep them tightly packed, but still easily accessible. Protection from dust and moisture was also important, and naturally, they needed to look good sitting on the shelf.

The box was designed so that each holds exactly 20 issues, meaning two boxes represents an entire decade of hacker history. Perhaps others with their own extensive library of this particular zine will find the design useful. There must be dozens of us.

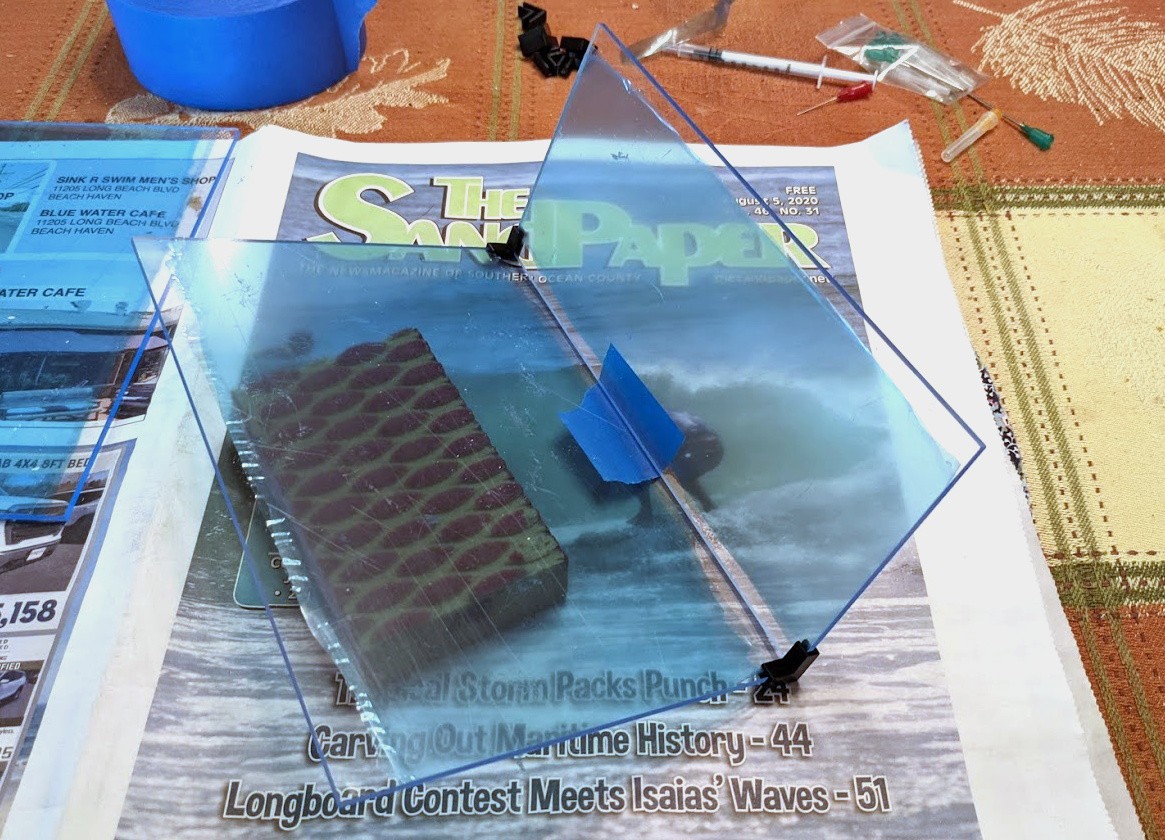
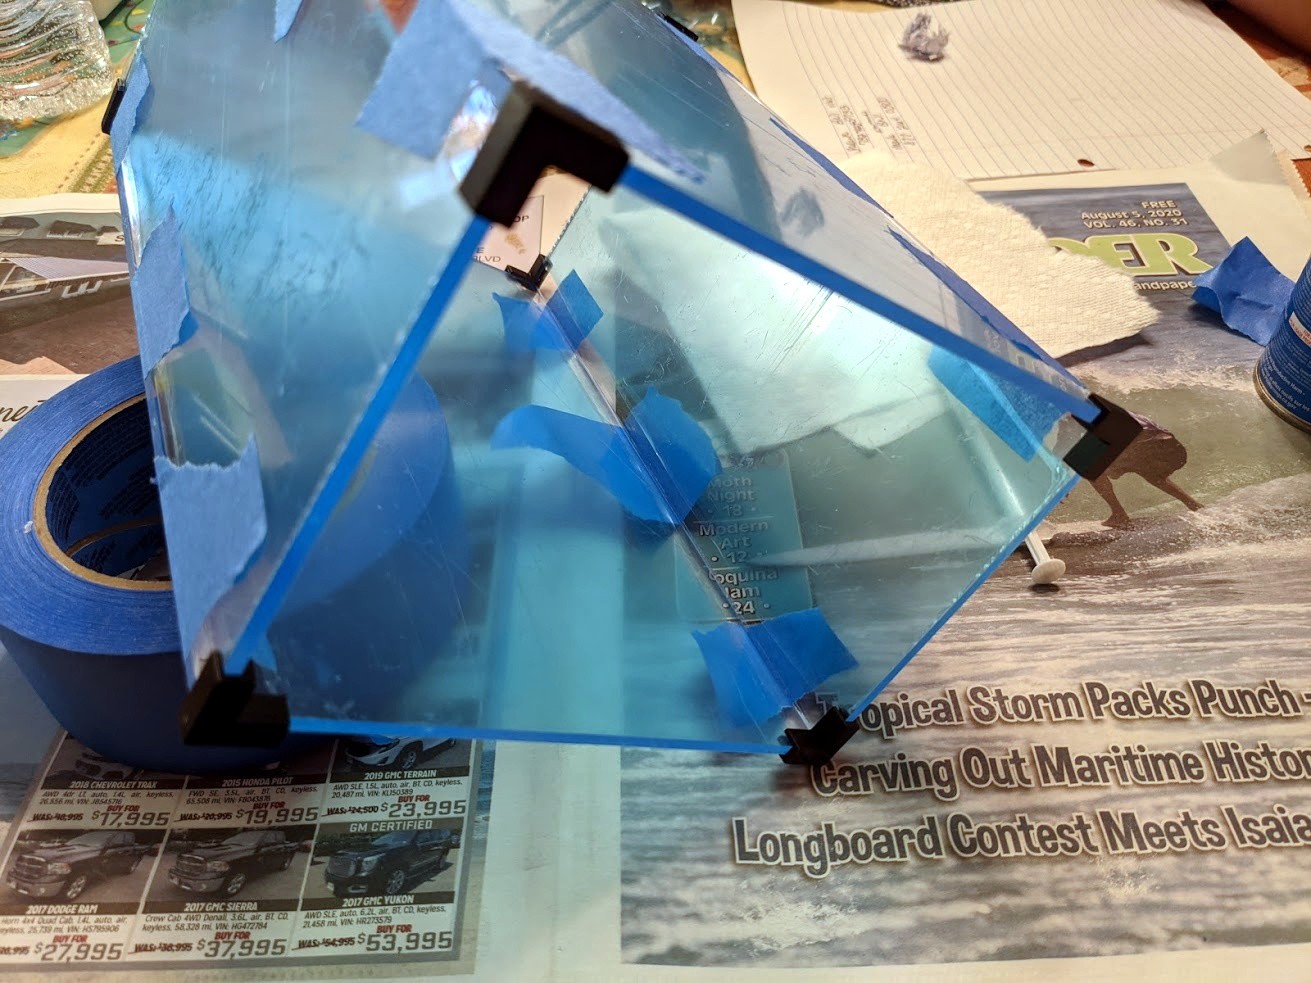
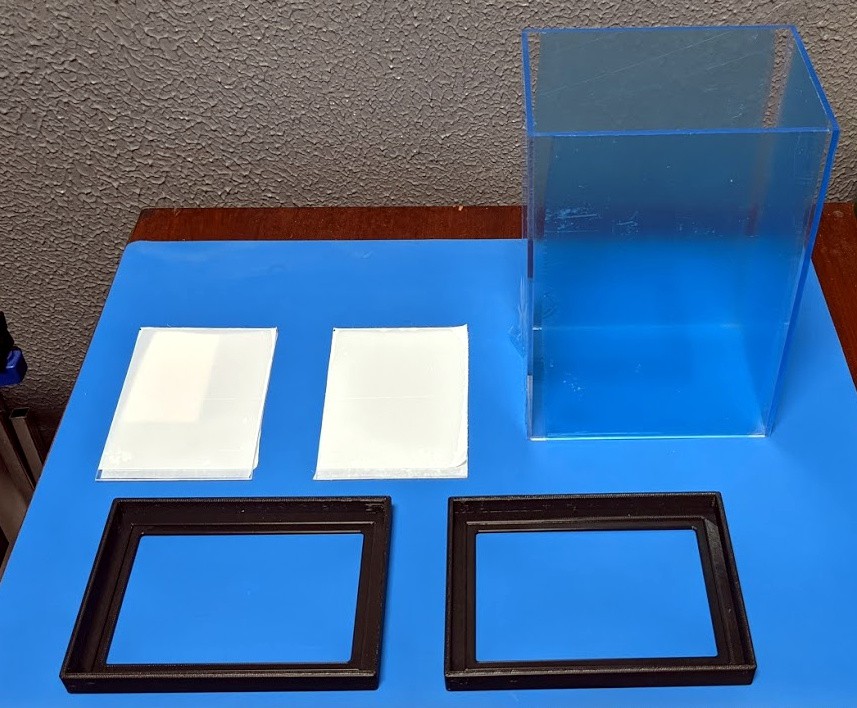
Each box is made up of four pieces of 3 mm acrylic sheet, bonded together with Weld-On 4. The side panels are 150 x 220 mm, and the front/rear panels are 100 x 220 mm. As I don't have access to a laser/CNC currently, I ordered them custom cut from TAP Plastics. 

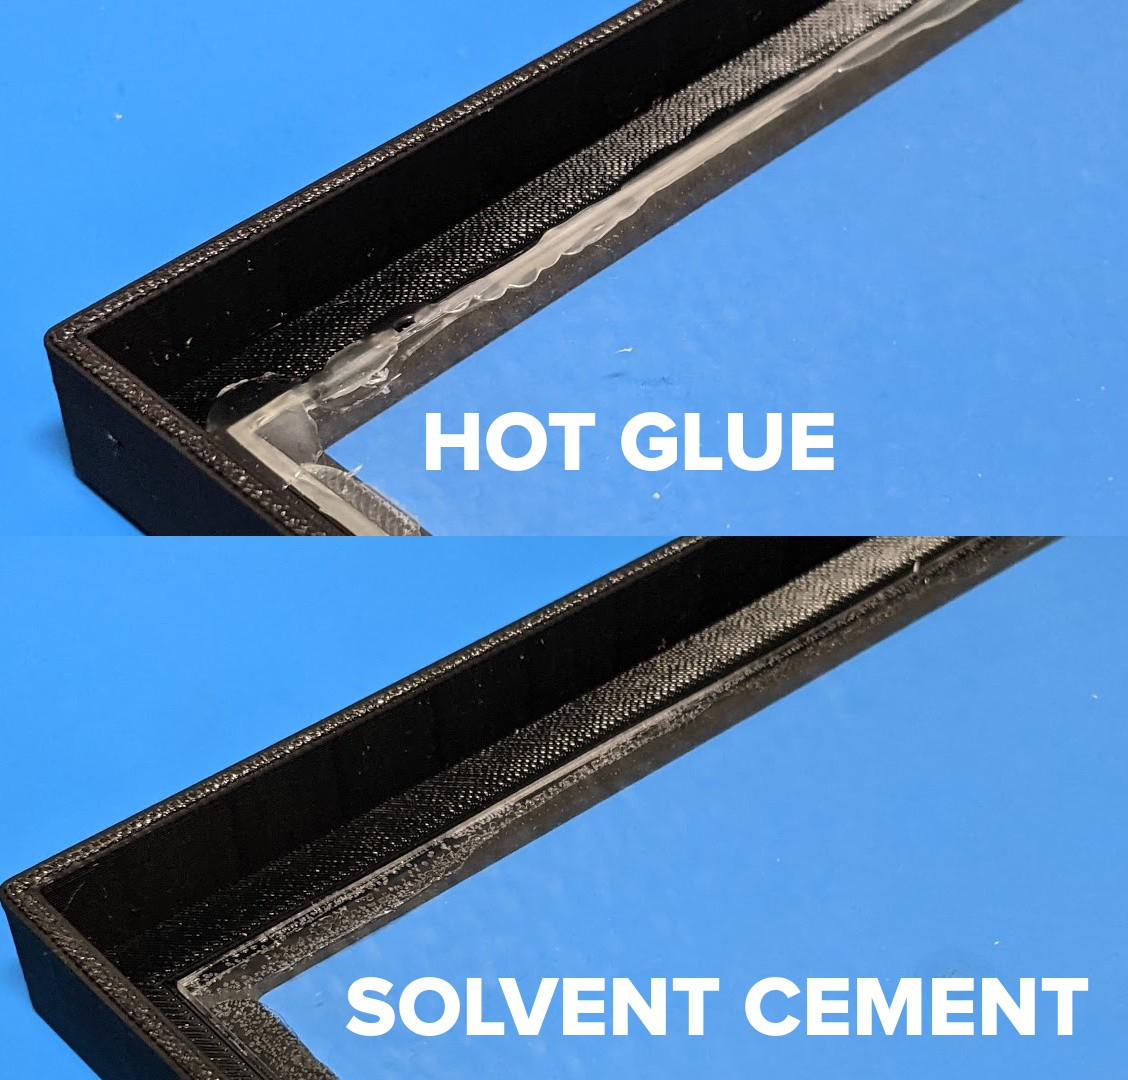
The end caps are 3D printed in PETG to resist warping. Both end caps are identical, and are designed to be tight enough that the top can be held on with friction, and a bead of hot glue keeps the bottom one affixed. To reduce printing time, I put a window in the end cap that gets filled with another piece of acrylic. This saved an hour of print time for each cap (or 12 hours over total project), but in the end the added assembly time and effort to fit the hand-cut acrylic windows meant it may not have been worth it.

cap.stl

End cap with opening for acrylic window, as used in the final project.

Standard Tesselated Geometry - 72.26 kB - 12/05/2020 at 03:09

Download

corner_jig.stl

Used to hold the 3 mm acrylic sheets at a perfect 90 degree angle while gluing. Optional, but highly recommended.

Standard Tesselated Geometry - 5.72 kB - 12/05/2020 at 03:49

Download

cap_solid.stl

Alternate end cap without acrylic window, will take longer to print.

Standard Tesselated Geometry - 35.54 kB - 12/05/2020 at 03:09

Download

cap.scad

Parametric OpenSCAD file to create custom end caps.

x-openscad - 1.22 kB - 12/05/2020 at 03:09

Download

  • Image Test

    Tom Nardi07/20/2023 at 00:16 0 comments

    MS3FGX  7:19 PM
    Test
    MS3FGX  7:19 PM

  • Test Table Mode

    Tom Nardi07/19/2023 at 17:31 0 comments

    bilherd  3:07 PM
    I "cheat" and use the vendor specific tools such as Altera and Xylinx, what are the open source alteratives?
    salec  3:07 PM
    You compiled your notes, professor!
    DPM  3:07 PM
    How about a "Best choice for beginners" in logic simulators?
    christoph  3:07 PM
    oh good evening!
    bilherd  3:07 PM
    I submit that Al is really a simulation (ssshhh... don't tell him)
    wd5gnr  3:08 PM
    Al or AI?
    wd5gnr  3:08 PM
    So...
    craigcc.frii  3:08 PM
    Didn't know Falstad had CPU models, sweet!
    wd5gnr  3:08 PM
    I guess the first thing to think about is what you want to accomplish
    Foundation  3:08 PM
    I saw recently some apps to pull circuit diagrams from images. Then lots of groups doing SPICE circuit simulations. And lots of videos of beginners (hackers) drawing circuits by hand, and then mumbling half remembered rules for how to calculate basic voltages, currents, couplings and frequencies.

  • New Printer, New Size

    Tom Nardi03/21/2021 at 01:17 0 comments

    Fun fact, 2600 switched printers for this latest issue, and the magazine is now almost 5 mm narrower than before.

    This isn't a huge deal (at least it's not wider), but does mean the new issues will rattle around more than they should in the boxes. Incidentally this isn't the first time they've changed printers, so the sizes of the issues have drifted a few mm in either direction over the years. Pre-2000 or so, they were actually quite a bit thinner as well.

View all 3 project logs

  • 1
    Acrylic Box Assembly

    I designed small 3D printed corner pieces to hold the acrylic sheets at a perfect 90 degree angle, and used blue painters tape to pull them together tightly. Using a syringe, I ran a small amount of Weld-On 4 down the length of the joint from the inside. You only have a few seconds before the pieces are permanently bonded, and it's important to make sure the ends are flush or else the caps won't fit properly.

    To make it easier, I suggest focusing on one joint at a time and slightly elevating the longer end so that the solvent cement naturally flows into the corner. It's also a good idea to keep the protective plastic on the sheets until the end, so that any accidental drops of cement don't mar the surface.

    With all the corners were cemented, I would set the box (with the printed corner pieces still attached) vertically for about 30 minutes before disturbing it. The Weld-On 4 documentation says it can take 72 hours for the bond to reach 80% strength, but I found they were solid enough to handle after just a few minutes. I usually waited overnight before adding the end caps.

  • 2
    End Cap Assembly

    As mentioned in the description, I put a window in each end cap as it saved approximately an hour of print time per cap. To fill in the void, I hand-cut pieces of 1 mm acrylic and glued them into place. Because of the way the cap is designed, the magazines are not actually supported by the acrylic in the window; so there's no problem to go thinner here. It's really just to keep out the dust.

    For most of the boxes I used hot glue to hold the window in place, but it was a bit of a mess. Towards the end of the project I realized that the Weld On solvent cement used to hold the acrylic sheets together will also melt the PETG used to print the end caps, which meant I could run a bead of solvent on the lip of the window opening and just drop in the acrylic. This was not only faster than using the hot glue, but made for a stronger and cleaner looking installation. I was half-tempted to go back and redo the hot glue end caps, but even I'm not that crazy.

    Once the windows are installed in the end caps, one of them needs to be glued onto the bottom. I used hot glue for all of these, even after I switched to solvent cement for the windows, because the mating surface between the printed PETG and smooth acrylic sheet has too many voids.

    This process has to be done very quickly so I never got a picture of it, but essentially I ran a bead of hot glue around the entire inside of the end cap, keeping it close towards the open end. That way, when the acrylic box was pushed down into the end cap, it would pull the glue down with it.

View all instructions

Enjoy this project?

Share

Discussions

Similar Projects

Does this project spark your interest?

Become a member to follow this project and never miss any updates