As far as projects go, this one was actually really straightforward. If it weren't for the tedious calibration steps, this could have easily been a one- or two-day project. Here's the breakdown:
Hardware
The hardware for this project is super simple and super cheap. Each window consists of the follow components:
- Stepper Motor and Driver Board
- 1/2 in PVC pipe cut to length
- Curtain (mine were cut from discarded black-out curtains)
- 3D-printed motor mount
- 3D-printed idler mount
In addition to this, there was also a main controller board that drives both windows. It is made up of an ESP8266 Huzzah Breakout and a 5V 4A power supply, both from Adafruit. All together, this project should cost less than $50, depending on what you have lying around. I had almost every single part spare, so all I needed was the power supply and ESP8266.
The Control Board
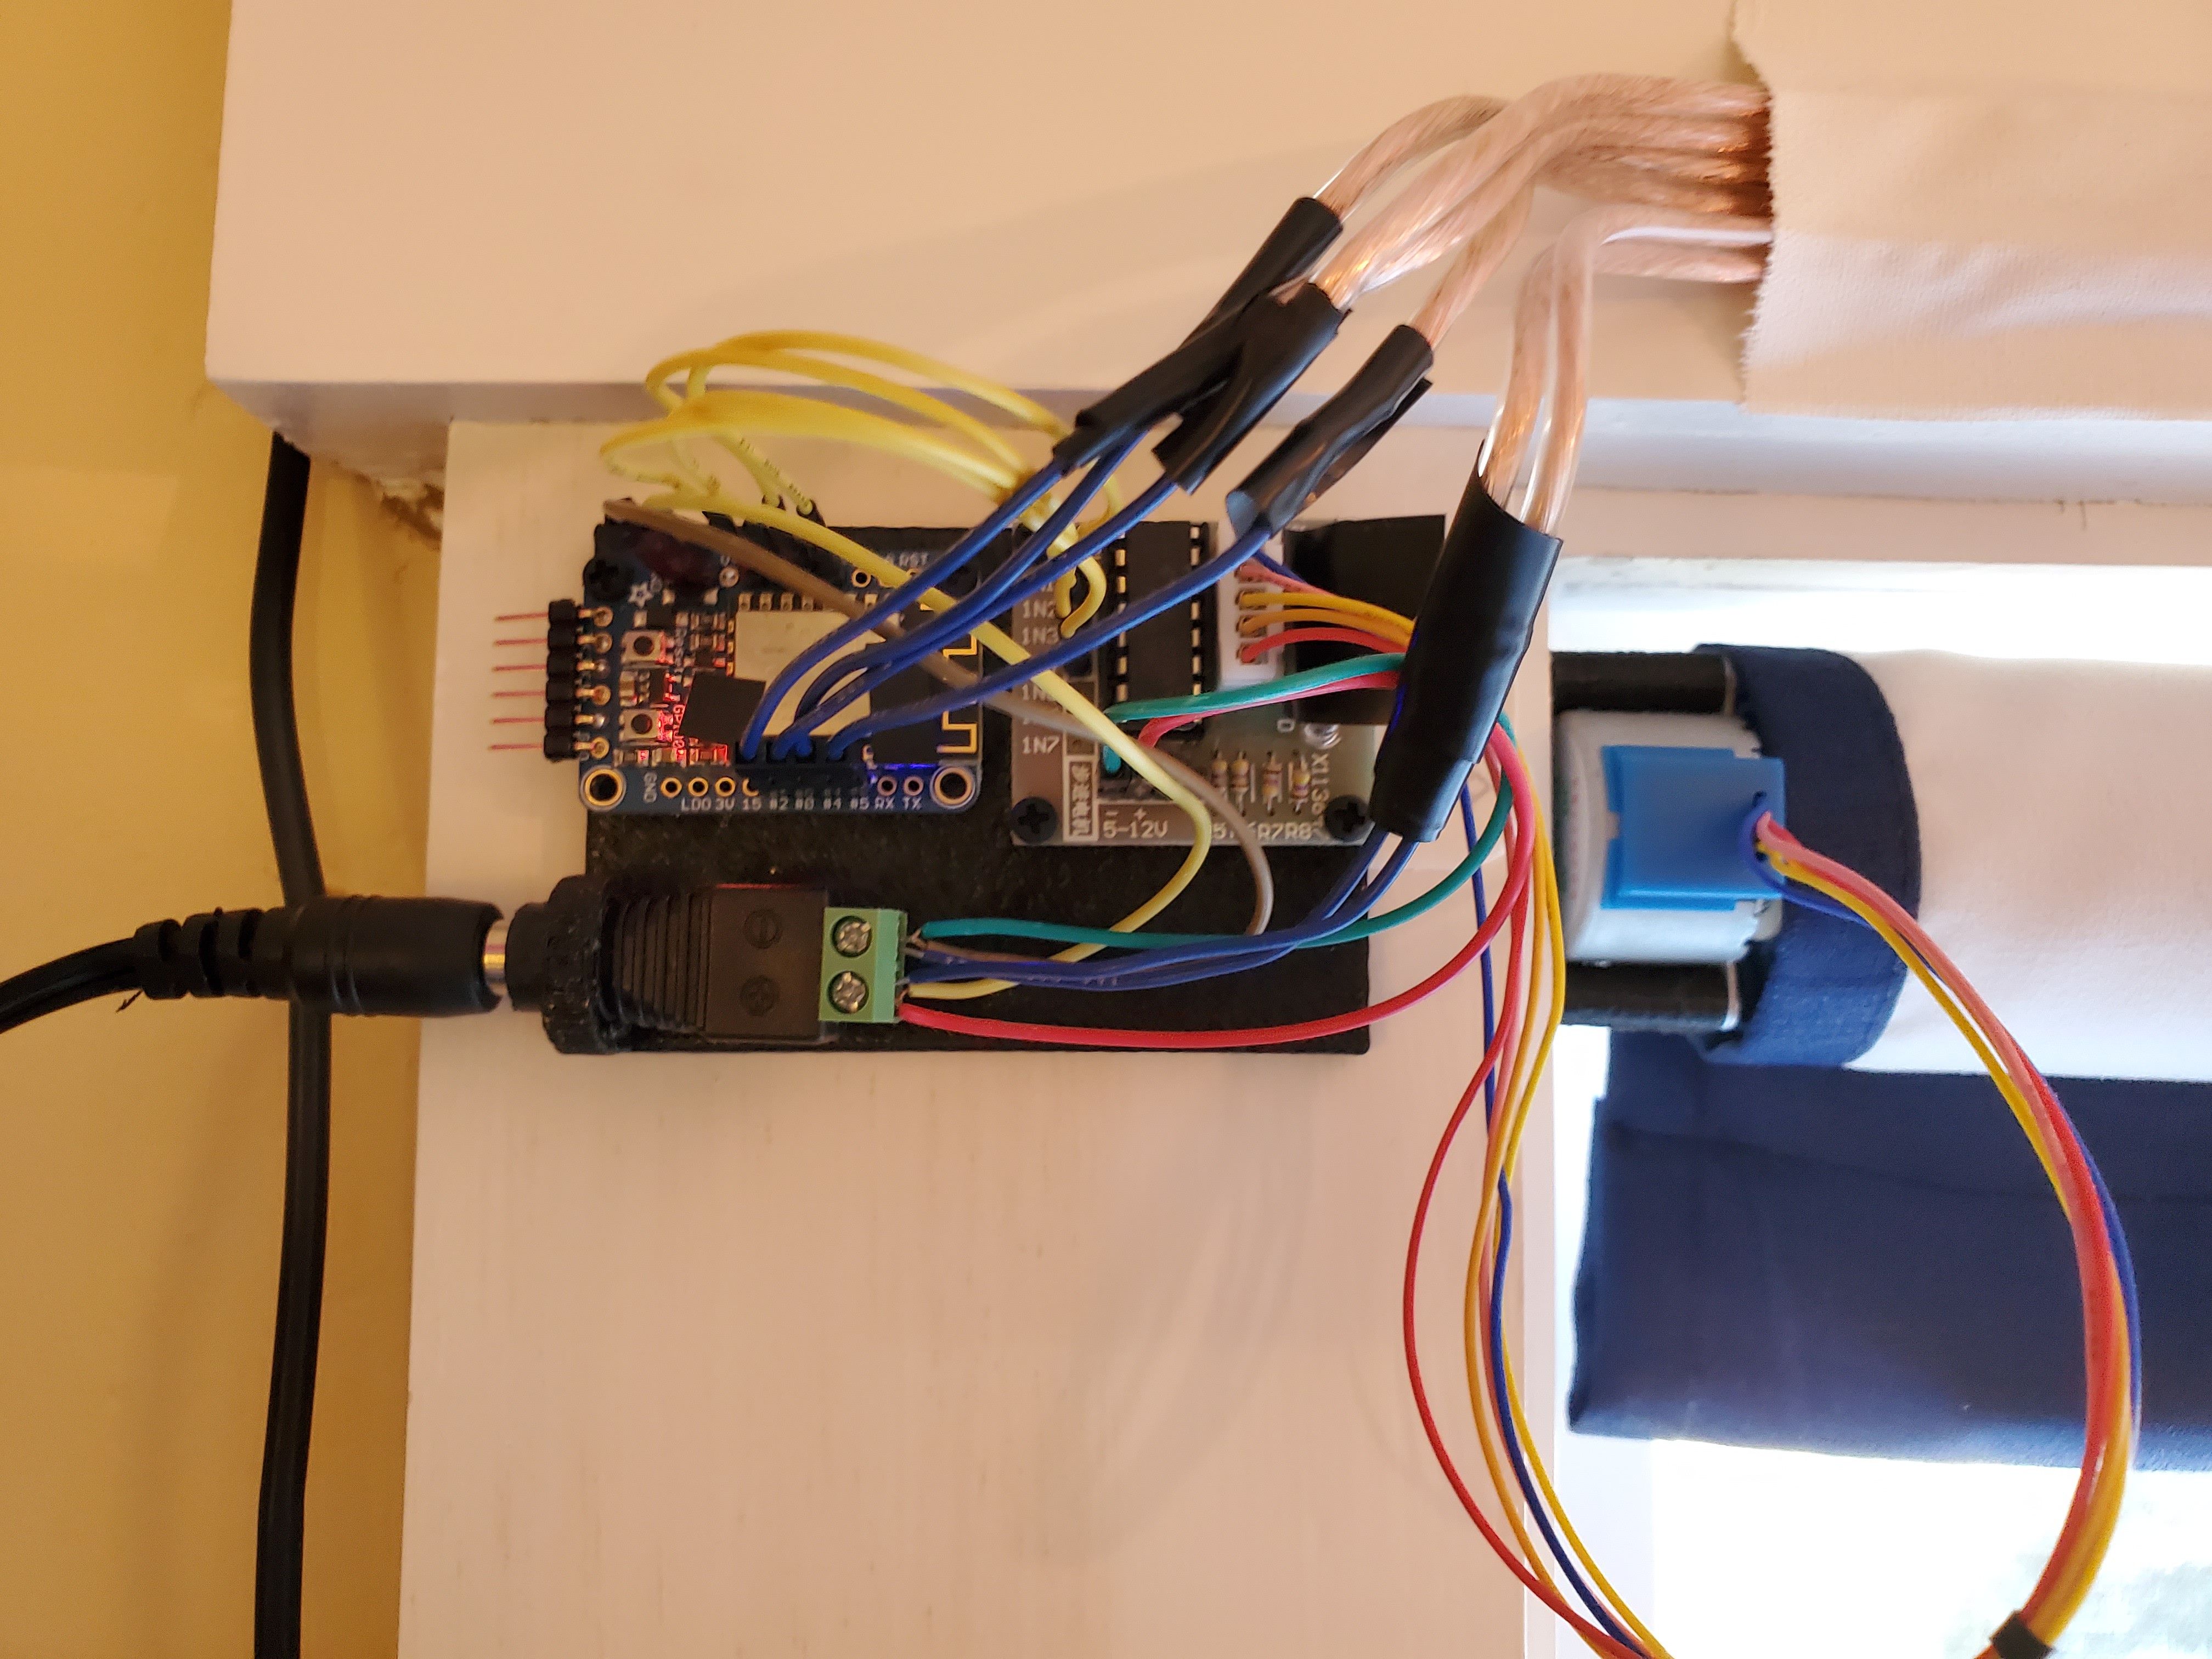 This is the setup that actually drives the stepper motors. The top part of the board has the ESP8266 jumpered over to a stepper driver board. The bottom part of the board breaks up the incoming power the ESP and the motors. The construction here is as simple as soldering in headers and connecting the right pins together. I decided against soldering the wires straight to the board in the even that I wanted to make some modifications later on (I was also being a bit lazy). The only weird thing is the wires coming out the top: those go to the other window. I didn't have much in the way of wiring laying around, so I used some spare speaker wire to bridge the gap. That side looks like this. It's the same wiring, just with extensions. I call this side the Aux board.
The Mounting Hardware
All of the components needed to mount the blinds and electronics to the wall are 3D-printed and available to download here. There are three groups of component: Wall components, Tube components, and Board components.
The Wall components help fix the stepper and idler ends of the blinds to the walls/window frame. Both sides use two screws to attach to the window frame. The stepper side (left) has mount points for the stepper motor and the idler side (right) has a channel that lets you slot in the tube. In newer versions of the idler side, the channel is sloped to make it easier to insert the tube when the blinds are mounted close to the top of the window frame.
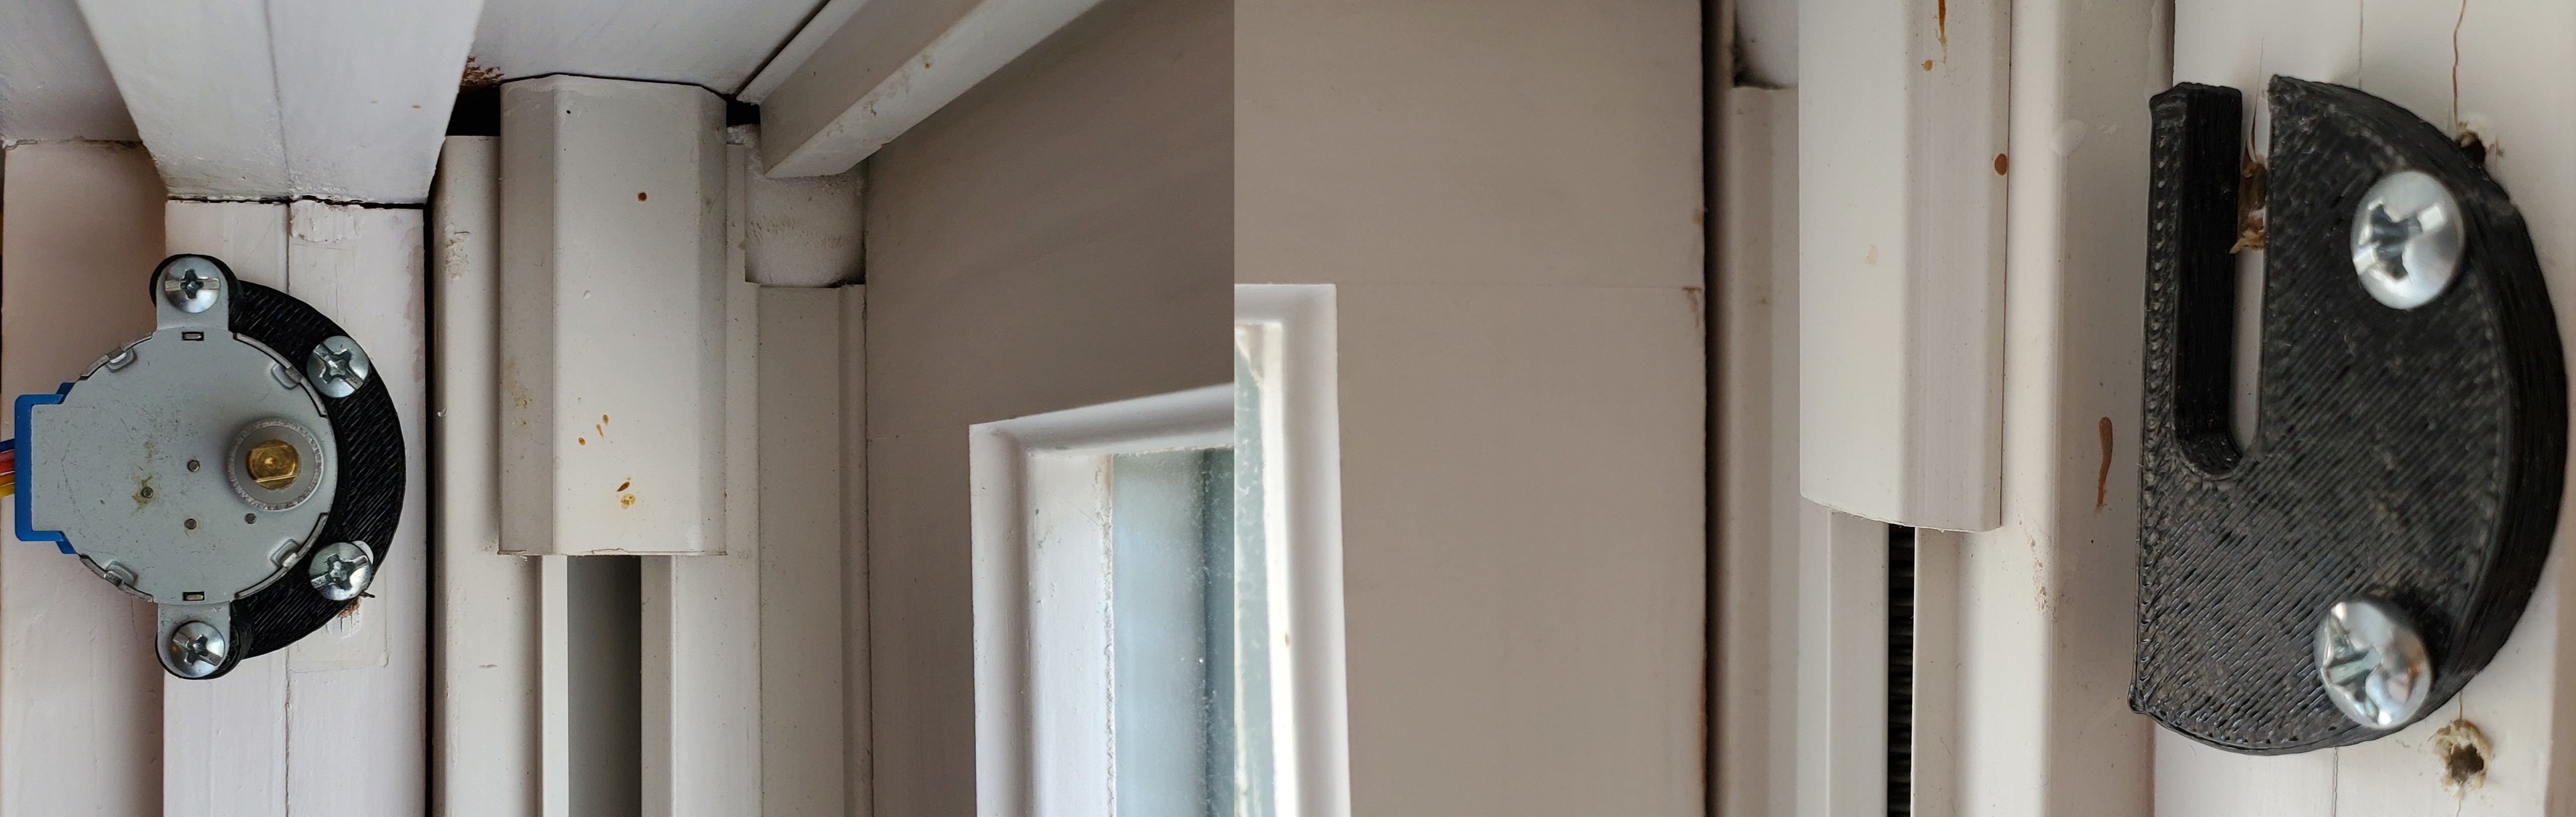
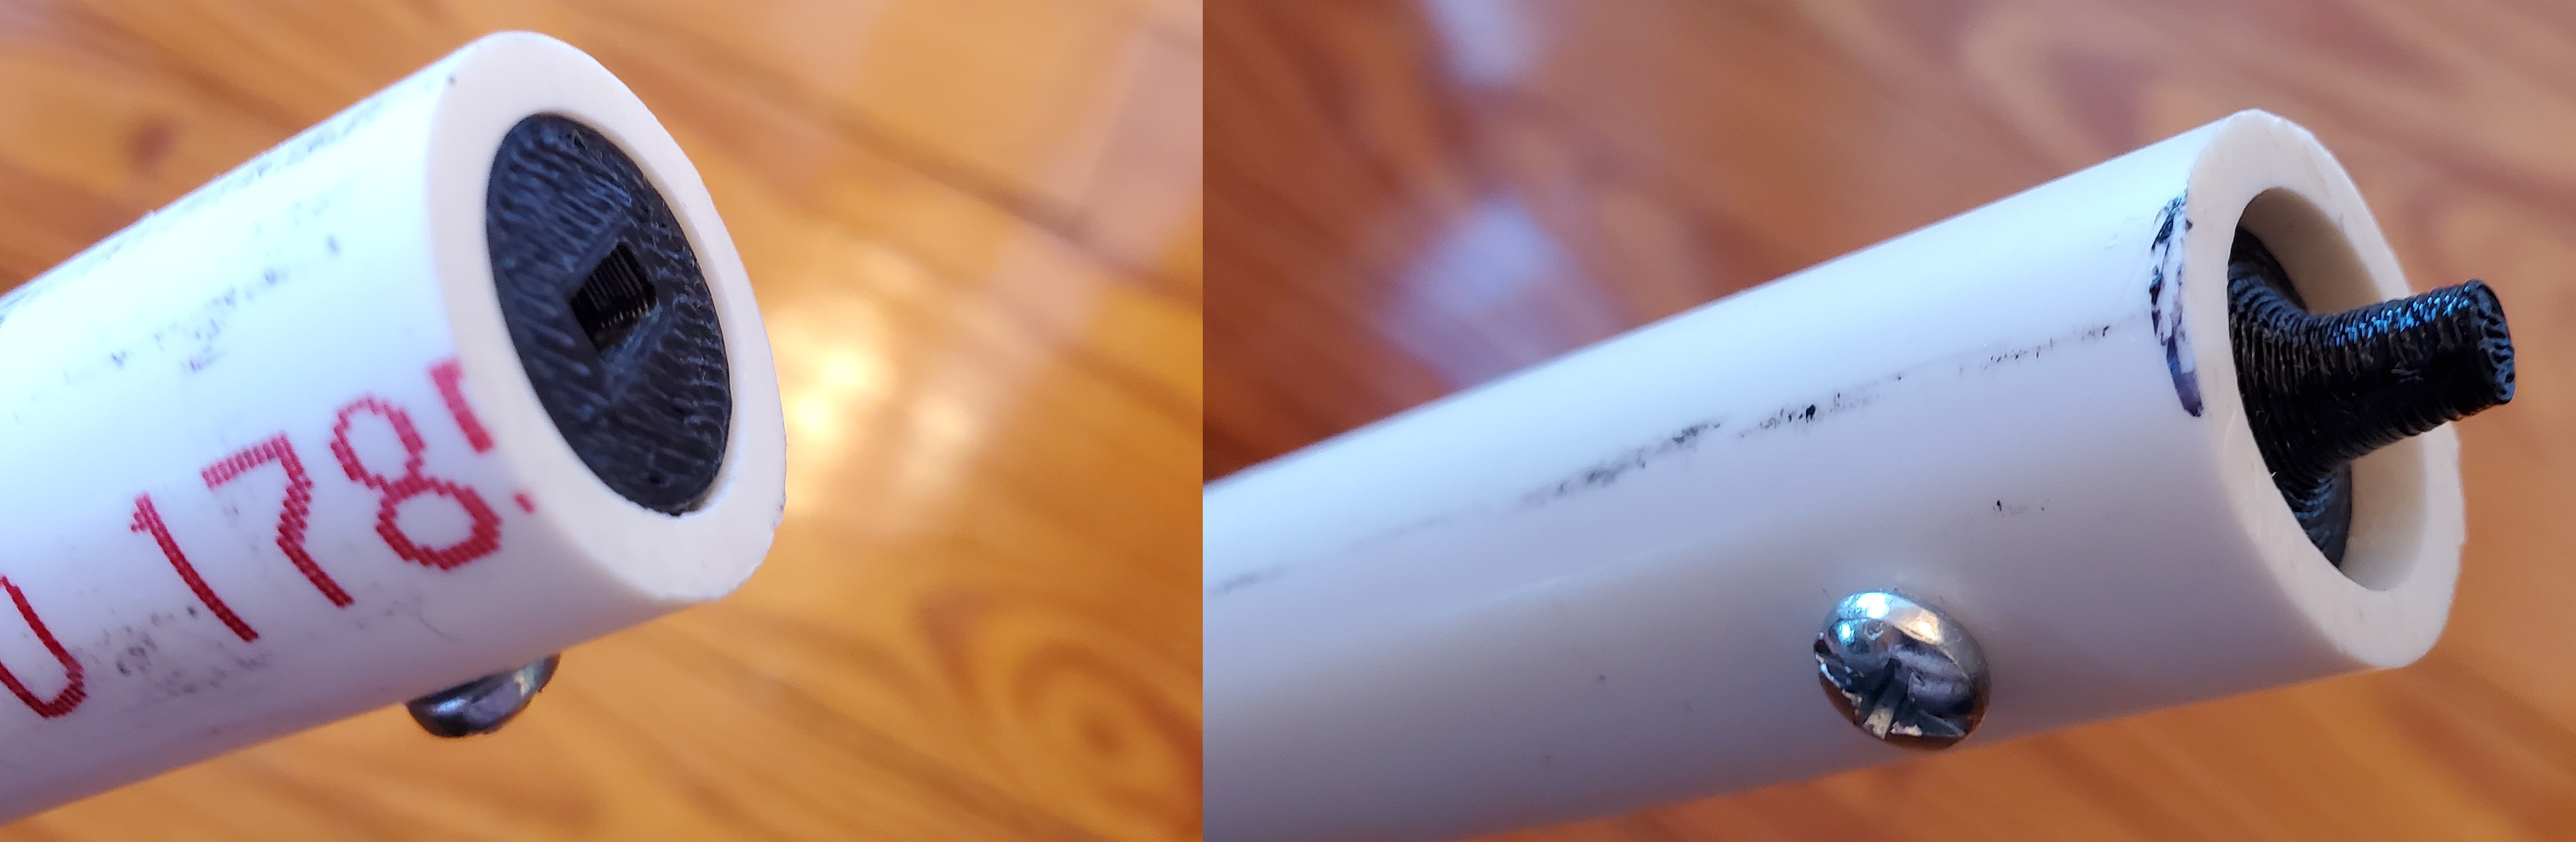
The Tube components connect the PVC tube to the stepper motor and provide an axle for the blinds to idle on. The stepper motor side (left) is just a cylindrical insert with a rectangular hole for the stepper motor head. The idler side (right) is another cylindrical insert, but with a taper to it. This tapered cylinder sticks out and slots into the idler channel. If you find that the tube is too long, you can easily slide the idler insert further into the tube until it fits into the window frame.
Finally, the Board components are handy mounting plates that the electronics can screw into. These plates can just be stickied to the wall with Command strips, gaffer's tape, etc. You can see these plates in the background of the photos in the Control Board section. The Control side has holes for the ESP8266 and a stepper motor driver. It also has a little arch for the power supply adapter. The Aux side (left) only has mounting holes for the stepper driver, since it's controlled by the ESP8266 mounted to the other window. You can just barely make this board out in the auxiliary board photo, but it's hidden pretty well by the stepper driver.
The Curtains
This is the main event, luckily it's not too hard. My curtains were cut from material I had lying around from some old black-out curtains. To cut these, I measured out the length and width of my windows and marked that up on the fabric. I left a lot of extra length since I wanted some curtain to still be on the rod even when the blinds were fully rolled down. I also left some space in the bottom for a metal rod to help keep tension on the blinds when they were being rolled up. I found this made them roll up a lot neater. Here's a photo from that process:

I sewed up the hems and mounted them to the rods. I just screwed the curtains into the rods instead of doing any proper adhesive, it was just easier that way. Unfortunately, my work was not yet done. Somewhere in my process I had forgotten to level either the curtains or the wall mounts. This meant that my blinds had a tendency to drift to one side as they rolled up. After much troubleshooting, I eventually found a solution. I can't find the website it's from, but the solution was to put tape on the side the blinds were drifting away from. As I understand it, this increases the radius, allowing that side to 'catch up' to the other side of the blinds. After many hours of this calibration, I finally had blinds that would go up properly.
Software
I use ESPHome to control these blinds, which made things super easy. I was worried I would have to write a custom HomeAssistant integration and build a web controller on the ESP8266, but it turned out to be a lot better than that. All I needed to do was write up a short script that used ESPHome's stepper modules to drive the motors. The script would also register some services with HomeAssistant that would let me raise the blinds, lower the blinds, or control the motors directly. To be entirely honest, though, it's mostly just the stepper example code with some modifications. Here's the script:
esphome:
  name: bedroomblinds
  platform: ESP8266
  board: huzzah

wifi:
  ssid: "WIFI_SSID"
  password: "WIFI_PSK"

  # Enable fallback hotspot (captive portal) in case wifi connection fails
  ap:
    ssid: "Blinds Fallback Hotspot"
    password: "**********"

captive_portal:

# Enable logging
logger:

# Enable Home Assistant API
api:
  services:
    - service: control_left_stepper
      variables:
        target: int
      then:
        - stepper.set_target:
            id: leftwindow
            target: !lambda 'return target;'
    - service: control_right_stepper
      variables:
        target: int
      then:
        - stepper.set_target:
            id: rightwindow
            target: !lambda 'return target;'
    - service: open_blinds
      then:
        - stepper.set_target:
            id: rightwindow
            target: 0
        - stepper.set_target:
            id: leftwindow
            target: 0
    - service: close_blinds
      then:
        - stepper.set_target:
            id: rightwindow
            target: 15500
        - stepper.set_target:
            id: leftwindow
            target: 16500
ota:


# Set up the stepper
stepper:
  - platform: uln2003
    id: leftwindow
    pin_a: D16
    pin_b: D12
    pin_c: D14
    pin_d: D13
    max_speed: 250 steps/s
    acceleration: 45
    deceleration: 22
    sleep_when_done: true

  - platform: uln2003
    id: rightwindow
    pin_a: D5
    pin_b: GPIO4
    pin_c: GPIO0
    pin_d: GPIO2
    max_speed: 250 steps/s
    acceleration: 45
    deceleration: 22
    sleep_when_done: true
This script did require a little bit of tweaking to make the blinds work right, though. I decided to reduce the speeds the steppers operate at to 250 steps/s since they would occasionally stall on the way up. I also added in some acceleration and deceleration terms to reduce the mechanical loads on the steppers when they stopped and started. The hope is that this prevents the blinds' position from drifting over time. Finally, I enabled the sleep_when_done option so the stepper motors don't stay on when they reach their target position. I figured since I would only be using these a couple times a day, there was no need to keep the motors on all the time.