 Jon Mendenhall
Design Iterations
Following my ground-up strategy, the foot was the first place to start designing. At the very beginning I was thinking about designs for the feet, but couldn't quite settle on a look that I liked. I wanted something mechanical, yet still with a good match to the general shape of a human foot... using mine for reference dimensions.
My first thought was some sort of solid core, with faceted panels attached to it. This led to the following:

It was a nice idea, but didn't quite give me what I was looking for, and I had no great ideas for the ankle joint, just some placeholders for a 2dof joint.
I went back to the drawing board and was figuring out the key things I wanted from the foot:
- High rigidity to resist bending when lots of force is exerted on the toes
- Simple design
- Lightweight and compact
- Mechanical look
- Correct proportions
After reviewing these requirements, I can up with a design where strength and a mechanical look were highly considered:
Based on it actually being printed, you can tell I liked it a lot more!
It had a simple design with a primary base plate reinforced by a vertical fin that would attach to the ankle. The dimensions looked pretty good, and the sprung toes helped add to the realism. The problem with this design was still that I didn't quite know what the ankle would be like, so it was not designed with that in mind, just sort of a modular part I could redesign later (the fin). Another problem was that this was relatively bulky and a little heavier than I hoped for.
After a long time of thought, and jumping around to other joints on the leg, I ended up deciding that cable driven joints would be the best in terms of strength, backlash (basically none), and weight savings. This led me to develop some joints for the knee and ankle using rolling contact surfaces, and block and tackle systems to decrease the tension on the cables, while multiplying the torque output of each joint. Thinking about the actual mechanisms for the joints was a big help to considering how the ankle should connect with the rest of the foot.
This eventually resulted in:

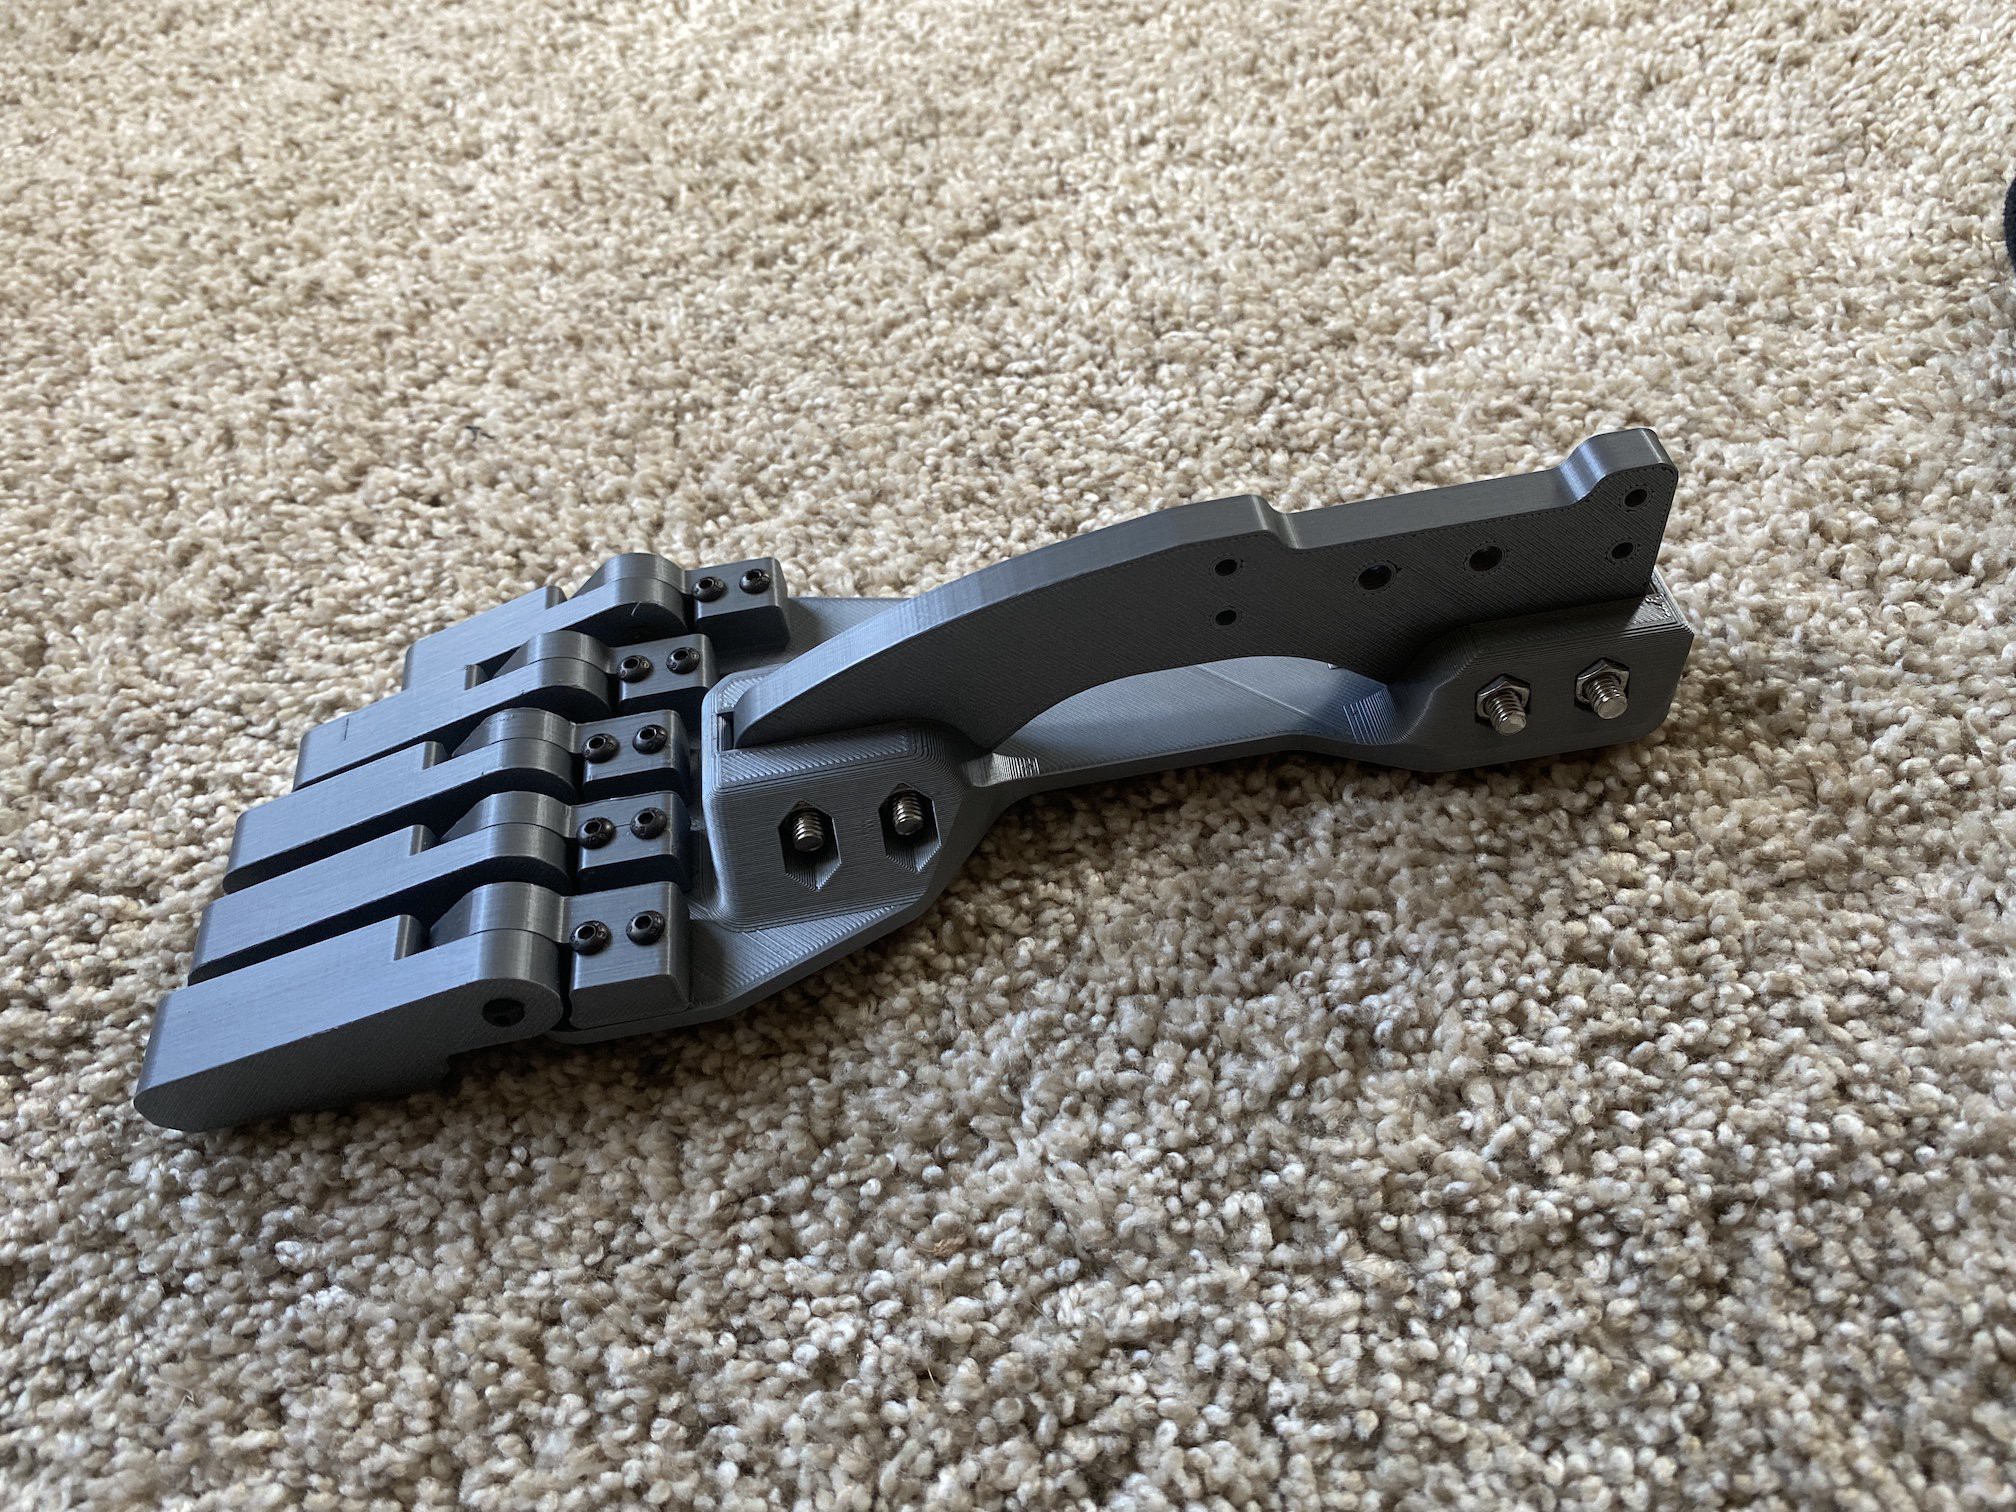
This design is now the one I've settled on as it meets all of my goals very well!
The base of the foot is a 3mm Carbon Fiber plate that provides for the high strength and rigidity I was looking for. Below it, an 8mm layer of EVA foam that will be mounted with M3 bolts and some hex-nuts embedded in printed inserts. A layer of neoprene rubber will be adhered to the bottom of the foot to ensure plenty of grip, and an extra layer of neoprene rubber with cutouts to make a tread pattern will be adhered on the very bottom. This foam-rubber section will be entirely removable so if it becomes damaged or worn down, it will be trivial to manufacture a new one.
Because I designed the primary rolling joint of the ankle first, I was well prepared to add a second axis to the joint (side to side) and easily mount that to the carbon fiber plate. Additionally, there are 2 forward arches that help add extra stiffness to the carbon fiber plate when large forces are exerted on the very end of the toes. It's not visible here, but the outline of the carbon/foam/rubber does not actually include the larger slots as shown on the top toe part. This helps to make the entire foot more rigid, while not sacrificing the added realism of the more defined toes.
This design looks very mechanical, but also extremely close to realistic dimensions. The EVA foam and rubber layers also acts as a shock absorbing material that give the foot more volume and utility.
Manufacturing
So far I have milled the EVA foam layer, and am very happy with the shape. Additionally I have printed most of the ankle parts, and they look very nice when all put together!
(This is my Sphinx 55 from OpenBuilds)
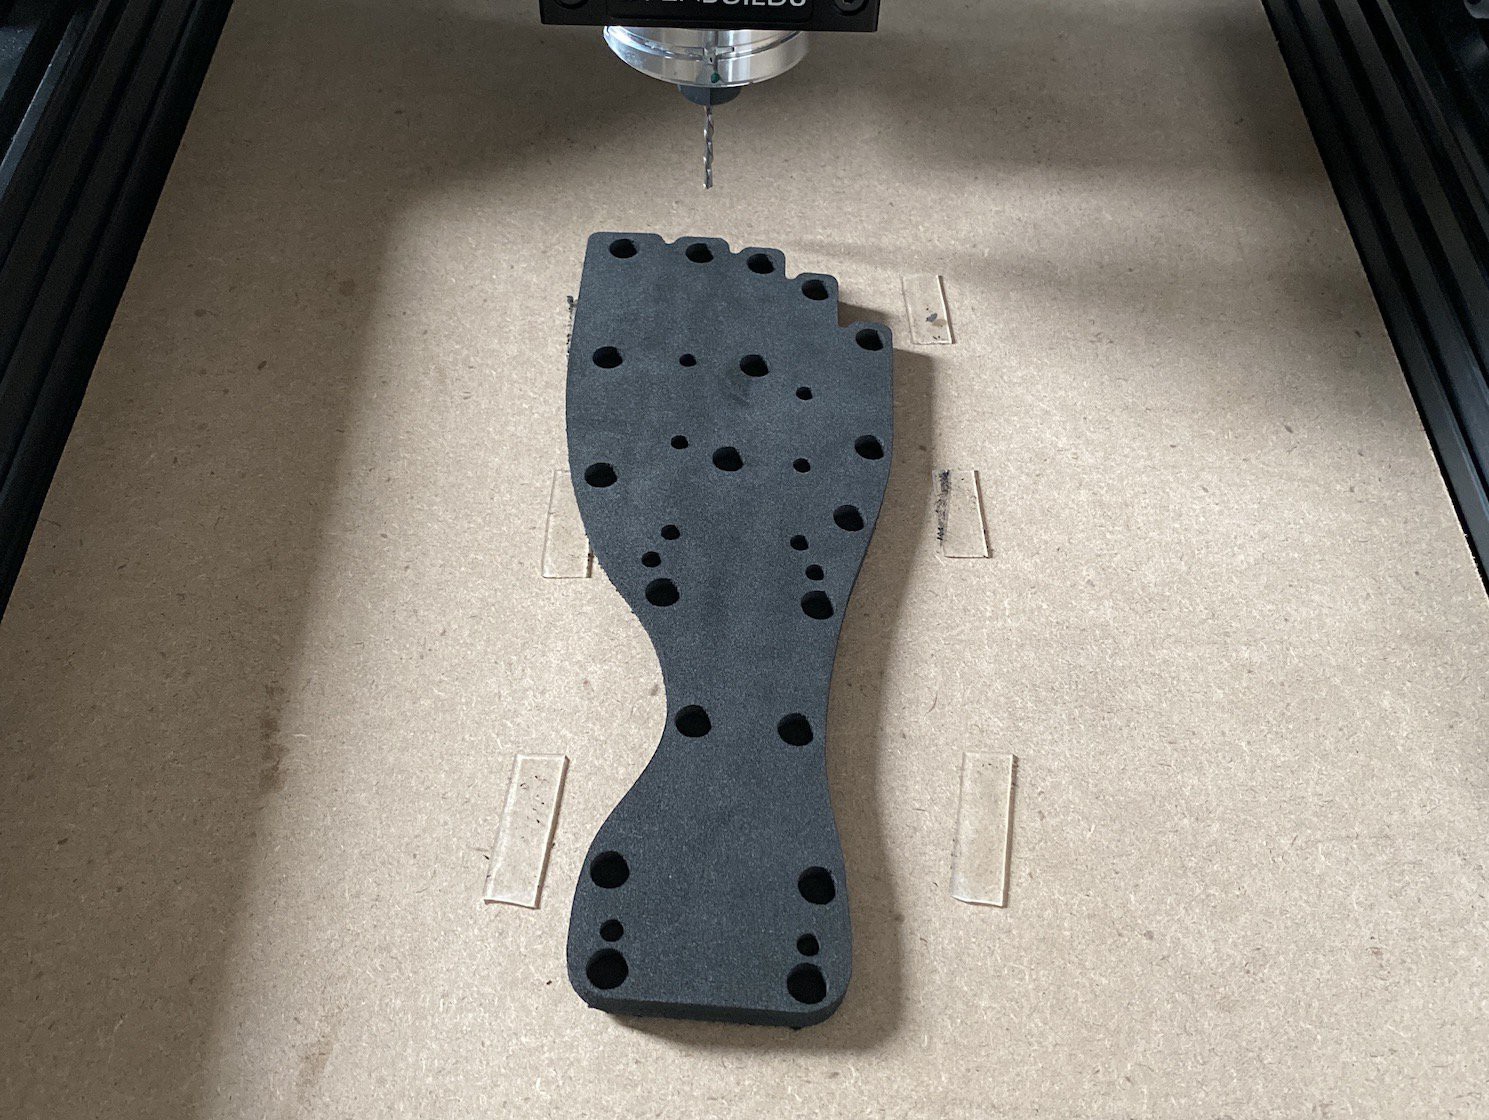
There are 19 pockets for the embedded nut inserts that will let me bolt the foam/rubber section to the carbon plate on the foot. Additionally, I added cutouts for 10 socket head bolts that will be on the bottom side of the carbon plate.
I am currently working on setting up an underwater carbon fiber cutting setup on this machine, and should be cutting the main carbon plate pretty soon. The underwater setup will consist of...
- Stainless Steel cooking tray about an inch tall mounted to MDF with rigid clamp-style parts.
- Thin plastic sheet to act as a water-safe waste board, probably stuck to the tray with adhesive.
- Strong neodymium magnets attracted to the stainless steel to hold carbon fiber plate strongly against the plastic sheet and stop it from sliding / lifting.
- Easy water drainage mechanism with small valve and outlet tube at a low point on the side of the tray to drain water after cuts.
- The water will help contain the carbon fiber dust particles during the milling operations for health and safety reasons. Carbon fiber is not fun to breath... very strong irritant due to small particle sizes.
- Additionally, the enclosure will help with dust containment if any dust managed to escape the water bath.
My next post will likely relate to this carbon plate cutting ;)
Discussions
Become a Hackaday.io Member
Create an account to leave a comment. Already have an account? Log In.