Close
0%
0%

Internet Connected NeoPixel Clock

Dual NeoPixel Ring Clock shows hours, minutes and seconds with concurrent digital display. Time set via Internet. Shows temperature too.

Public Chat
Similar projects worth following
Network connected NeoPixel Clock

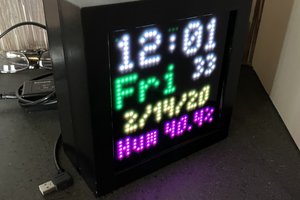
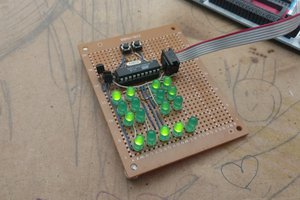
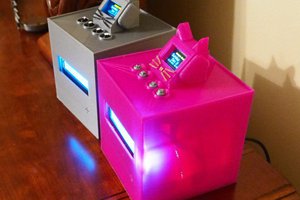
The project places two NeoPixel rings and a small 4 digit display behind a black diffuser panel that replaces the glass on a pre-made craft shadow box.    Time is set via outreach to the internet and the clock is set.  

The outer ring shows minutes and seconds with the seconds sweeping and the minute a single moving blue dot.

The inner ring shows the hour.   The digital display show the time and the temperature from the DS3231 RTC alternatively.

Time is automatically adjusted for DST.    There is a single pushbutton that 'forces' a reset of the time.

Wifi SSID, Password are configurable, as is the time-zone offset to UTC.

All the components fit in the shadowbox.

IMG_9156.MOV

Shows clock animation and 'end of minute' sweep of minute ring

quicktime - 14.48 MB - 01/29/2021 at 23:22

Download

document - 13.78 kB - 01/29/2021 at 23:08

Download

NeoPixel_Clock_1-28-Post.ino

Code for NeoPixel Clock

ino - 33.10 kB - 01/29/2021 at 23:08

Download

  • 4 × AdaFruit 15 Pixel 'arc' used to Construct 60 Pixel ring
  • 1 × AdaFruit 24 Pixel Ring
  • 1 × DS3231 RTC
  • 1 × Generic ESP8266 module
  • 1 × 5 Volt 2A Power Adapter

View all 10 components

  • 1
    Step 1

    Neopixel clocks are pretty common, but I have done other clocks and had the basic NPT and DST change routines down already.  Wanted to do a NeoPixel clock that used the black acrylic diffusion panel that makes the pixels look like they float in space.  Also, I don't have access to 3D or laser fabrication, so I sized it to fit an existing shadow box from an arts supply house.  The rings and 4 digit display were simply hot melt glued directly to the black acrylic panel.  I pull the existing glass panel out and just replace it with the acrylic panel.

    Everything fits inside after making the connections and hooking up the power supply.

    I solder all the 5V and GND connections in common, the rest of the connections are done via jumper wire and a project board.   

    There is a configurable 'test mode' to see if its working without the necessity of an internet connection, but it seems to connect and set pretty fast.

View all instructions

Enjoy this project?

Share

Discussions

Similar Projects

Does this project spark your interest?

Become a member to follow this project and never miss any updates