 Nick
NickInspiration
The release of the Raspberry Pi pico finally tempted me away from 8-bit AVR development under Windows. These are a few notes on my experiences in case they are of use to anyone else. Let me say straight away that all I've done is followed the instructions in the official pico documentation so all of the cleverness is theirs not mine (please follow this link to the official home page!).
The new RP2040 chip is a big leap-up from an ATMega328 but the promise of VS Code compatibility and Raspberry Pi quality hardware was too much to resist. On both counts, first impressions have been very positive.
The pico board itself (about £3.60) is a cut-above a lot of similar boards. The fit and finish is as good, if not better, that the premium third-party brand Arduino boards and way ahead of unbranded maker-market clones. I won't repeat the chip specs here because there is plenty of detail on the official site but it provides more processing power, memory and IO capabilities than I can imagine using in a typical home project.
The pico documentation is just excellent. No, really - you might think you've seen good documentation but this will change your mind. From the low-level chip datasheet, right up the stack to the Getting Started Guide, it is clear, consistent and easy to follow. Do yourself a favour, download if from the Pico site and get reading.
So, why this project note if the official docs are so good?
Here's the first thing I learned: When you document one board, three editors (VSCode, Eclipse, CLion), multiple tools (OpenOcd, PicoProbe, gdb and others) and three operating systems (RPi Linux, Windows and Mac), you generate a lot of combinations. The challenge for me was pulling together the right sections in the right order to create the build/debug environment I wanted.
Here's the second thing I learned: The Linux descriptions in the docs are (sometimes) specific to Linux on the RPi. In fairness, this is clearly stated in the docs (in many places) but as a Linux newbie I made some very basic errors in translating the instructions from Linux on the RPi to standard Debian on a laptop. I hope this note will save some fellow newbies from falling into the same trap!
My Target Environment
This is what I was aiming for:
- Linux Laptop development host (running Debian)
- VS Code editor and debug gui
- PicoProbe programmer/debugger.

The PicoProbe
First step was to wallop-up a programmer using one of the two Pico boards I'd bought. Appendix A of the "Getting Started with Raspberry Pi Pico" manual has step-by-step instructions for building the software and flashing the board. This was my first experience of the Pico's drag-and-drop programming capability and it really was as easy as advertised. Hold down the bootsel button, plug in the usb cable and the pico boots as a removable storage device. Drag and drop an executable and the pico automatically reboots itself and runs the newly loaded code.
Appendix A.3 has a very simple wiring diagram and I followed this to connect my picoprobe-flashed pico to a USB lead at one end and some flying leads at the other.

As you can see, like all the best projects, this relied heavily on shrink-wrap and hot-melt glue.
The same section of the Getting Started Guide covers config of the target board. This was also very easy, but one wrinkle to watch out for here is that the Pico won't actually fit onto a standard breadboard in the way that most boards will.
The middle of the three debug pins on the board (the debug label is visible in the picture above) aligns with the centre gutter of most breadboards. This means that you can't have the long side of the header pins downwards for the debug connection as you can for the other connections.
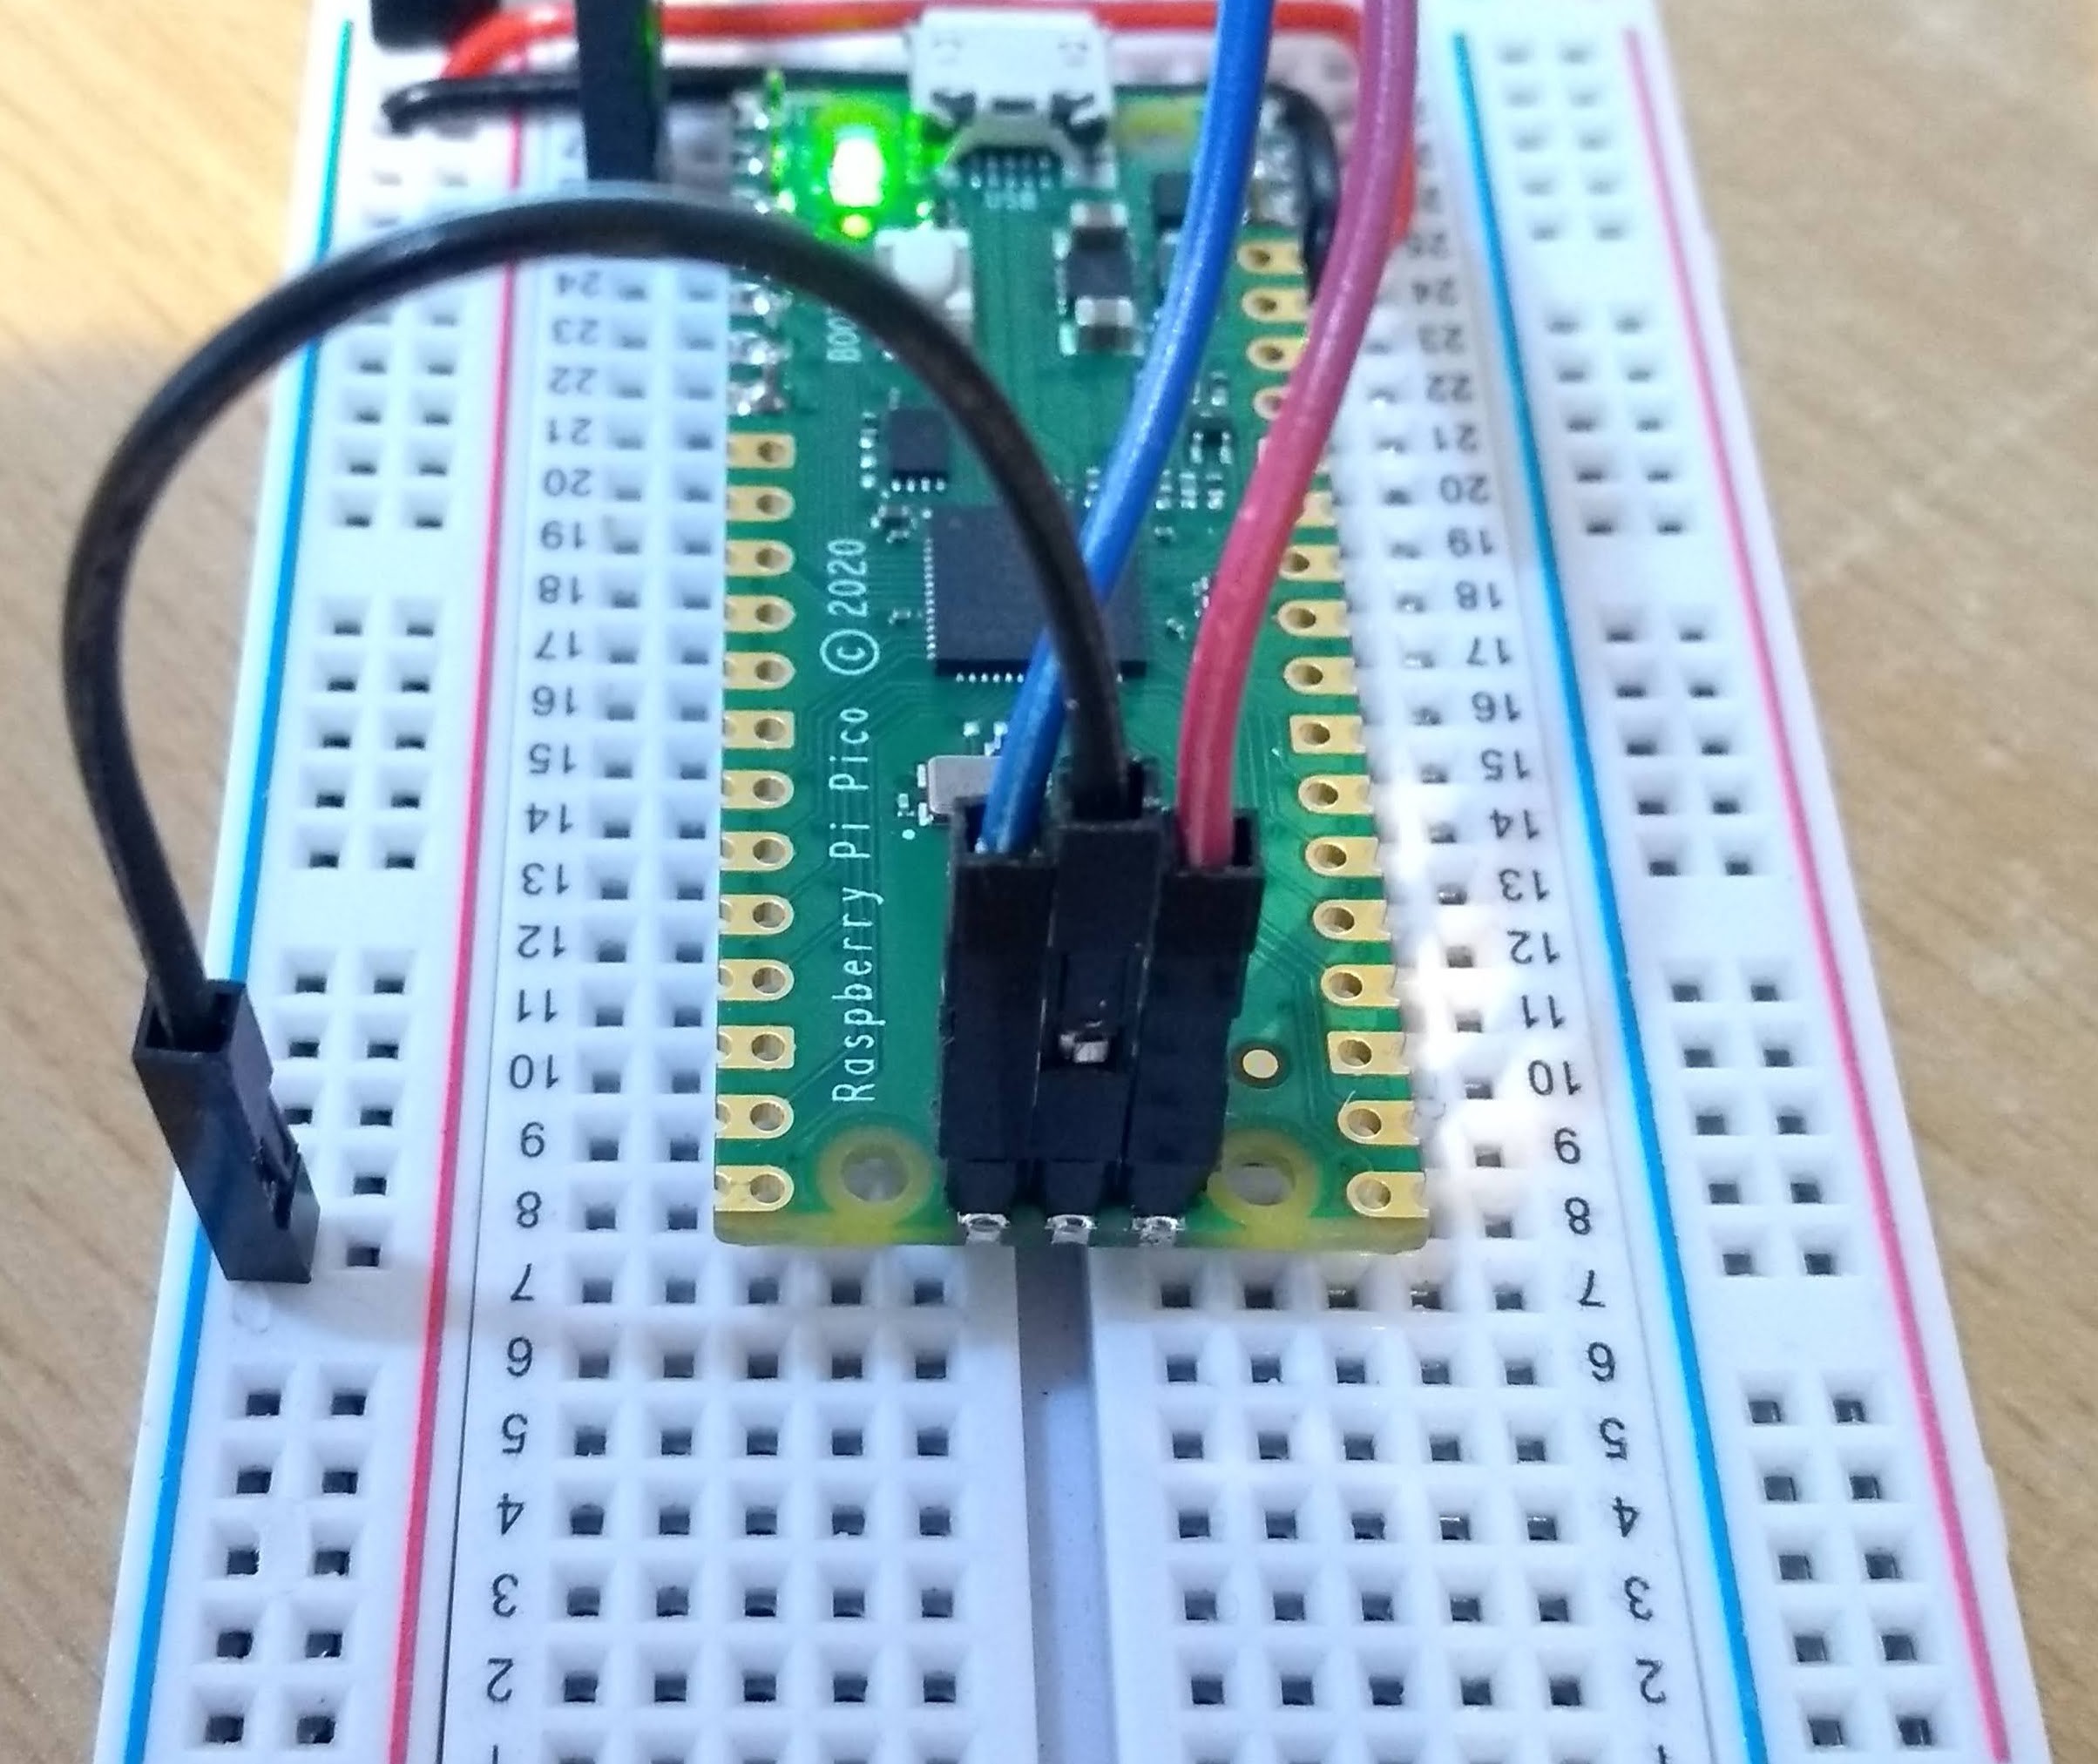
Not a big deal of course, just use female jumper wires, but something I missed in my enthusiasm to get a board connected. (A note in passing though......
Read more »
 Danny
Danny
 foamyguy
 Mike Lemberger
Great project. I am using your updated json config file and set everything up in ubuntu as well.
My only problem is, i don't see any output for printf in minicom at all. Nothing comes up.
Can you be more detailed on how to set that up? should i see the printf output somewehre else?