 Michael Gardi
My Inspiration
When I was designing Think-a-Tron 2020, my plan A was to use an ESP32-CAM to read QR codes off the back of some business cards. I did have a backup plan though. I ordered a GM67 Bar Code Reader Module from AliExpress just in case.
Well the ESP32-CAM worked out great. The GM67 arrived around the time I was wrapping up Think-a-Tron 2020. Still I thought I should check it out.

This is what shipped in the box. It's a solid unit. The USB cable and wired connector for the UART port were nice bonuses.
When you plug the GM67 into a PC via the provided USB cable it attaches as a keyboard. Open any text editor and point the device at a bar or QR code and the payload strings appear in the editor. A very cool out of the box experience.
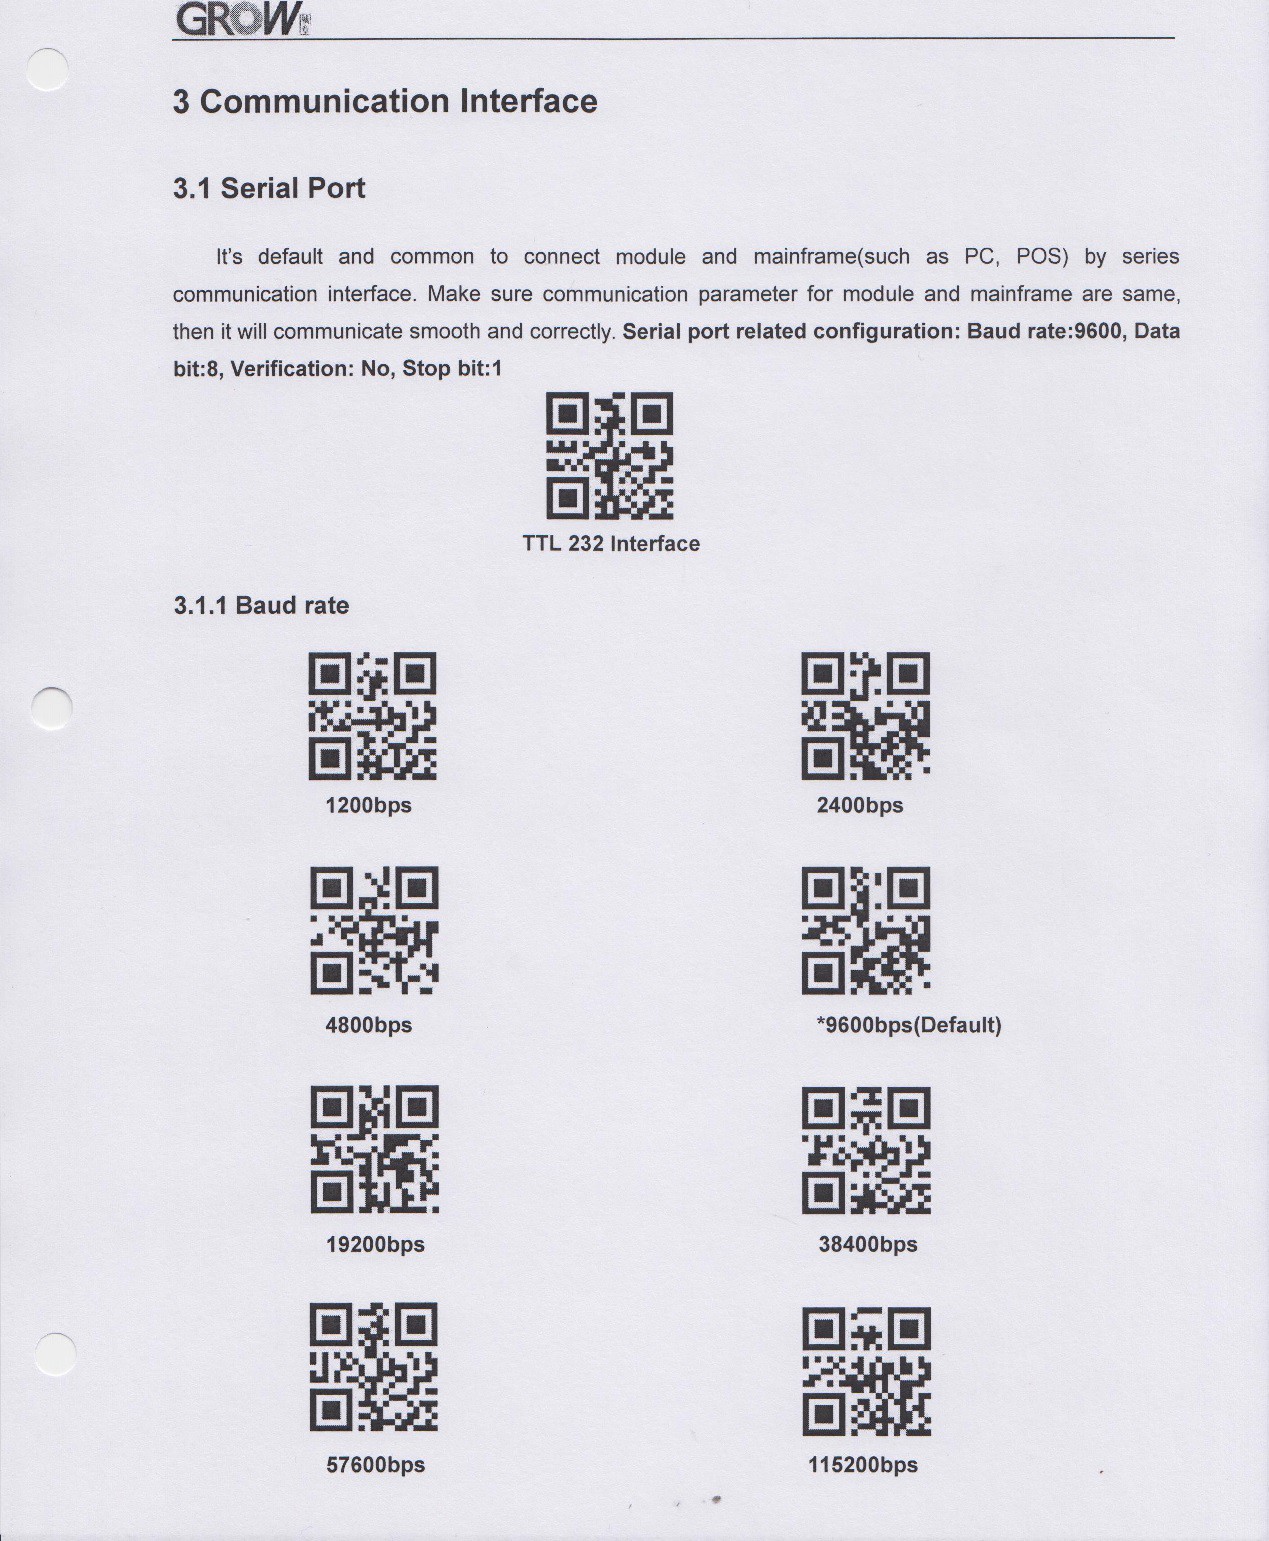
So I cracked open the manual and this is where I got my mind blown a bit. The first few pages were the expected technical specifications and interface definitions. But when I got to the configuration section all I saw were pages and pages of QR codes. The very first QR code was to reset the unit to factory defaults. There were QR codes to configure the serial port (baud, parity, stop bits, etc.) , codes to change the default behavior of the unit (manual, button trigger, continuous, etc.), codes to change the keyboard interface by country, and many more. Virtually all the configuration was done by having the unit scan a QR code. This may be old hat to some of you out there, but this was definitely new to me. Here is a sample page.
So this whole notion of using QR codes to alter the running state of the reader, got me wondering how else you might take advantage of this capability. Since I had just finished Think-a-Tron 2020 my thoughts drifted in that direction and Think-a-Tron Mini was born.
The Design
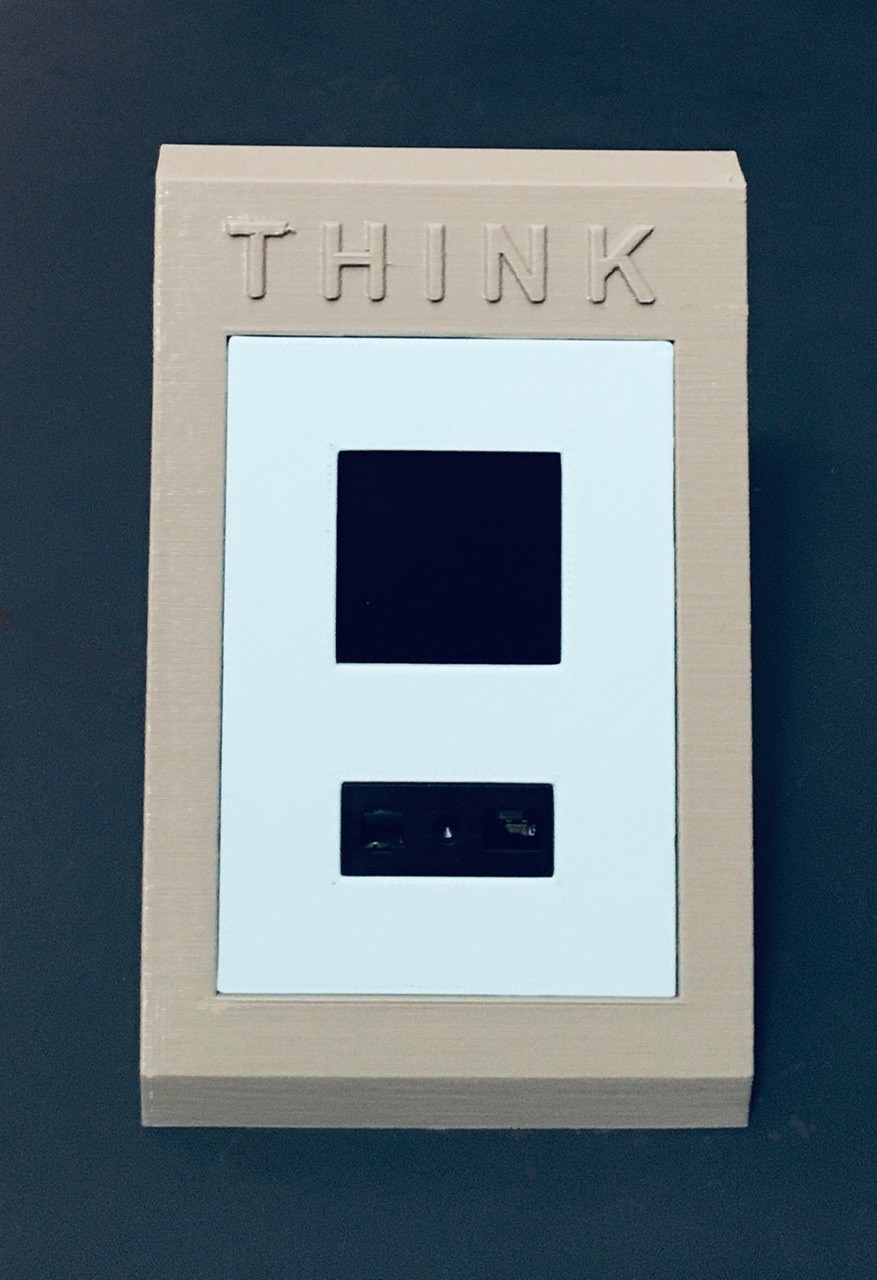
While the end result did turn out to be pretty small in size, when I first started considering the Mini name, I was also thinking about Minimal. What would a Minimal Viable Product implementation of a Think-a-Tron look like. How could I pare down Think-a-Tron 2020’s eleven buttons, two seven segment displays, and 5x7 LED display. Well if all of the buttons were replaced by cards with QR codes, and the seven segment and 5x7 LED displays were combined into a small LCD display, that would do the trick.
Also since this was a "spur-of-the-moment" kind of project I was hoping to do something with parts that I already had on hand.
Fortunately I had a Waveshare 1.5 Inch RGB OLED Module and an Arduino Nano in my parts box, and it turns out that's all I needed. Because I had all of the parts on hand I was able to pull this project together in just three days.
The Build
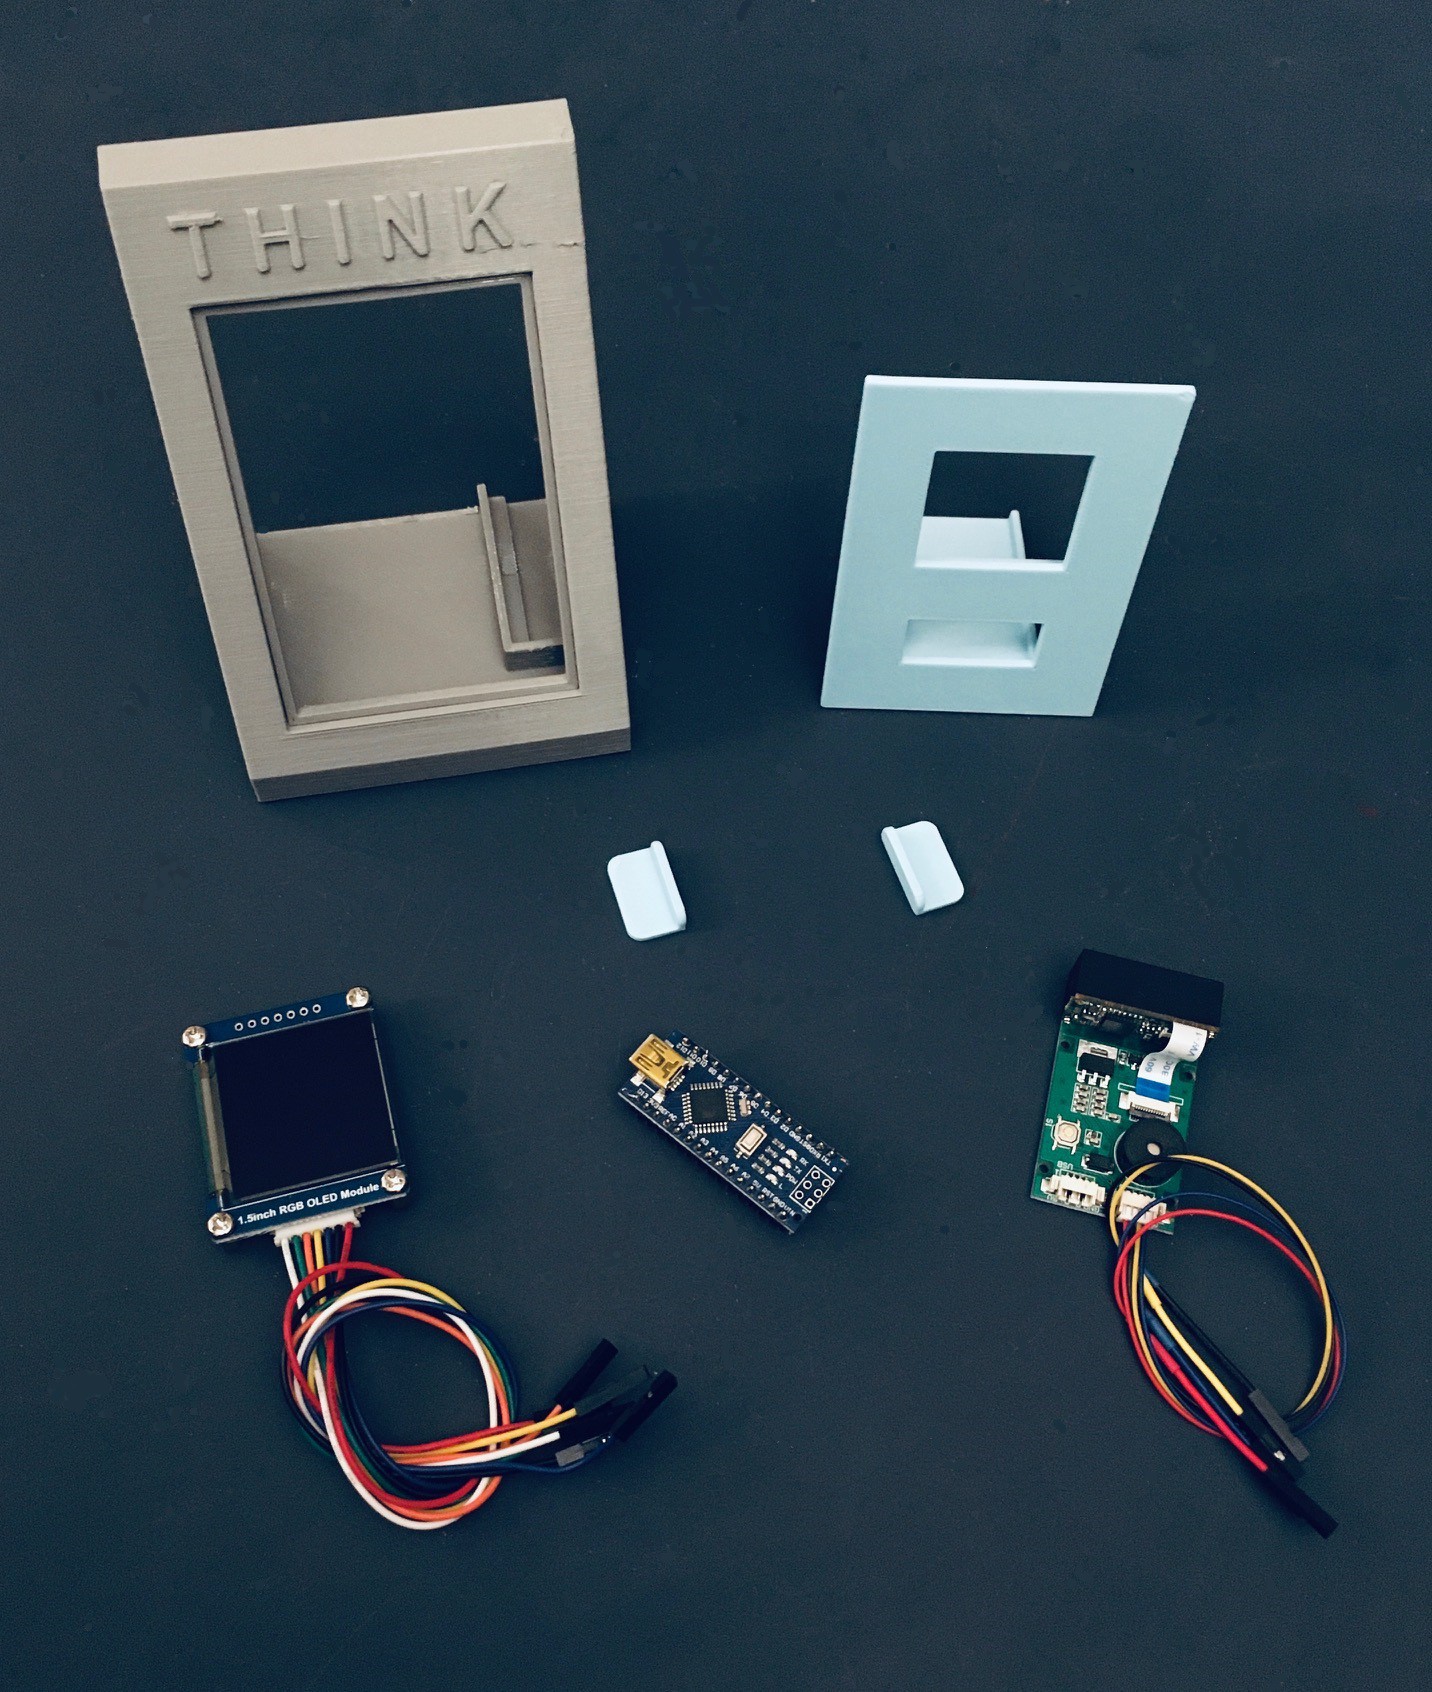
I designed an enclosure for the project. Here is a photo of everything required to make a Think-a-Tron Mini.
The GM67 unit and the OLED display slide into the slots provided behind the front panel. I printed some tabs to hold the display in place and used a small piece of two sided tape to secure the GM67. The front of the scanner should be flush with the front of the panel.
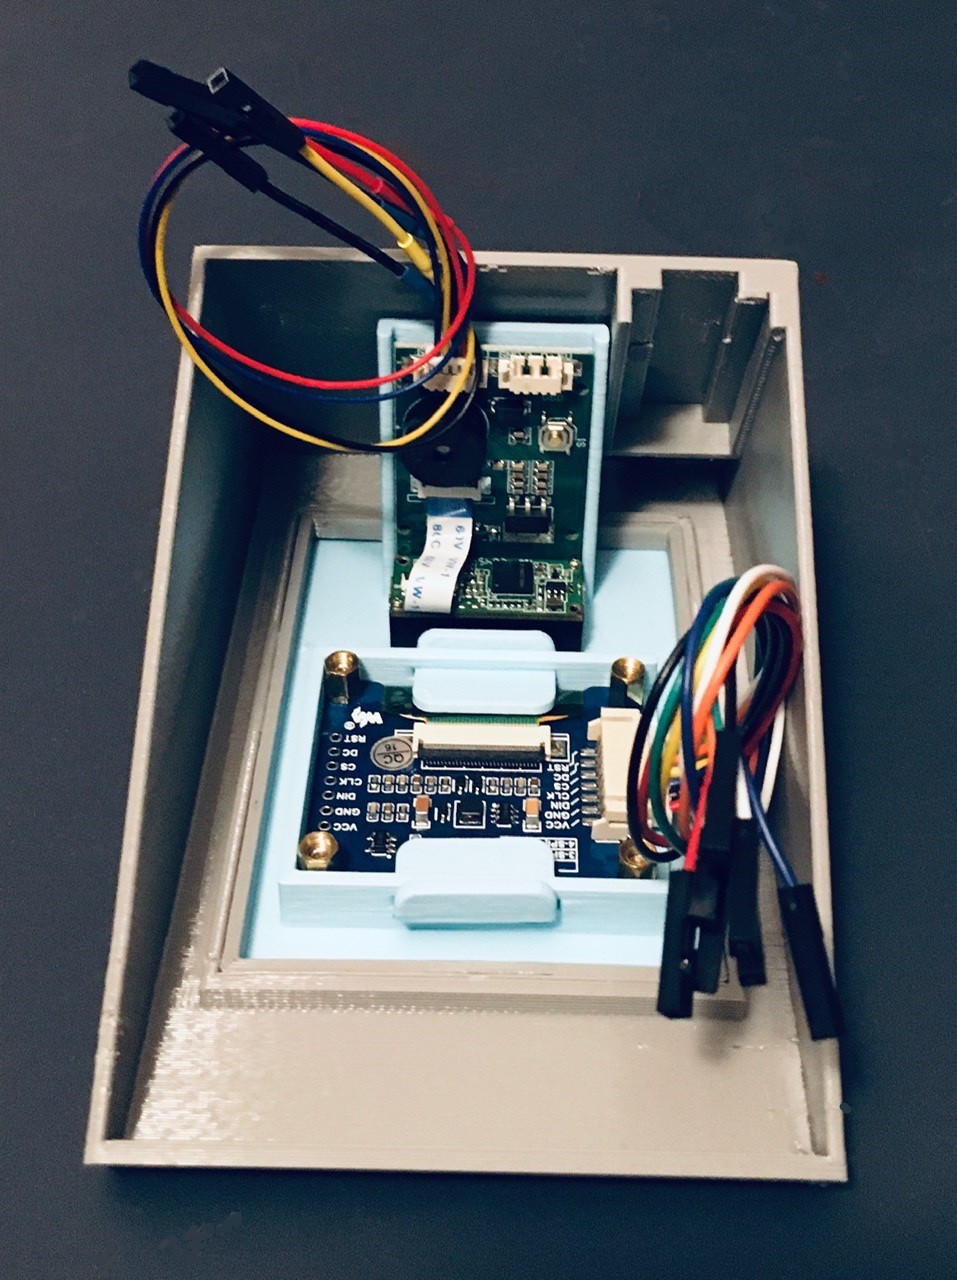
There is also a spot for the Nano to nest. I anchored it in place with two sided tape.
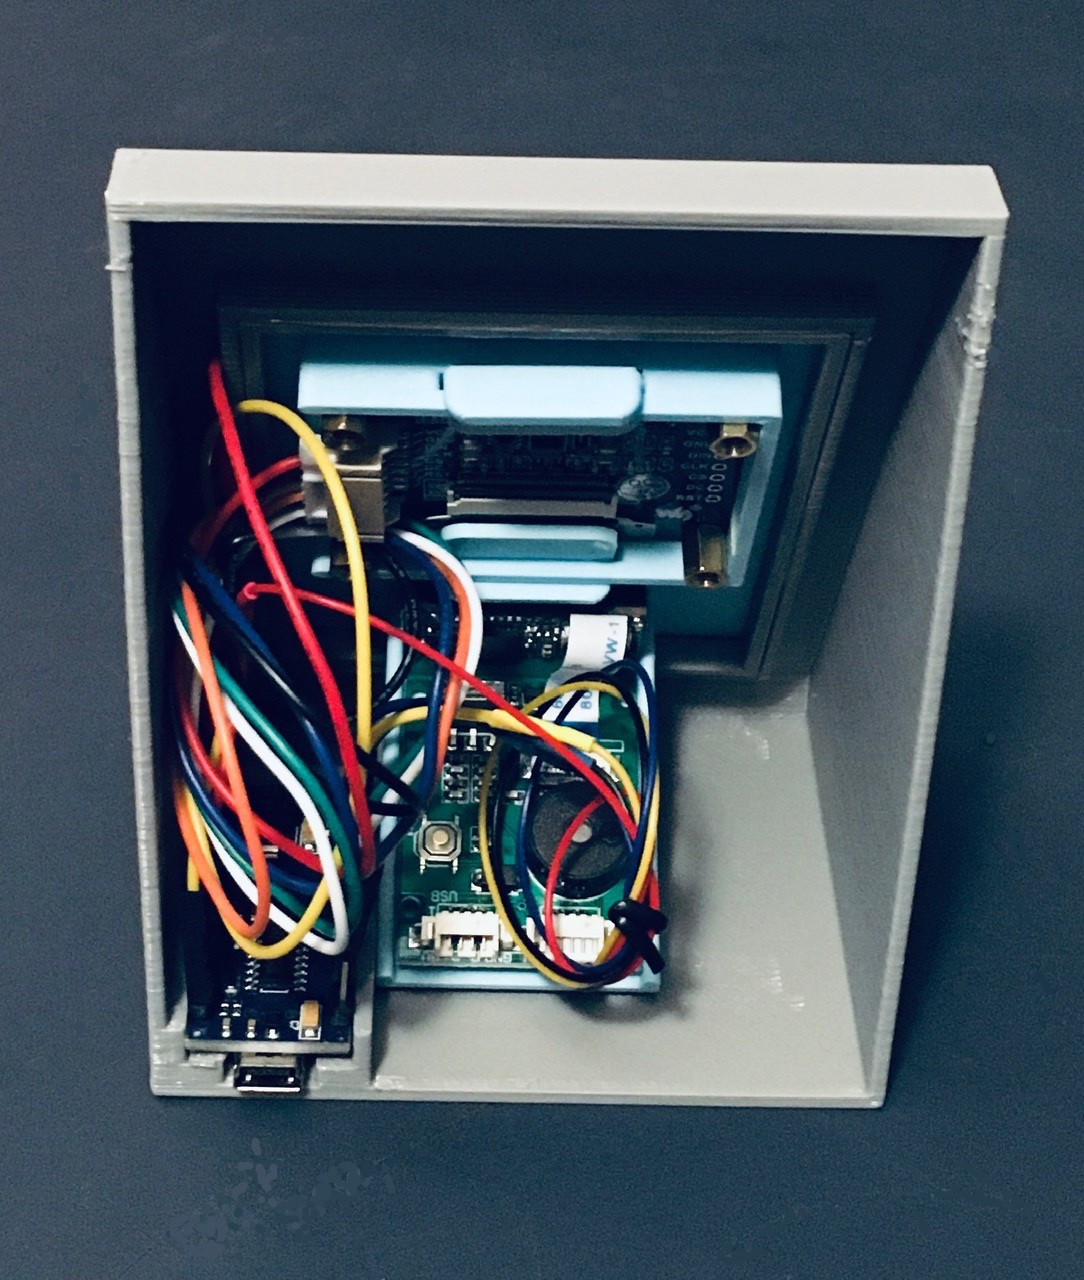
The wiring looks a bit messy but is actually pretty straight forward.
| From | To Arduino |
|---|---|
| GM67 VCC | 5V |
| GM67 TX | D2 |
| GM67 RX | D3 |
| GM67 GND | GND |
| OLED VCC | 3.3V |
| OLED GND | GND |
| OLED DIN | D11 |
| OLED CLK | D13 |
| OLED CS | D10 |
| OLED DC | D7 |
| OLED RST | D8 |
And that's it. It doesn't get much more minimalistic than this.
The only tweaks I made to the GM67's default factory settings were to:
- Change the scanning mode from continuous to one where it detects the presence of a card before scanning based on lighting changes. This seems to work pretty well.
- Disable the LED light on the front of the unit. The light was pretty bright and it's not necessary for most situations
This was done by scanning in the appropriate QR codes from the manual of course. So cool.
All that's left to do is to load the Arduino sketch onto the Nano. The sketch can be found on github. See Think-a-Tron Mini.
It's All In the Cards
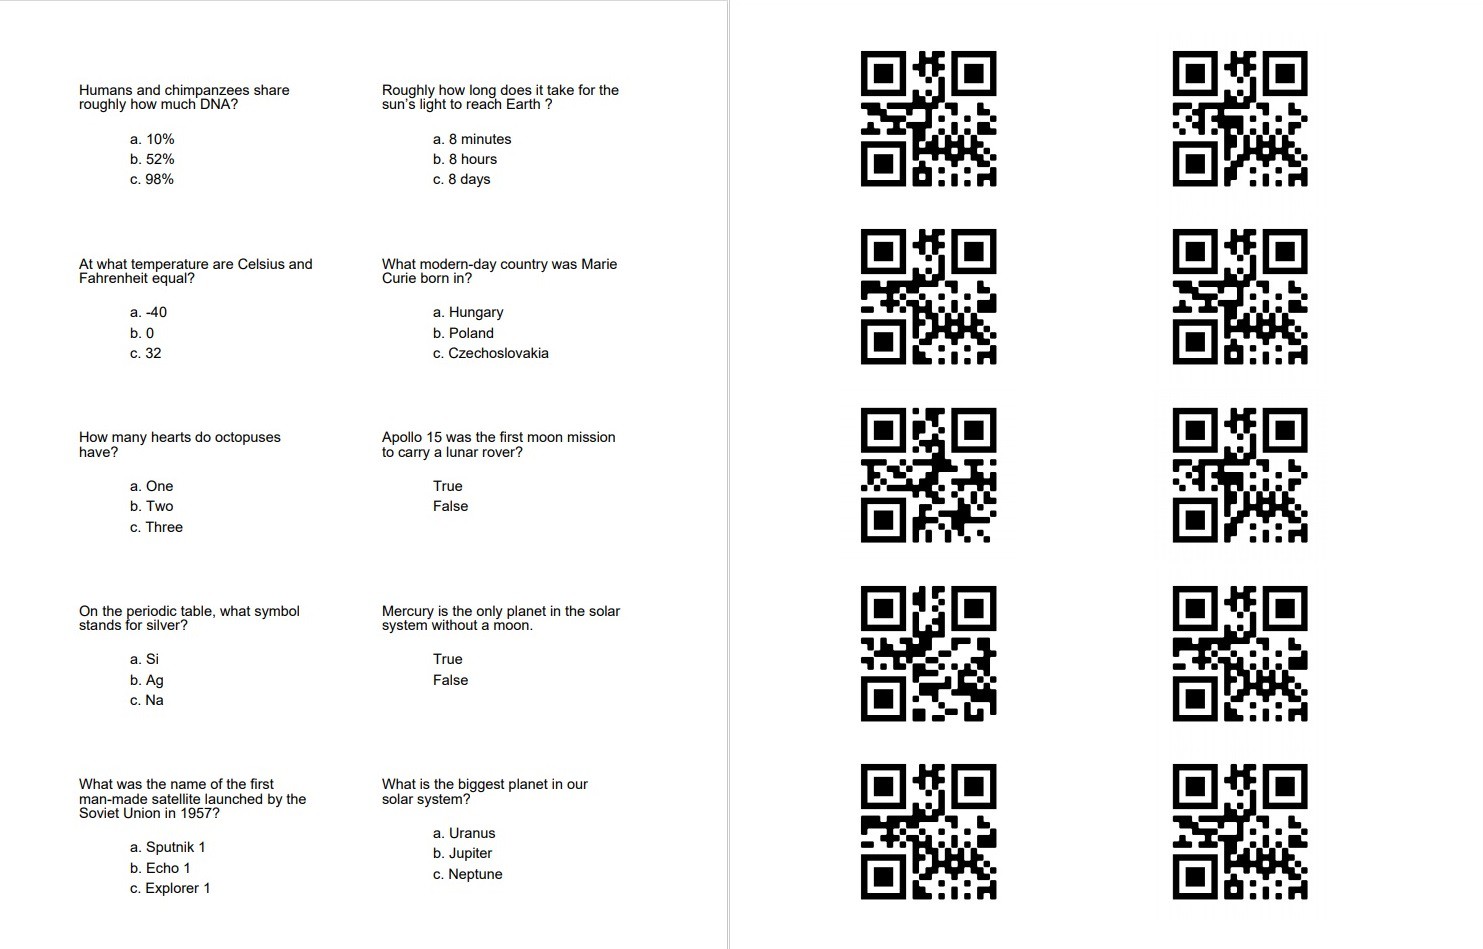
For Think-a-Tron 2020 and Mini versions, standard business sized cards (3 1/2 x 2 inches) are used to hold the trivia questions. The questions, multiple choice or true and false, are printed on the front, and the correct answer is printed as a QR code on the back.
For Think-a-Tron Mini I created a new version of the Python script from Think-a-Tron 2020 that was used to create trivia cards and made a couple of changes.
- Since I am not limited to using physical buttons on the Mini version I have increased the number of optional trivia question choices to five from three.
- Also, the GM67 has no problems reading Python generated QR codes (as the ESP32-CAM implementation did), so I obfuscated the payloads for the question cards to prevent a player from figuring out the answer just by looking at the QR codes (hard but doable without the obfuscation).
So the application works with one sheet of Avery 5371 business cards at a time. You simply key in ten questions, choices, and answers then press the Save button. This will create:
- A text file with your data so that you can Load it back in to make changes.
['Humans and chimpanzees share roughly how much DNA?', 'Roughly how long does it take for the sun’s light to reach Earth ?', 'At what temperature are Celsius and Fahrenheit equal?', 'What modern-day country was Marie Curie born in?', 'How many hearts do octopuses have?', 'Apollo 15 was the first moon mission to carry a lunar rover?', 'On the periodic table, what symbol stands for silver?', 'Mercury is the only planet in the solar system without a moon.', 'What was the name of the first man-made satellite launched by the Soviet Union in 1957?', 'What is the biggest planet in our solar system?']
['10%', '8 minutes', '-40', 'Hungary', 'One', '', 'Si', '', 'Sputnik 1', 'Uranus']
['52%', '8 hours', '0', 'Poland', 'Two', '', 'Ag', '', 'Echo 1', 'Jupiter']
['98%', '8 days', '32', 'Czechoslovakia', 'Three', '', 'Na', '', 'Explorer 1', 'Neptune']
['', '', '', '', '', '', '', '', '', '']
['', '', '', '', '', '', '', '', '', '']
[3, 1, 1, 2, 3, 4, 2, 5, 1, 2]
- A PDF of the questions and choices nicely formatted one per card.
- A PDF of the ten QR codes laid out to align with the correct questions when two sided printing.
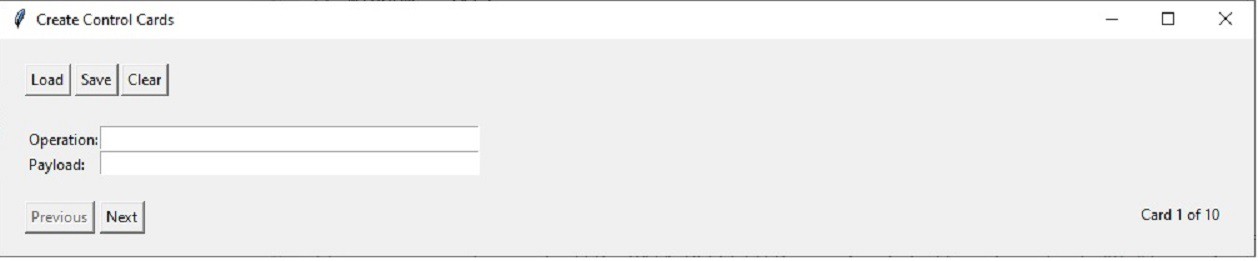
In addition for the Mini version I created a second Python application to make "control" cards. As with the trivia questions, the application works with one sheet of Avery 5371 business cards at a time.
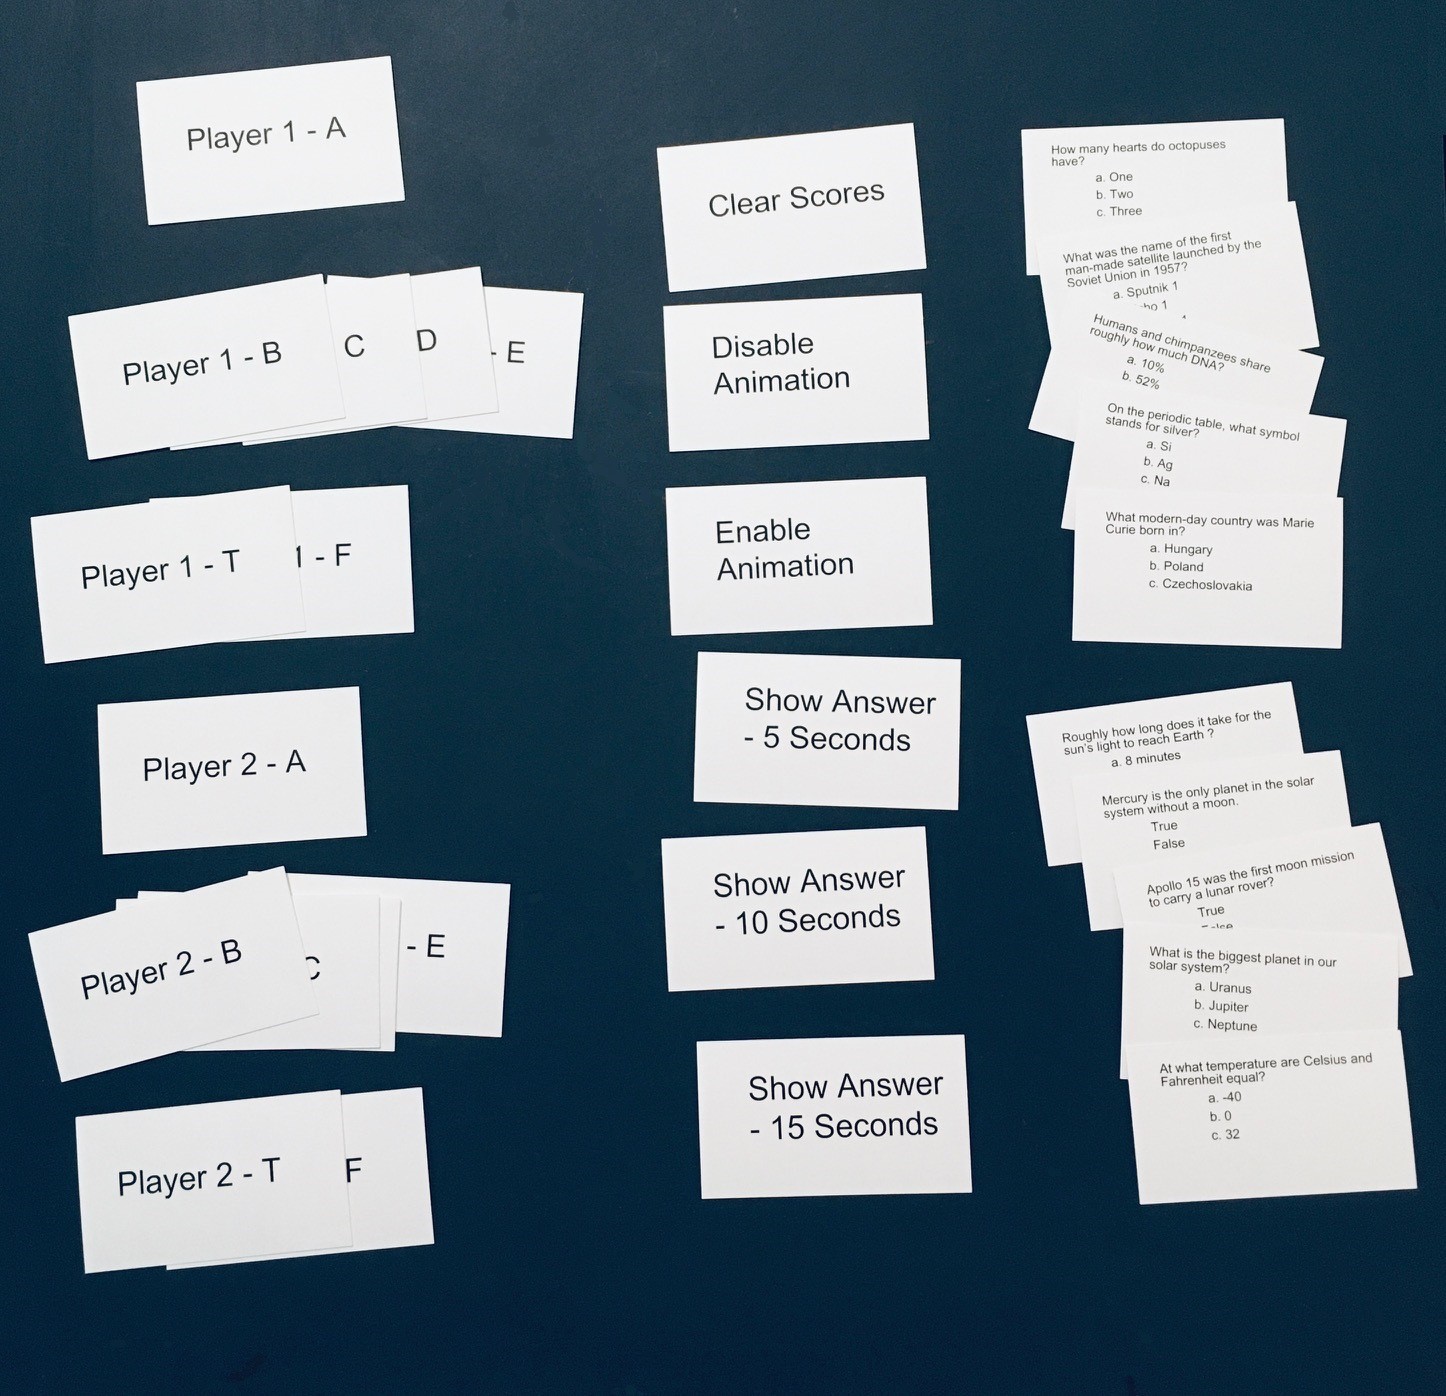
I used this application to make seven cards for each player that allow them to "scan in" their guesses ("A", "B", "C", "D", "E", "T", "F"). I also made cards to control the operation of the game. For instance to reset the scores to zero and start a new game, or disable the animation when showing an answer.
Each control card payload is a simple 3 character command string:
| Player Answer Cards | P1A, P1B, P1C, P1D, P1E, P1T, P1F, P2A, P2B, P2C, P2D, P2E, P2T, P2F |
| Game Control Cards | Cxx - where xx is an operation number (00, 01, 02, etc.) |
| Answer Cards | Axx - where xx is a slightly obfuscated code representing the answer (A, B, C, etc.) |
Here is a look at all three types of cards.
The Python scripts for both these applications can be found on github. See: Think-a-Tron Mini.
Would You Like To Play a Game?
So with the Think-a-Tron Mini, playing a game goes something like this.
- Someone reads the question from a trivia card.
- Both players lock their answers into Think-a-Tron Mini by scanning the appropriate player card with the letter of the choice they want. They can change their mind and scan a different card if they want.
- The answer card is scanned into Think-a-Tron Mini, which is "activated" and reveals the correct answer after a short optional animation.
- Think-a-Tron 2020 automatically increments the score for those players with the correct answer. Correct answer guesses are highlighted in green on the display and incorrect guesses in red.
- After a short configurable time interval the screen resets for the next question with the ? appearing.
- Repeat.
I made a little demo video of Think-a-Tron Mini in action.
Final Thoughts
The GM67 was my inspiration for this build. I chose to use it in a follow up to my Think-a-Tron 2020 project. But I am sure that there are many other applications for which this relatively simple piece of hardware could be employed.
For three days of effort I am super happy with the result.