Close
0%
0%

Pi Pedalboard: Live/Recording Rig

A small pedalboard to enable home recording and performance during lockdown

Similar projects worth following
While the whole of the UK has been plunged into a state of lockdowns, live music and studio work has been nigh on non-existent. As with a lot of industries, music performers have resorted to recording and live streaming from home.
Now I am predominantly working from home in my day job I'd like to assemble a rig to allow me to allow play from home.

Project Requirements

In order to meet my ideas,

  • Record Audio
  • Offer onboard FX
  • Be small and portable
  • Flexible audio routing
  • Have an intuitive interface to control it all
  • Be built from already owned parts (as much as can be)

Record Audio

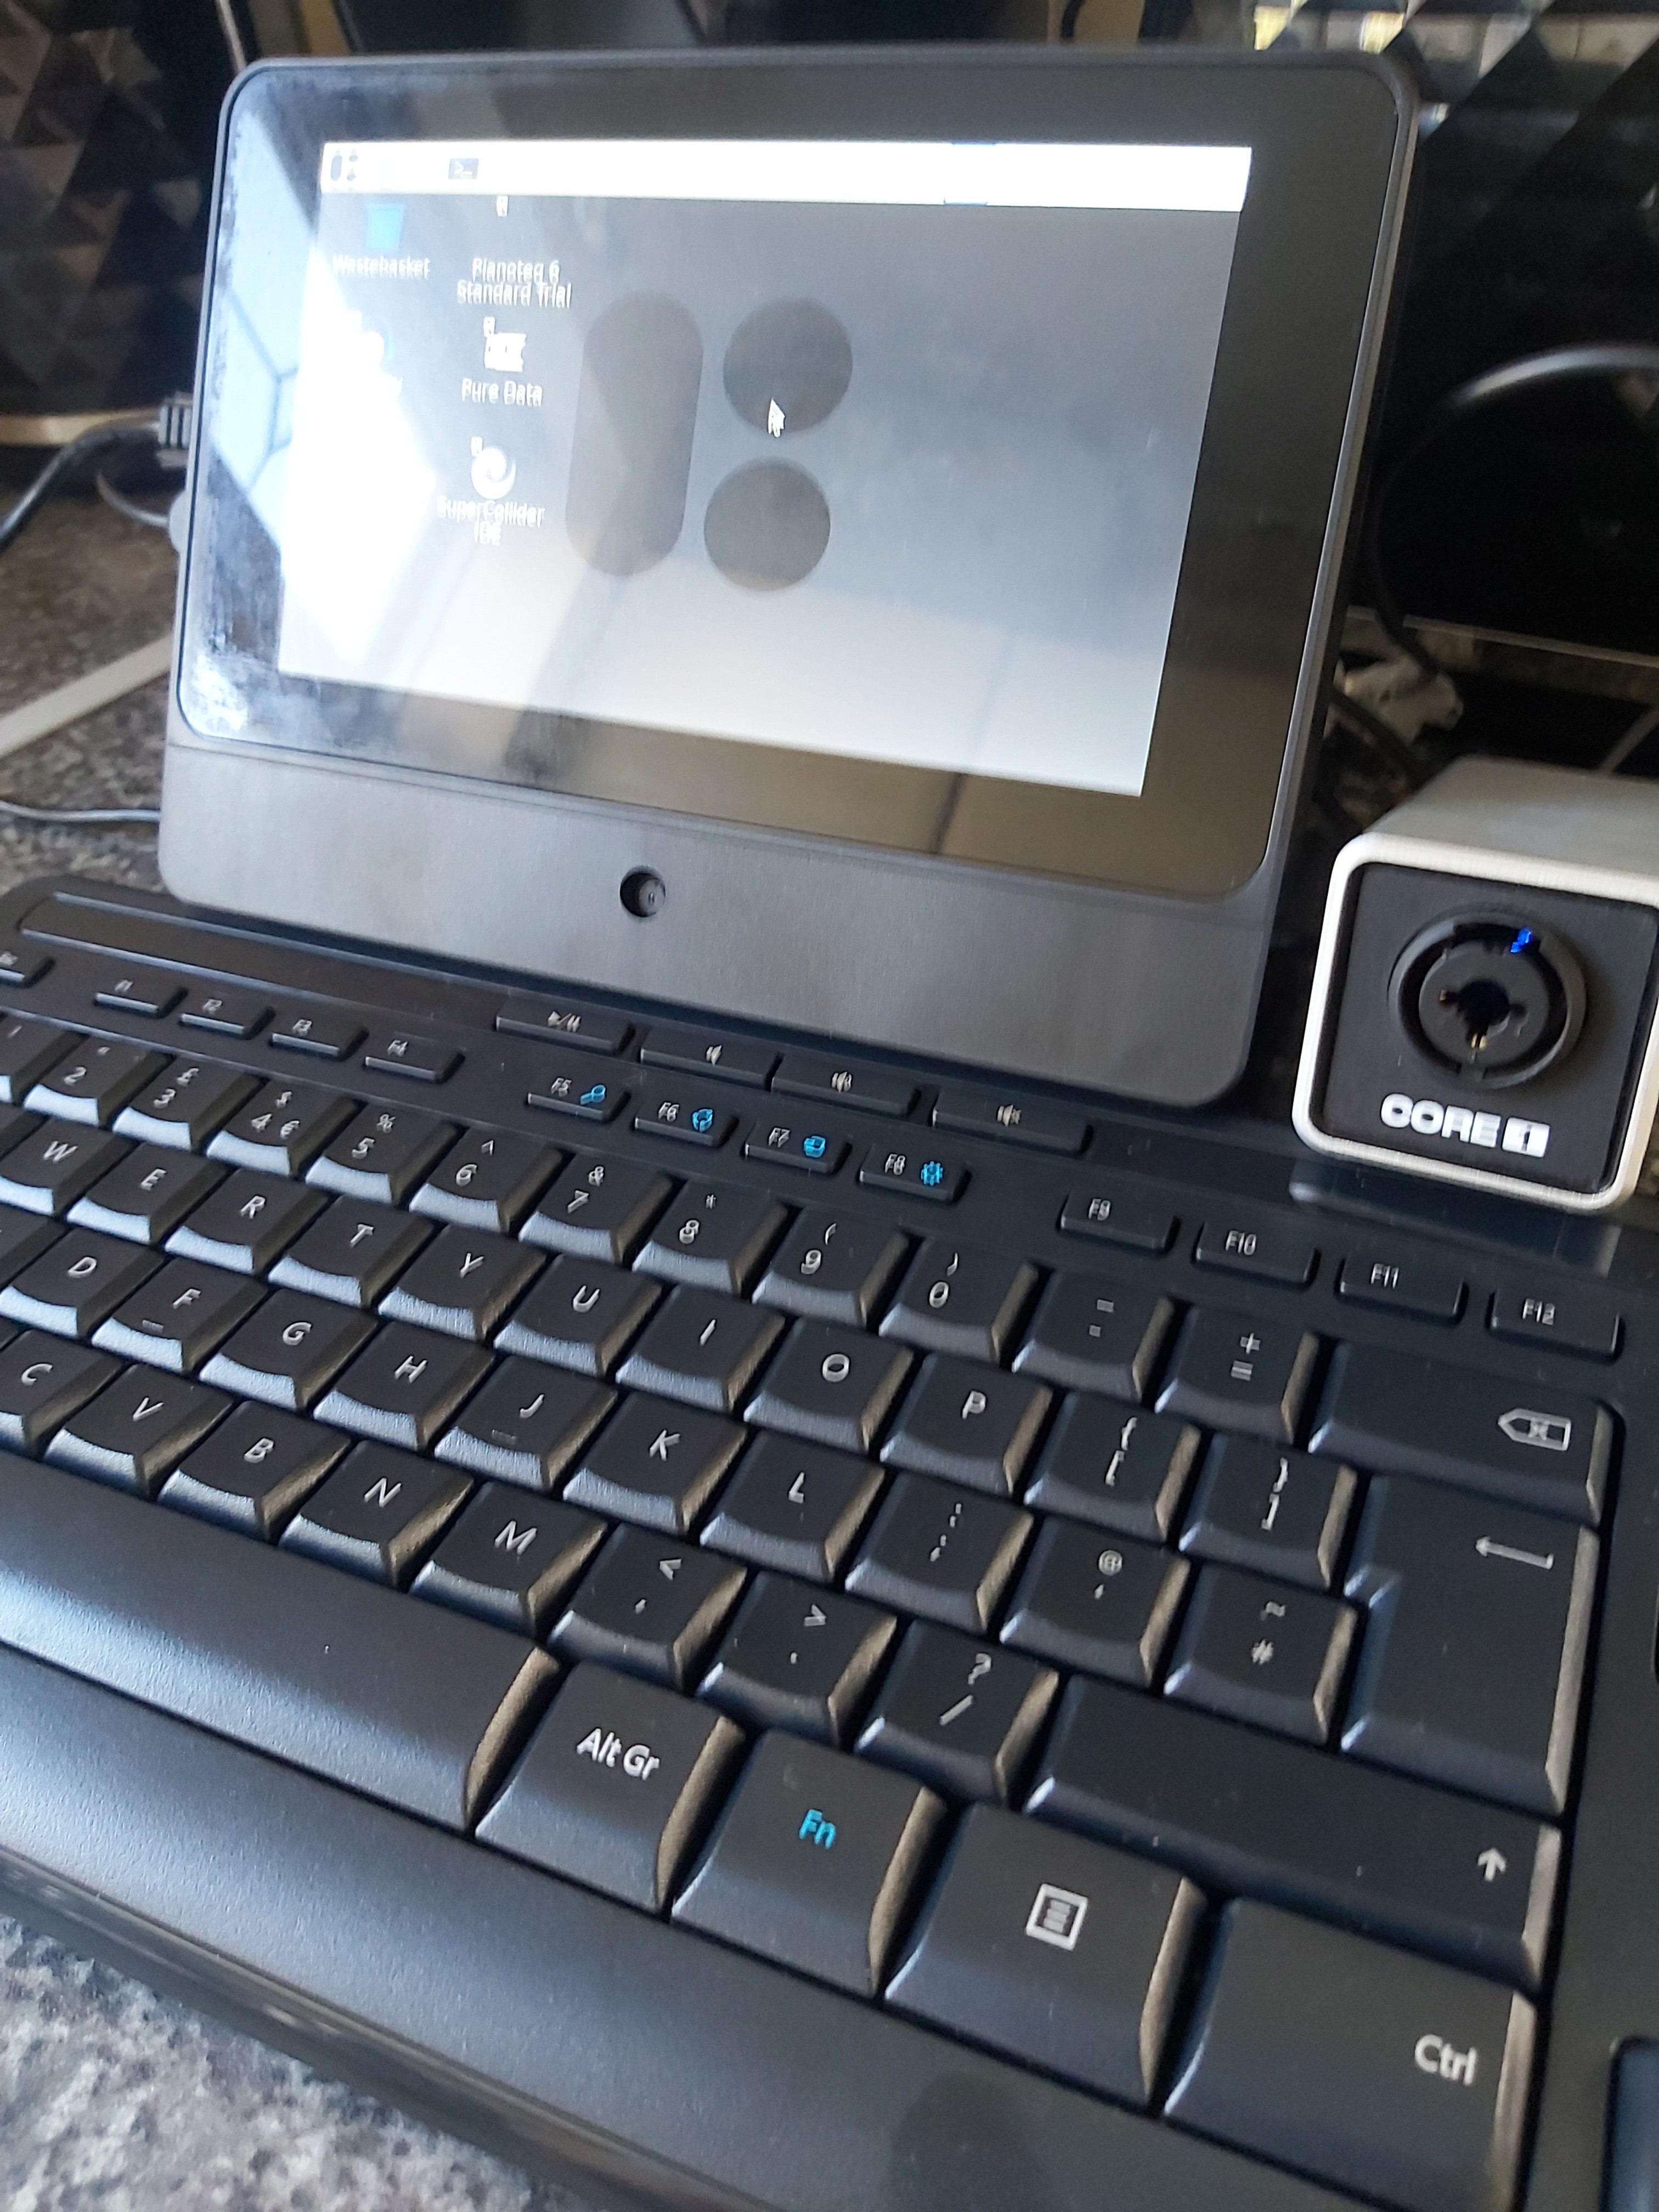
The Audio DAW Reaper has recently released a Pi-specific installer for the Pi2 board and upwards; using this DAW would be great (and more useful than something like Audacity). I have a Pi 3 and an official
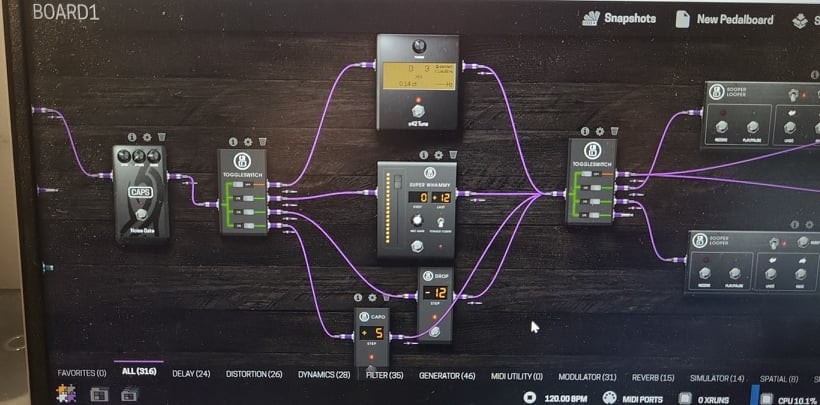
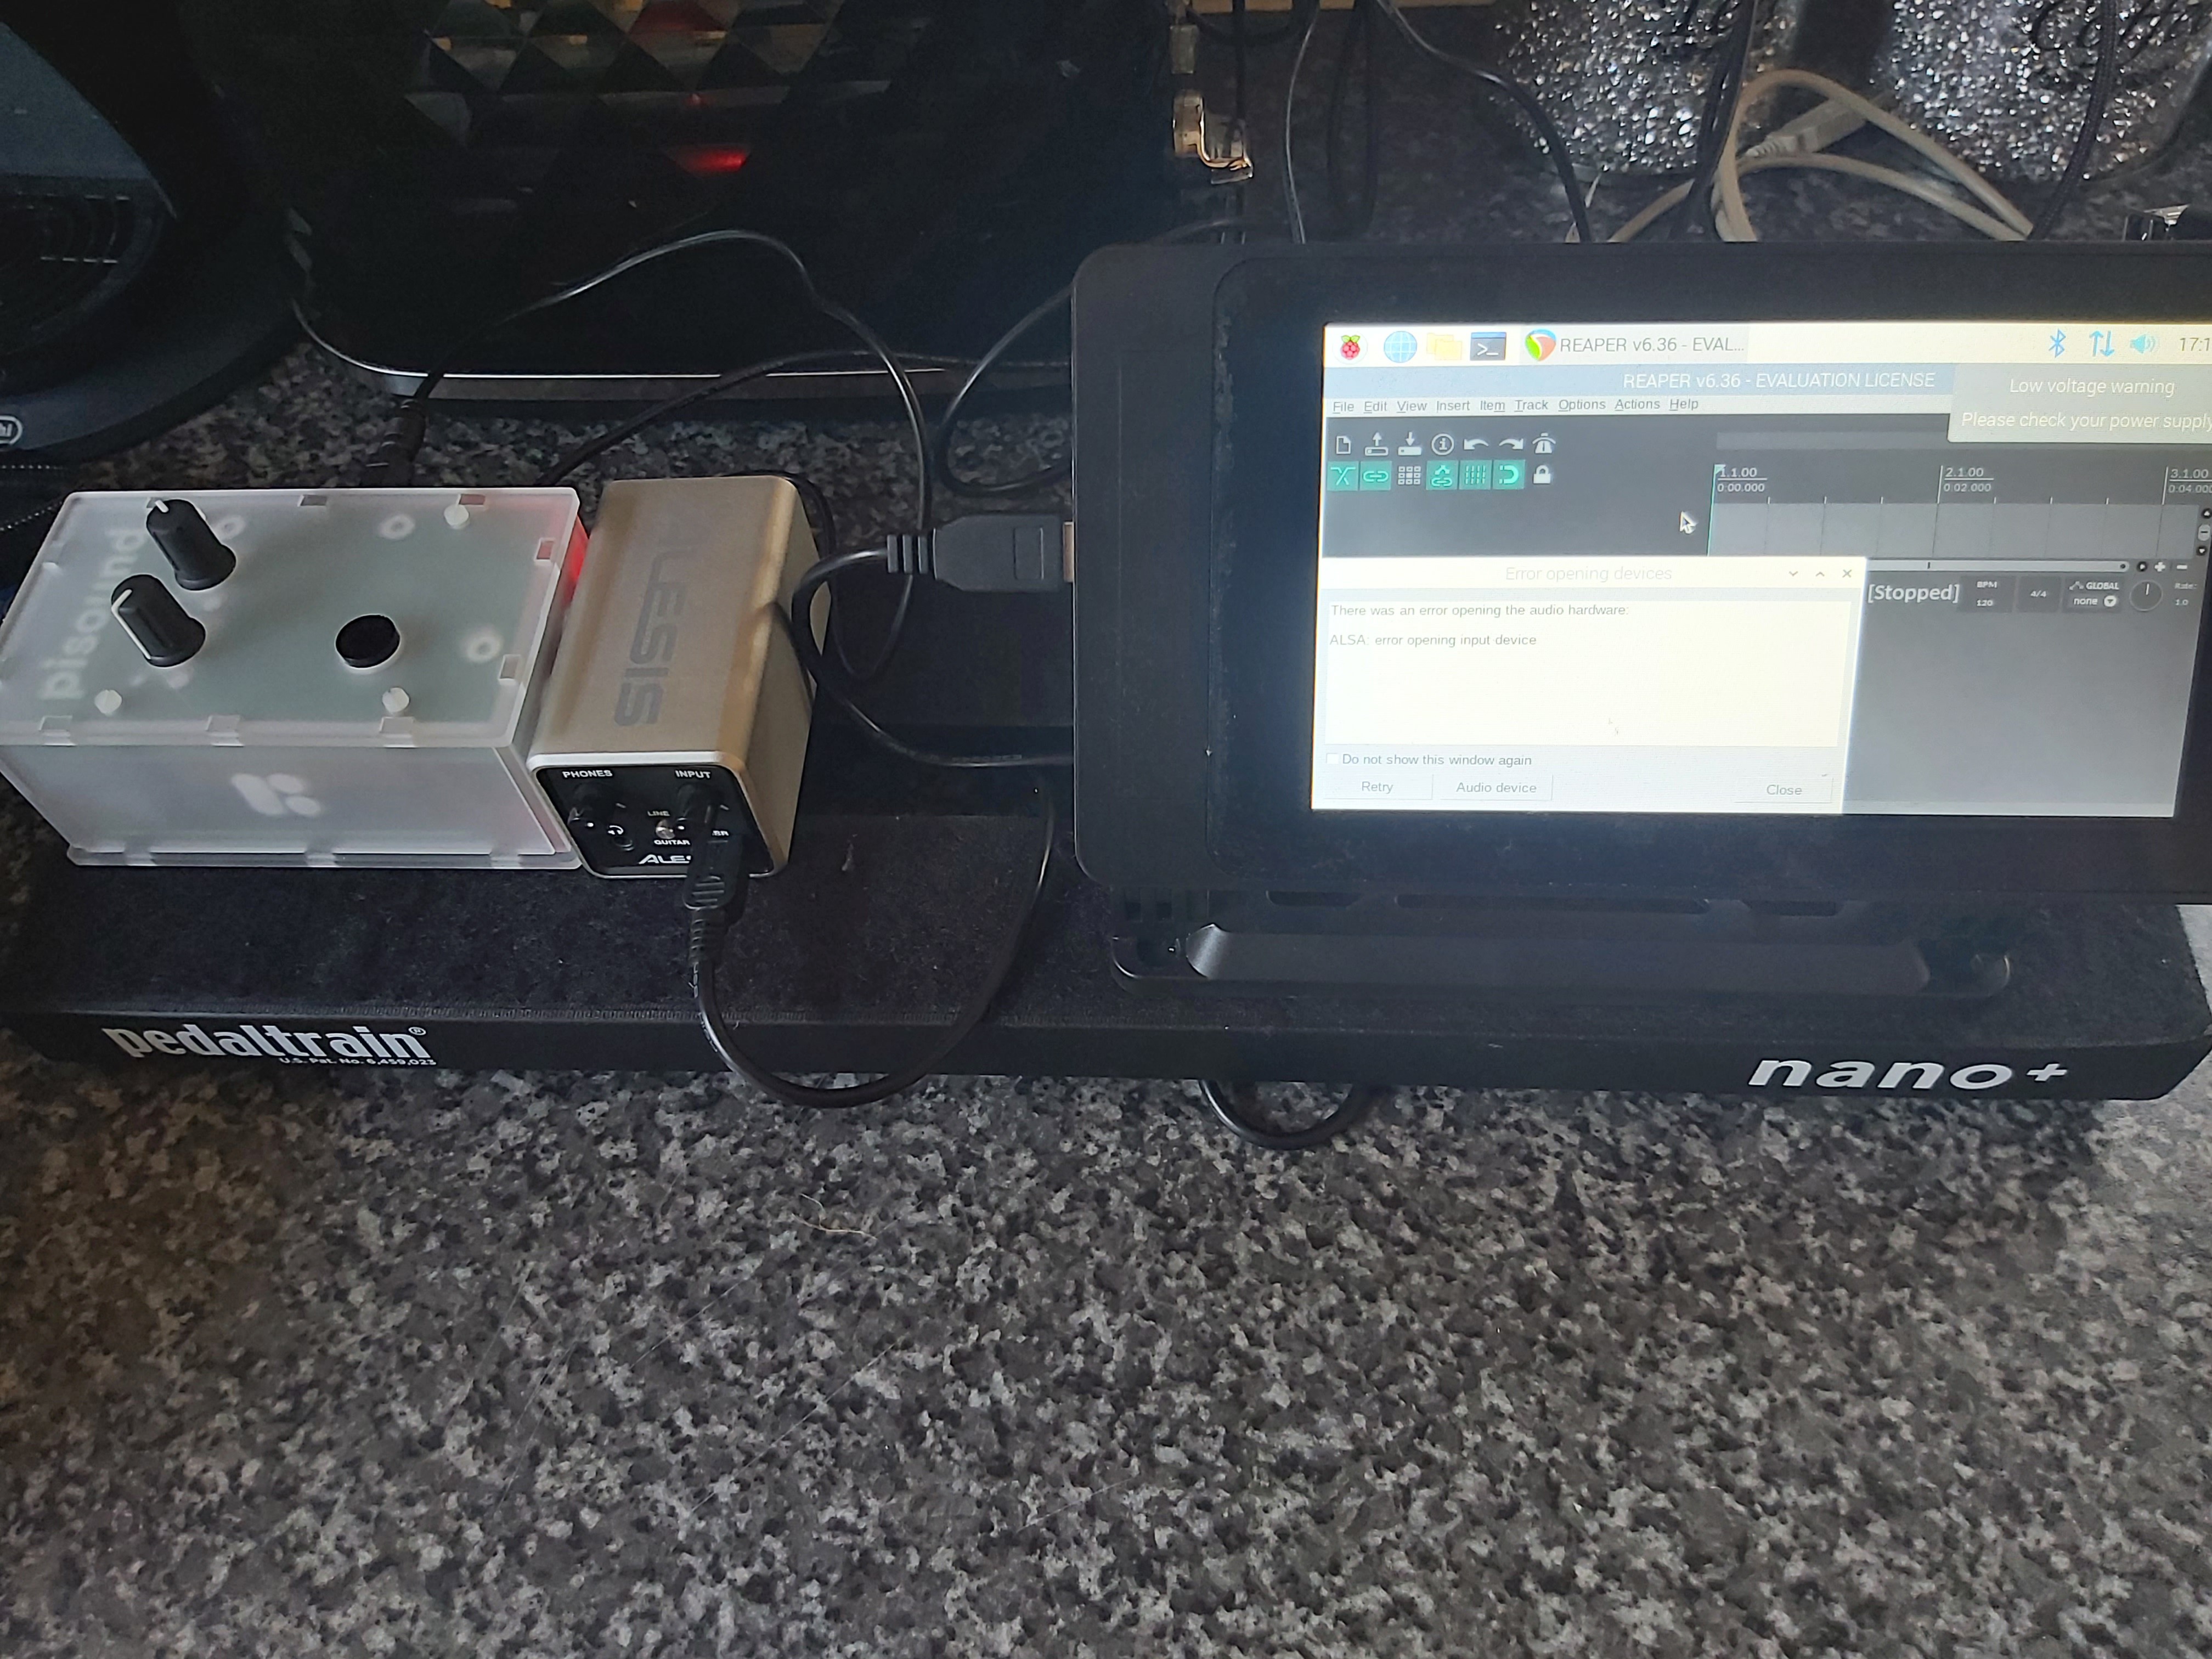
Onboard FX

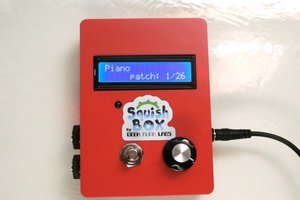
Following my work with my Multi FX Stomp Box project I've been fascinated with MODEP by Blokkas Labs for running a virtual pedalboard. I have since picked up a Pisound soundcard and a Pi4 4gb to run it on as an upgrade to my DIY built pedal, and would love to use it in this setup to handle sound processing. It's dual inputs and outputs give options (like a dedicated recording output and live output), and its MIDI ports open up the possibility of controlling presets from a central interface

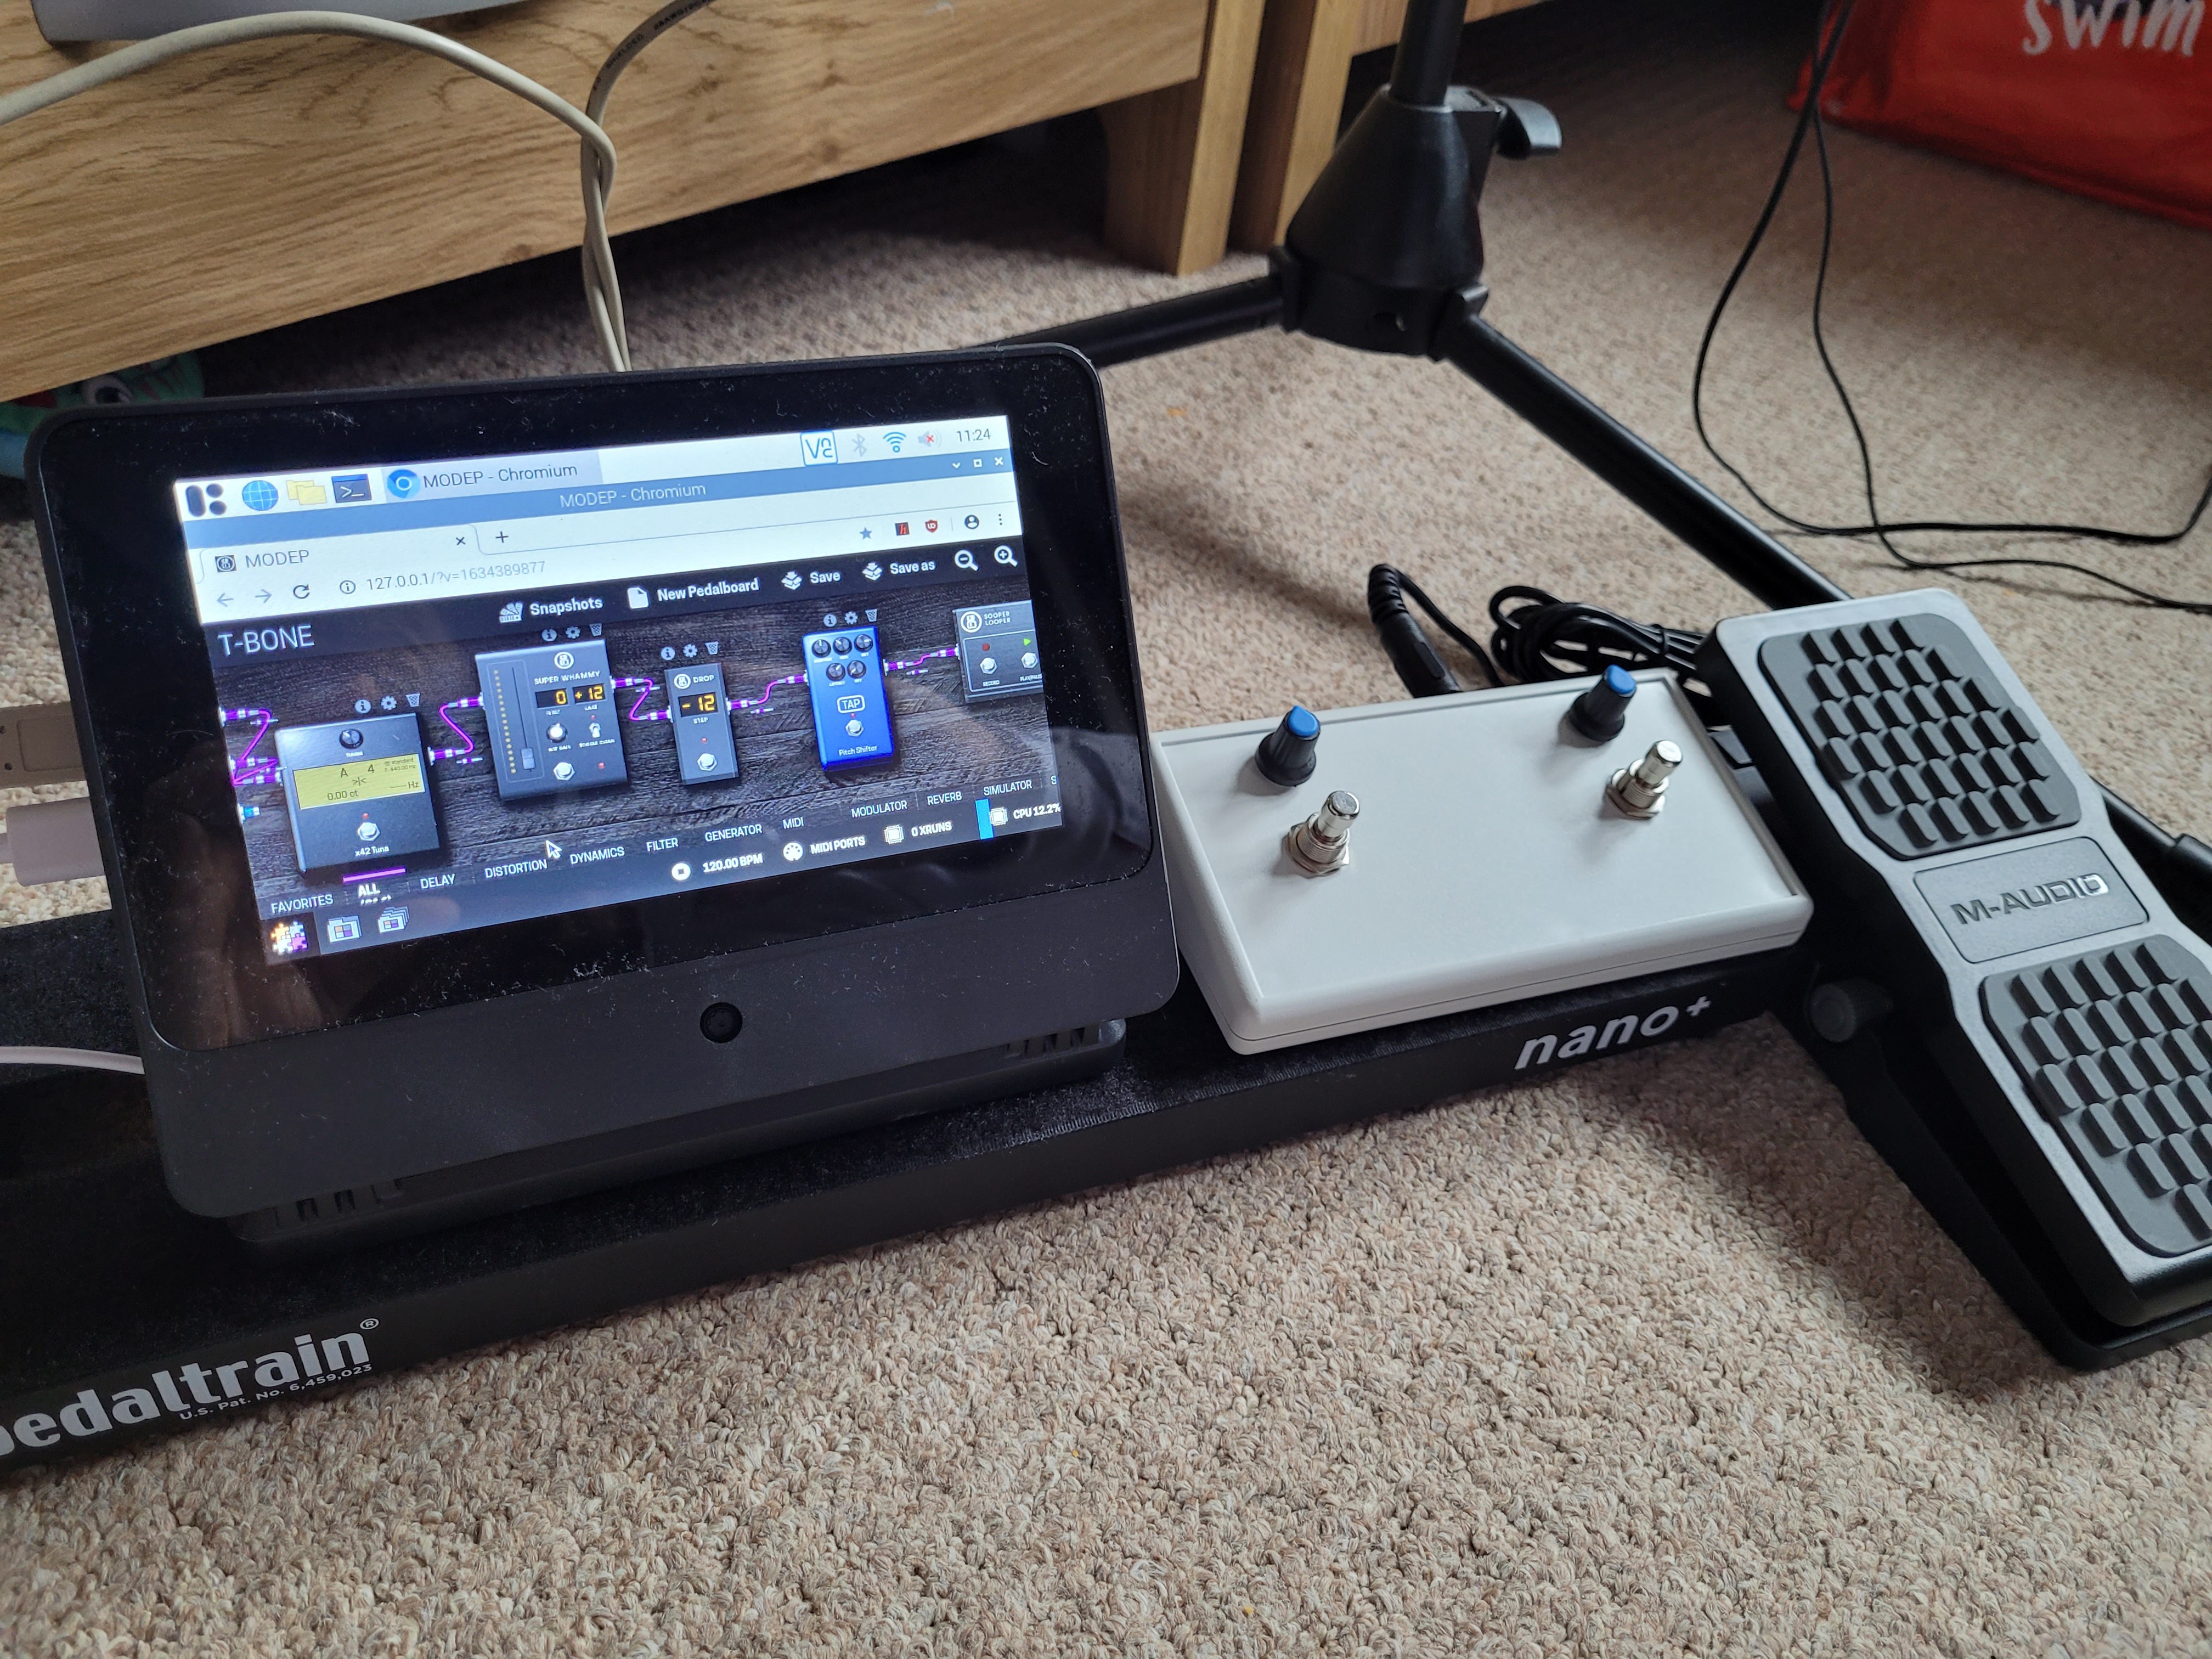
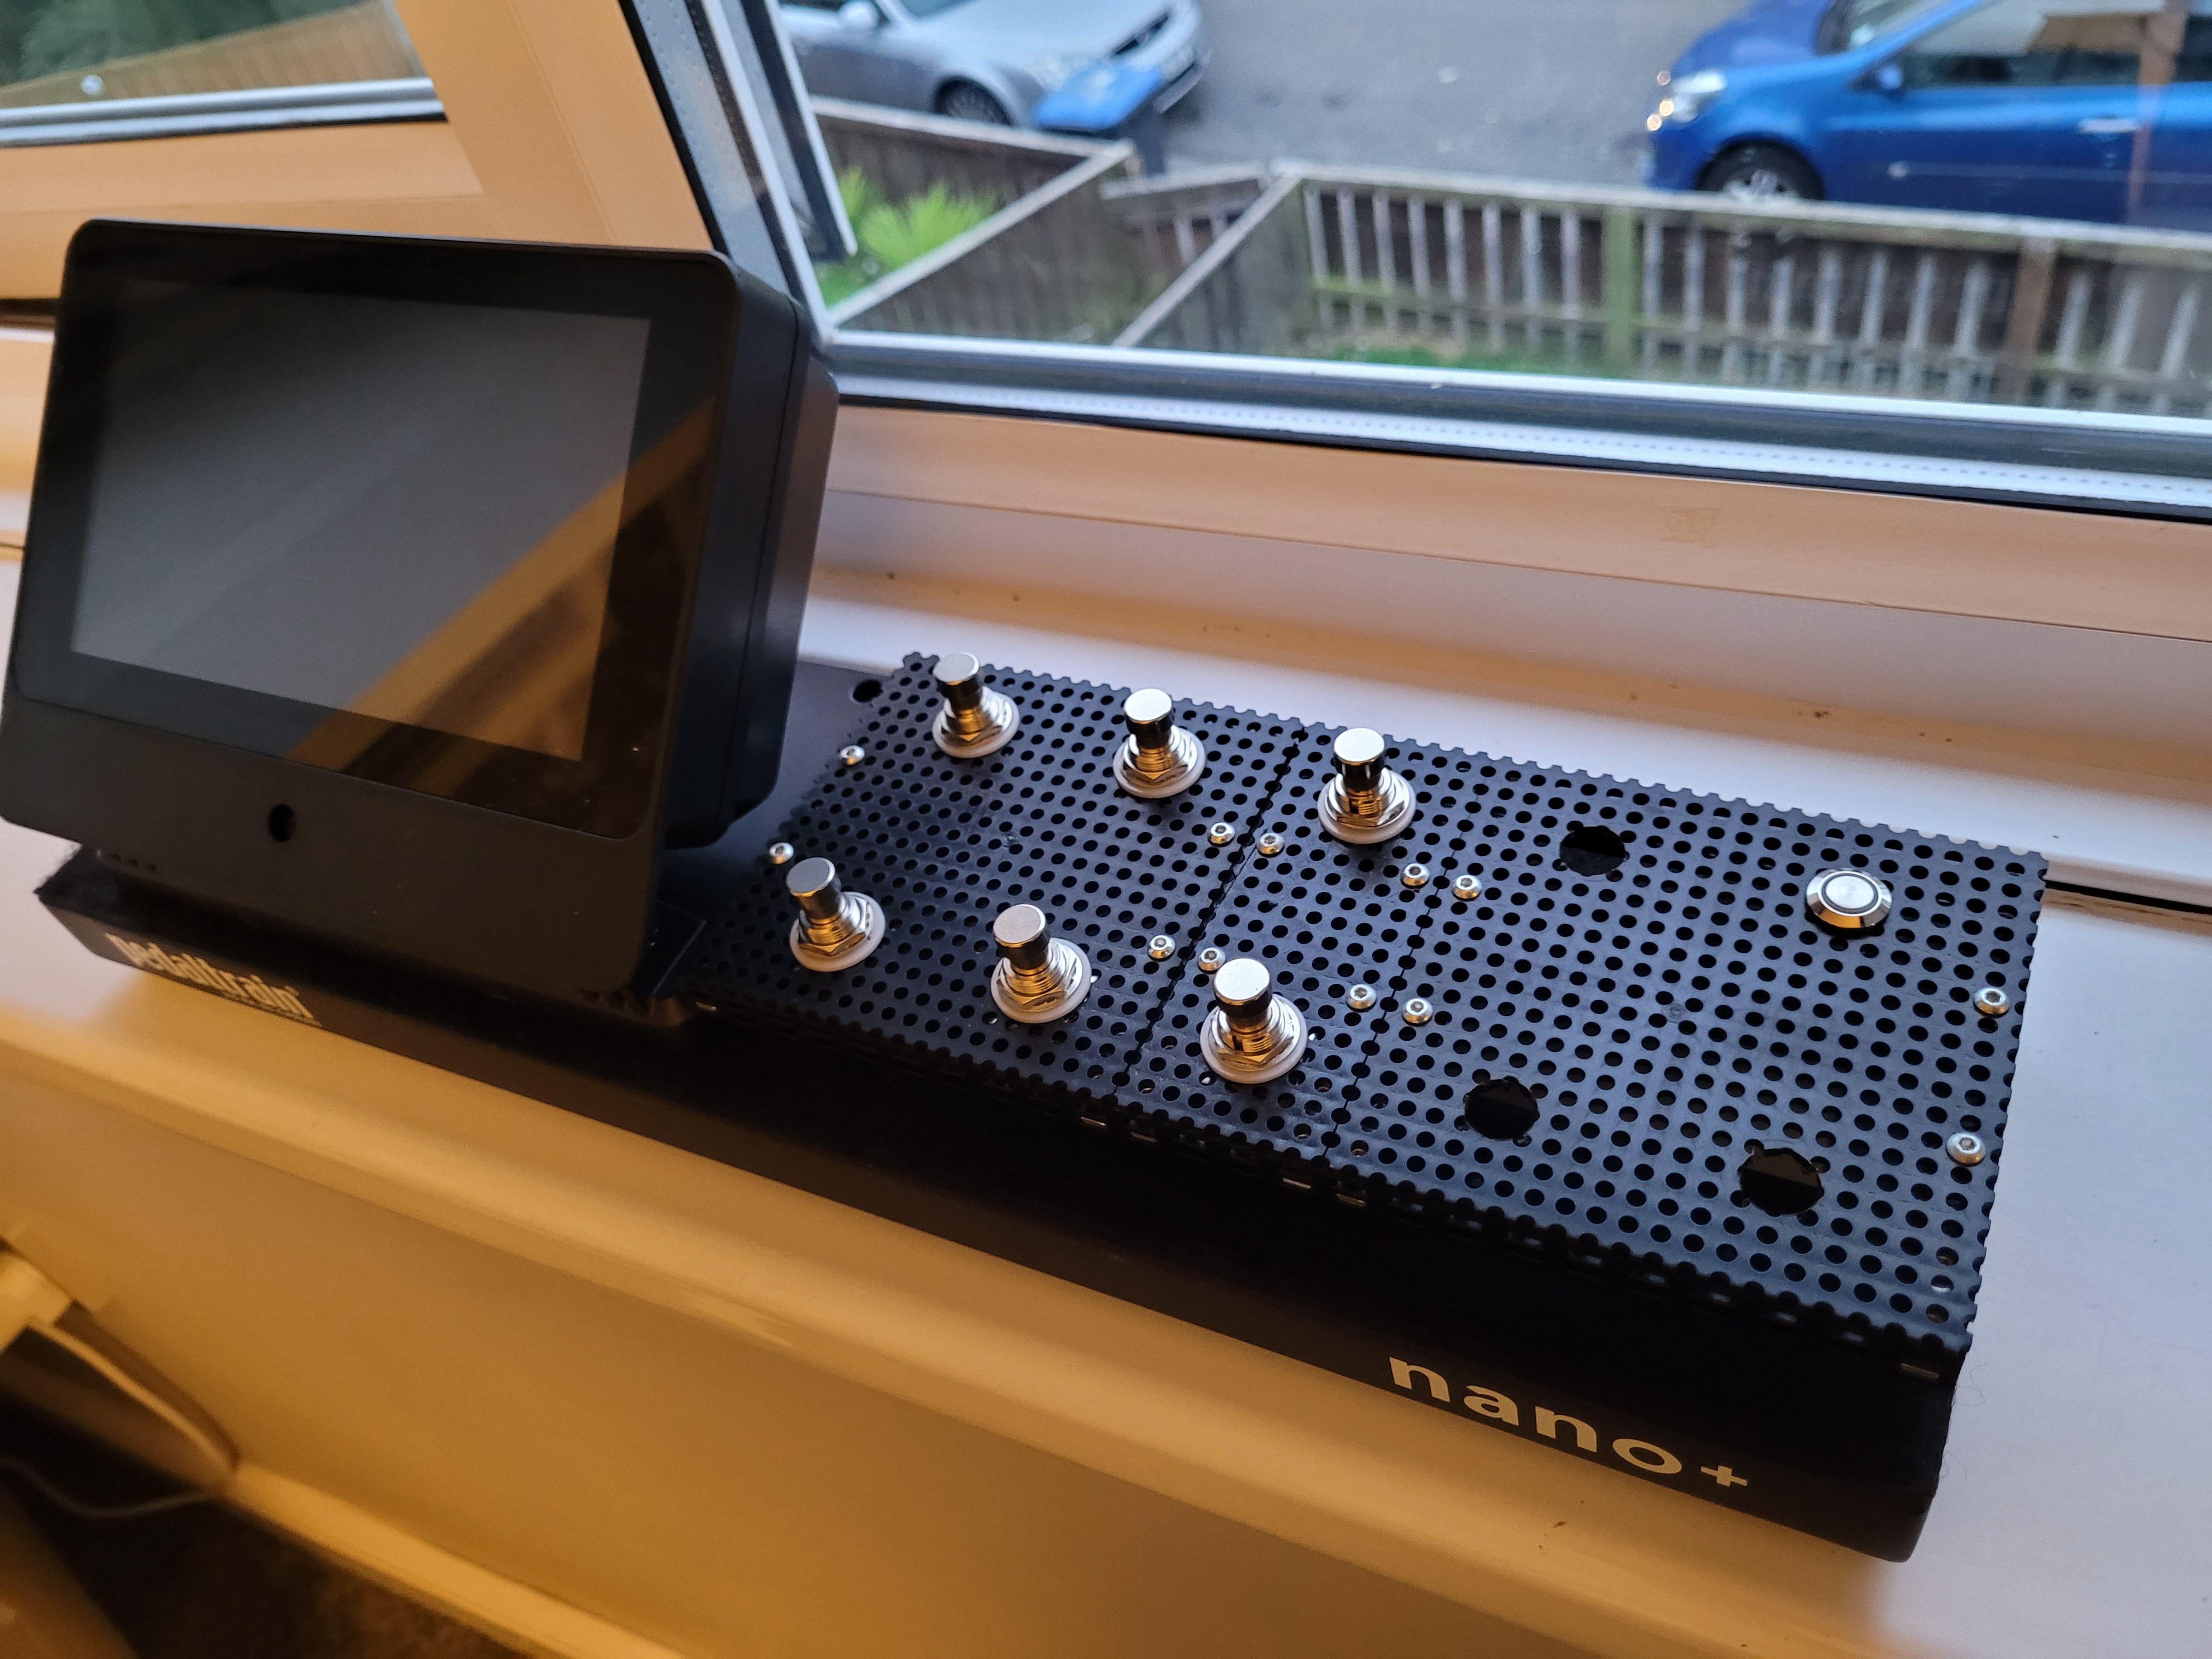
Size and Portability

I have a small Pedaltrain Nano+ pedalboard I picked up a few years ago and did nothing with it. It has enough space to mount the two Pis and a small space for a control interface. Given the two Pi devices will be powered from 5v it's feasible to, in the future, look to creating a large batter bank from 18650 cells to power the whole board. 
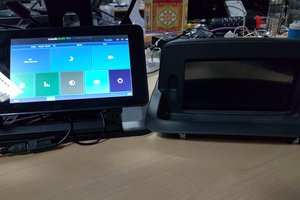
Control Interface

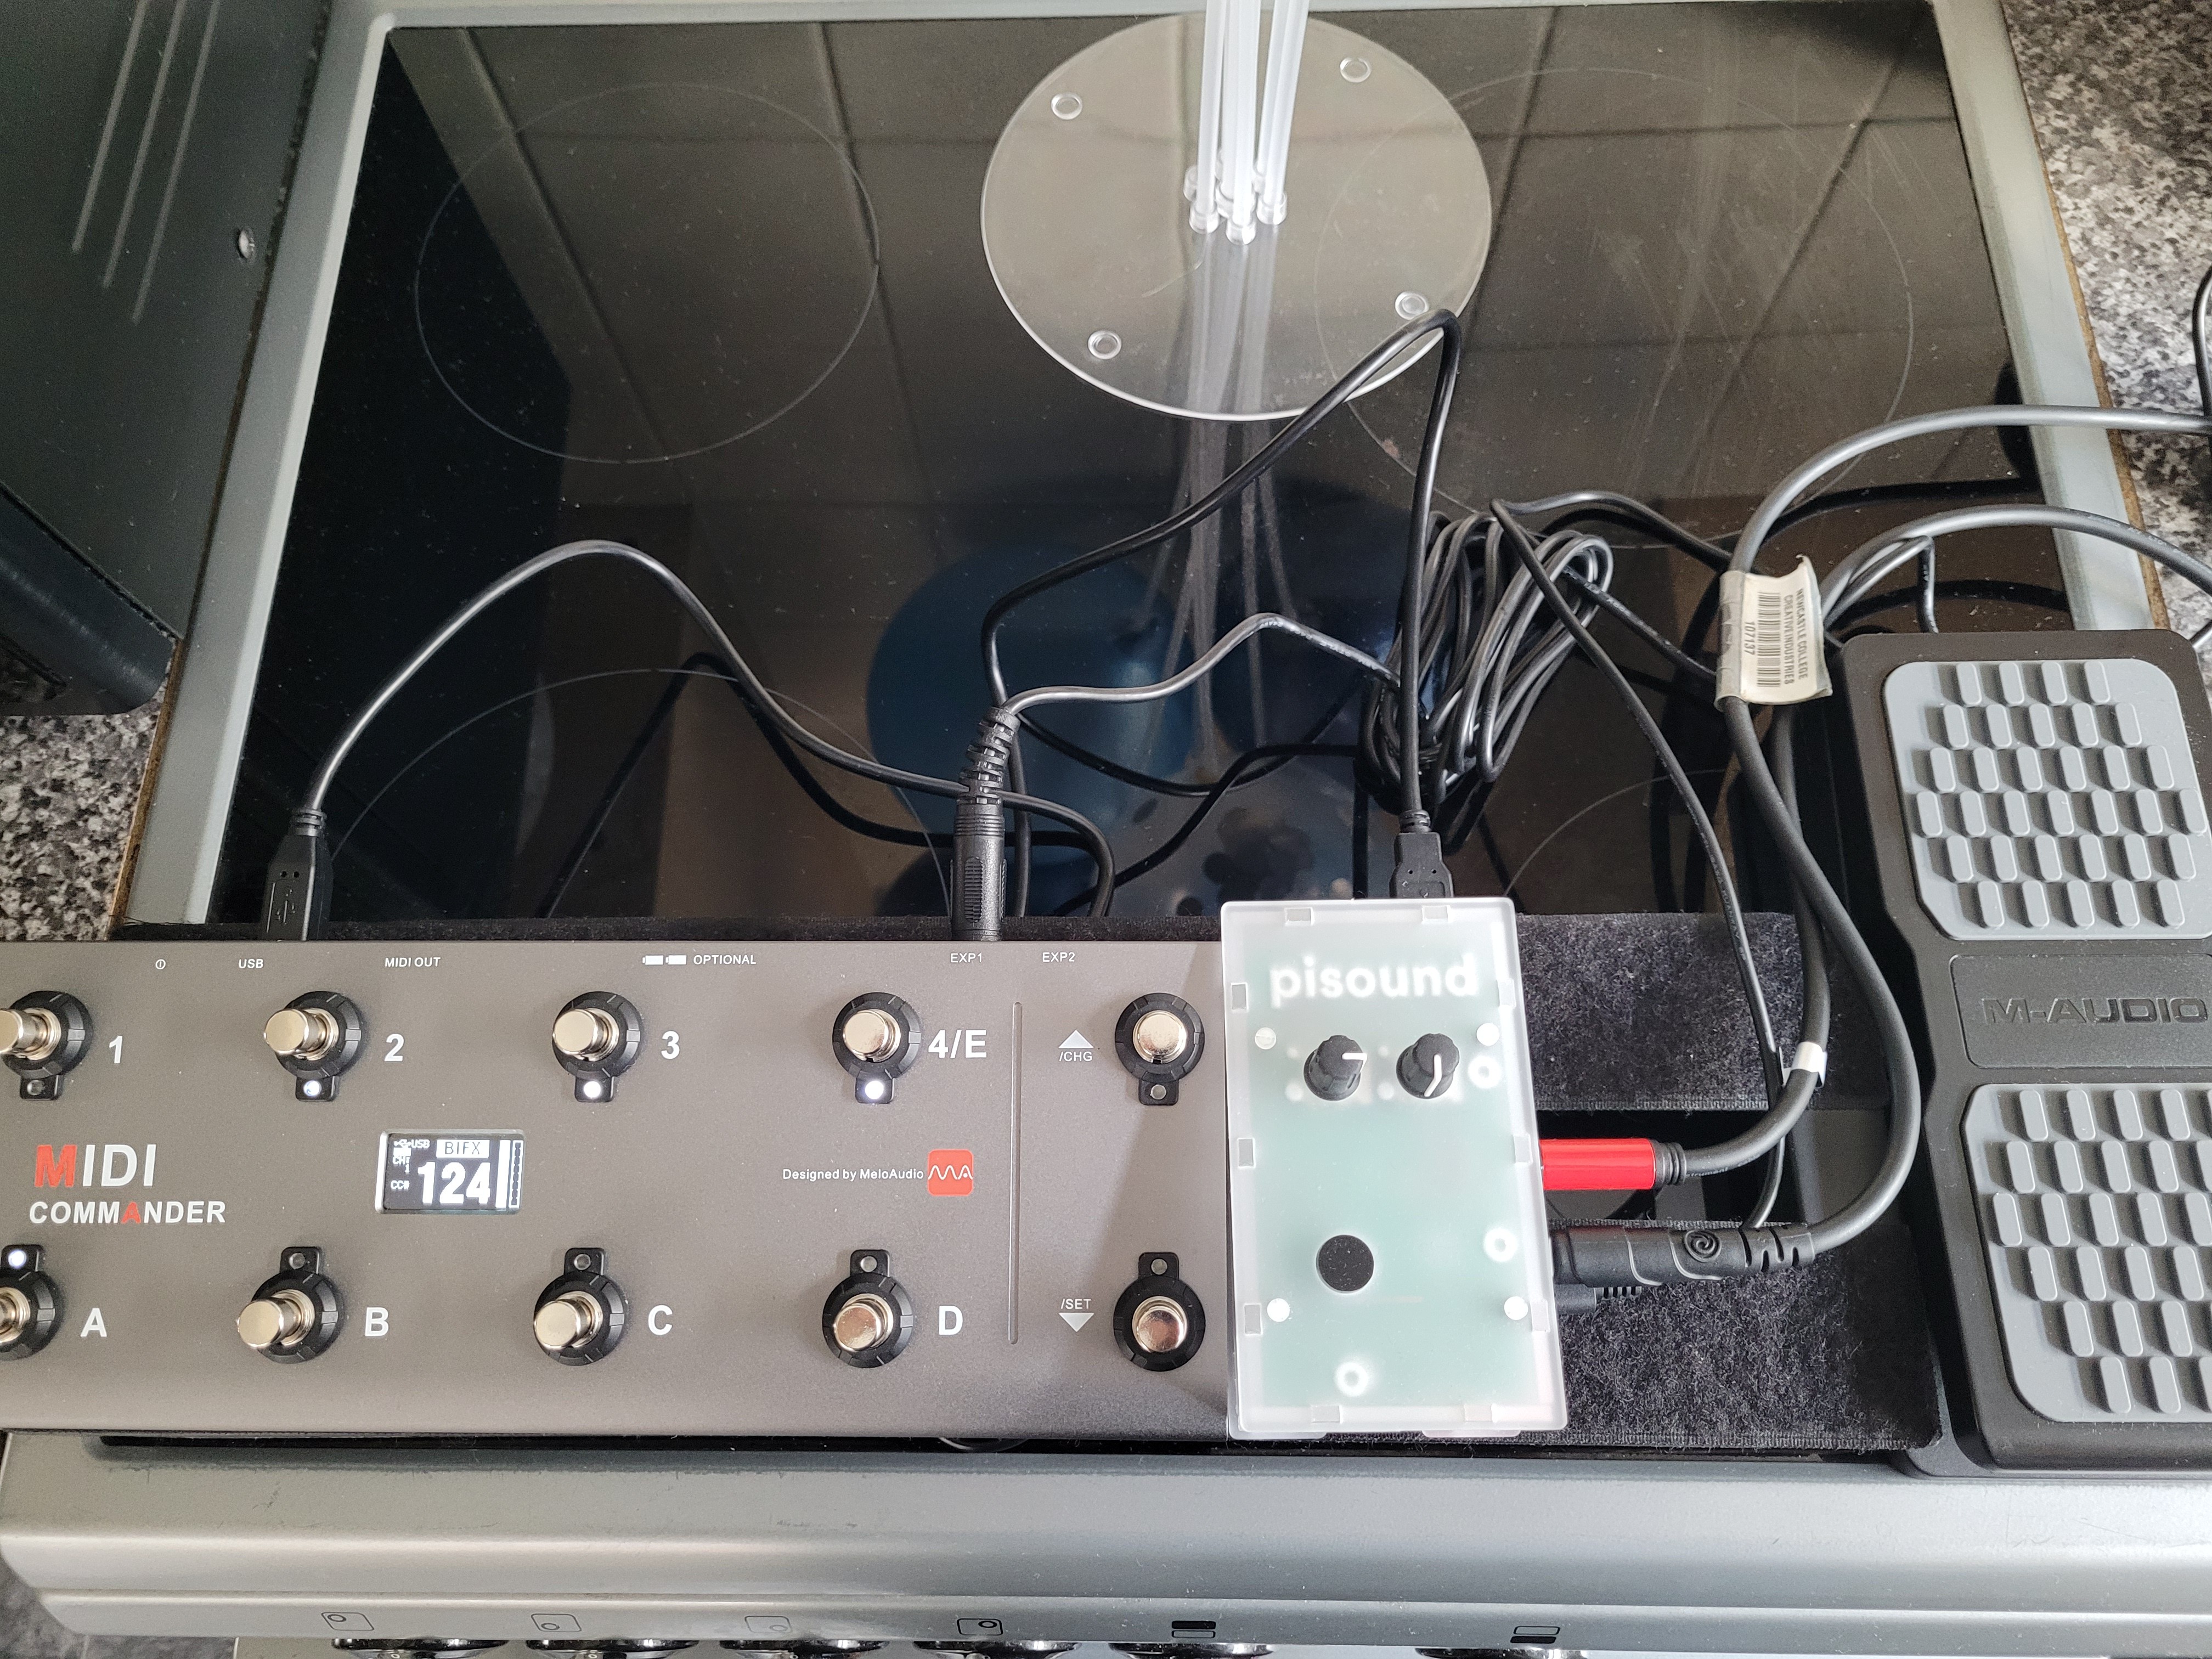
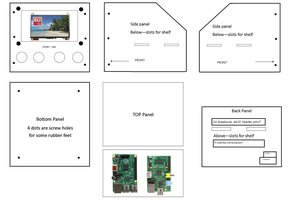
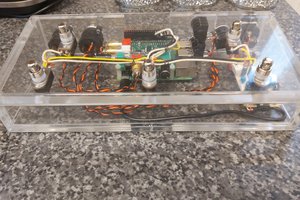
For a control interface I'd like to assemble a small box to go between the two Pi boards to act as a midi controller for them both.

I believe using two Arduino Pro Micros will be the simplest way to connect the two Pis; one can handle the buttons for the pisound, and one can handle the buttons for Reaper.

For Reaper, I'd like to have some basic controls to select a track, arm it and trigger recording.

For the pi sound the ability to switch between pedalboard layouts and also toggle pedals in the layouts on and off would be great. I'd also like to break out the analog pins for using expression pedals, and also the i2c for adding further interfaces in the future.

Flexible Routing

This is an important part - being able to use it in various configurations will be very useful thing.

The board will have the following audio routes:

  • Pisound output to Reaper input (via USB soundcard) | Reaper output via Pi HAT
  • PiSound output to jack out for live playing to an amp or FOH.

This will allow the board to have a live output and a recording output too. The Pi HAT has a headphone out, so backing tracks can be listened to while recording.

It also makes it possible to have different effects on the live out and the recording.

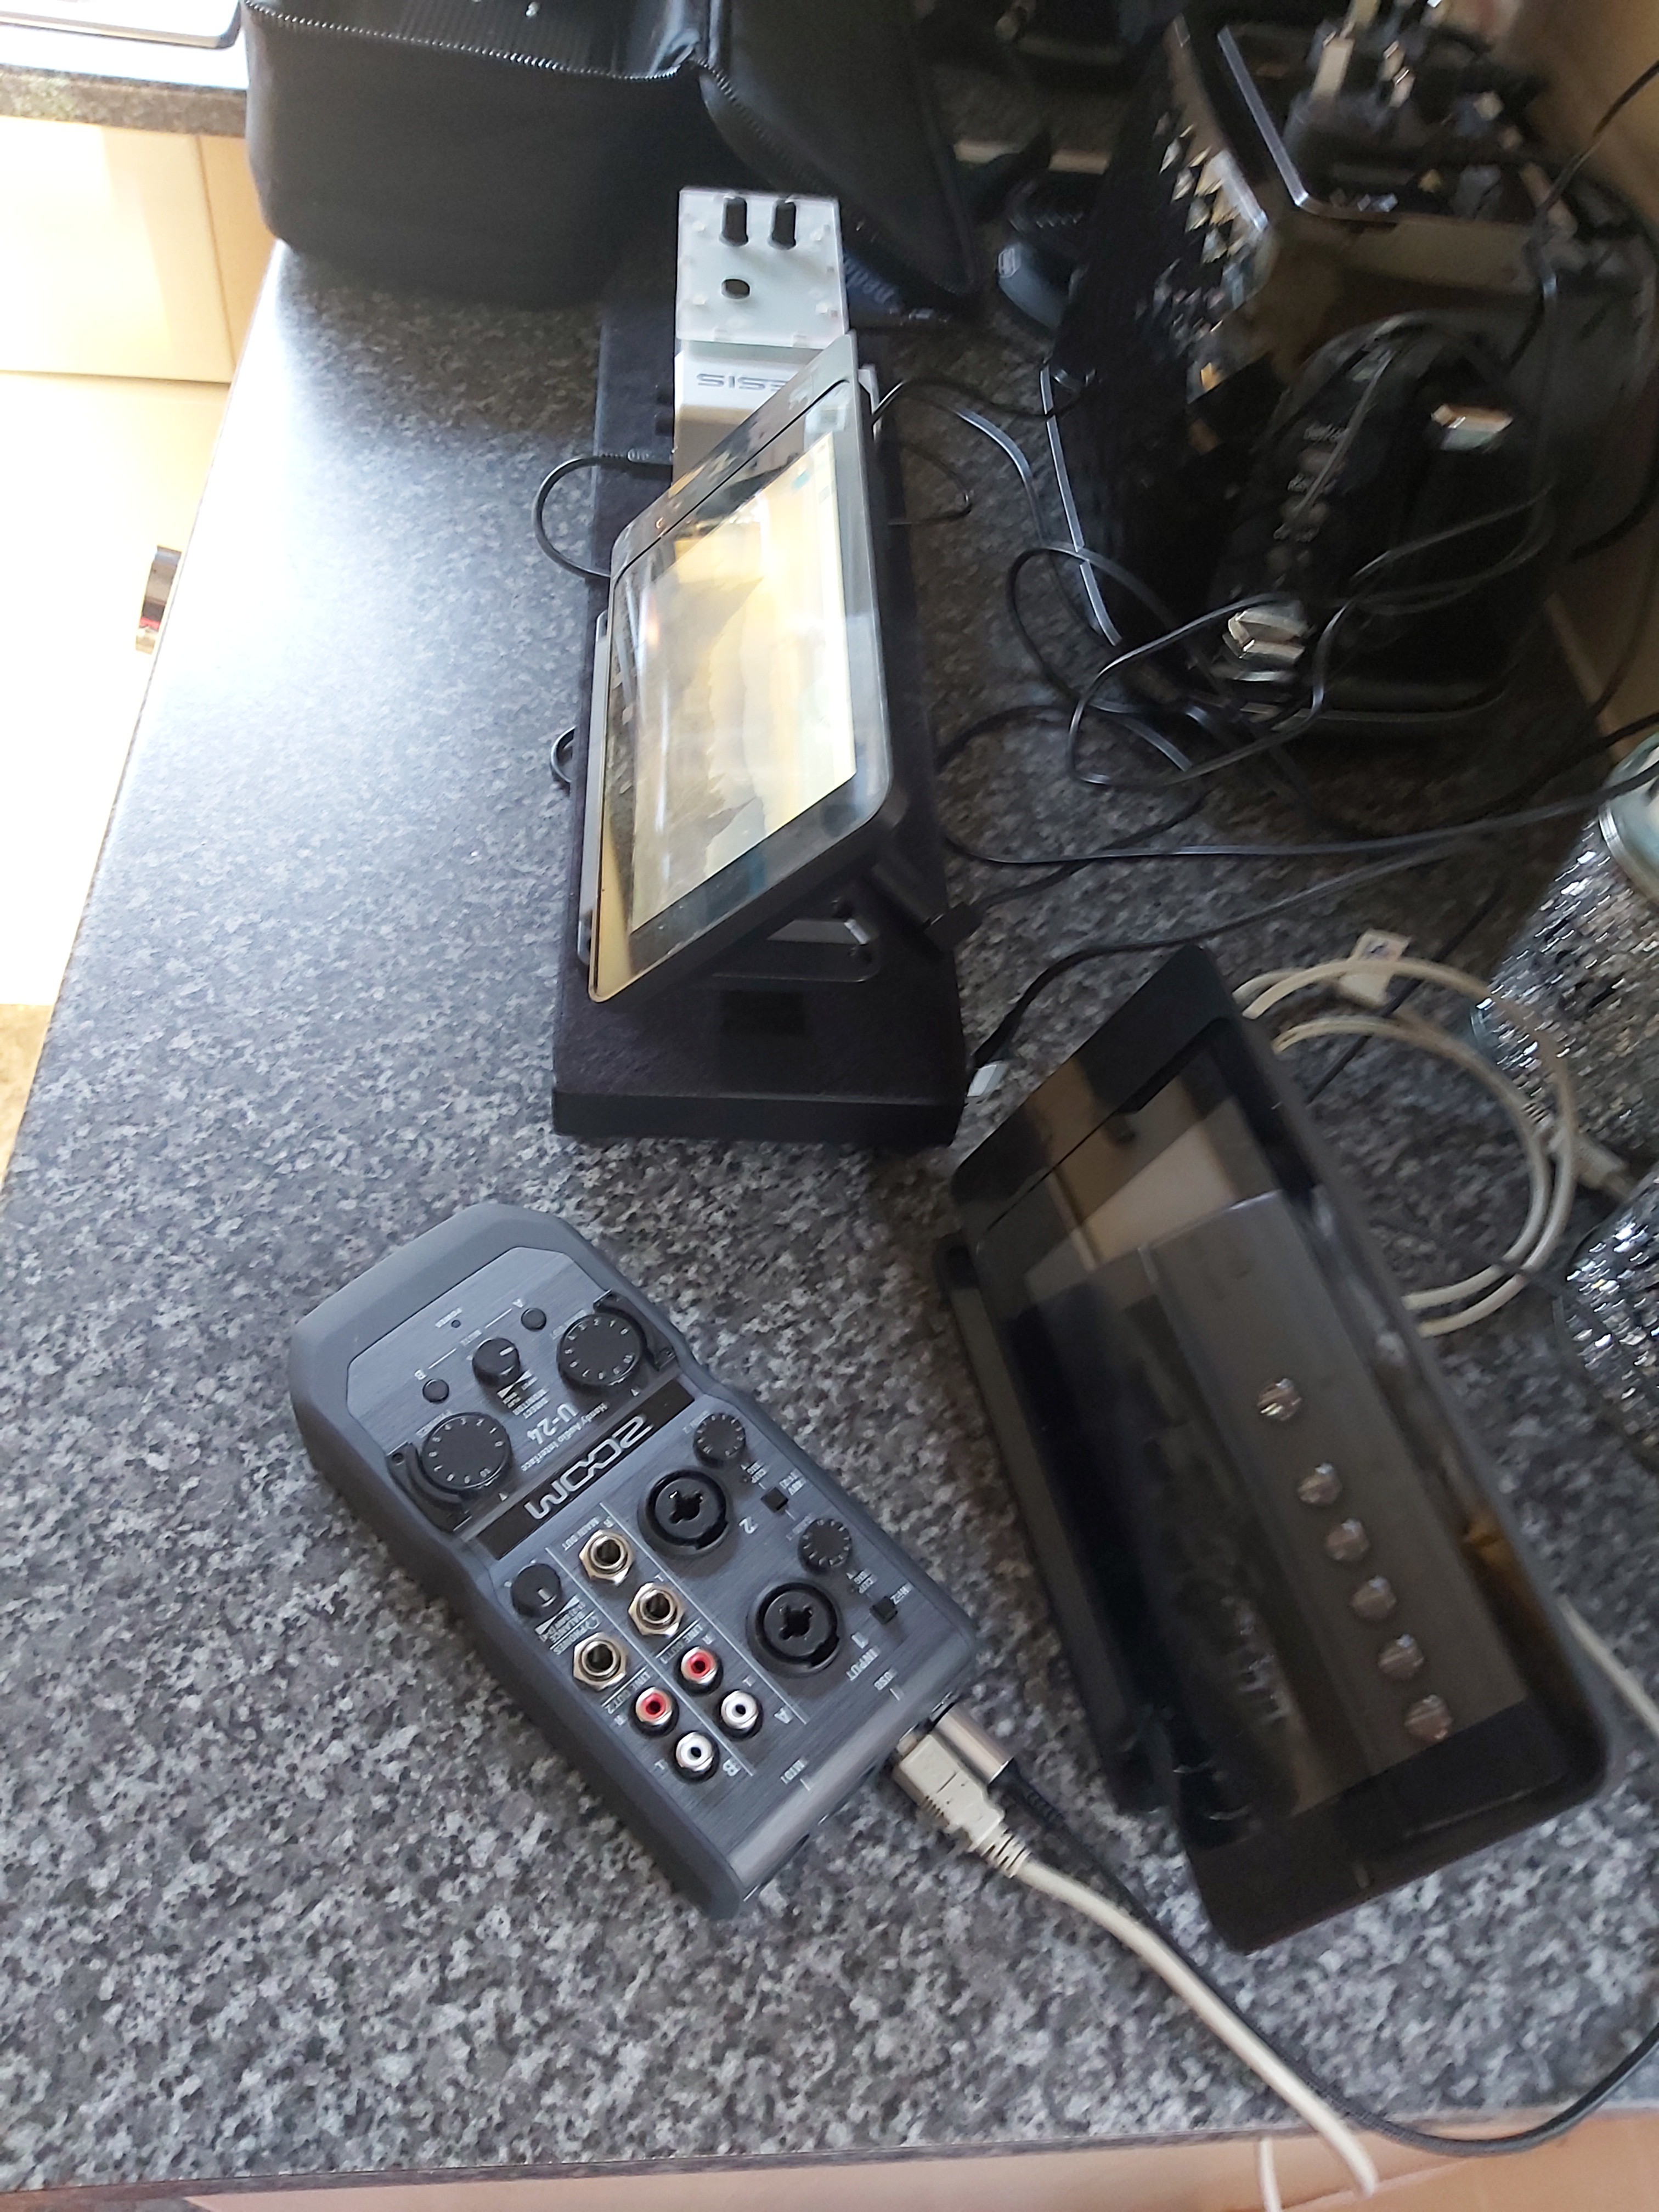
The use of a USB soundcard on the reaper pi will make it easy to unplug it and run it to a different recording system for use in studios when lockdown situations change.

Pre-existing parts

Good thing Is I am a hoard of all things Pi and Arduino, so mot of this parts list I have to hand.

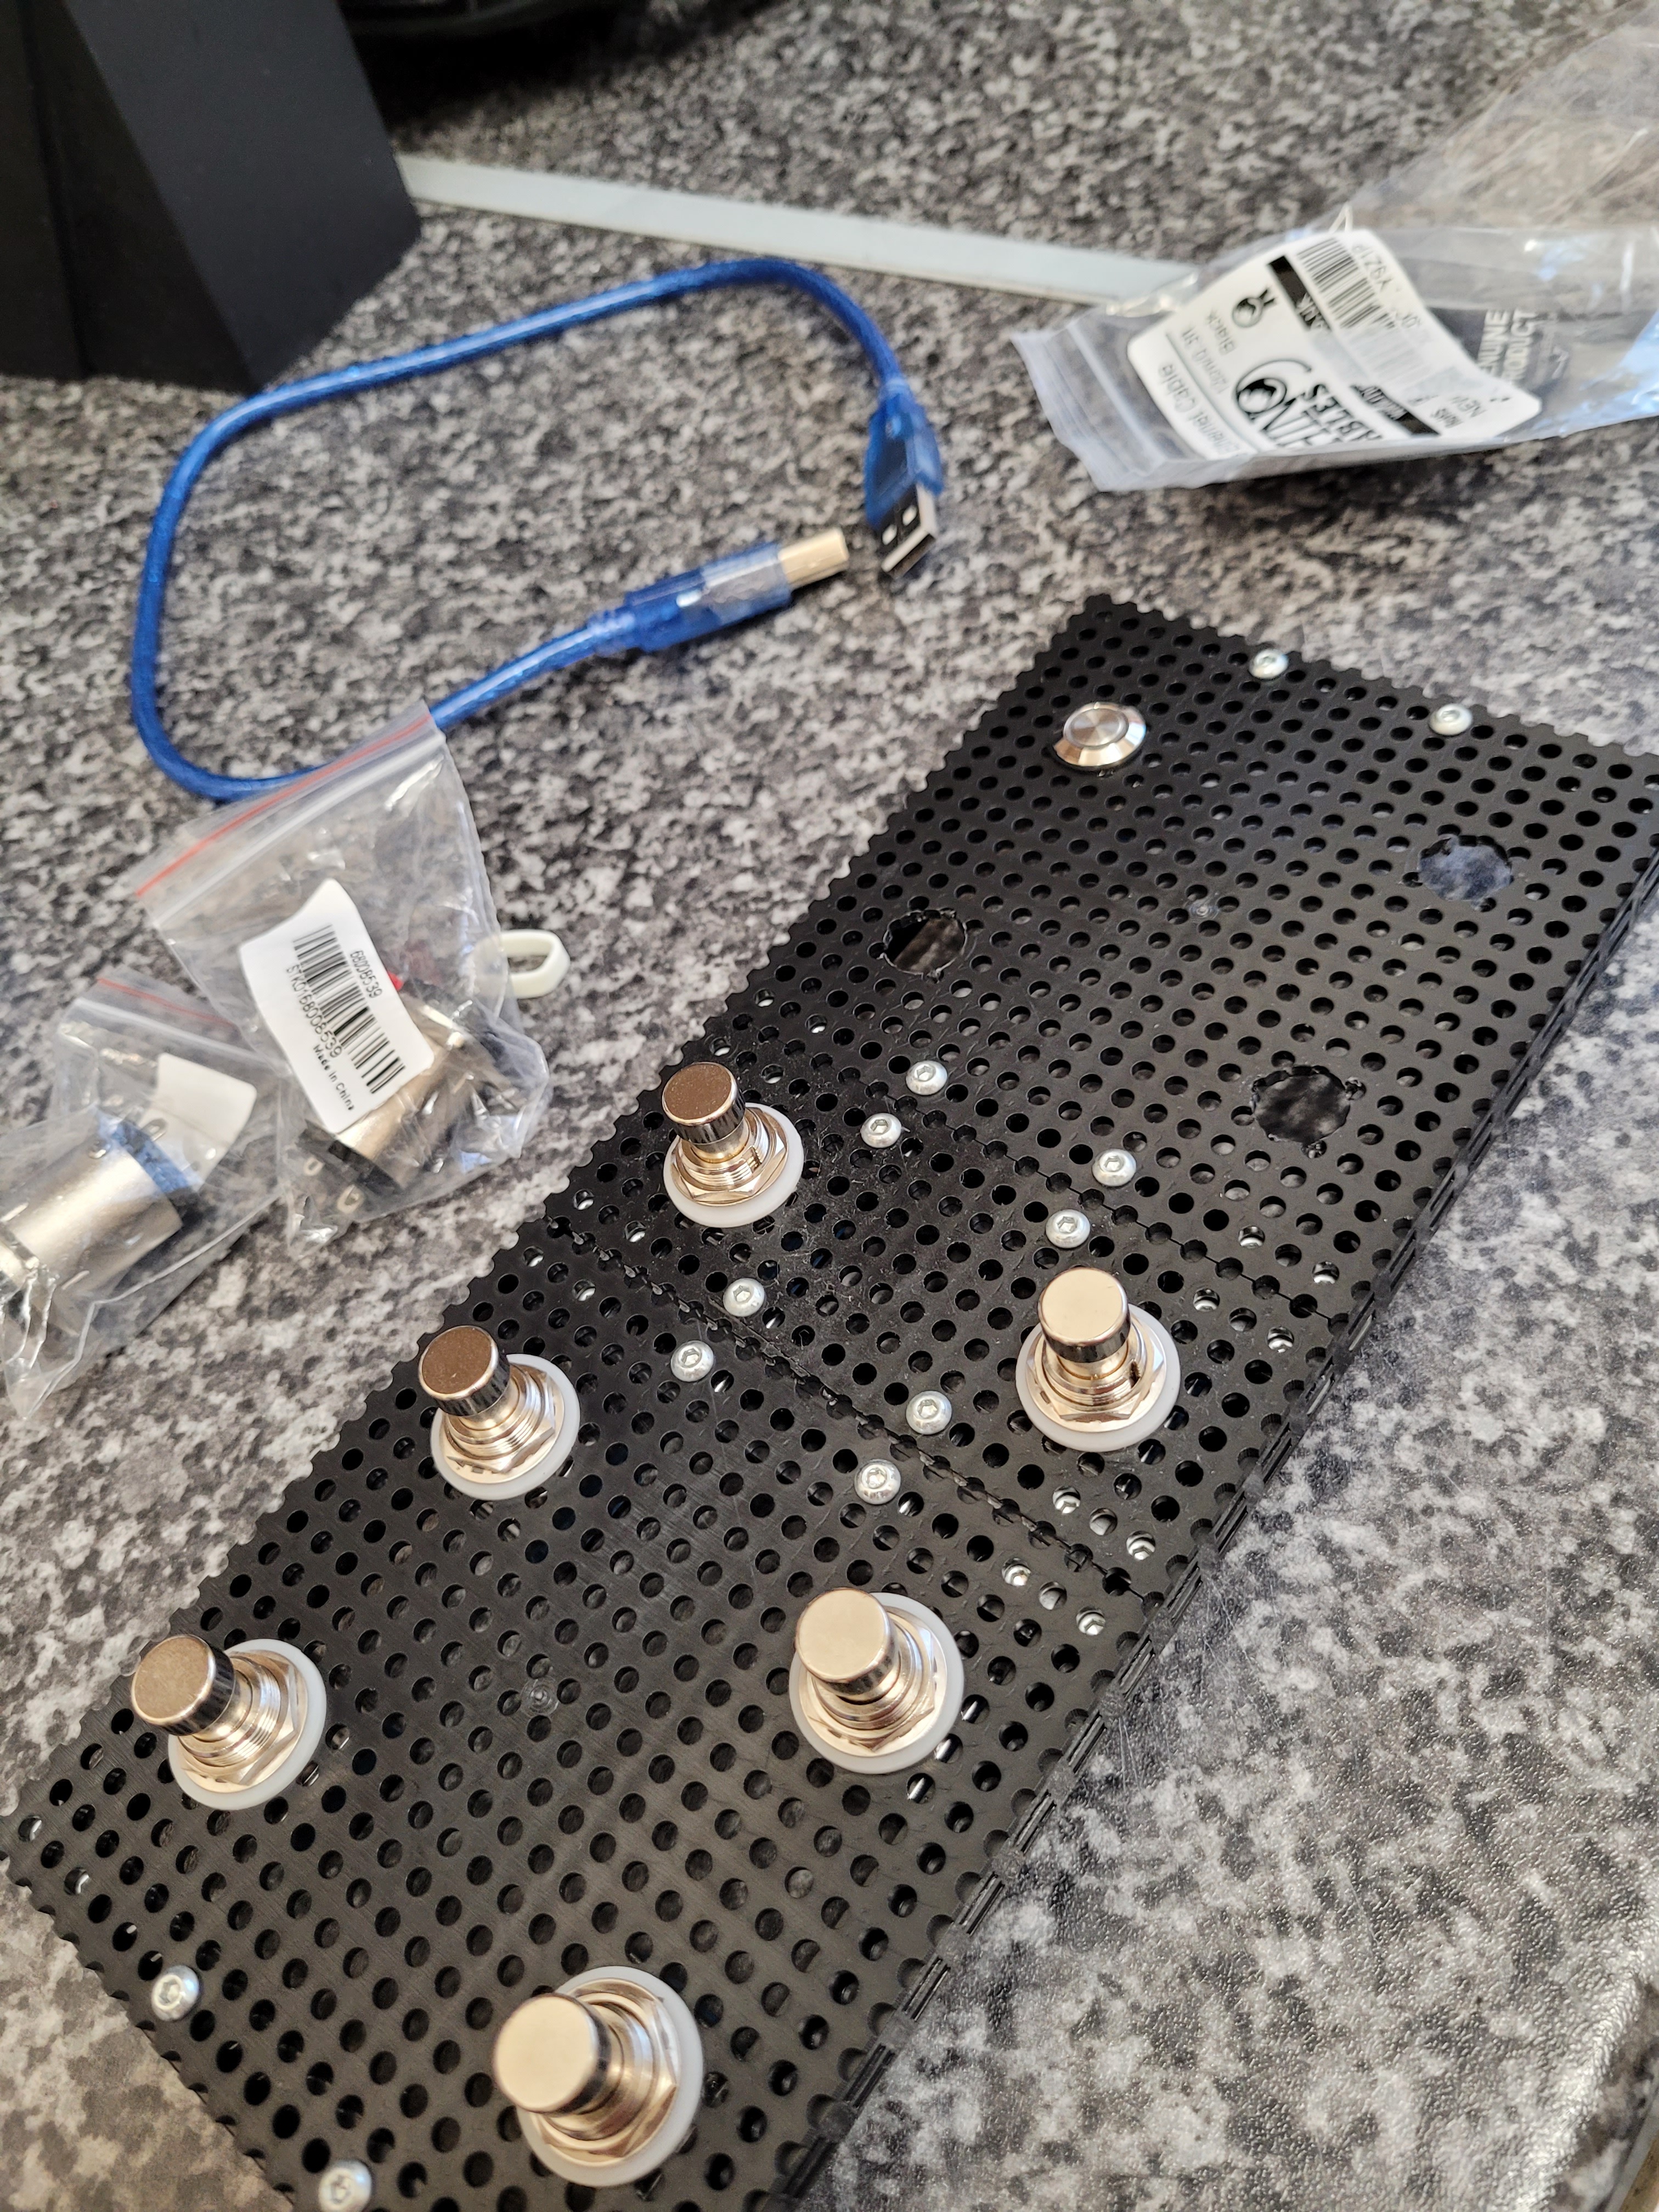
I will need to find a more suitable enclosure to build my control interface; the one I have doesn't fill the full space on the board and would be too small for footswitches.

  • 1 × Raspberry Pi 4 4gb One for the Pisound, one for Reaper
  • 1 × Pisound Soundcard Optional
  • 1 × USB audio interface For optional XLR input
  • 1 × USB C Power supply To Power the Pi, with everything else powered from the Pi itself
  • 1 × Pedaltrain Nano+ pedalboard To mount everything to

View all 6 components

  • Project Review

    Craig Hissett09/07/2022 at 22:53 0 comments

    So, I'm finally happy to mark this project as complete and move onto the next one!

    It's been a long road to settling on my final setup, but I've absolutely loved every phase.

    The project has come a long way from the first iteration using a small Alesis USB interface and has taken many forms; at some points featuring Two Pi boards with 7" screens on both, but having really got into using the device I have settle on the below setup:

    Hardware

    The final hardware for me is built around the Pi4, the Pisound HAT, the Melaudio MIDI Commander, and the mini-expression pedal.

    This setup gives me two in/two out recording, with extremely low latency using the i2s interface with the Pisiound, and the quality is great. Yes, I lack the XLR input I originally wanted, but for live use the use of an unbalanced XLR>Jack cable with a blazing trombone through it really doesn't make much of an impact to me. If I ever require the use of a condenser mic with a proper XLR interface I can always add one via USB with minimal software changes required.

    The MIDI Commander is the game-changer here; USB control device, 8 assignable switches, 2 bank selection switches and 2 expression pedal inputs give me all the flexibility I need to control the software. I'm running one small expression pedal on my board, with a second input easily added to for times when more foot control is needed (whammy and wah on a trombone is incredible, ha ha ha!)

    Software

    This has always been about MODEP for me. Great emulation of the MOD Duo pedal software, well supported by its developers and works perfectly with the Pisound. The Blokkas community made getting my software working a really fun experience, and I have never looked back. Really easy to set up with the MIDI commands from the commander, but also works really well with OSC, so using my phone/tablet for pedals with extra parameters that aren't foot friendly make this really flexible.

    Conclusion

    While originally wanting to build a solution for effects and recording, it became apparent that doing both on a single Pi well was a tall ask, and adding secondary Pi devices increased latency and complexity, somewhat unnecessarily. At first it was a kick in the teeth to drop the recording target, however I'm so glad I did, as I honestly think this would be still rumbling on now.

    All in all I am really, really pleased with my board and I'm happy with how this works.

    I have trialled it for guitar, vocals, guitar & vocals, and trombone and while capable of some wild shiz, it is also capable or being a really solid, subtle effects unit.

    Next steps

    Next up I have a handful of recording projects coming up, including recording a song my son wrote. I aim to use my rig to provide some amp simulation for guitar and some reverb for my brass parts, and I would also like to record some proper demonstration videos and putting them on YouTube.

    Next project I will be working on is:

    #Lattepanda Delta Recording Rig 

    This project will go alongside my effects setup to give me two ultra-portable rigs that will have me covered for all my musical exploits.

    Thanks for reading!

  • Final Iteration!

    Craig Hissett03/07/2022 at 22:21 0 comments

    An opportunity arose to get my hands on a Melaudio MIDI commander for less than half it's RRP. Given that would put it in the price point of picking up the enclosure I wanted and did everything I needed and so much more, I'd be silly not to bite the bullet and go for it.

    Its rounded the build off perfectly, following my decision to go back to my pisound interface. 

    I'll get some sample videos and audio soon!

  • Next iteration

    Craig Hissett11/25/2021 at 23:40 0 comments

    Just had a thought about the next step of my pedabloard project. I haven't thought it through, but I thought I may as well do that while I write. Ha ha!

    So, now I have a concept that works (Pi + usb interface, screen, footswitches etc) I've been keen to refine the approach and make it a) easier to use and b) more robust.

    Currently the footswitch box and pi with screen are on top of a pedaltrain nano+ pedalboard; they're good for mounting conventional pedals, and come with a nice gig bag, and I got it really cheap a few years ago for a planned board that I never built.

    The Pi and screen sit quite high above the board so would make it quite prone to damage if hit in the wrong place; the screen folds back slightly,  but not flat. Another thing I've been noticing while I tinker with it is that I really don't think that I'd use the screen if I had more buttons....

    The screen is a nice touch and has been vital while I've been developing the script to automate the launching of Reaper and the mapping of inputs and outputs, but it's not that practical as a performance aid; it's too small to get a full daw layout, basically.

    So, what if I was to remove the screen and have more switches in its place? More buttons means more MIDI control, so I can map all the basic commands (play/pause, record,add track, arm track, transport controls) to this extended footswitch and not need the screen at all.

    I'm probably going to be prepping my DAW projects on my laptop, and adding any provided stems or backing tracks to a project file there before dropping onto the Pi; if I write some functions to select opening projects that'd be perfect. This is the step that'll take the most work, I think, getting that control of opening files. Probably a job for a python script that turns midi commands into keyboard presses.

    This bigger footswitch will also aow for more effects to be controller in my effects software too, which is awesome. I could have banks upon banks of presets for controlling, effects, reaper, Pi shutdown etc.

    Now the cogs are turning about an all-button layout, here's the plan... rather than build a big footswitch to mount to my pedaltrain, why not turn the pedaltrain into the pedal?!
    Hear me out 😂😂😂
    The board has space for power supplies to be mounted underneath - I plan to glue some standoffs under and put the Pi there, with the Arduino from the footswitch mounted on the other side in a similar fashion. For power, I'll add a panelmount USB C port to keep it tidy.
    I'll also add a panelmount for one of the USB3 ports so I can plug my interface in, and drill a jack hole for my expression pedal. So far so good.
    Next I will drill holes for footswitches to be mounted into the pedaltrain itself. I should be able to get 10-12 with plenty of clearance from other switches. All wiring will be done below, and cable tied for a clean install.
    Last thought - the middle channel of the pedaltrain can be a place to mount some lcd screens (16x2, 20x4 depending on space, i2c with different addresses) and some rgb lighting for feedback. If I could get a screen per pair of buttons I'd be chuffed.

  • It's working!

    Craig Hissett11/16/2021 at 23:00 0 comments

    After a few solid days of testing, I can finally say I have this beaut working the way I need it to.

    I spotted an Audio contest on Instructables and knew I had to get this working, as it was almost there.

    https://www.instructables.com/Tiny-Audio-Effects-Rig/

    I put together a small controller with a few switches and encoders on and put a basic sketch on for basic on/off control, and was over the moon to see this work the way I had hoped it would. 

    Next step is to create a better footswtich as planned.

  • Prototyping footswitch

    Craig Hissett10/28/2021 at 19:25 1 comment

    I finally took a drill to some plastic and have started positioning buttons!

    I was hoping to get 10 buttons on this footswitch; 8 for pure effect assignment and 2 for cycling pedalboards. Its just going to be a bit tight to be feasible with foot use.

    No problem through- I have loads of the panels I've drilled, so I can just drill some more and swap them out.

    I'll explore using three footswitches along the bottom, three along the top and adding some code to allow holding the button to allow extra presses.

    Once happy I'll wire the buttons up and attached them to my arduino Due and build the rest of the enclosure around it.


  • Due Controller

    Craig Hissett10/27/2021 at 16:38 1 comment

    Just a quick update:

    Still working out one or two audio issues with the Zoom interface; everything works, but there's a crackly digital sound over the mic sometimes. I have a feeling it may need the JACK settings fiddling with and dropping from 96k, or having the buffer increased.

    That aside, the concept is working brilliantly; inputs can be routed via JACK into the effects software then into Reaper, as well as directly to Reaper. This allows me to record clean and effects simultaneously. 

    The Arduino Due has had a basic sketch put on it to send CC messages from the buttons on an LCD shield. It works, and has been tested with triggering Reaper transport controls. 

    This is coming along nicely.

  • Update: getting closer

    Craig Hissett10/01/2021 at 22:02 0 comments

    Today I took delivery of a SmartiPi Touch Pro case for my project. This was to upgrade one of my current touchscreens to facilitate it being used with a Pi4.

    I took the Pi4 4gb from my Pisound pedal, put the 3B paired with my screen in that (for now; a 2gb 4B will be in there eventually) and then assembled my new case for them. I love it:

    With regards to this part of the project the next steps will be to:

    Install Reaper 

    JACK tests; to route the outputs of the pedal software into inputs of reaper (alongside the normal input for recording the clean mic channel).

    Automate connection process on startup

    Run Reaper on Startup

    I have also begun work on the code for the foot controller. This can now be a straightforward MIDI pedal, so using an Arduino Due with the awesome Surface Control library to facilitate that.

    It allows for MIDI over USB natively and has ample pins for all my input needs.

    I plan to set up a host of pins as button inputs, a batch of pins as LEDs (for feedback) and route analog pins to jack sockets on the back of the pedal for connecting more conventional foot pedals and expressions pedals.

    I would also like to add some LCD displays to the controller for displaying pedalboard names from the pedal software and recording states from Reaper.

  • Another Change

    Craig Hissett09/23/2021 at 18:41 0 comments

    Another test to try: running reaper and the pedal software on one Pi with screen.

    If both run without bottlenecking the CPU or RAM I can use jack to run the input to the effects, then into Reaper.

    This will be, by far, the best setup if it works.

    One Pi and screen to power, no need to run a network between devices and a local MIDI/OSC controller.

    If testing works I may consider creating one enclosure for the screen and buttons of the controller in it.

  • Indecision: To screen, or not to screen

    Craig Hissett09/17/2021 at 16:33 0 comments

    So, been changing my mind again. Shock, horror!

    As convenient as the fully headless setup is, it still requires a screened device to access, and will need a family extensive hardware controller to get the full functionailty I am wanting.

    I've toyed with various layouts today; no screens, two screens, all of it:

    I've finally made my mind up again:

    One screen is the winner.

    The effects pedal will remain as is, with its output connected to the small Alesis C1 interface of the recording Pi, now sporting a screen.

    It will also be connected with an ethernet cable.

    The recording Pi will run reaper (or a Python recording app of my own design further down the line), and Also RaspAP. This will allow the Pi's WiFi to be used to connect to my home network and allow the ethernet port to share it with the other Pi.

  • Power update

    Craig Hissett08/15/2021 at 22:12 0 comments

    Just a quick update - I've ordered some USB C breakout boards which will enable me to use a meanwell power supply mounted under the pedalboard to power both Raspberry Pi boards with a normal usb c cable.

    EDIT

    They have arrived.

    Tomorrow I will try to solder them all together and look for a safe way of mounting them.

View all 20 project logs

Enjoy this project?

Share

Discussions

Similar Projects

Does this project spark your interest?

Become a member to follow this project and never miss any updates