I have a few roller blinds ripe for automation. The first attempt used a stepper motor with a 3D printed cog to pull the cord.

This worked but had the look of a Heath Robinson / Rube Goldberg love child so I looked for a neater solution.
Hardware
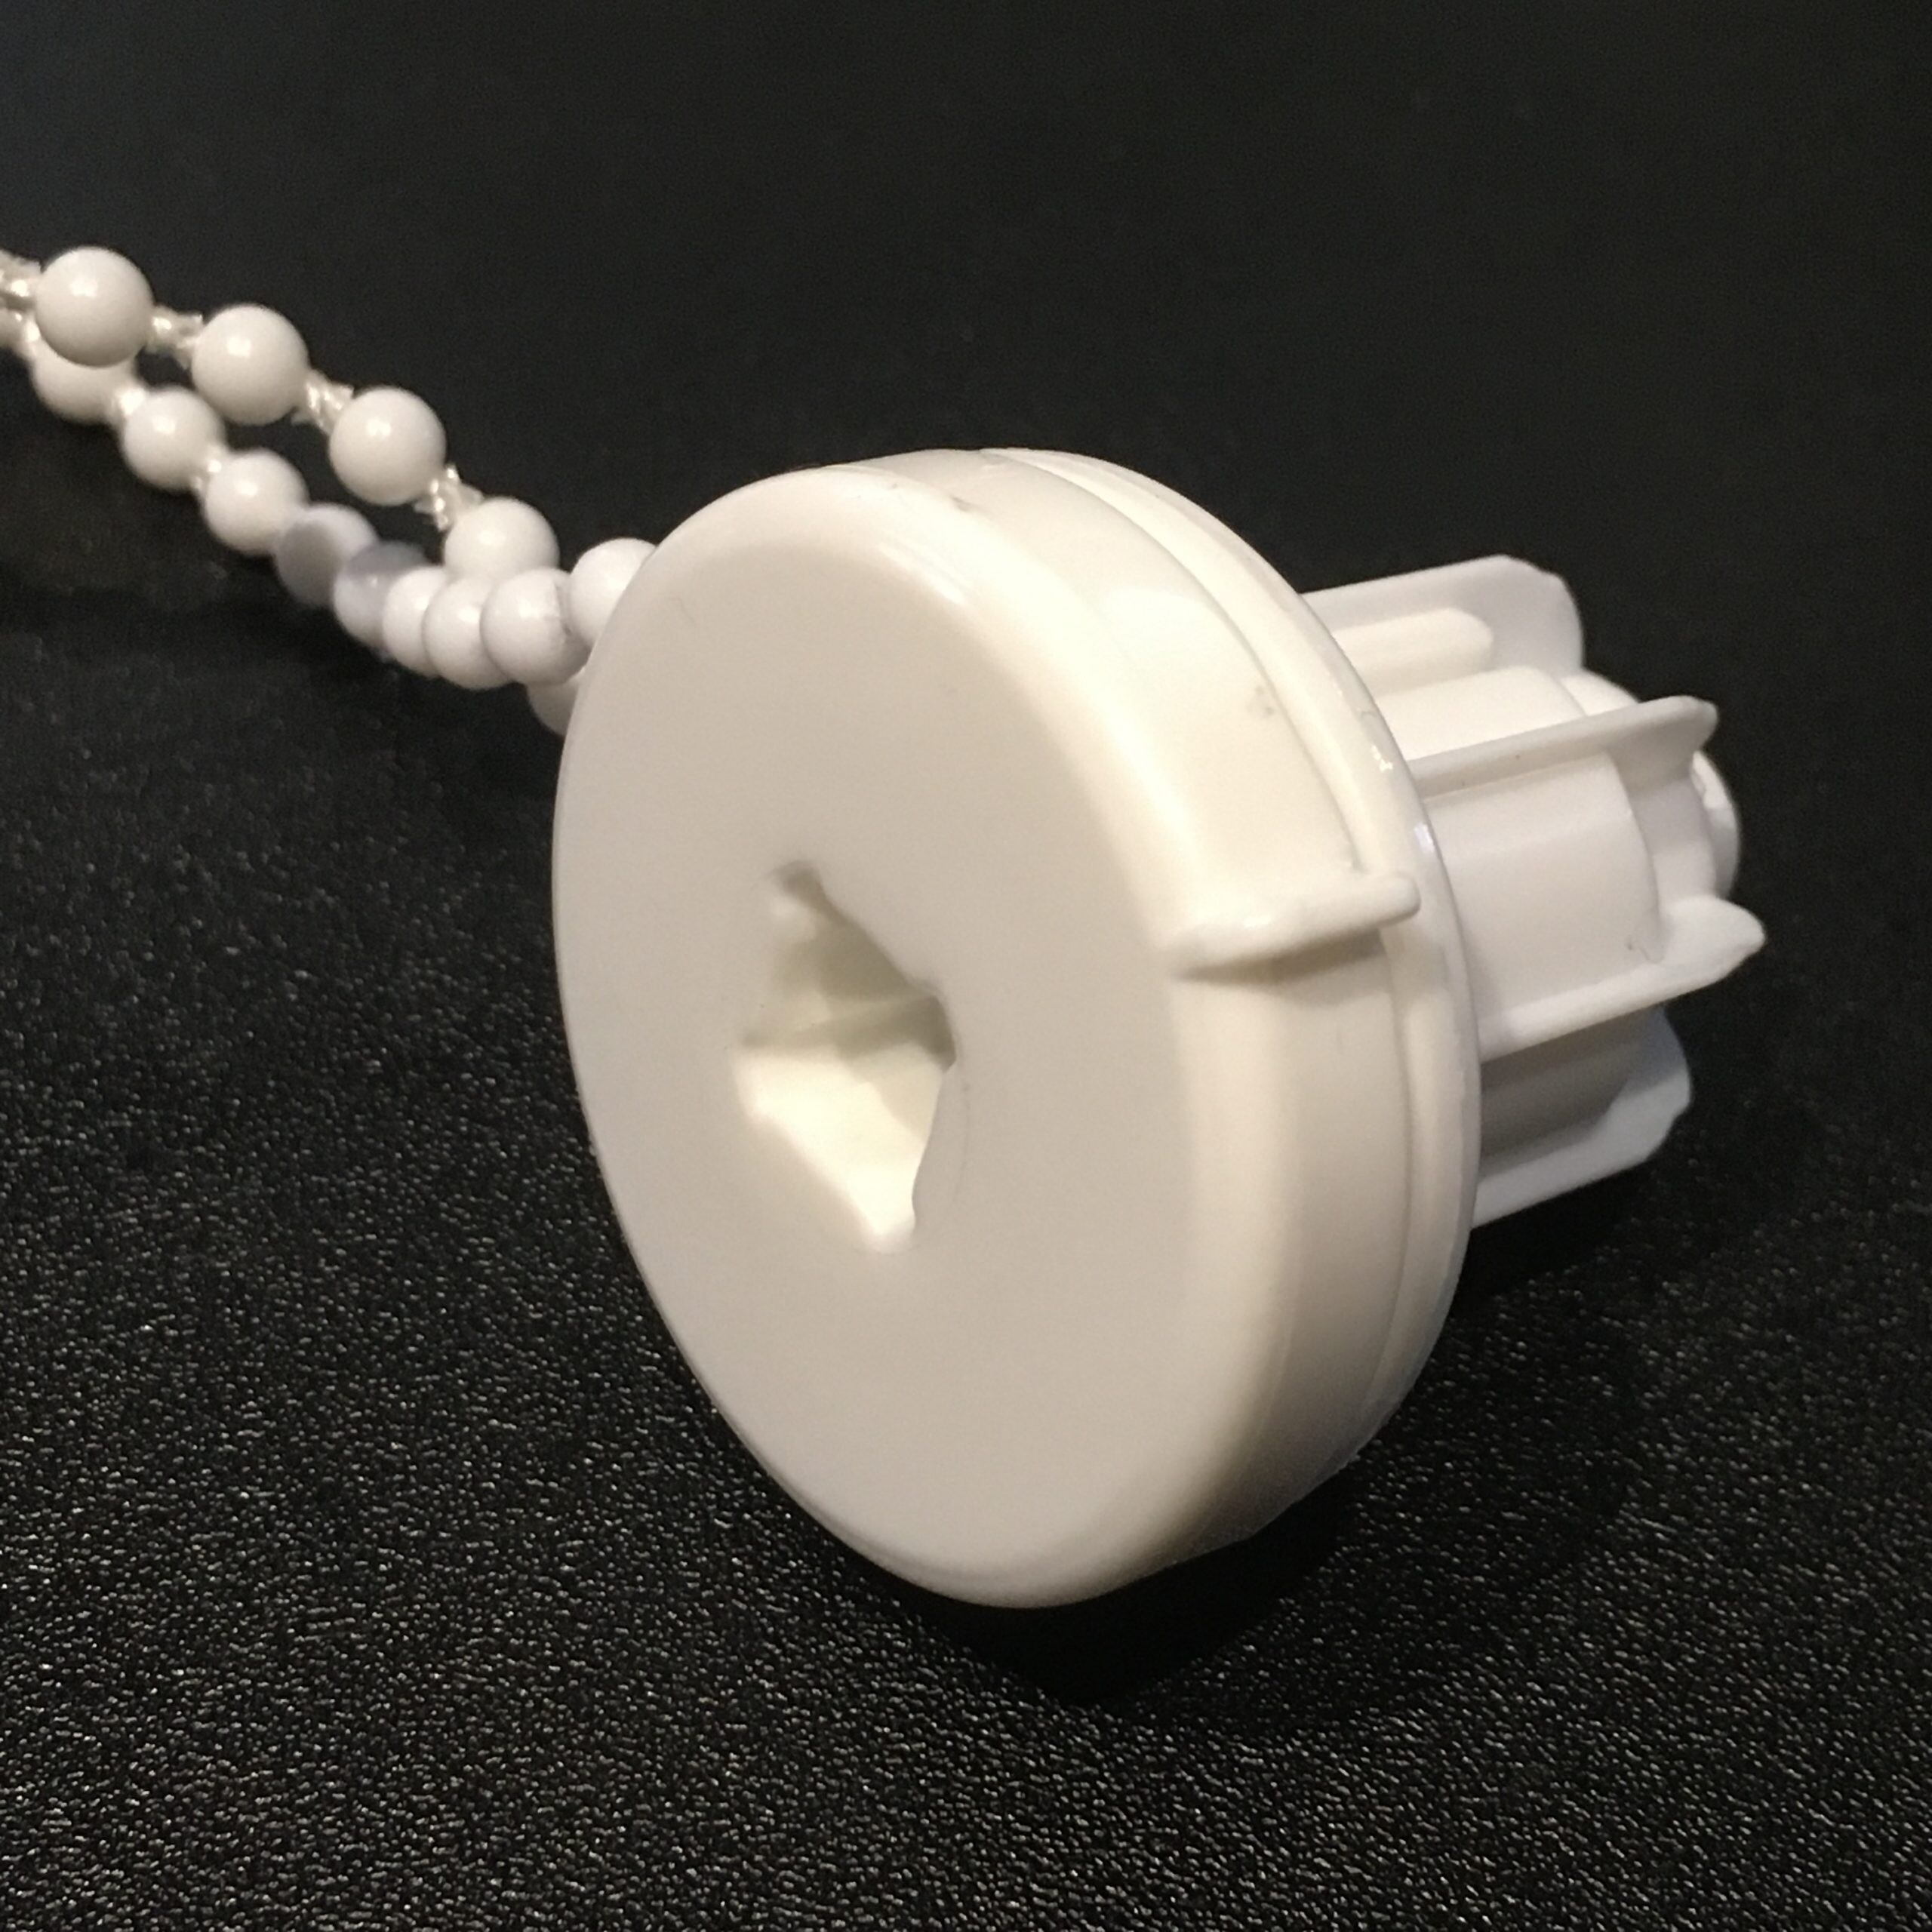
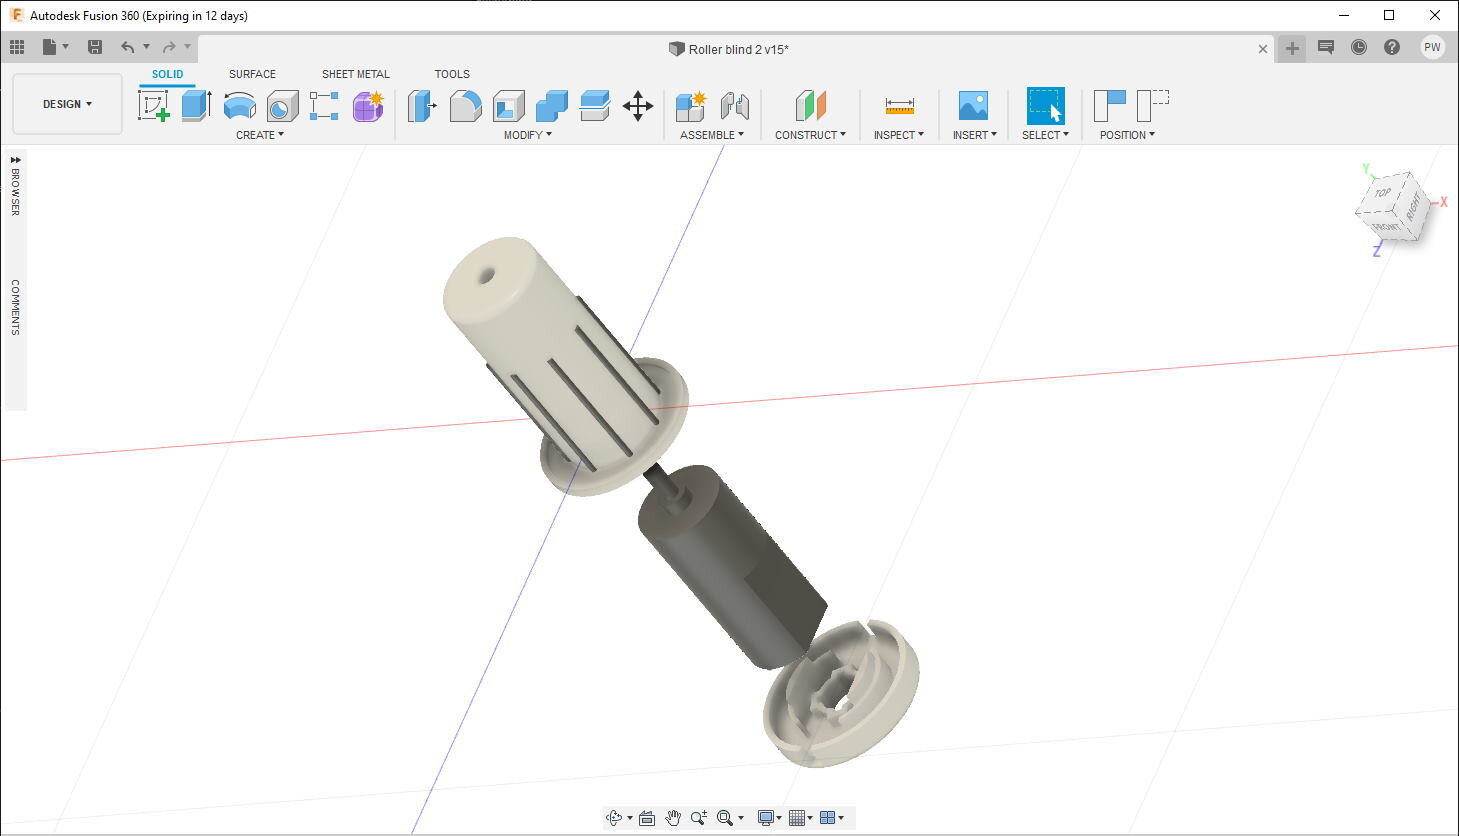
Tubular motors that fit inside the roller tube can be bought online but were rather expensive and bulky for my purposes so I opted for a more compact design. Taking measurements from the existing blind pulley mechanism and a suitable 30 RPM 12v DC motor with 20mm external diameter:

let me design a replacement in Fusion 360
Using a DC motor requires some sort of encoder to keep track of the blind position. I opted for a magnet/hall sensor mounted in the drive mechanism. This keeps the the sensor unobtrusive but limits the resolution to one revolution (about 10 cm of blind travel in my case). I hoped that combining this with timing data would be accurate enough. It was.
Output from the printer. Note a small 2 x 1 mm magnet has been inserted in one of the holes.
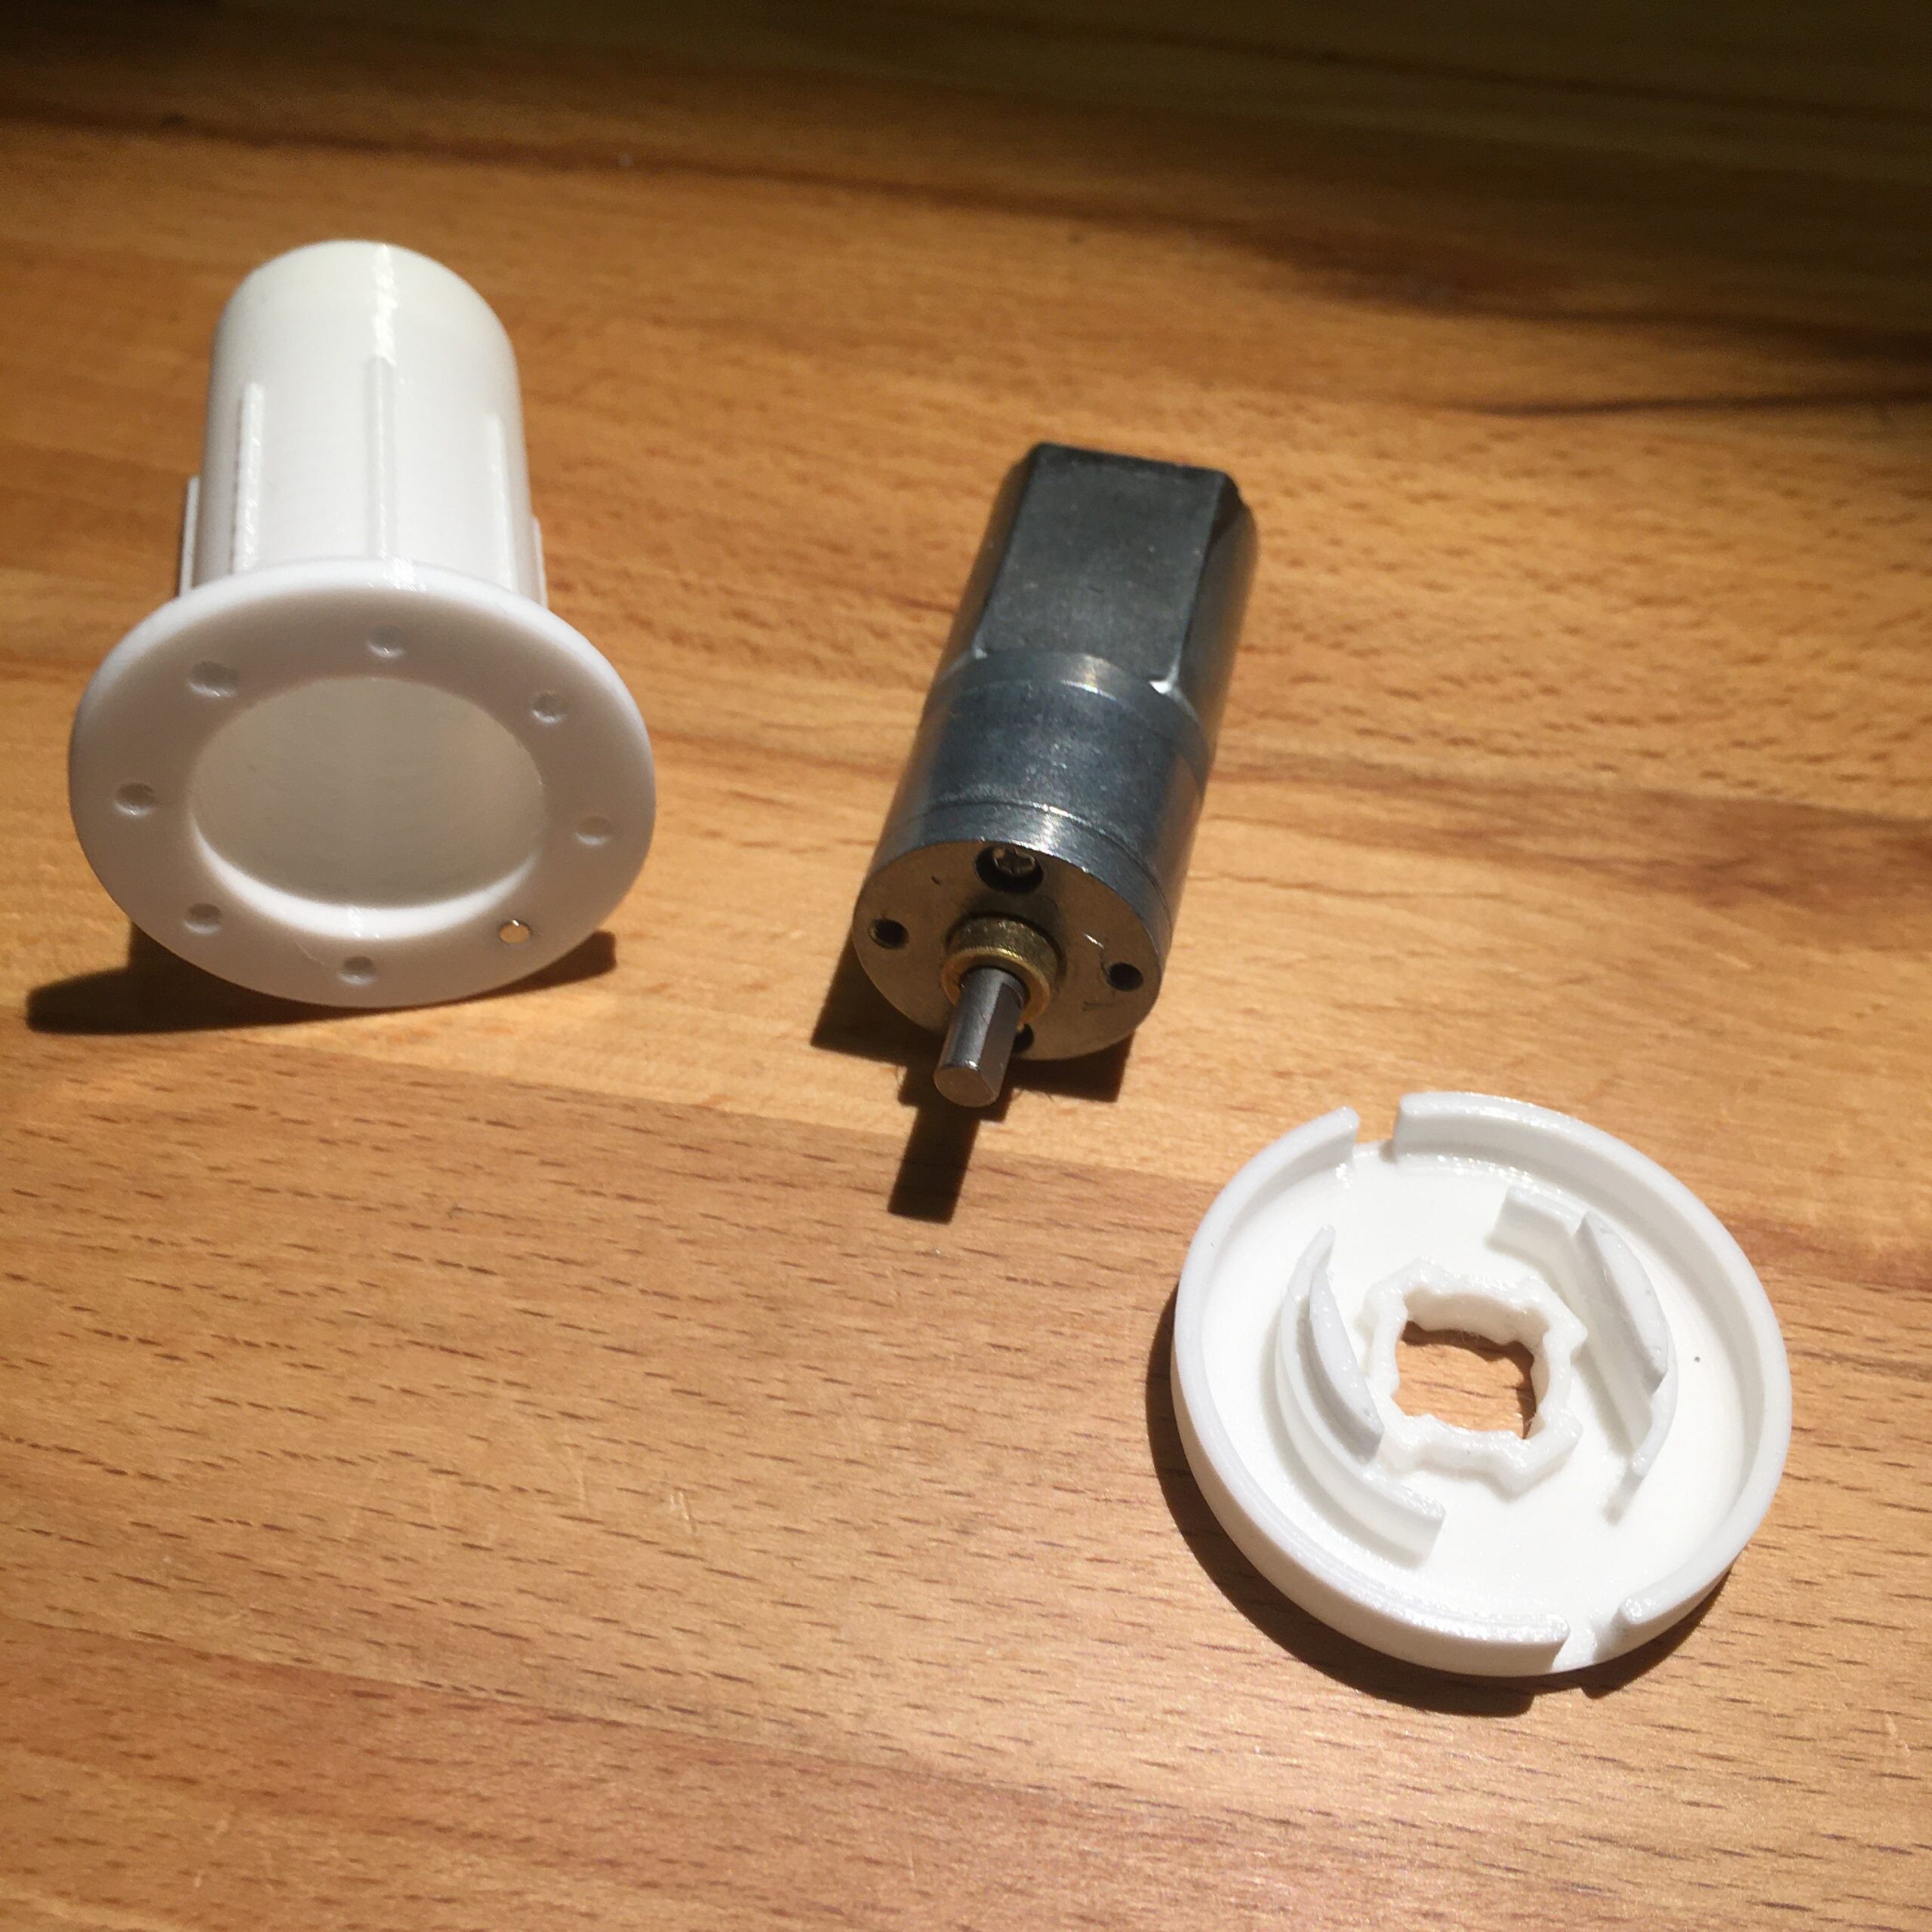
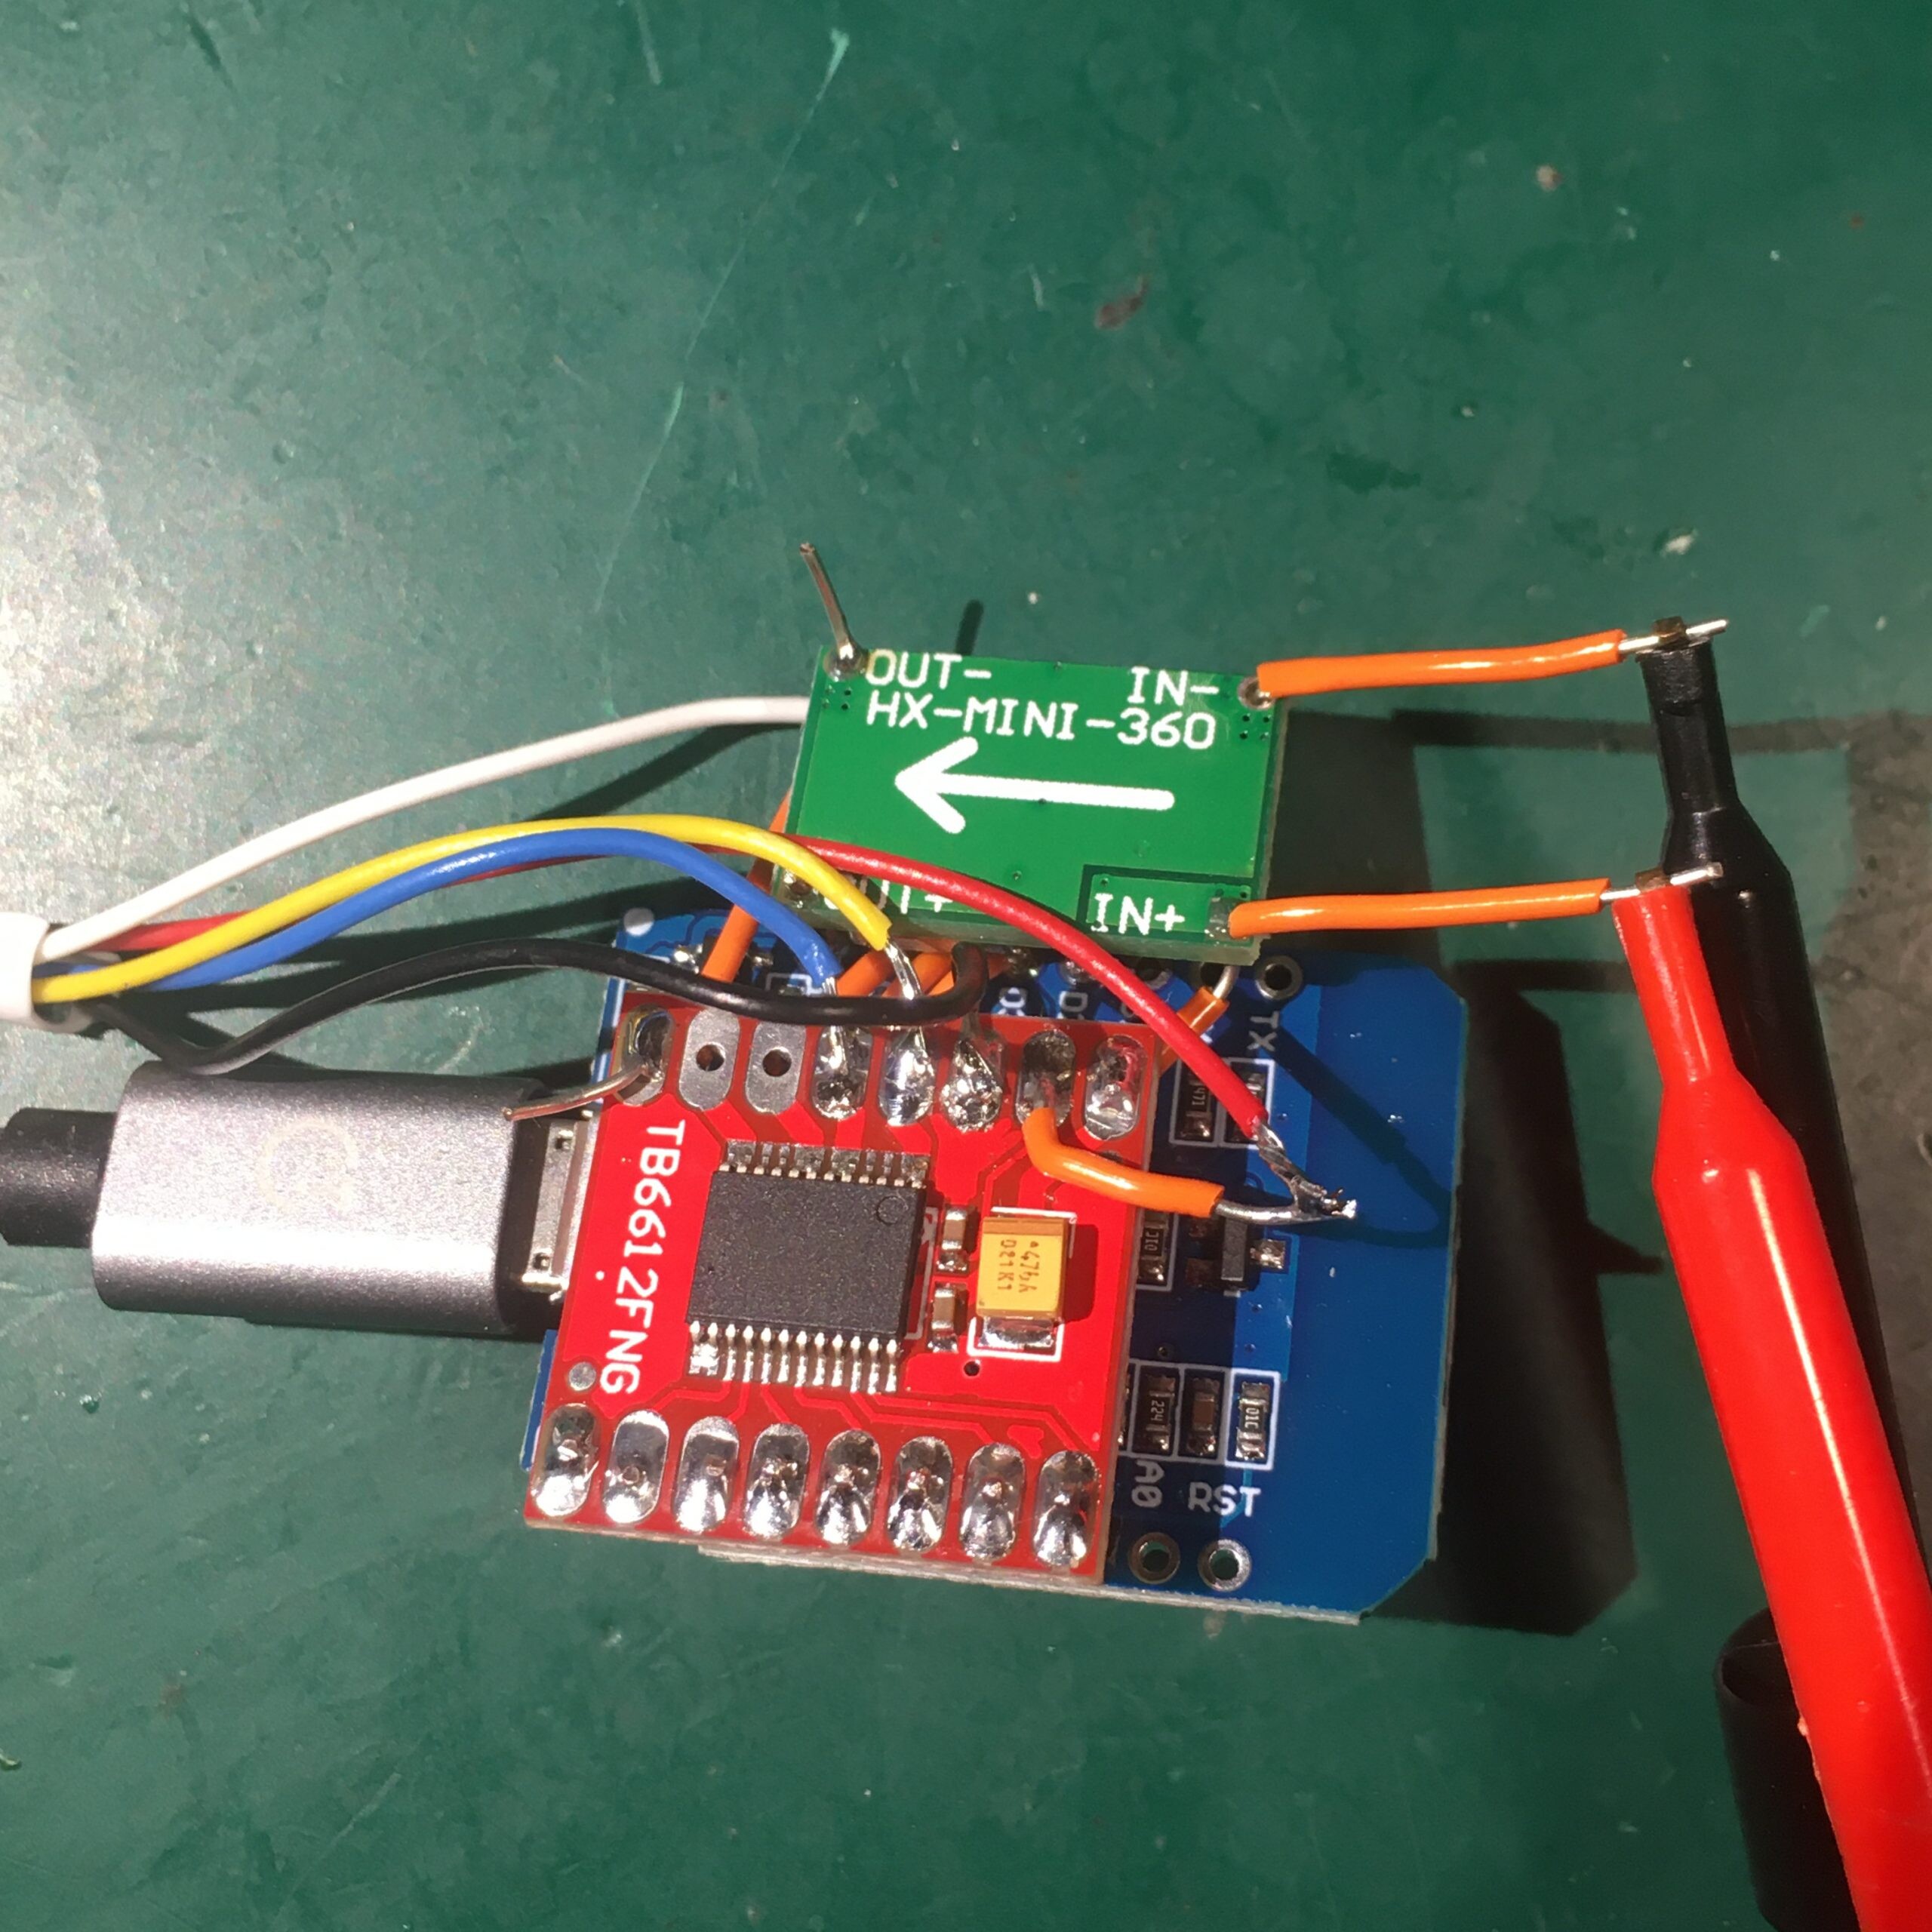
I hand carved a small PCB to hold the Si7025 hall effect sensor and connected everything up.
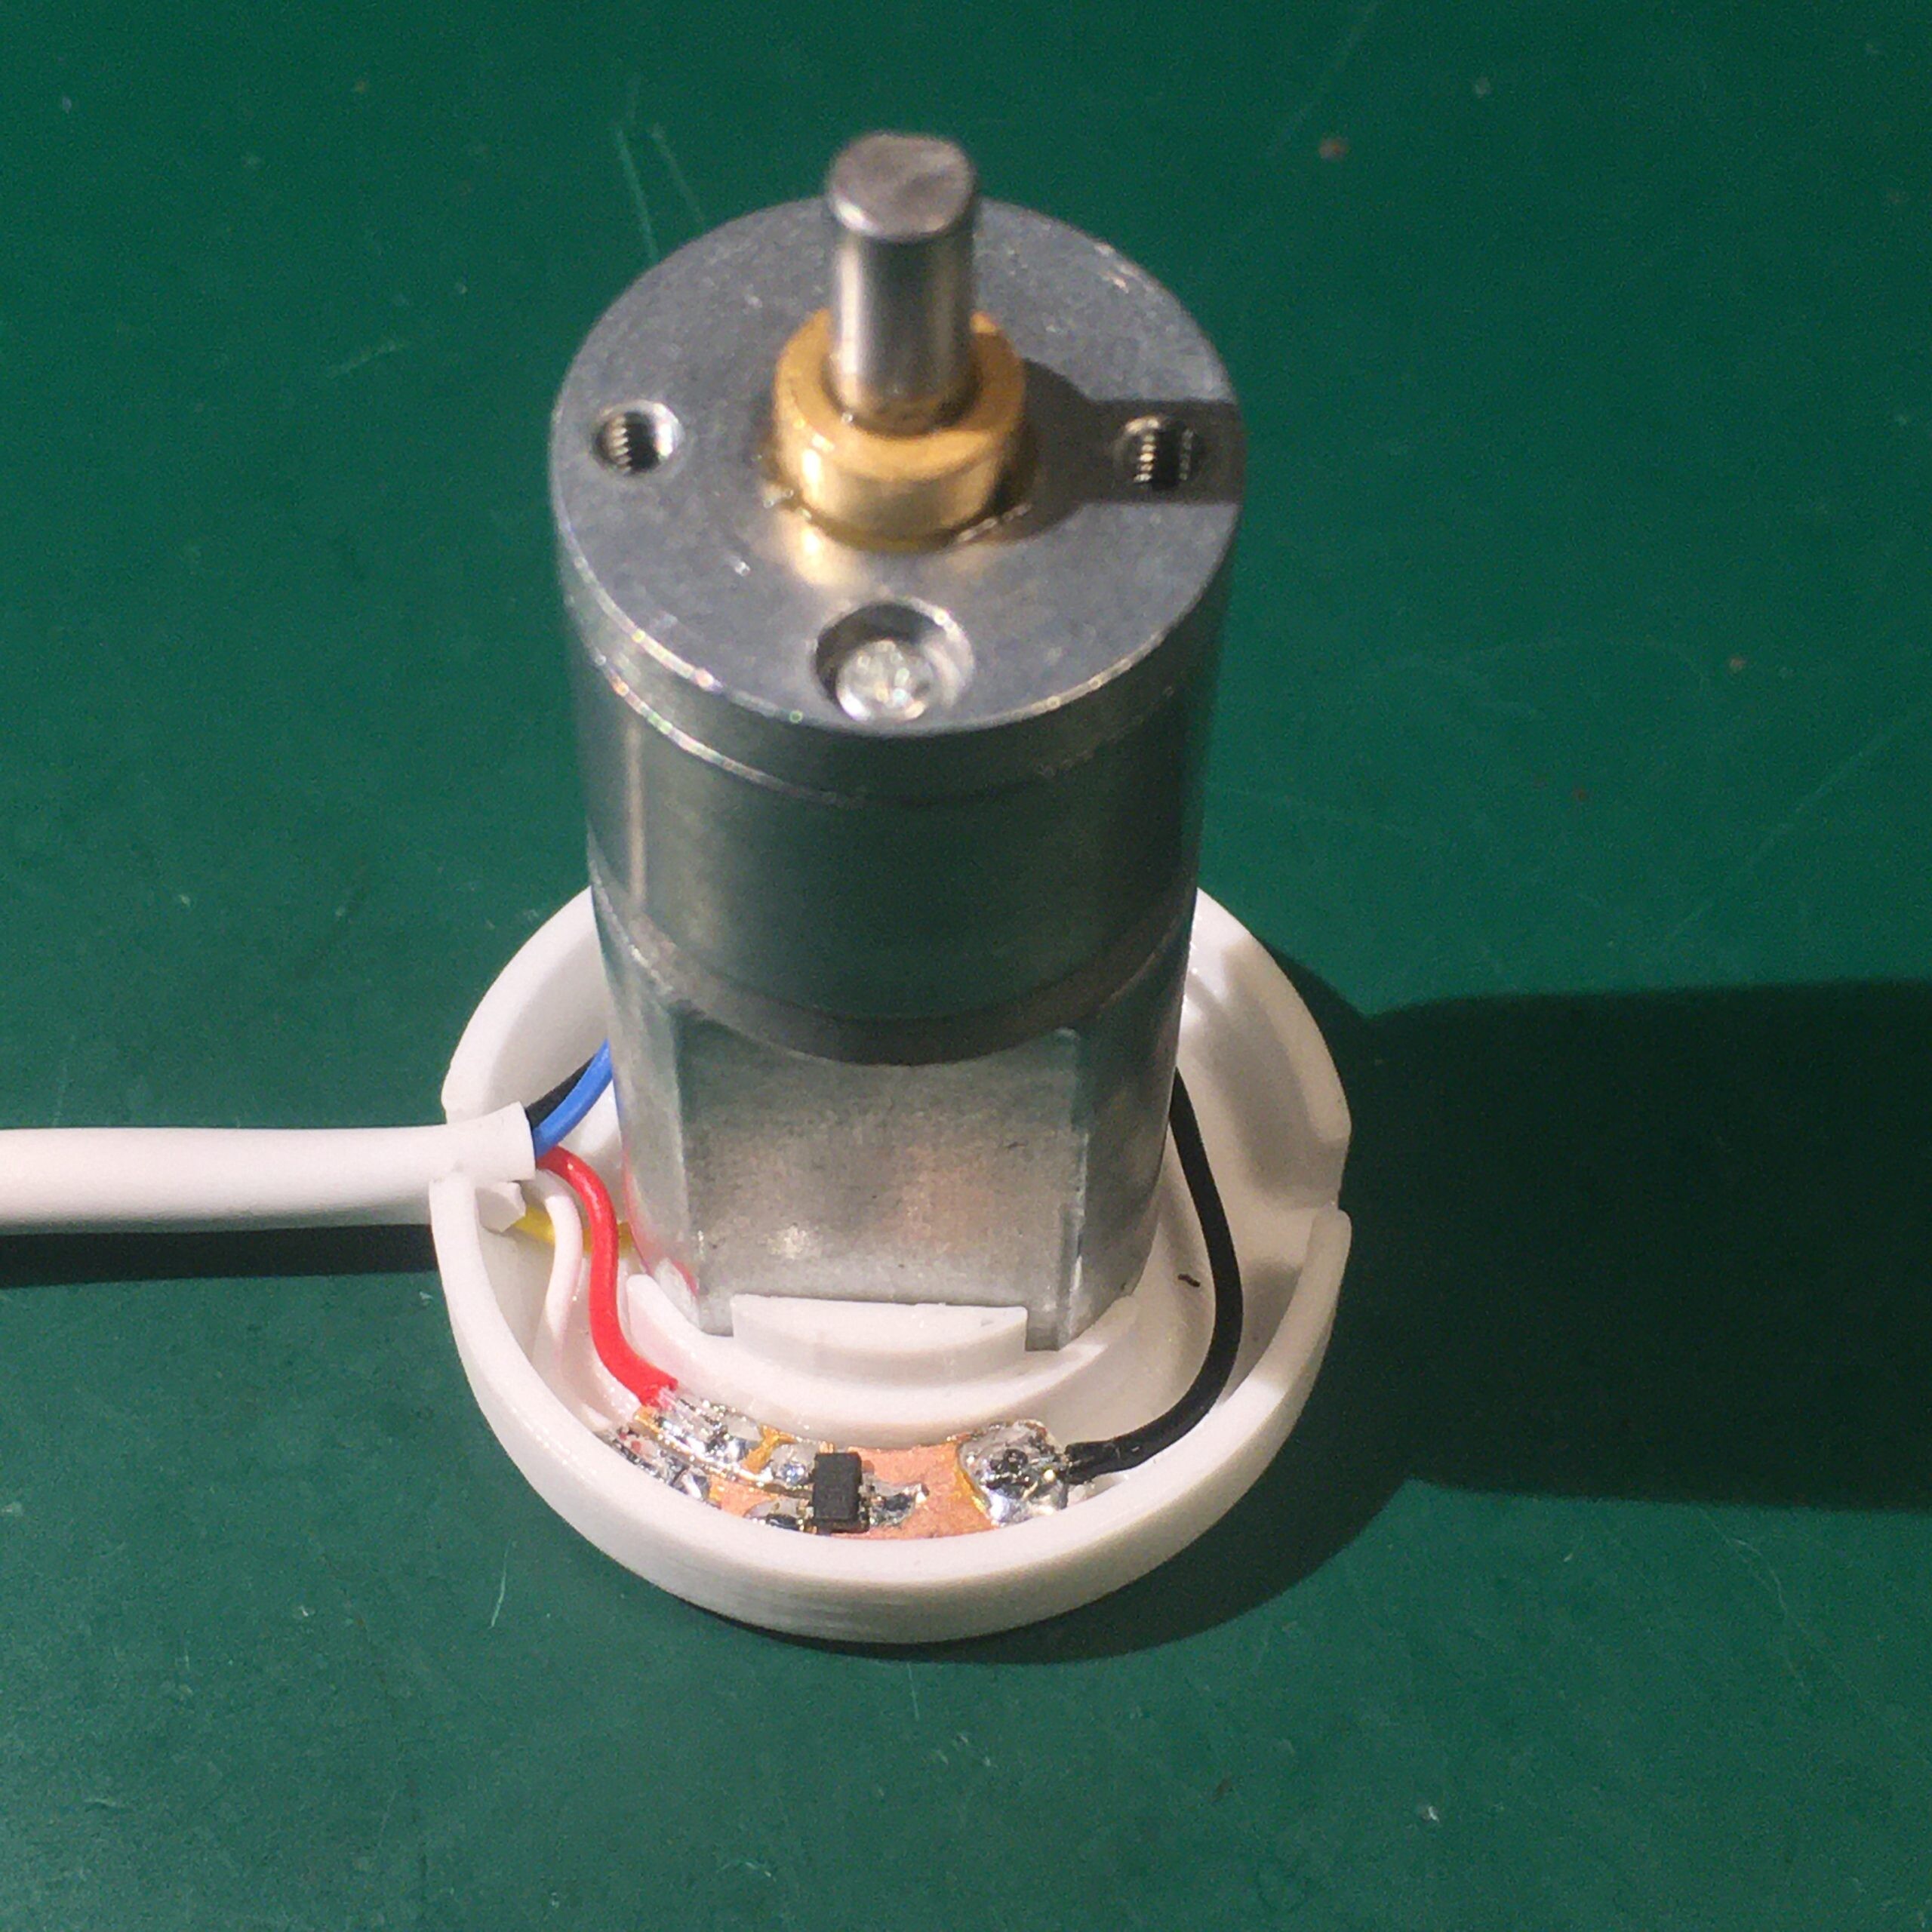
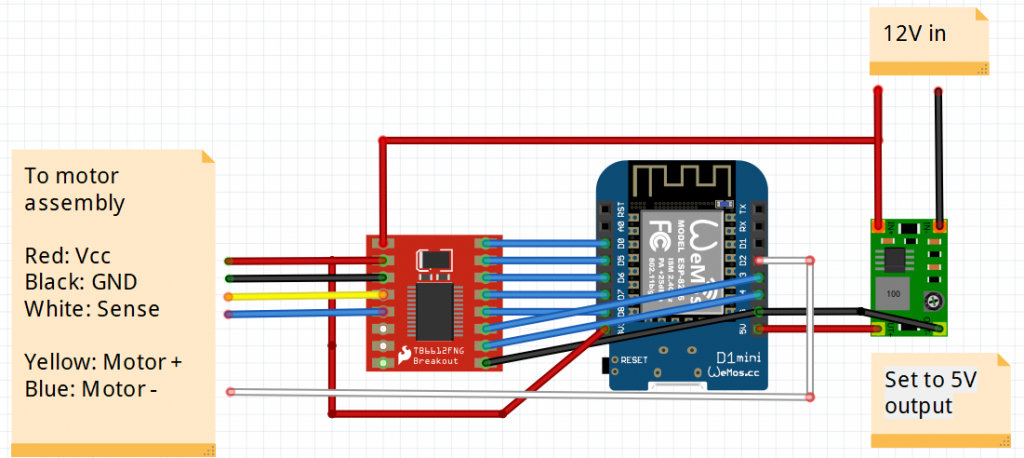
For the controller I used a Wemos D1 mini with a TB6612FNG driver module which can handle up to two DC motors. A small buck converter supplies 5V for the electronics from the 12V motor supply. All wired together in point to point style:
Software
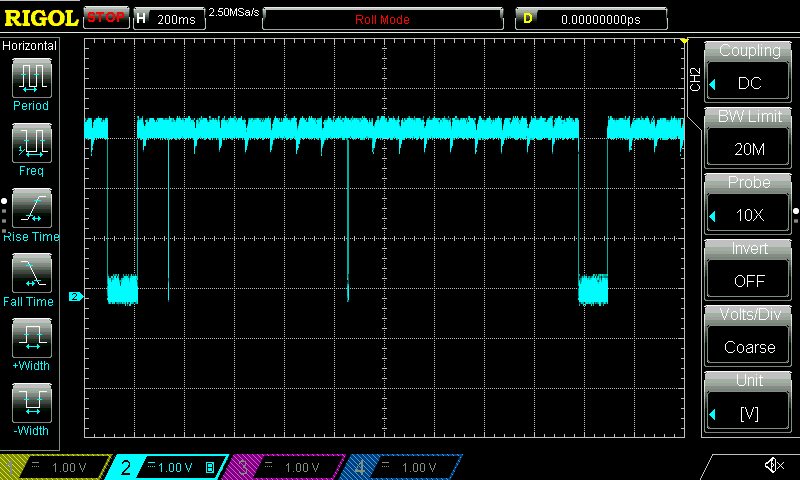
The code was written using the Arduino IDE. One unexpected problem was occasional glitches on the sensor output. This screenshot of the sensor output while running at 30 rpm shows the expected high -> low transitions as the magnet passes the sensor, but with the occasional spurious pulse. These pulses were always less than 1ms duration so are simply filtered out in software.
To move the blind to a given position, the software moves to the next magnet home position, then counts complete revolutions while timing how long each revolution takes, and then keeps the motor running for the required time to move the remaining distance.
An MQTT API was implemented, controlled from a Node Red flow.
Installation
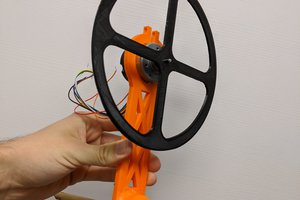
A small case to contain the electronics was 3D printed and wired up to a 12 V power supply. The motor itself takes up the same space as the original pull cord fitting.

And here are the blinds in action:
 A.M. Smith
 Vipin M
 Dharshan
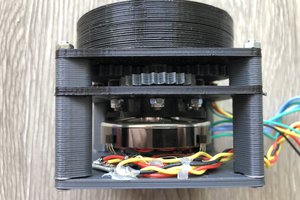
 Pavel G.