 Turranx
Motivation:
I hate cleaning computer cases. I've seen dust bunnies the size of gerbils. Being an engineer, I decided to do something about it.
Filters on the Market:
If you were to go looking, you will find two common types of computer air filters for purchase: mesh and open cell foam.
Both mesh and foam let the small stuff through until they accumulate enough grime that some of the smaller particles may get trapped by the grime. Until that buildup is sufficient to stop the small stuff, it passes right through. It's the small stuff that bypasses the filters and sticks to the edges of your fan blades, or to the fins of your heat sinks. I needed something better.
A Moment of Genius:
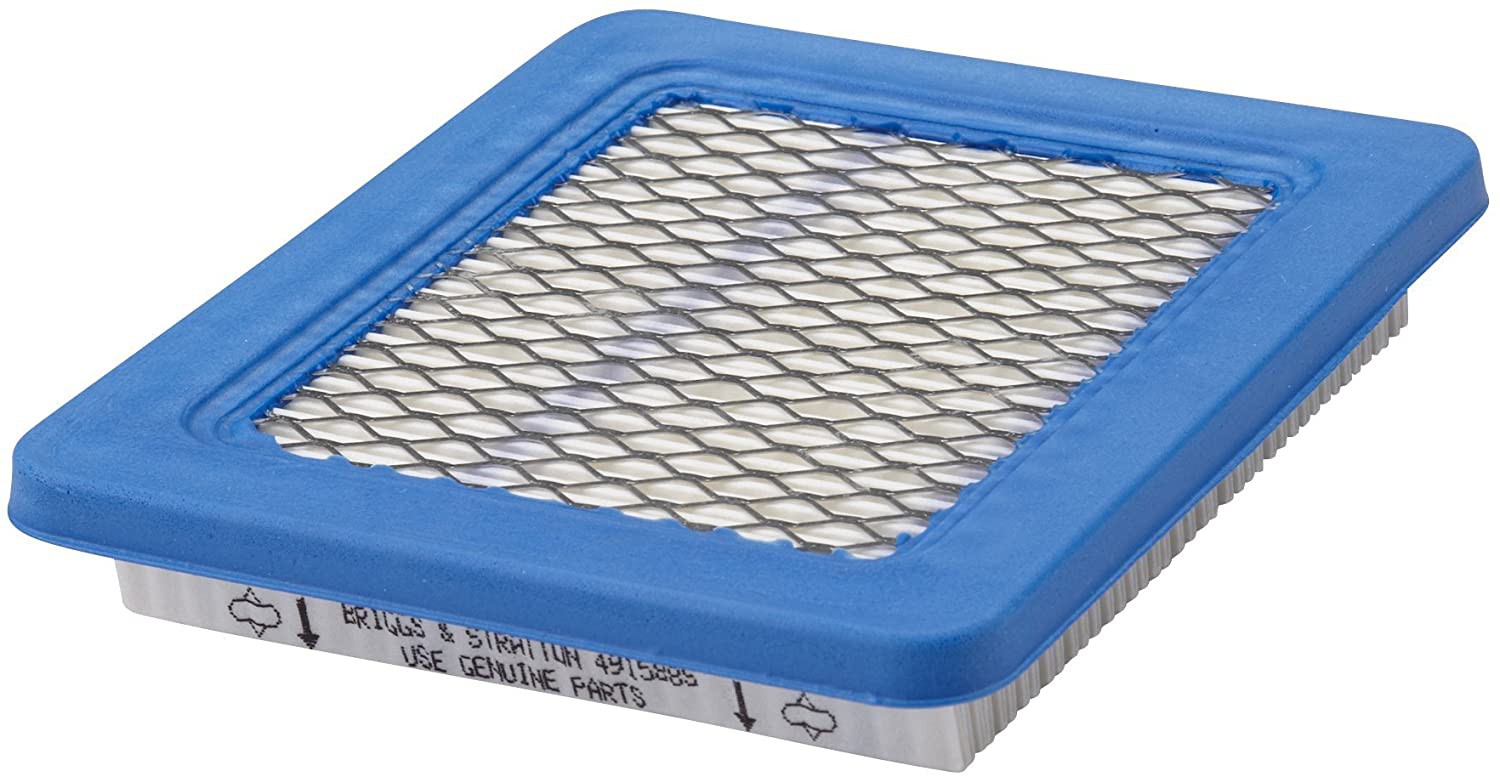
One spring morning I was performing the yearly maintenance on my walk-behind lawn mower and noticed how the air filter is smaller than a 140mm fan, and about as thick. The light bulb went on. Fast forward a year, and I completed my project for a compact-ish air filter that fits inside an ATX case.
The Compromise:
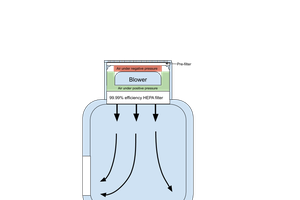
There is one problem with using a real filter on the intake of a computer: real filters are very difficult to pull air through. To combat this airflow restriction, we must use two solutions:
- Increase the size of the filter surface
- Increase the static pressure of the fans
Every filter will restrict air flow to some degree. Here are common filter types arranged according to airflow-restriction:
Open Window > Foam Filter > Fine Mesh Filter > Paper/Cloth Filter > HEPA Filter > ULPA Filter > Brick Wall
If you make the filter more restrictive and desire to keep the same rate of airflow, then you need to increase the surface area of the filter. If you run out of room to make the filter taller or wider, then you can fold it (pleated). That will make it thicker. The filter in this picture has been folded, then curved to make it roughly the same shape as a coffee can.

If you've made it as wide, tall, and deep as will fit into your design and the airflow is still too low, then the next step is to get bigger/faster fans. Sadly, standard computer fans don't have enough static pressure to pull a sufficient volume of air through a pleated paper/cloth filter. We need to step outside of the standard computer fans and begin looking at commercial/industrial strength fans.
The best place I've found to shop for fans is Digi-Key. Their web site allows you to search and sort according to fan properties. I selected three fans: 70mm, 80mm, and 92mm; all of which are 38mm thick. In Step 1 I have provided a link to a pre-filtered list of industrial-grade 12V fans at Digi-Key. All of the results have a static pressure of at least 1/2 inch H2O (12.7 mmH2O), 12 V, 4-pin wires or connectors, and are 70 to 120mm. Many of them with a tachometer output and/or PWM speed control input.
Why several different sized fans? I know that different sized fans will have a different sound profile. Each fan will have a different volume (SPL), base frequency (Hz), and harmonics. I've never heard any of these styles in person, so I decided to experiment. They might all be awful, or one of them might be perfect. And yes, they all have the capability of being "OH MY GAWD THATS LOUD", but with a PWM speed signal coming from my motherboard, I know they won't run flat out all the time.


 AviPeltz
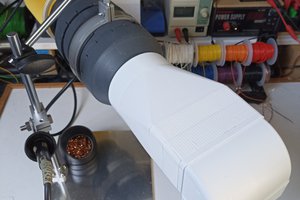
 Jeroen Brinkman
Your Project is Fantastic, but where are the HDDs!?