 techknight
Given the original ROM is a dumpster fire to me, trying to write a driver to run that from the 68K side is going to be a nightmare since we do not have the original codebase that used this card, that was downloaded from the satellite and embedded into the binary.
So to save what little sanity I had left, I need to look at custom ROM development for the 8051 with this particular card.
Prior to this point, I have never written MCS51 assembly before! We are going to need to find a toolchain, and learn the assembly language so we can do something with it. Luckily the assembly language is fairly similar to any other 8 bit microcontroller of the era, so it wasnt hard to pick up.
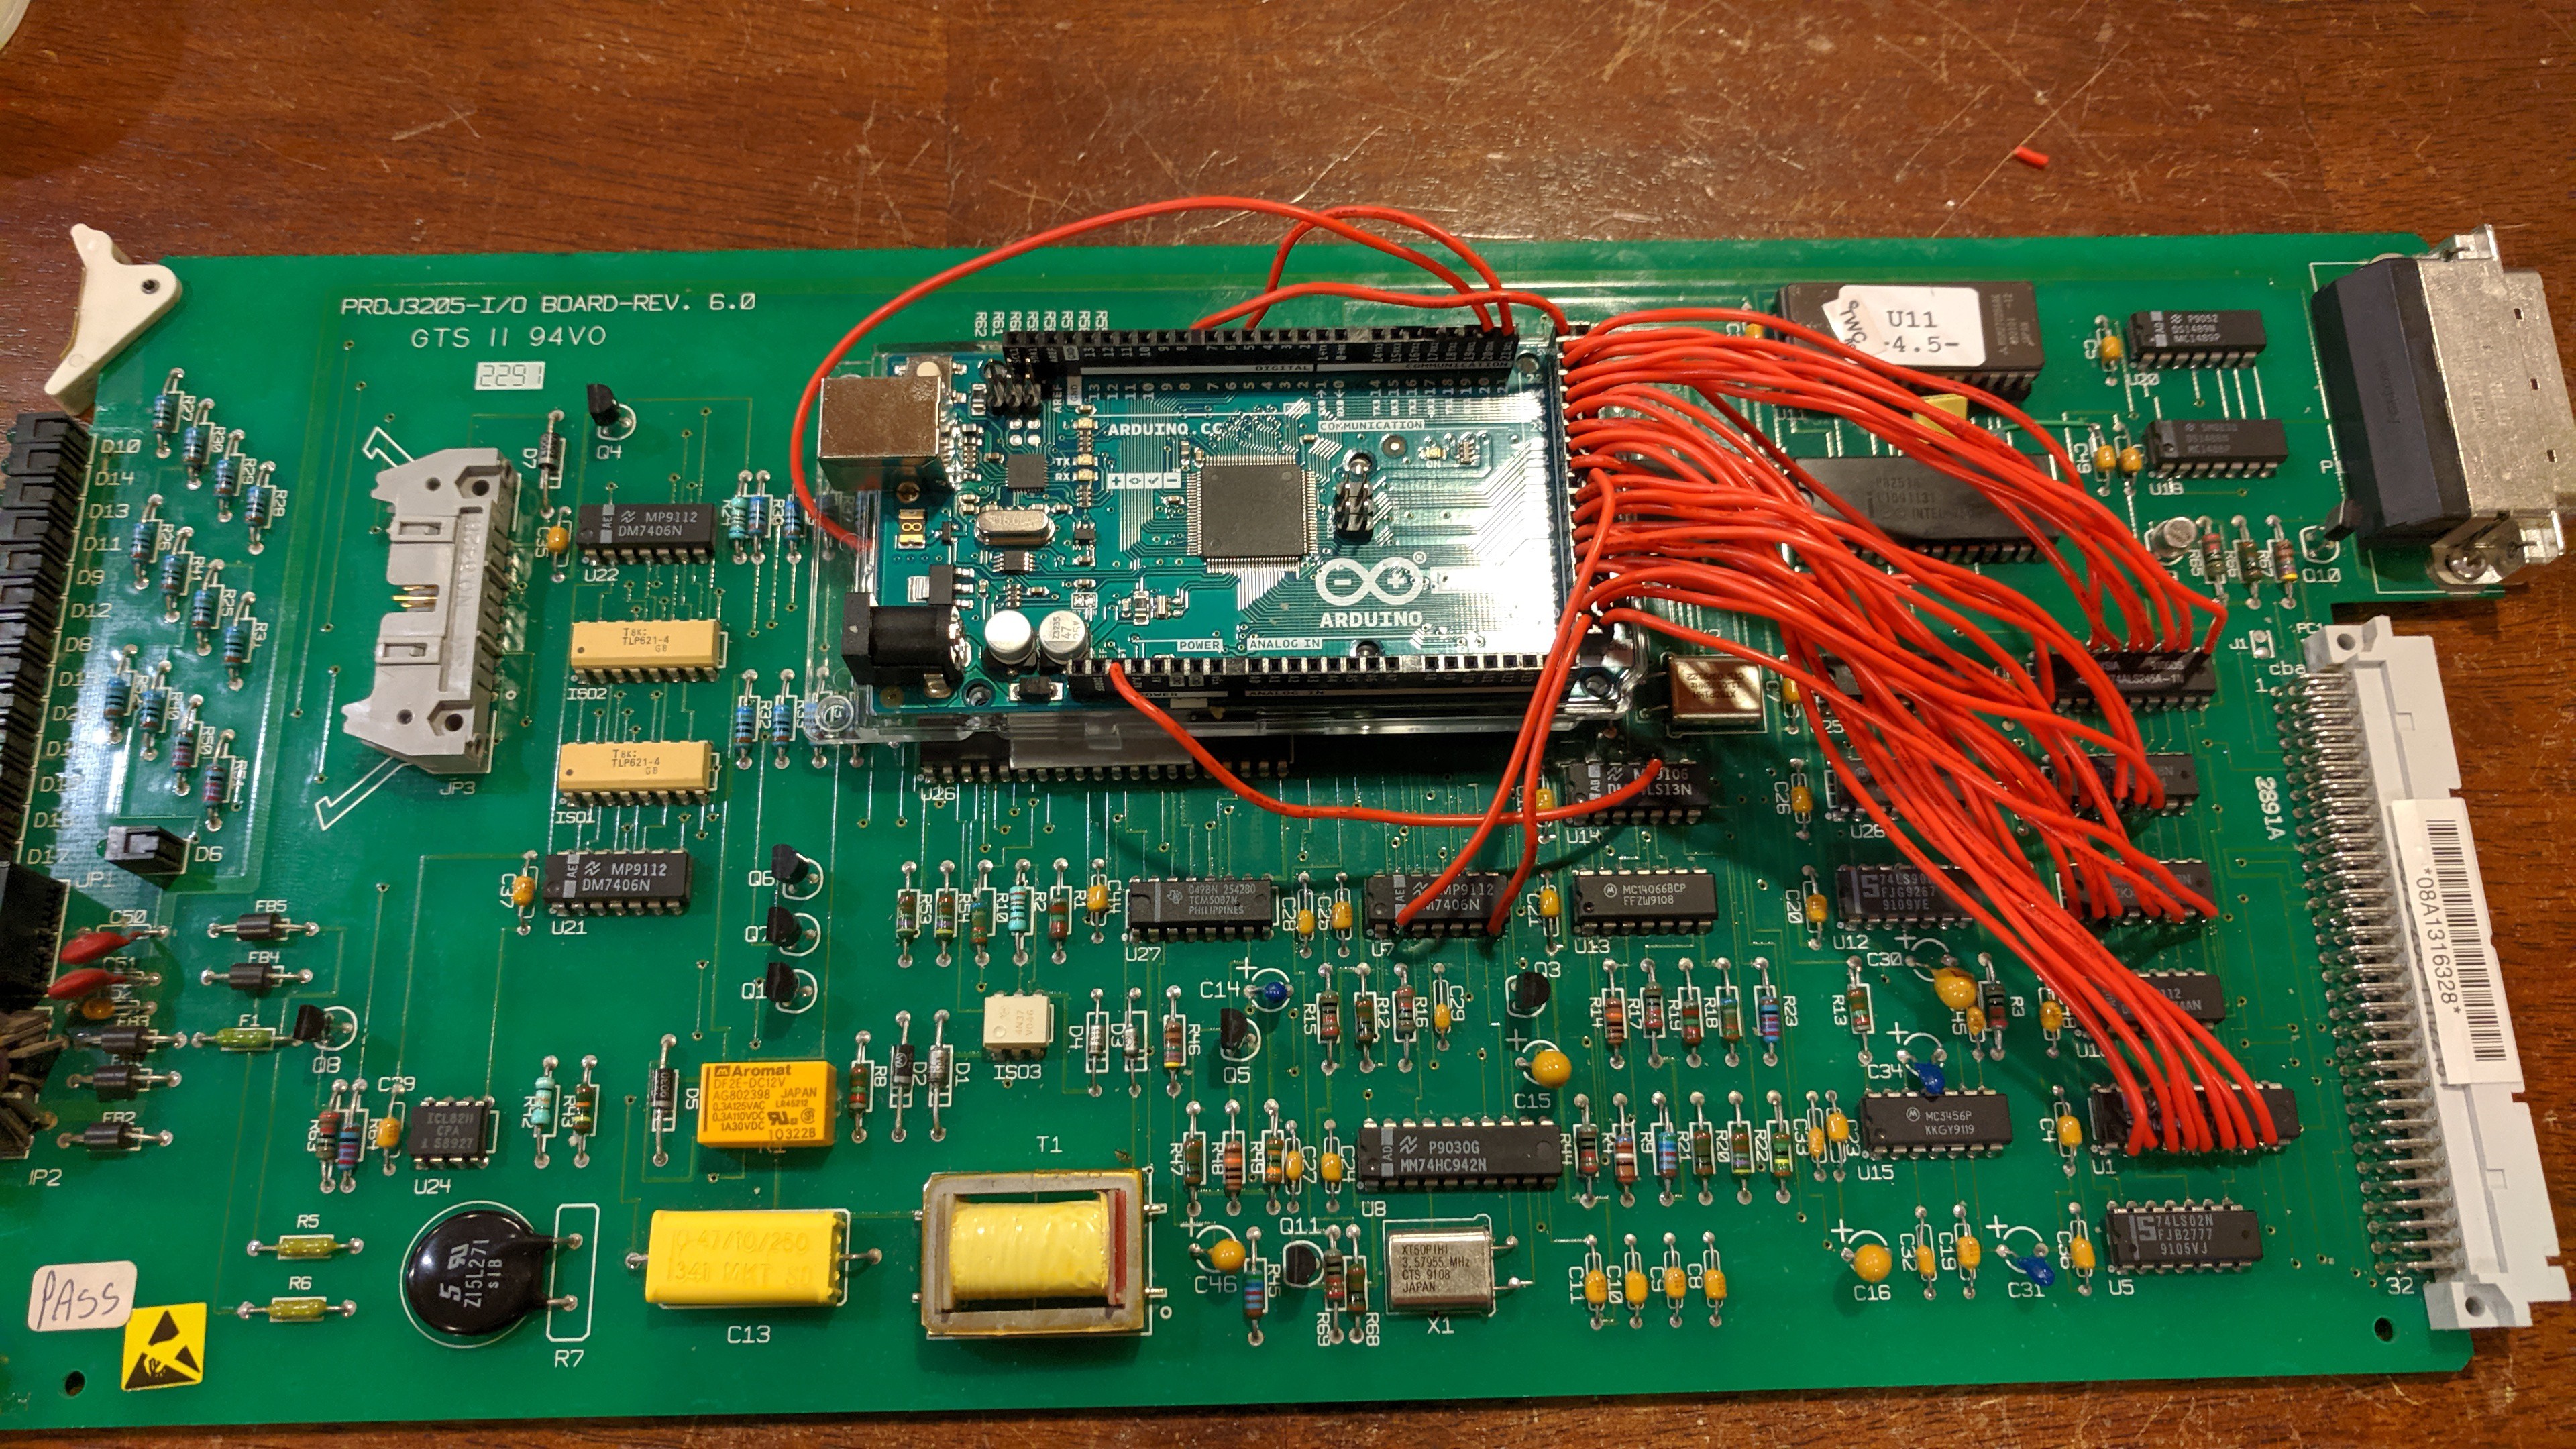
But.... before we can do anything, we need to prep the hardware so we can shove some bytes back and forth into the card to test operations.
I did try the brute-force method with the original ROMs with poor results.
Yep. This one was just as crazy as the graphics card.
I am going things this way to eliminate every potential variable I can, up to this point I have not touched the 68K architecture at all, nor written a hello world program to download and run on the 68K system itself.
Using an arduino as the "CPU" in place of the 68K makes this task much easier when I need to hack on and work with a specific piece of hardware, as I did with the graphics card.
The next piece of the puzzle, I need a toolchain for the MCS51. I did some searching around and the ONLY thing I could find was Keil. Keil is a paid product sadly so I had to deal with this situation. I dont know of any open-source assemblers for the MCS51 either, So I stuck with Keil.
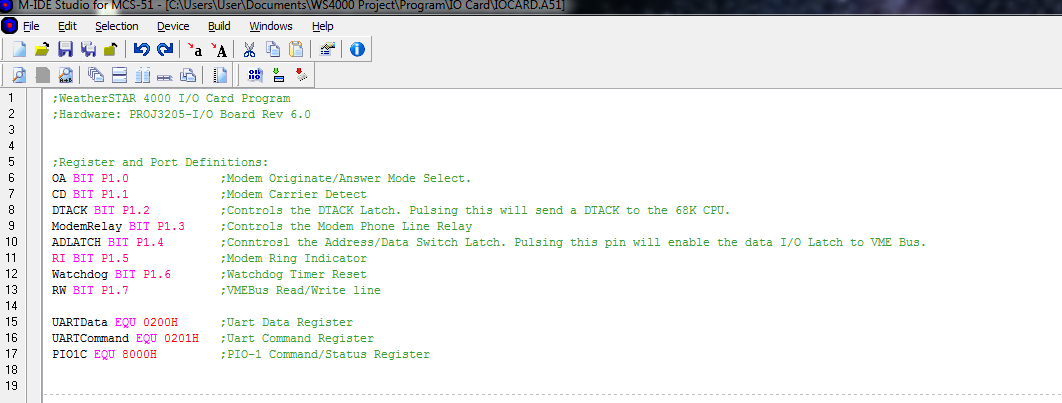
We need to start the skeleton of the ROM code, such as defining port pins and where they are going to go:
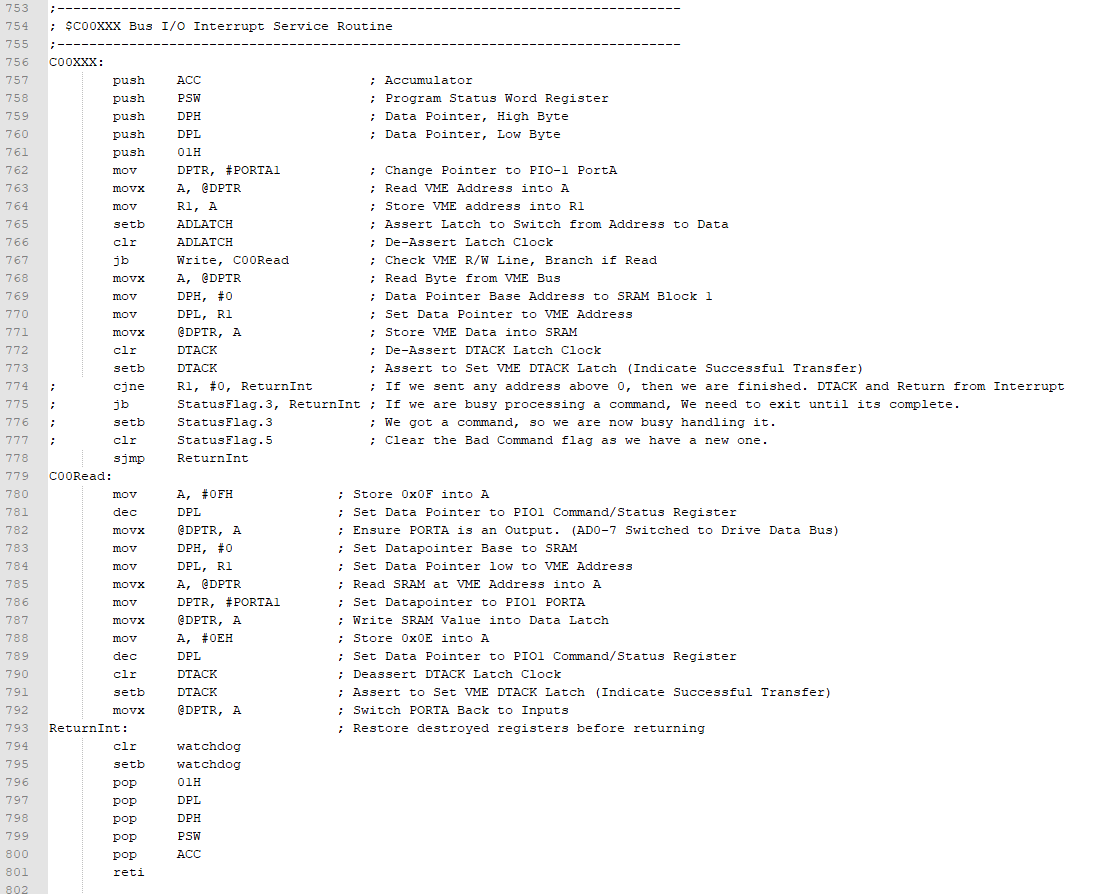
Since the INT0 and INT1 routines from the original ROM are fairly simple and timing critical, we shall borrow those for the new ROM project as I think that would be the easiest:
Now, when writing a new firmware for a completely foreign card that you wish to do your own thing with, you have to start thinking about the protocol you are going to use in which your driver will be written to communicate with the card.
With that in mind, you can see my commented code/lines in the original INT handlers for bus communications where I tried to do some special things my own way for my own protocol adaptation.
Unfortunately, no matter how hard I tried, anything i added/took away here would break the bus timing and prevent the 68K from reading/writing legible bytes from the I/O card.
so this interrupt absolutely COULD NOT be messed with in any way, it was timing critical! So I left these routines bland for the most part, all they do is read/write into the external SRAM in each PIO chip. C0XXX writes the first chip, C4XXXX writes the 2nd chip. From this point, it is up to me to detect byte changes in that chip in the mainloop and handle whats going on, change those bytes, and raise an interrupt back to the 68K CPU to service what I just did.
But, before we get so carried away with making a protocol, writing the control logic for the RS232 UART, GPIO, LEDs, etc... how about a simple hello world ROM?
why, of course! the best way to test this card standalone imho to make sure the ROM I am writing is working properly is to attempt to initialize the PIO hardware, and do some blinkenLEDS:
Success!!!! We able to write code, and assemble it. Burn it onto a ROM, and run the board. :-)
At this point? we need to start looking at initializing all the peripherals on the card, and then writing a protocol to communicate with all of this from the 68K side.
Now, time to move onto developing the ROM for this card!
Discussions
Become a Hackaday.io Member
Create an account to leave a comment. Already have an account? Log In.