 RachelAnne
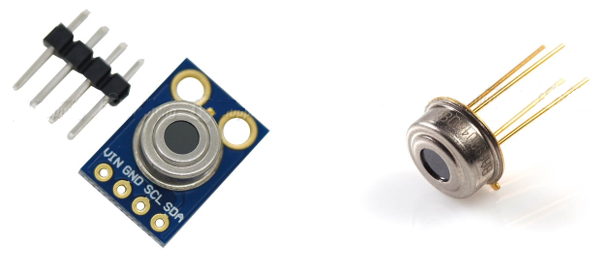
Recently, I saw many Makers publishing their own DIY thermometers. I decided to follow suit, but the sensors are too hard to find! Out of stock everywhere. After some twists and turns, I still got MLX90614. Although I prefer 90615, it is better than nothing. Well, first, I looked up some information about the infrared Thermometer. I just want to thank all the websites that I found inspiring first.
Let's begin!
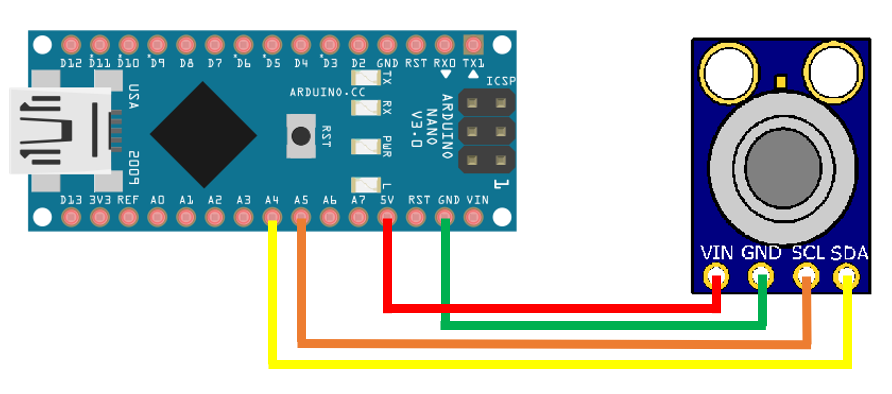
For the convenience of wiring, the module is shown in the lower-left figure here.
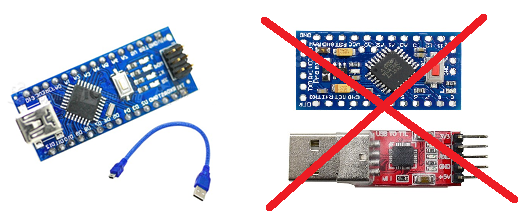
The main control board uses Arduino Nano so that the size of the temperature detector can be made smaller. After all, no one wants to take a big box to measure the temperature! It is also possible to use Arduino Pro Mini, but you have to prepare another USB to TTL. Well, I think Nano is convenient.
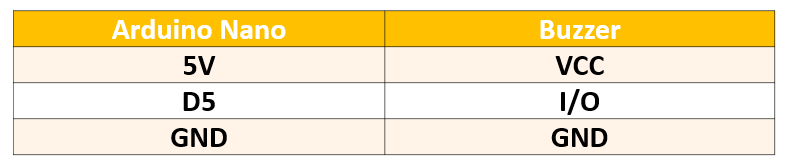
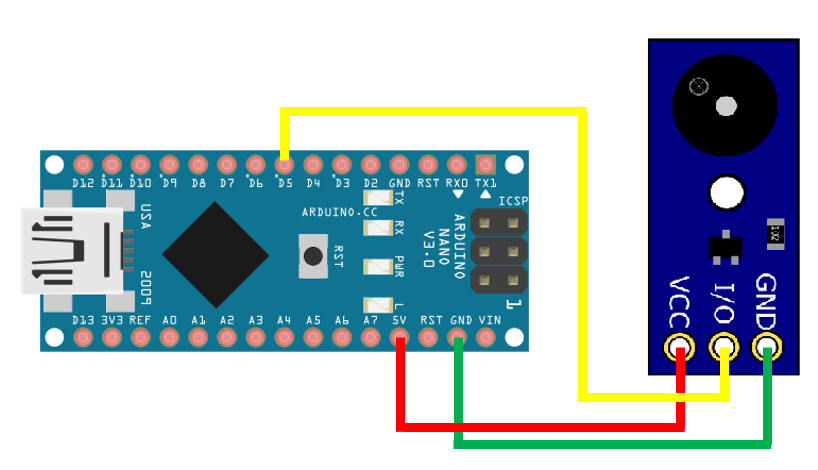
I hope that there is a screen that can display, and also a buzzer, to inform the user that the measurement is started and completed.
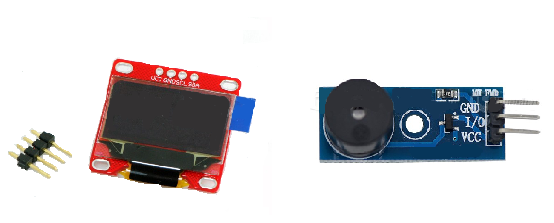
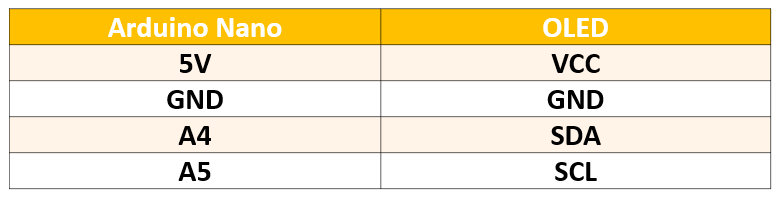
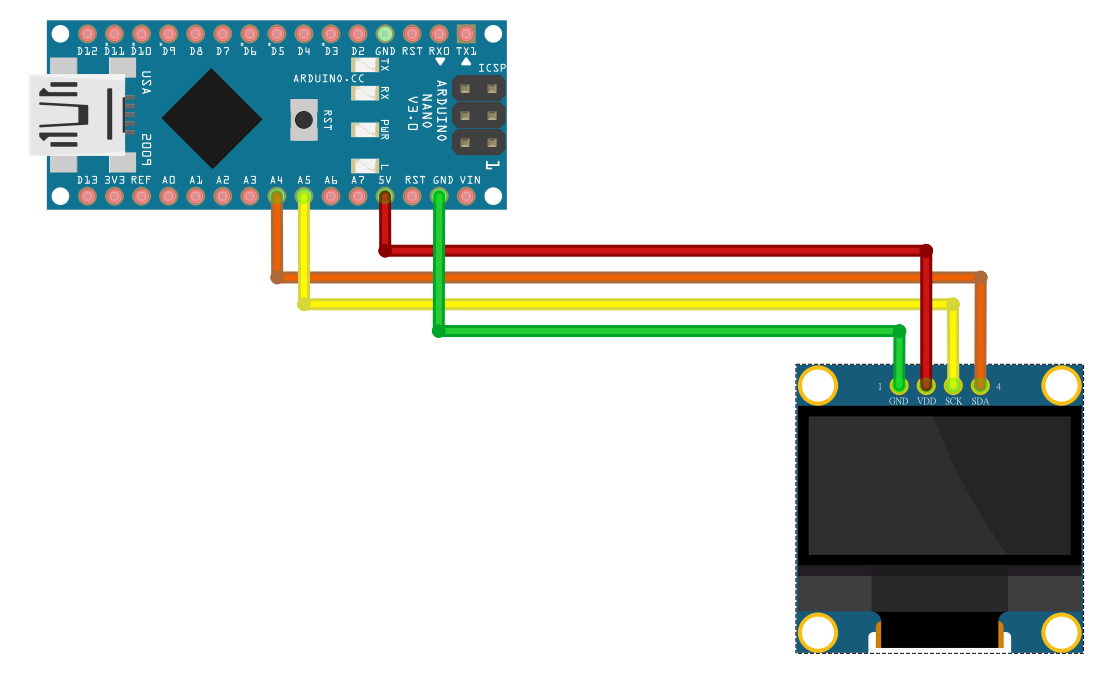
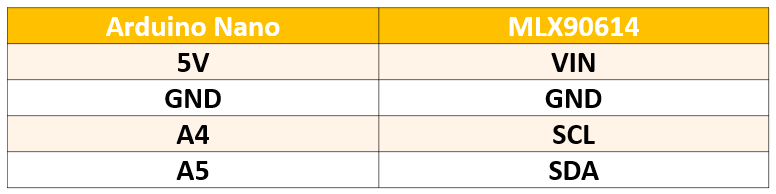
Both the MLX90614 and the OLED display screen are I2C, so a breadboard of appropriate size is needed to assist the Nano connection. It happens that there is adhesive foam glue on the bottom of the breadboard, which is convenient for us to fix the Nano.
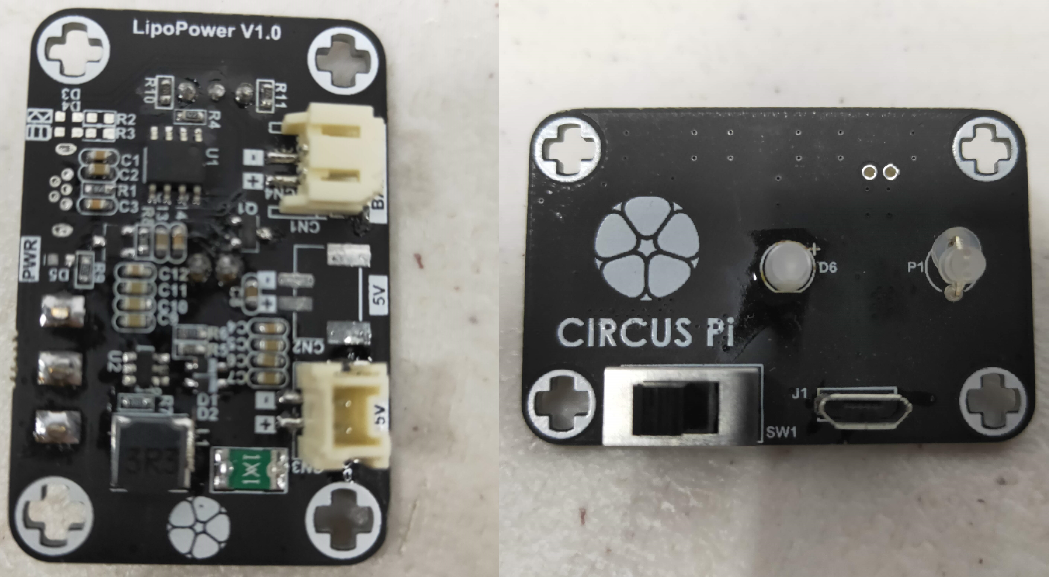
The last part is the power supply. I have referred to the power supply options used by many Makers. To meet the power supply requirements of Arduino 5V, it is nothing more than direct use of 9V batteries or two 18650 lithium batteries. Two 18650s take up too much space, and the 9V battery can only be used once, so I decided to use a booster board with a charging function, and the battery uses a sheet-shaped polymer lithium battery.

 Open Green Energy
 Chris K Cockrum