 Ari
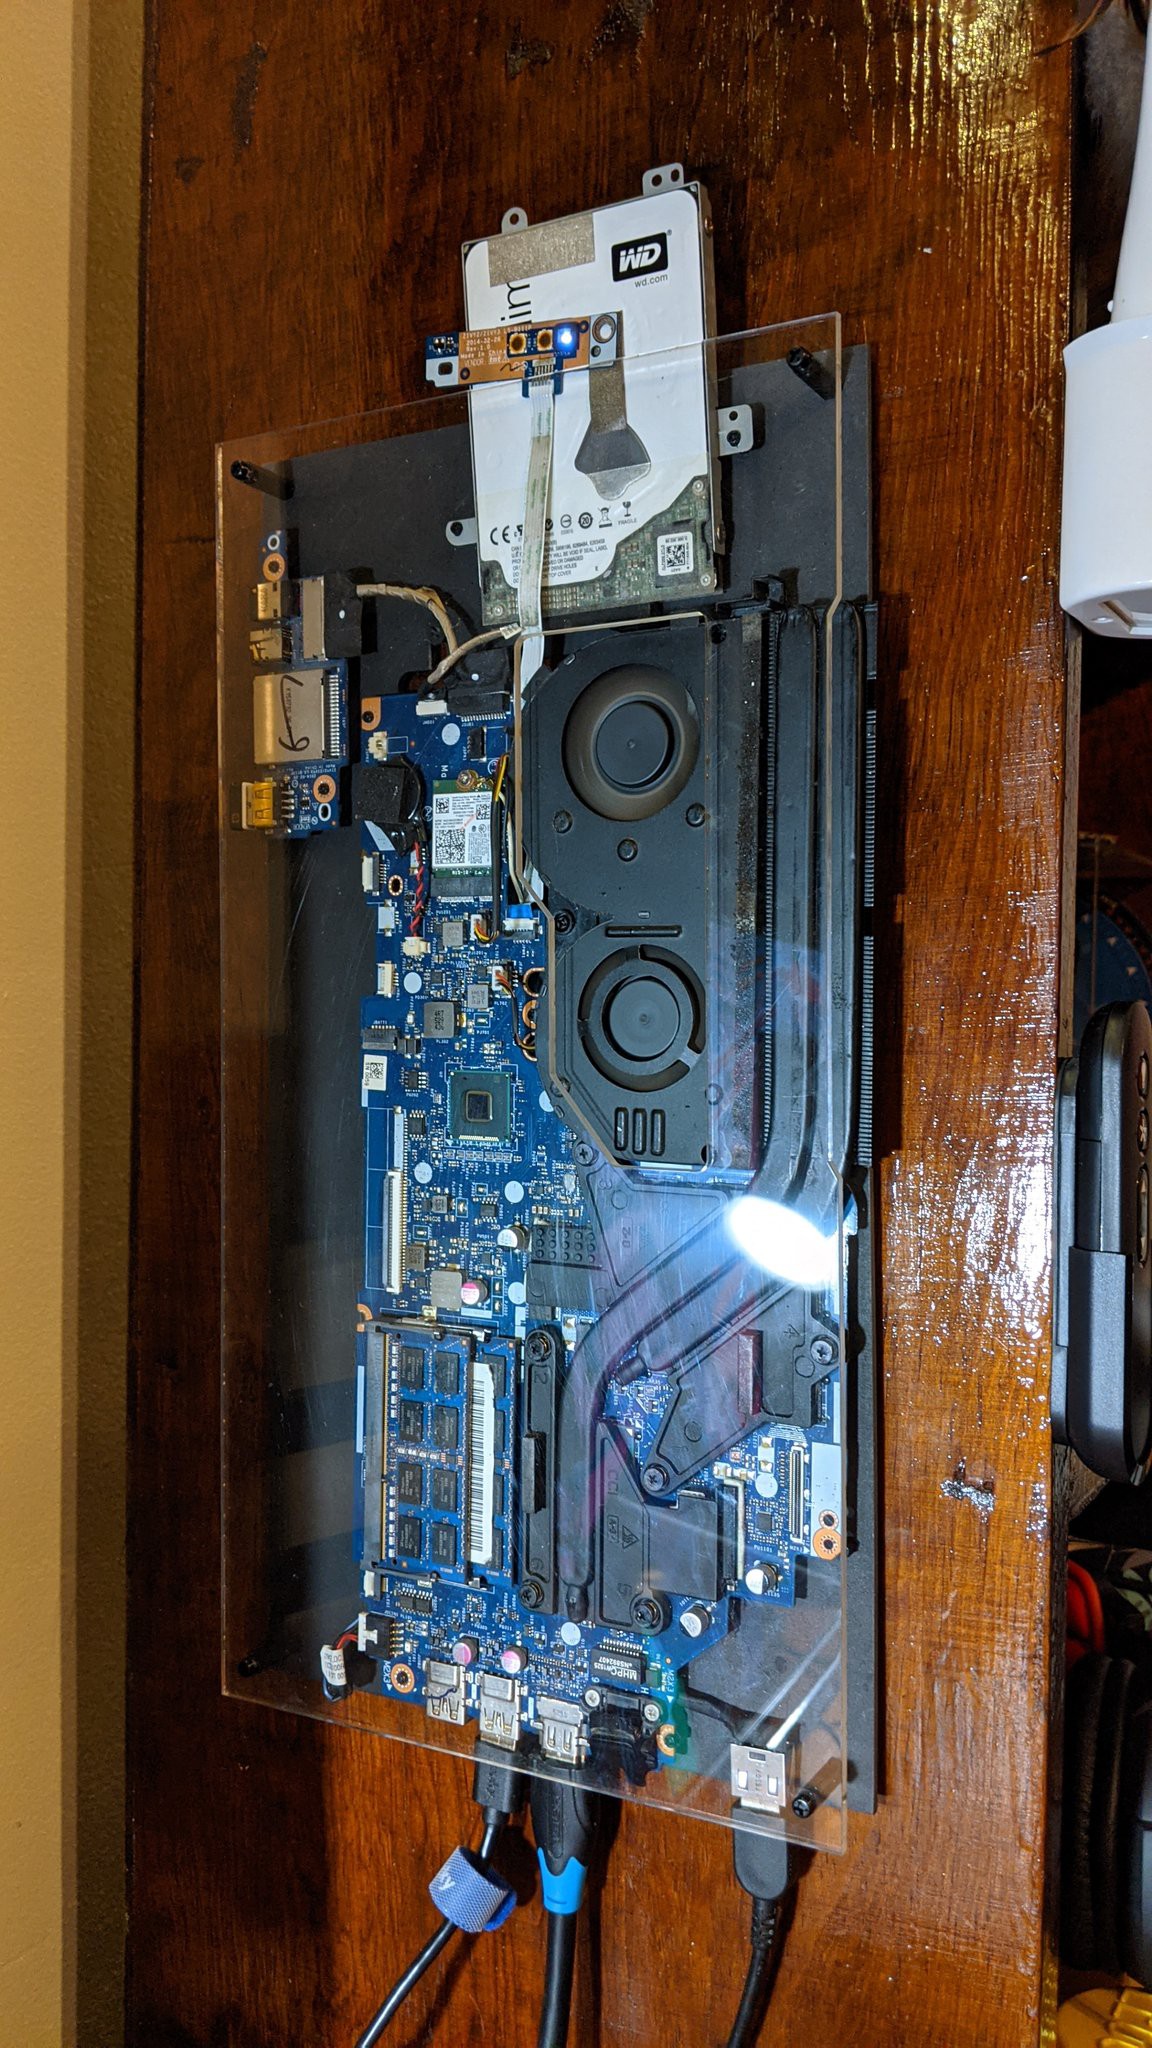
AriWhen taking out the battery I got a look at the motherboard. It just being a fraction of the whole laptop, the heat sink setup looked quite cool and the hard drive sticking out of the motherboard like if it was a quick slot of some kind; made me decide to make the design exposing more the electronic components.
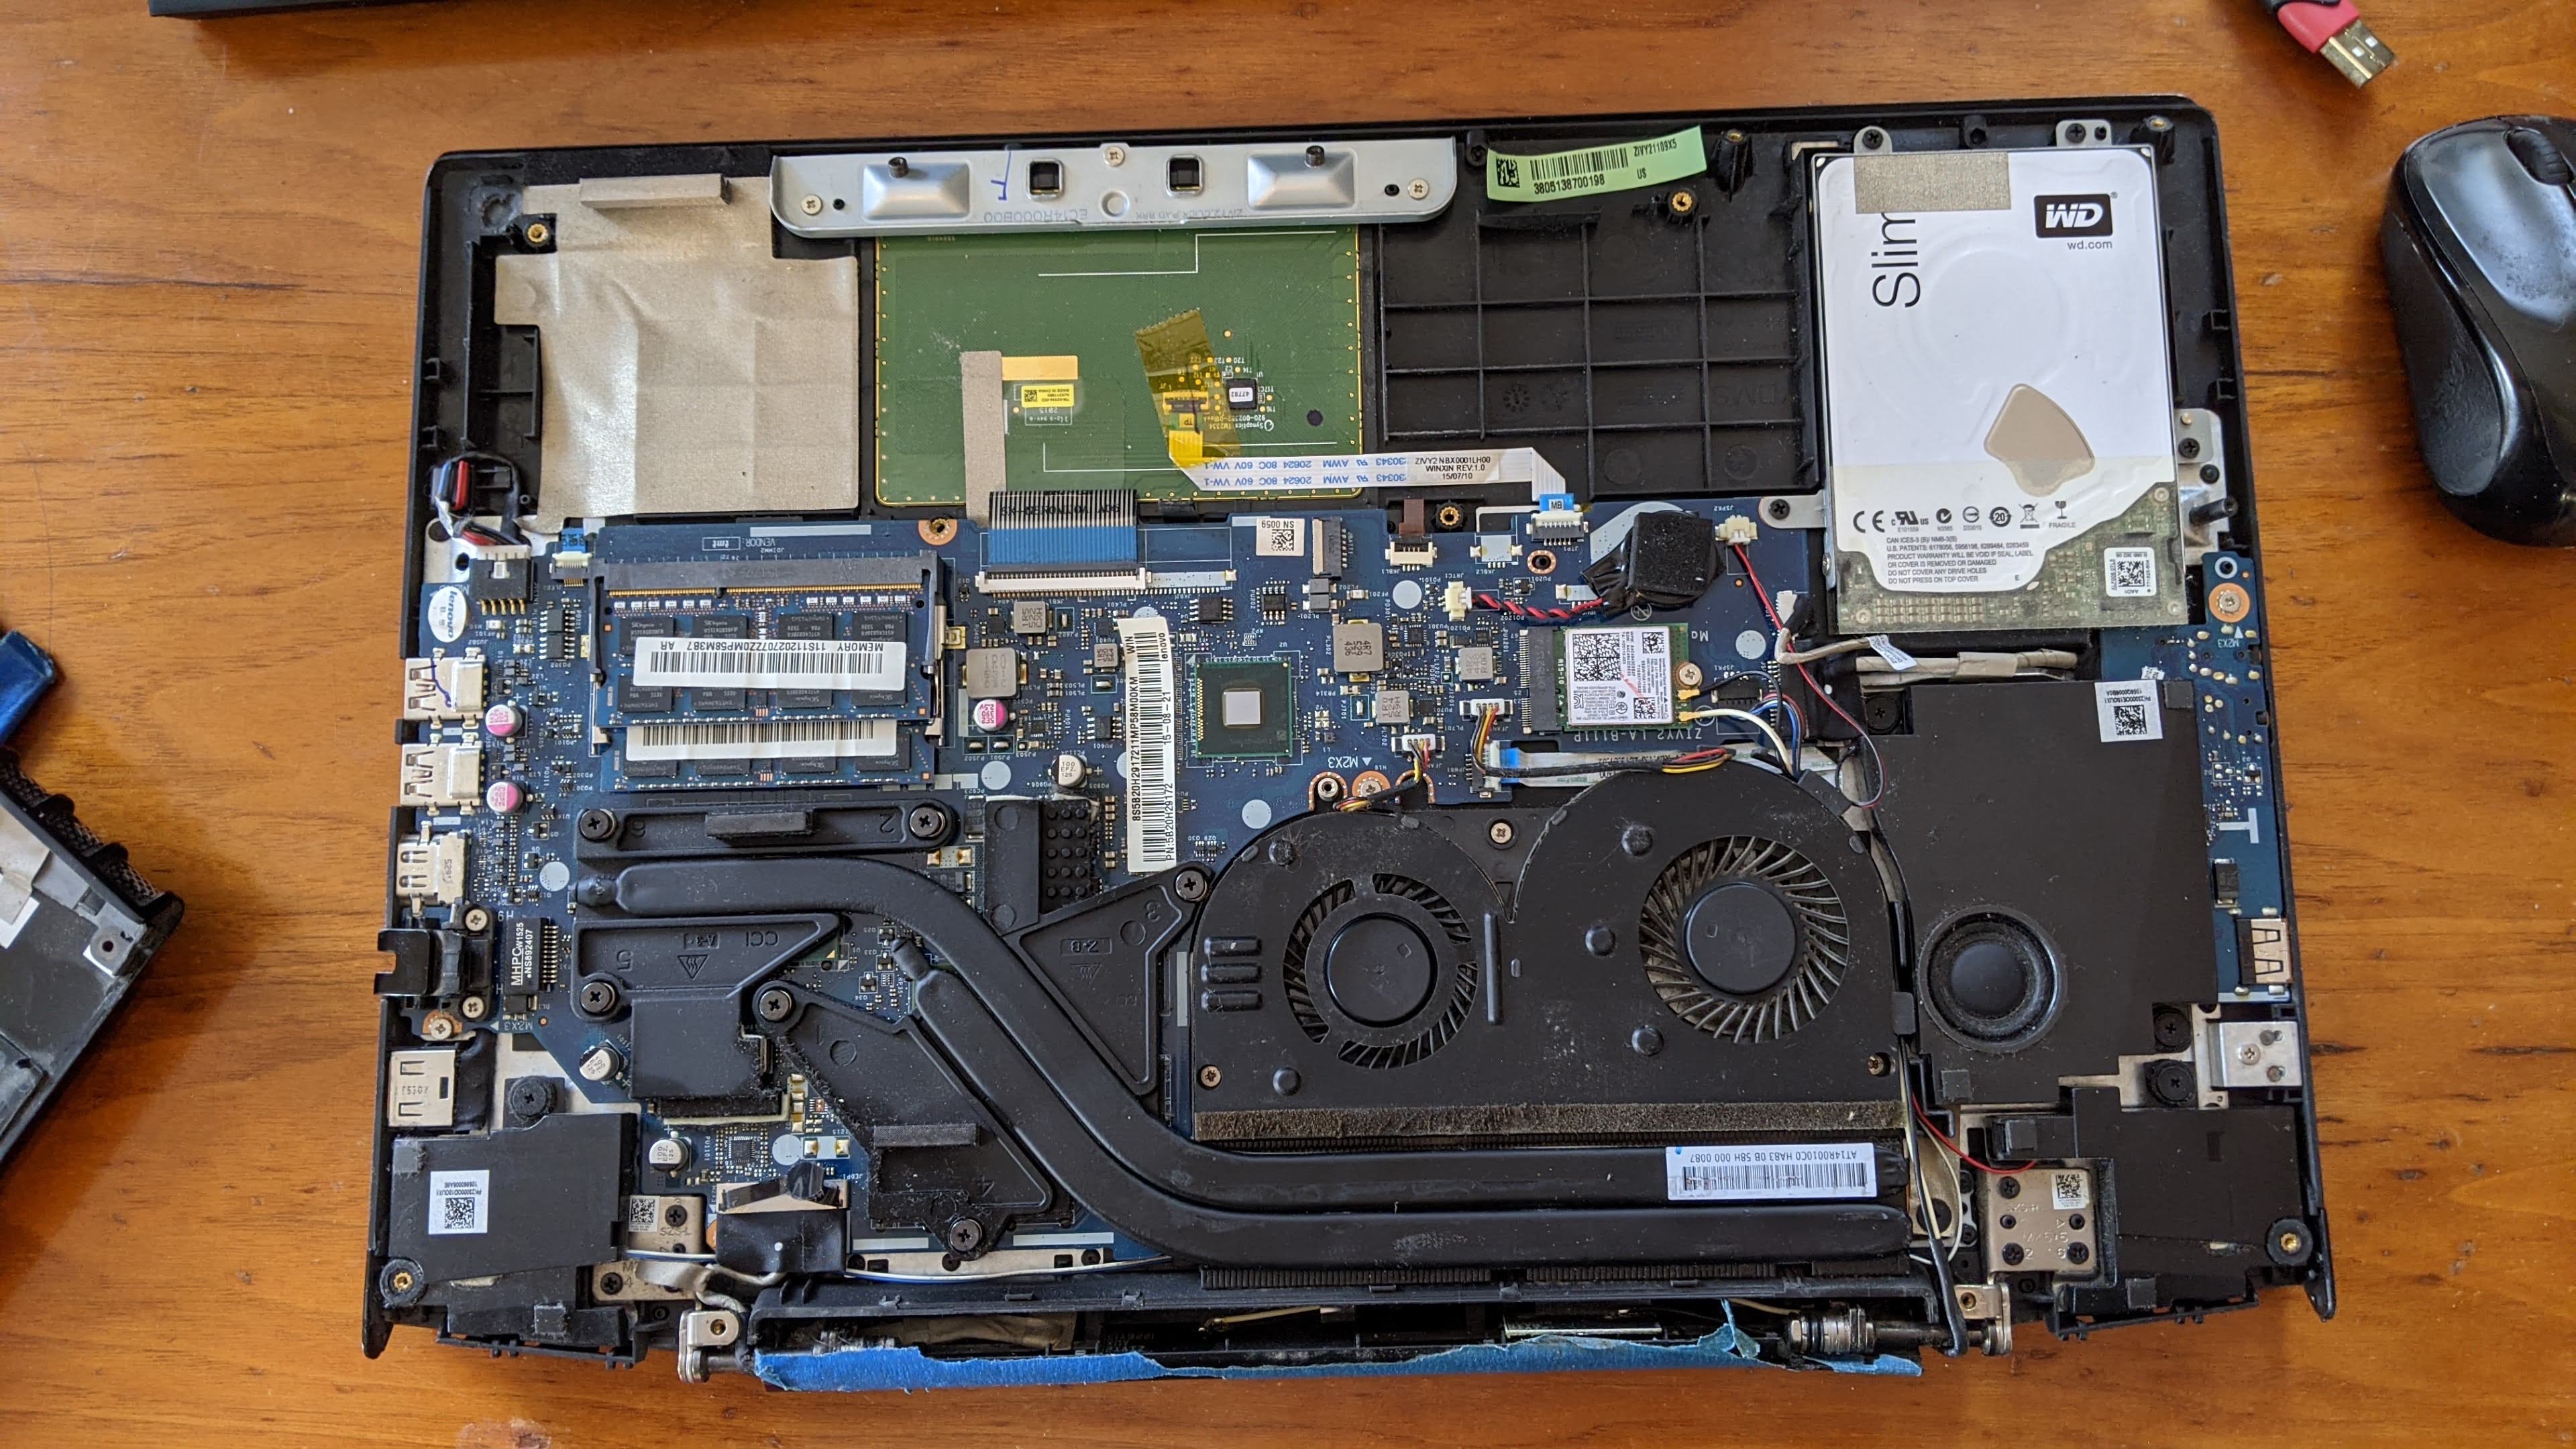
Began to analyze what parts where actually needed for the computer to work and also what pieces I wanted to take out. Could learn a lot of how computers are built and the pieces connected. Is my first time messing with electronics of this nature, have only worked with single board computers and micro controllers. Luckily the PCB is quite nicely labeled, each connector and screw with a code.
Getting the components out of the casing was harder than I expected since there's several layers going on and different parts being attached to different pieces of the case.
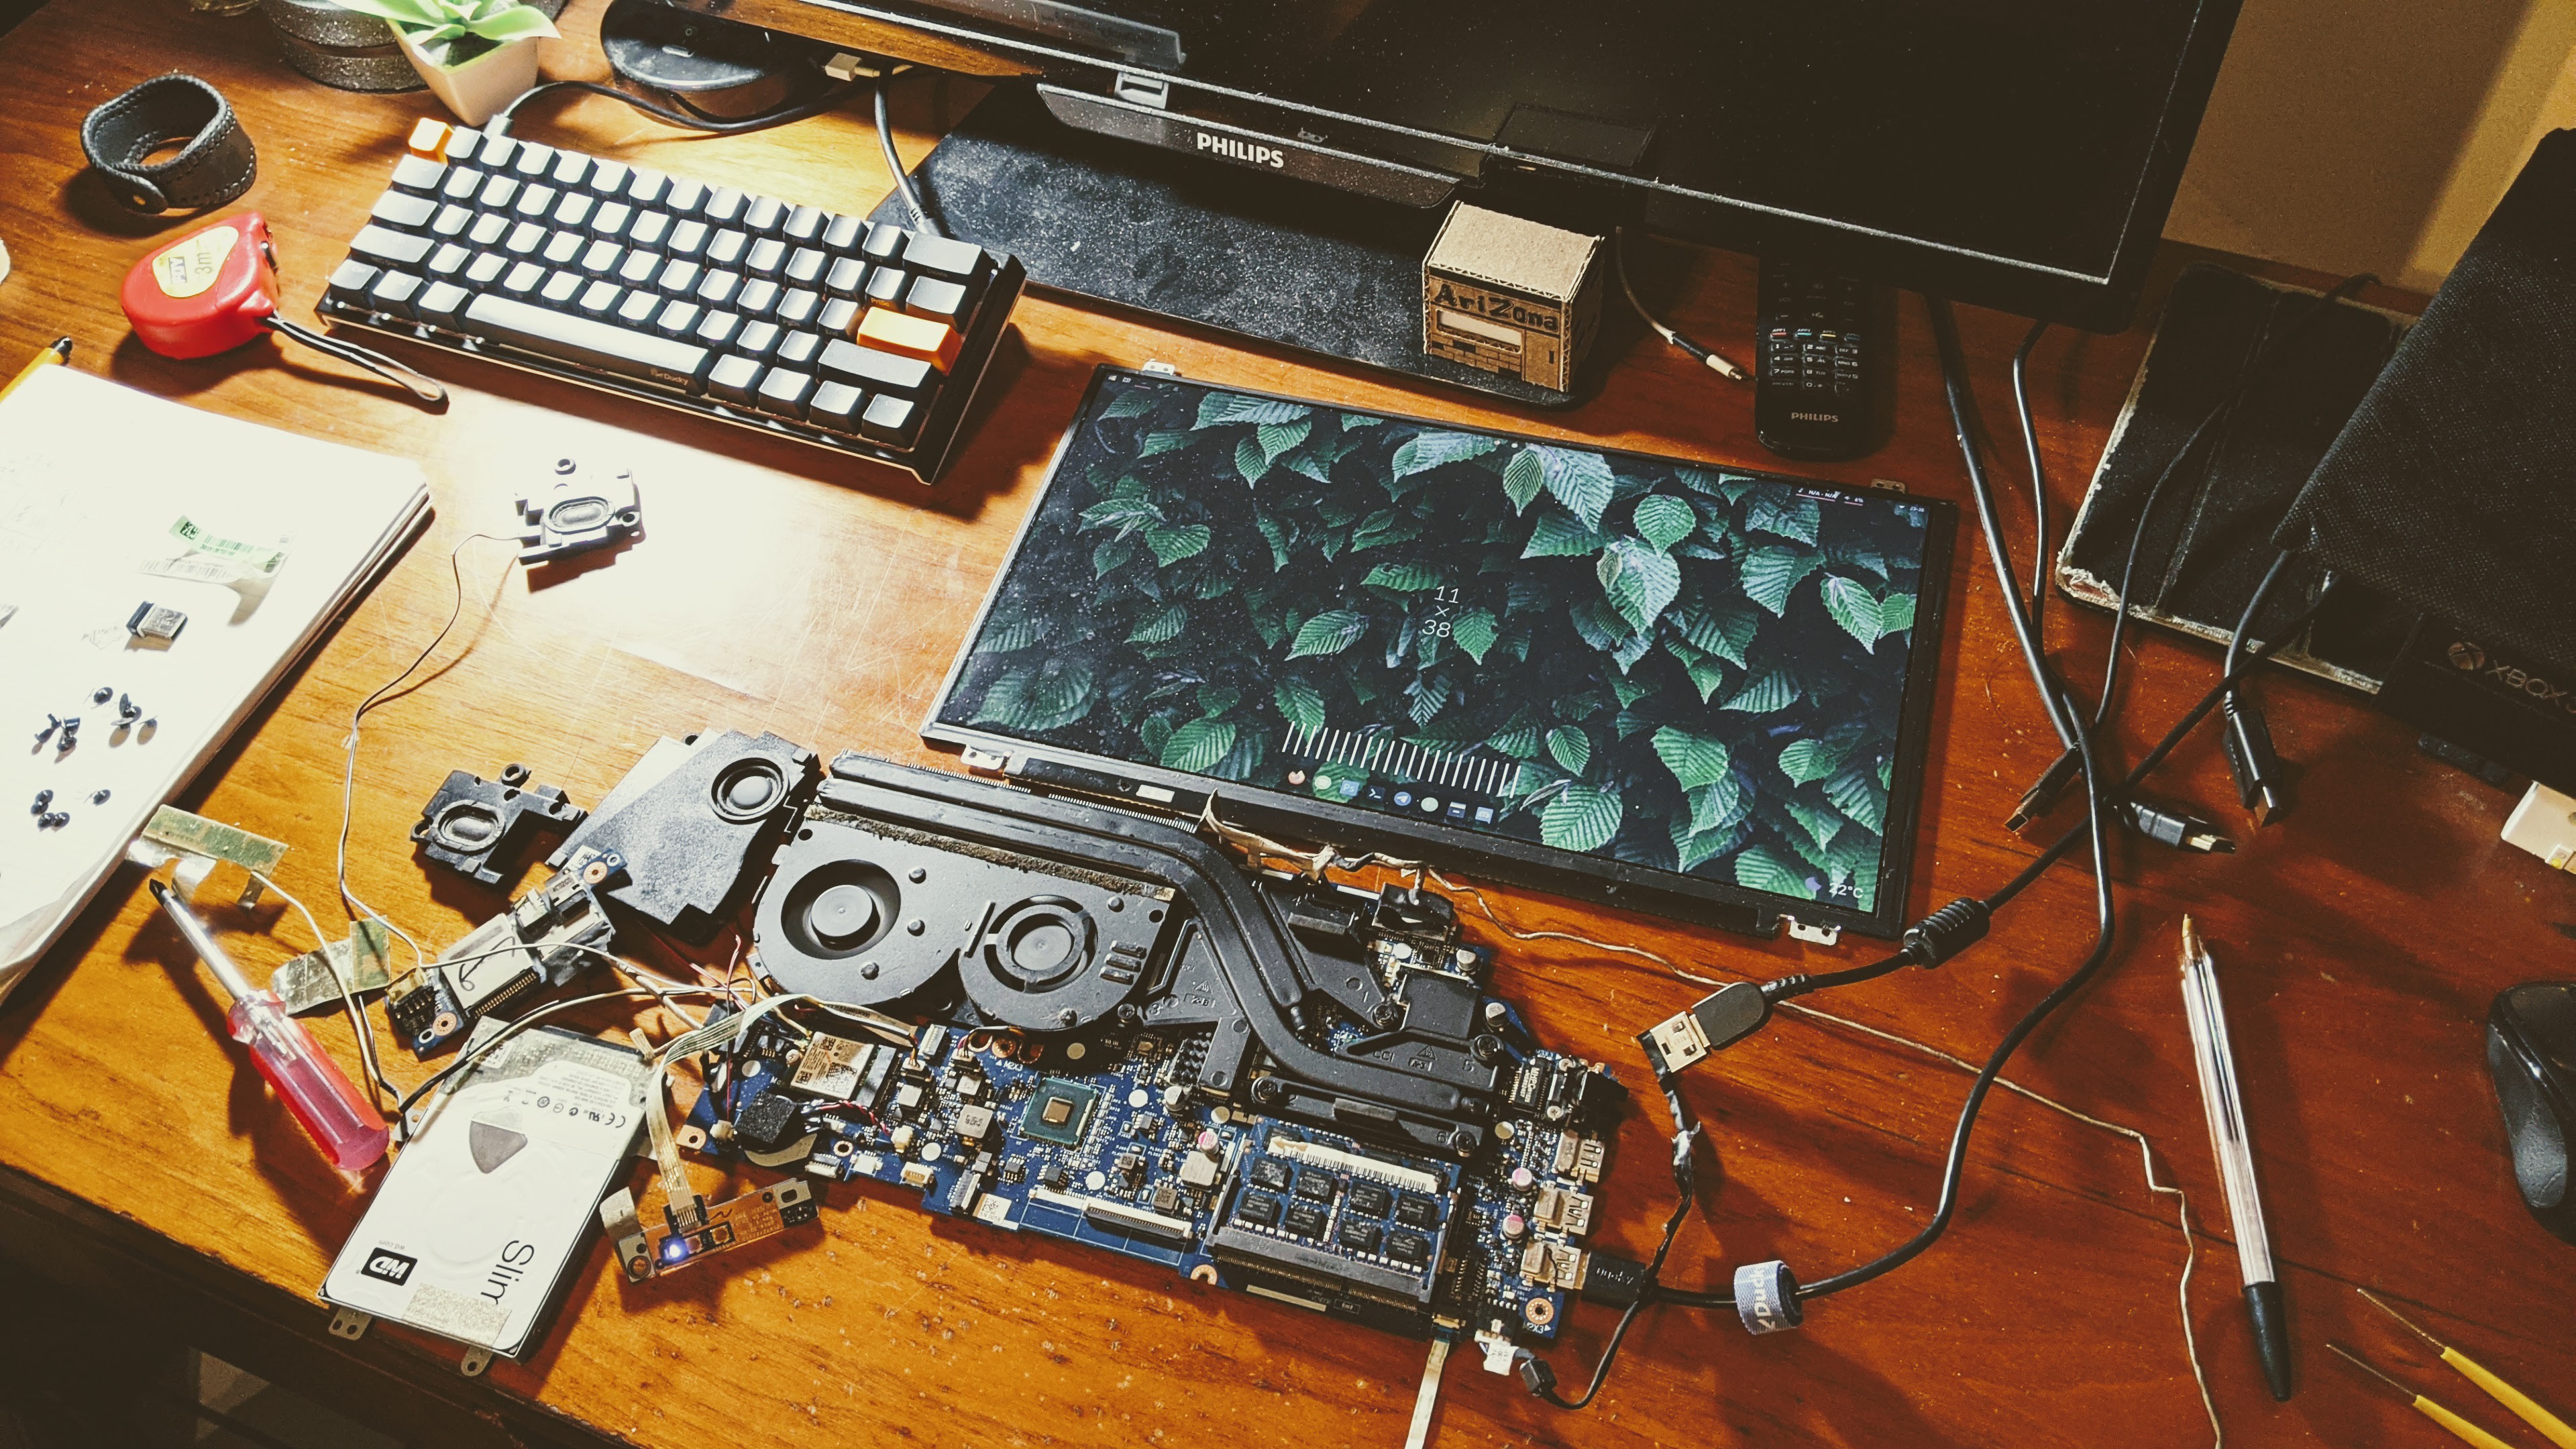
After carefully going through I was able to take all out into my desk and started to plug everything back together. I was so scared when it wouldn't boot up. Spent 30 minutes figuring out why, being afraid I broke a piece somehow or it actually needing the case for something. Turned out I plugged the ribbon cable of the power button upside down, such a deep feeling of relief once it started to boot like if nothing.
Did tried later to change the boot to wake-on-LAN or with the keyboard but turns out the laptop BIOS is really restricted in comparison to a PC one. Will have to keep that buttons board.
 Full pieces
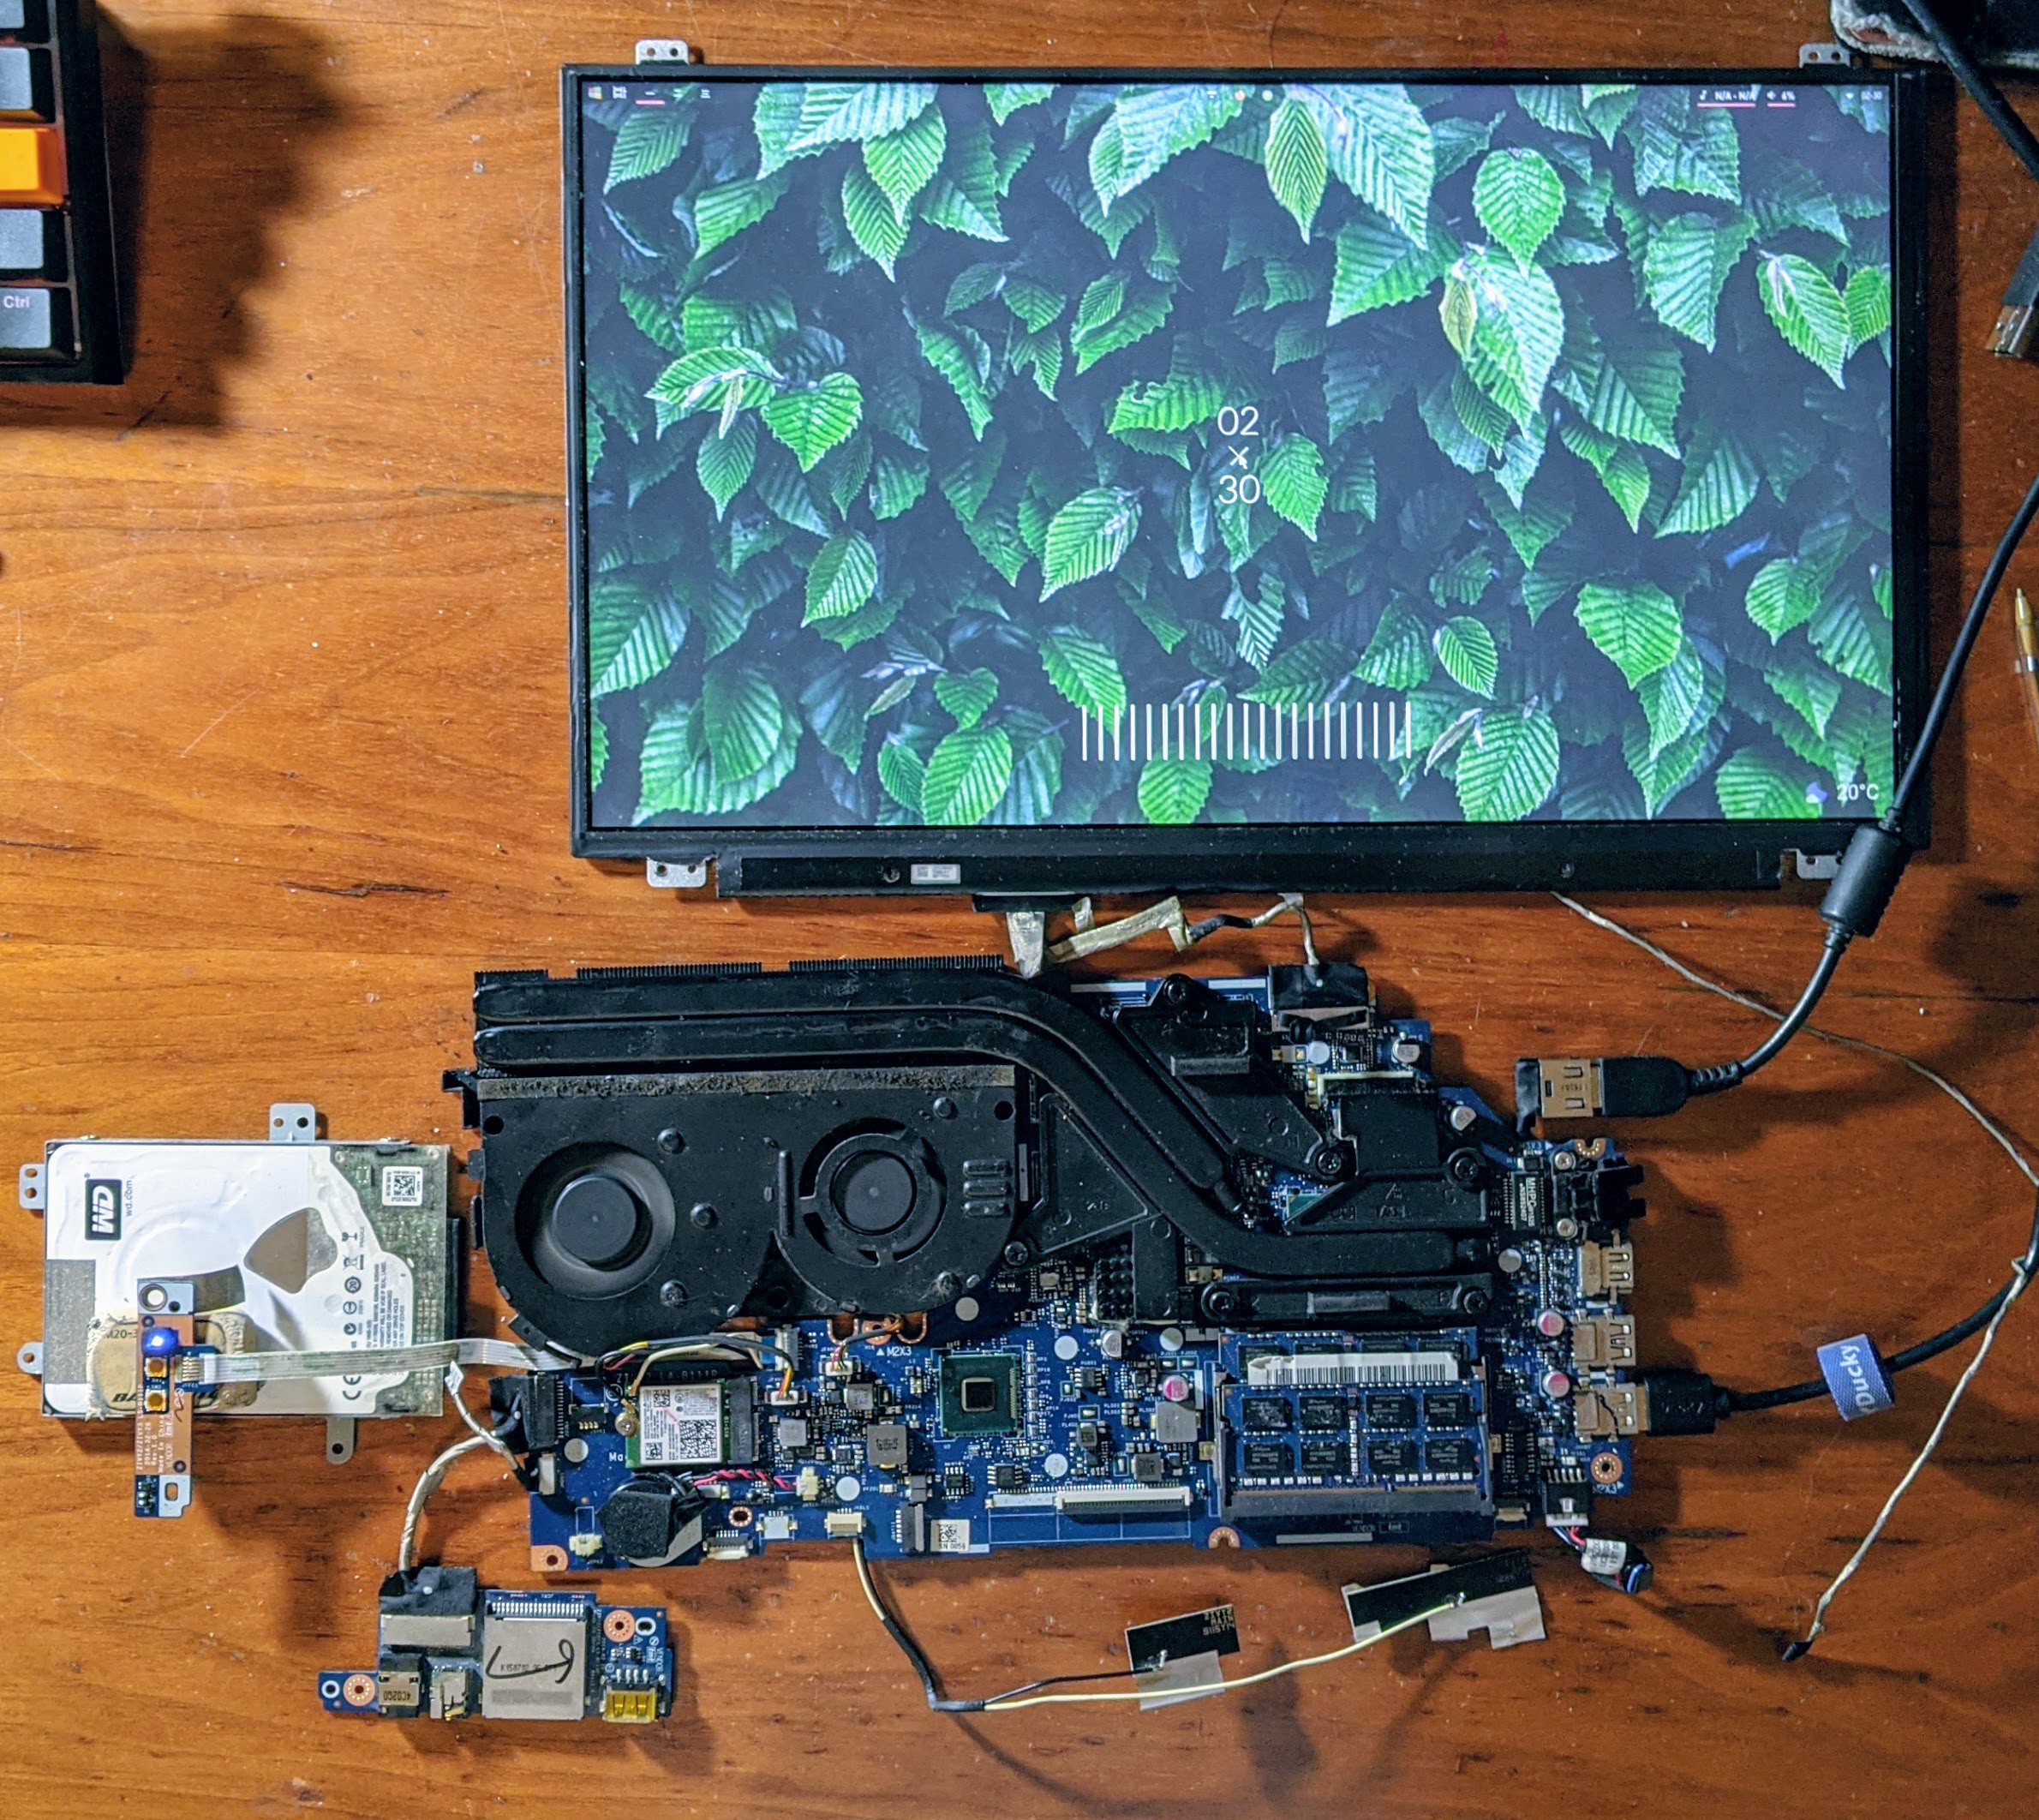
Removed the unneeded ones and arranged on the layout I would like
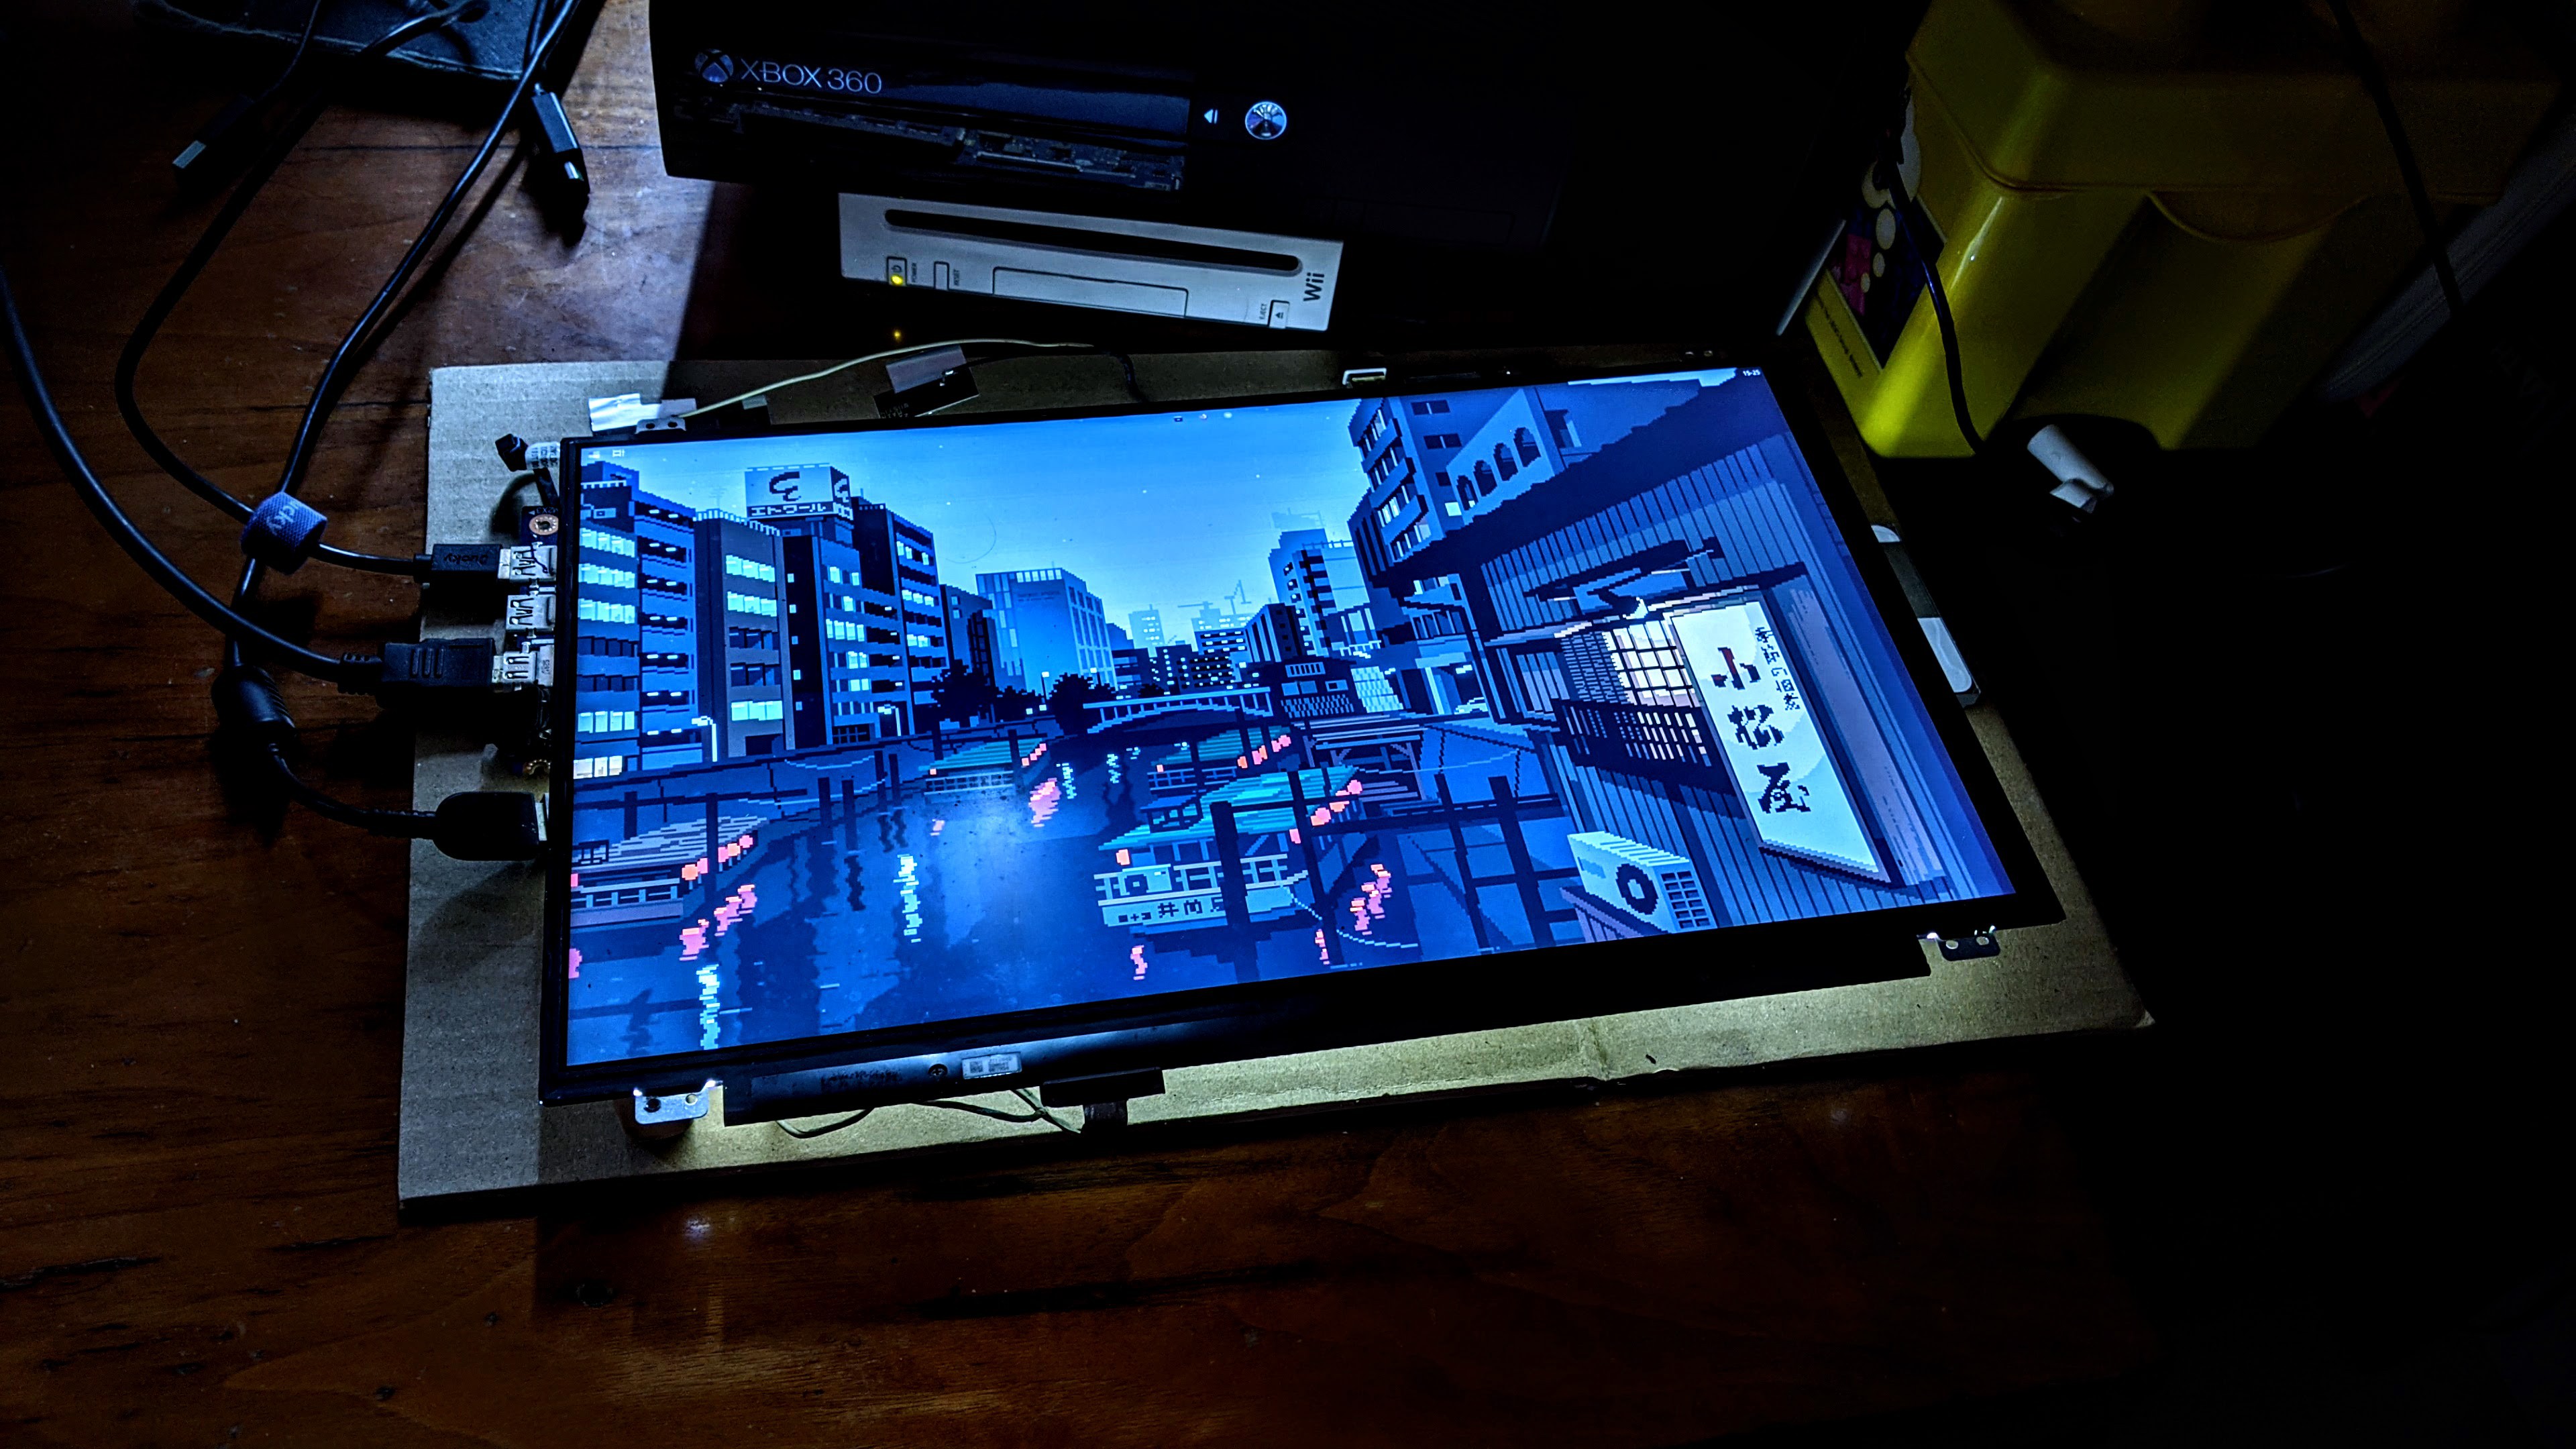
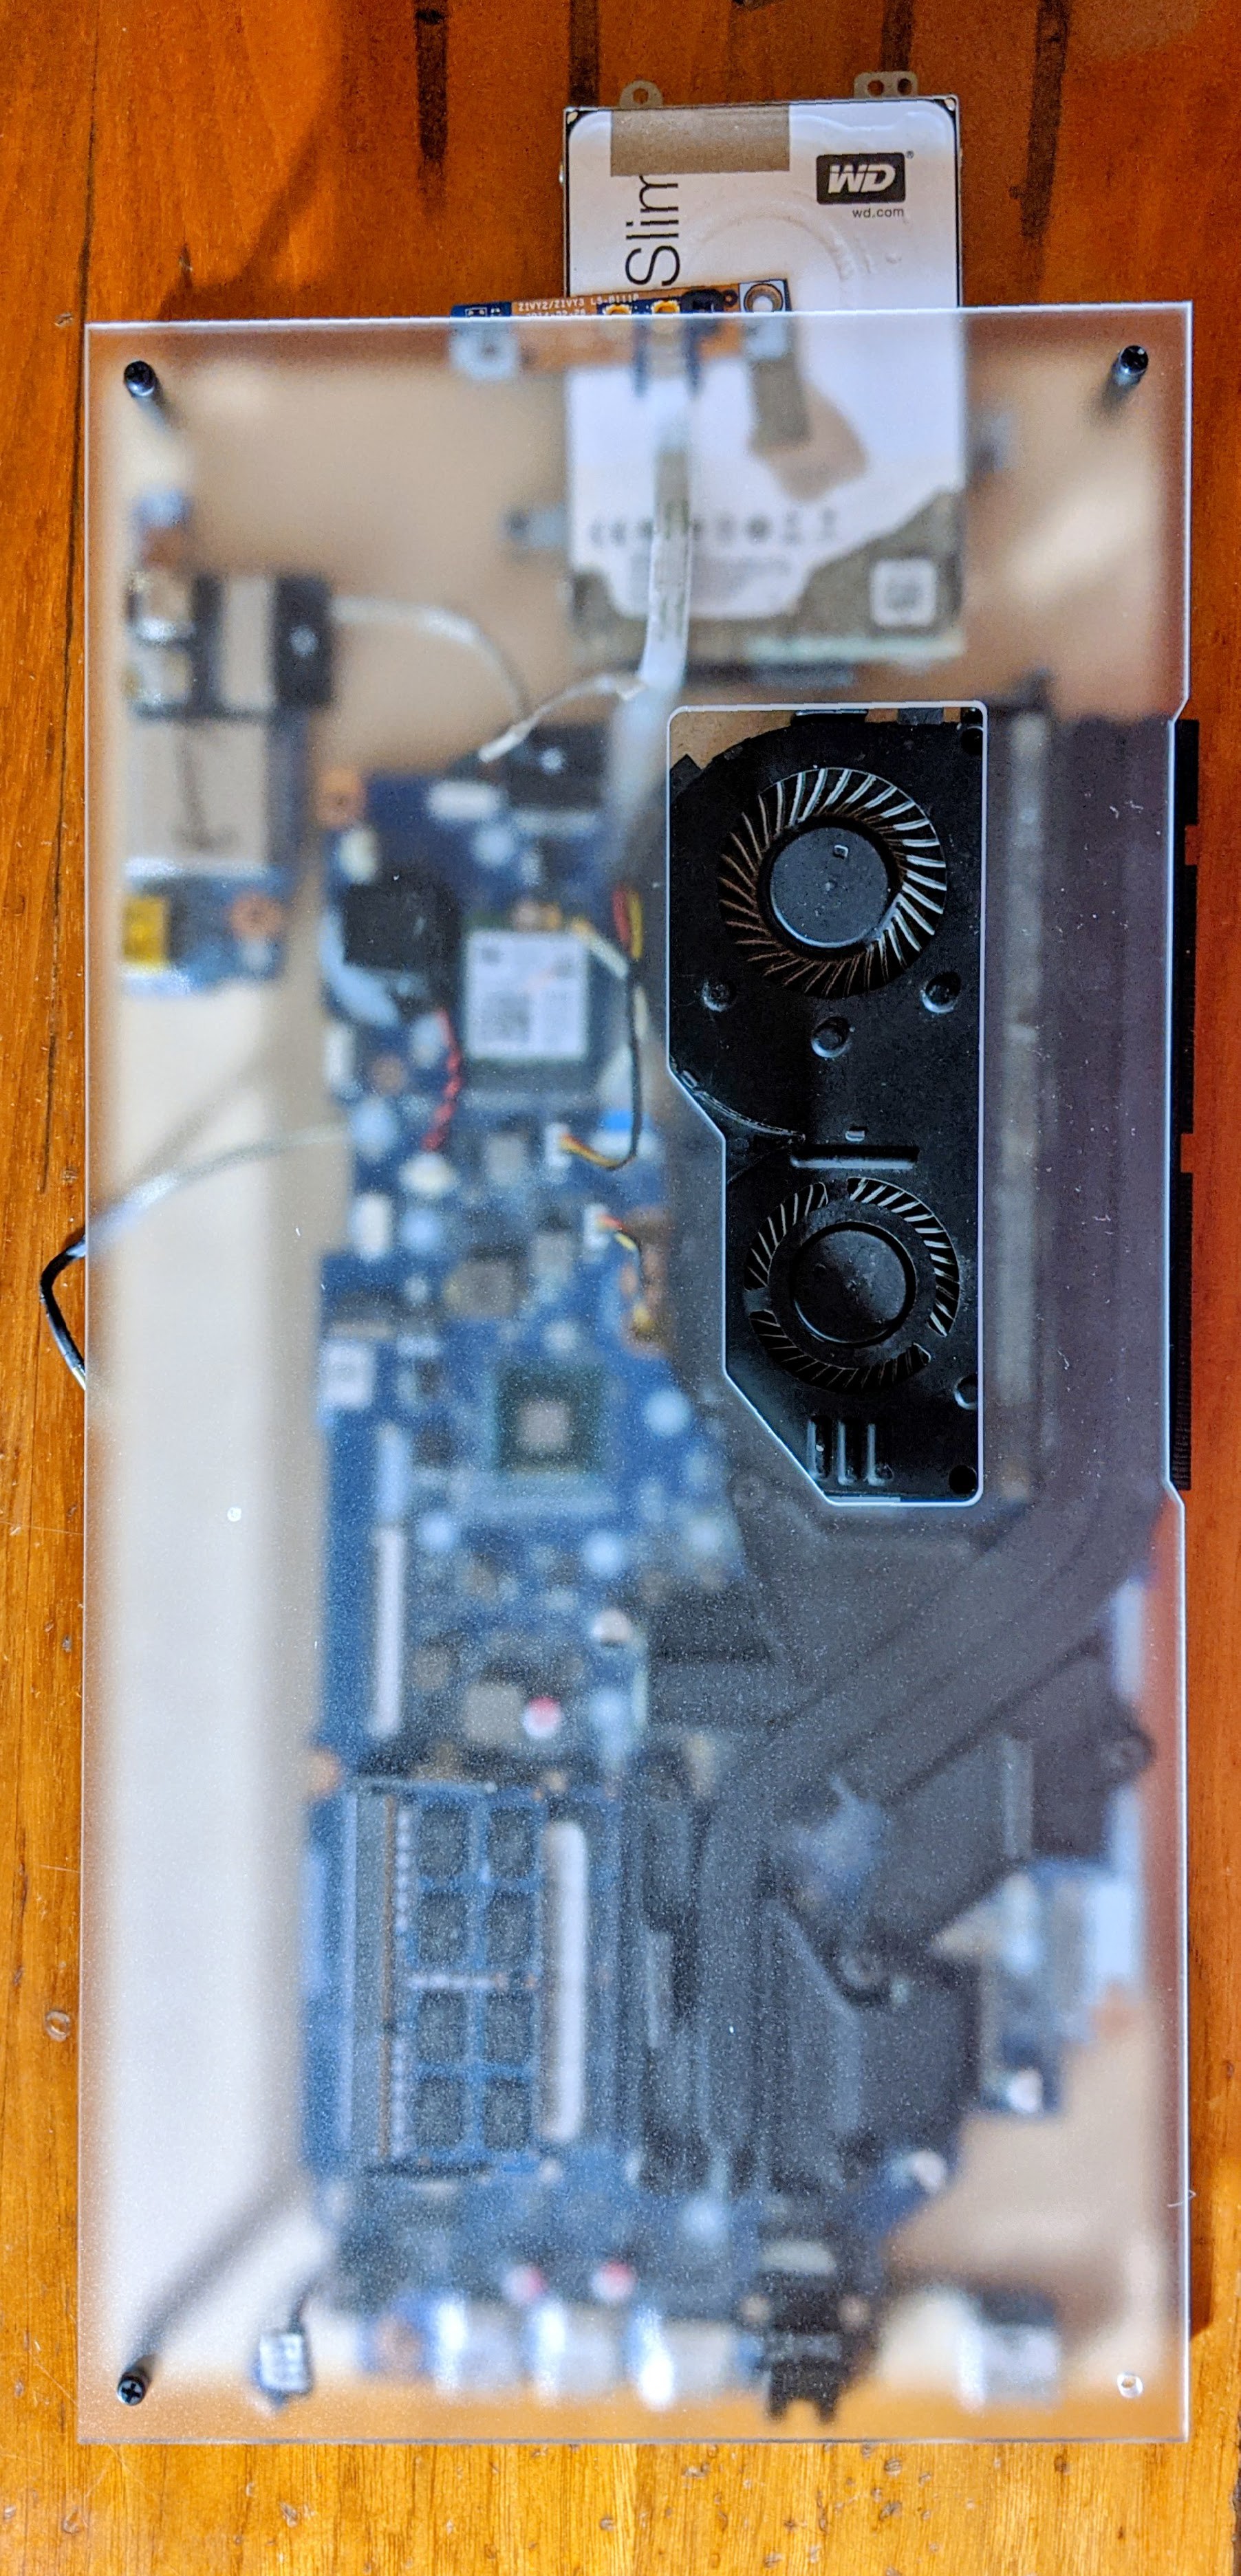
A cool thing about LCD panels is the led backlit it uses. Actually gives light in all directions but on the case it will be covered. Haven't notice any difference on the brightness of the display so will use that light as a nice screen effect.
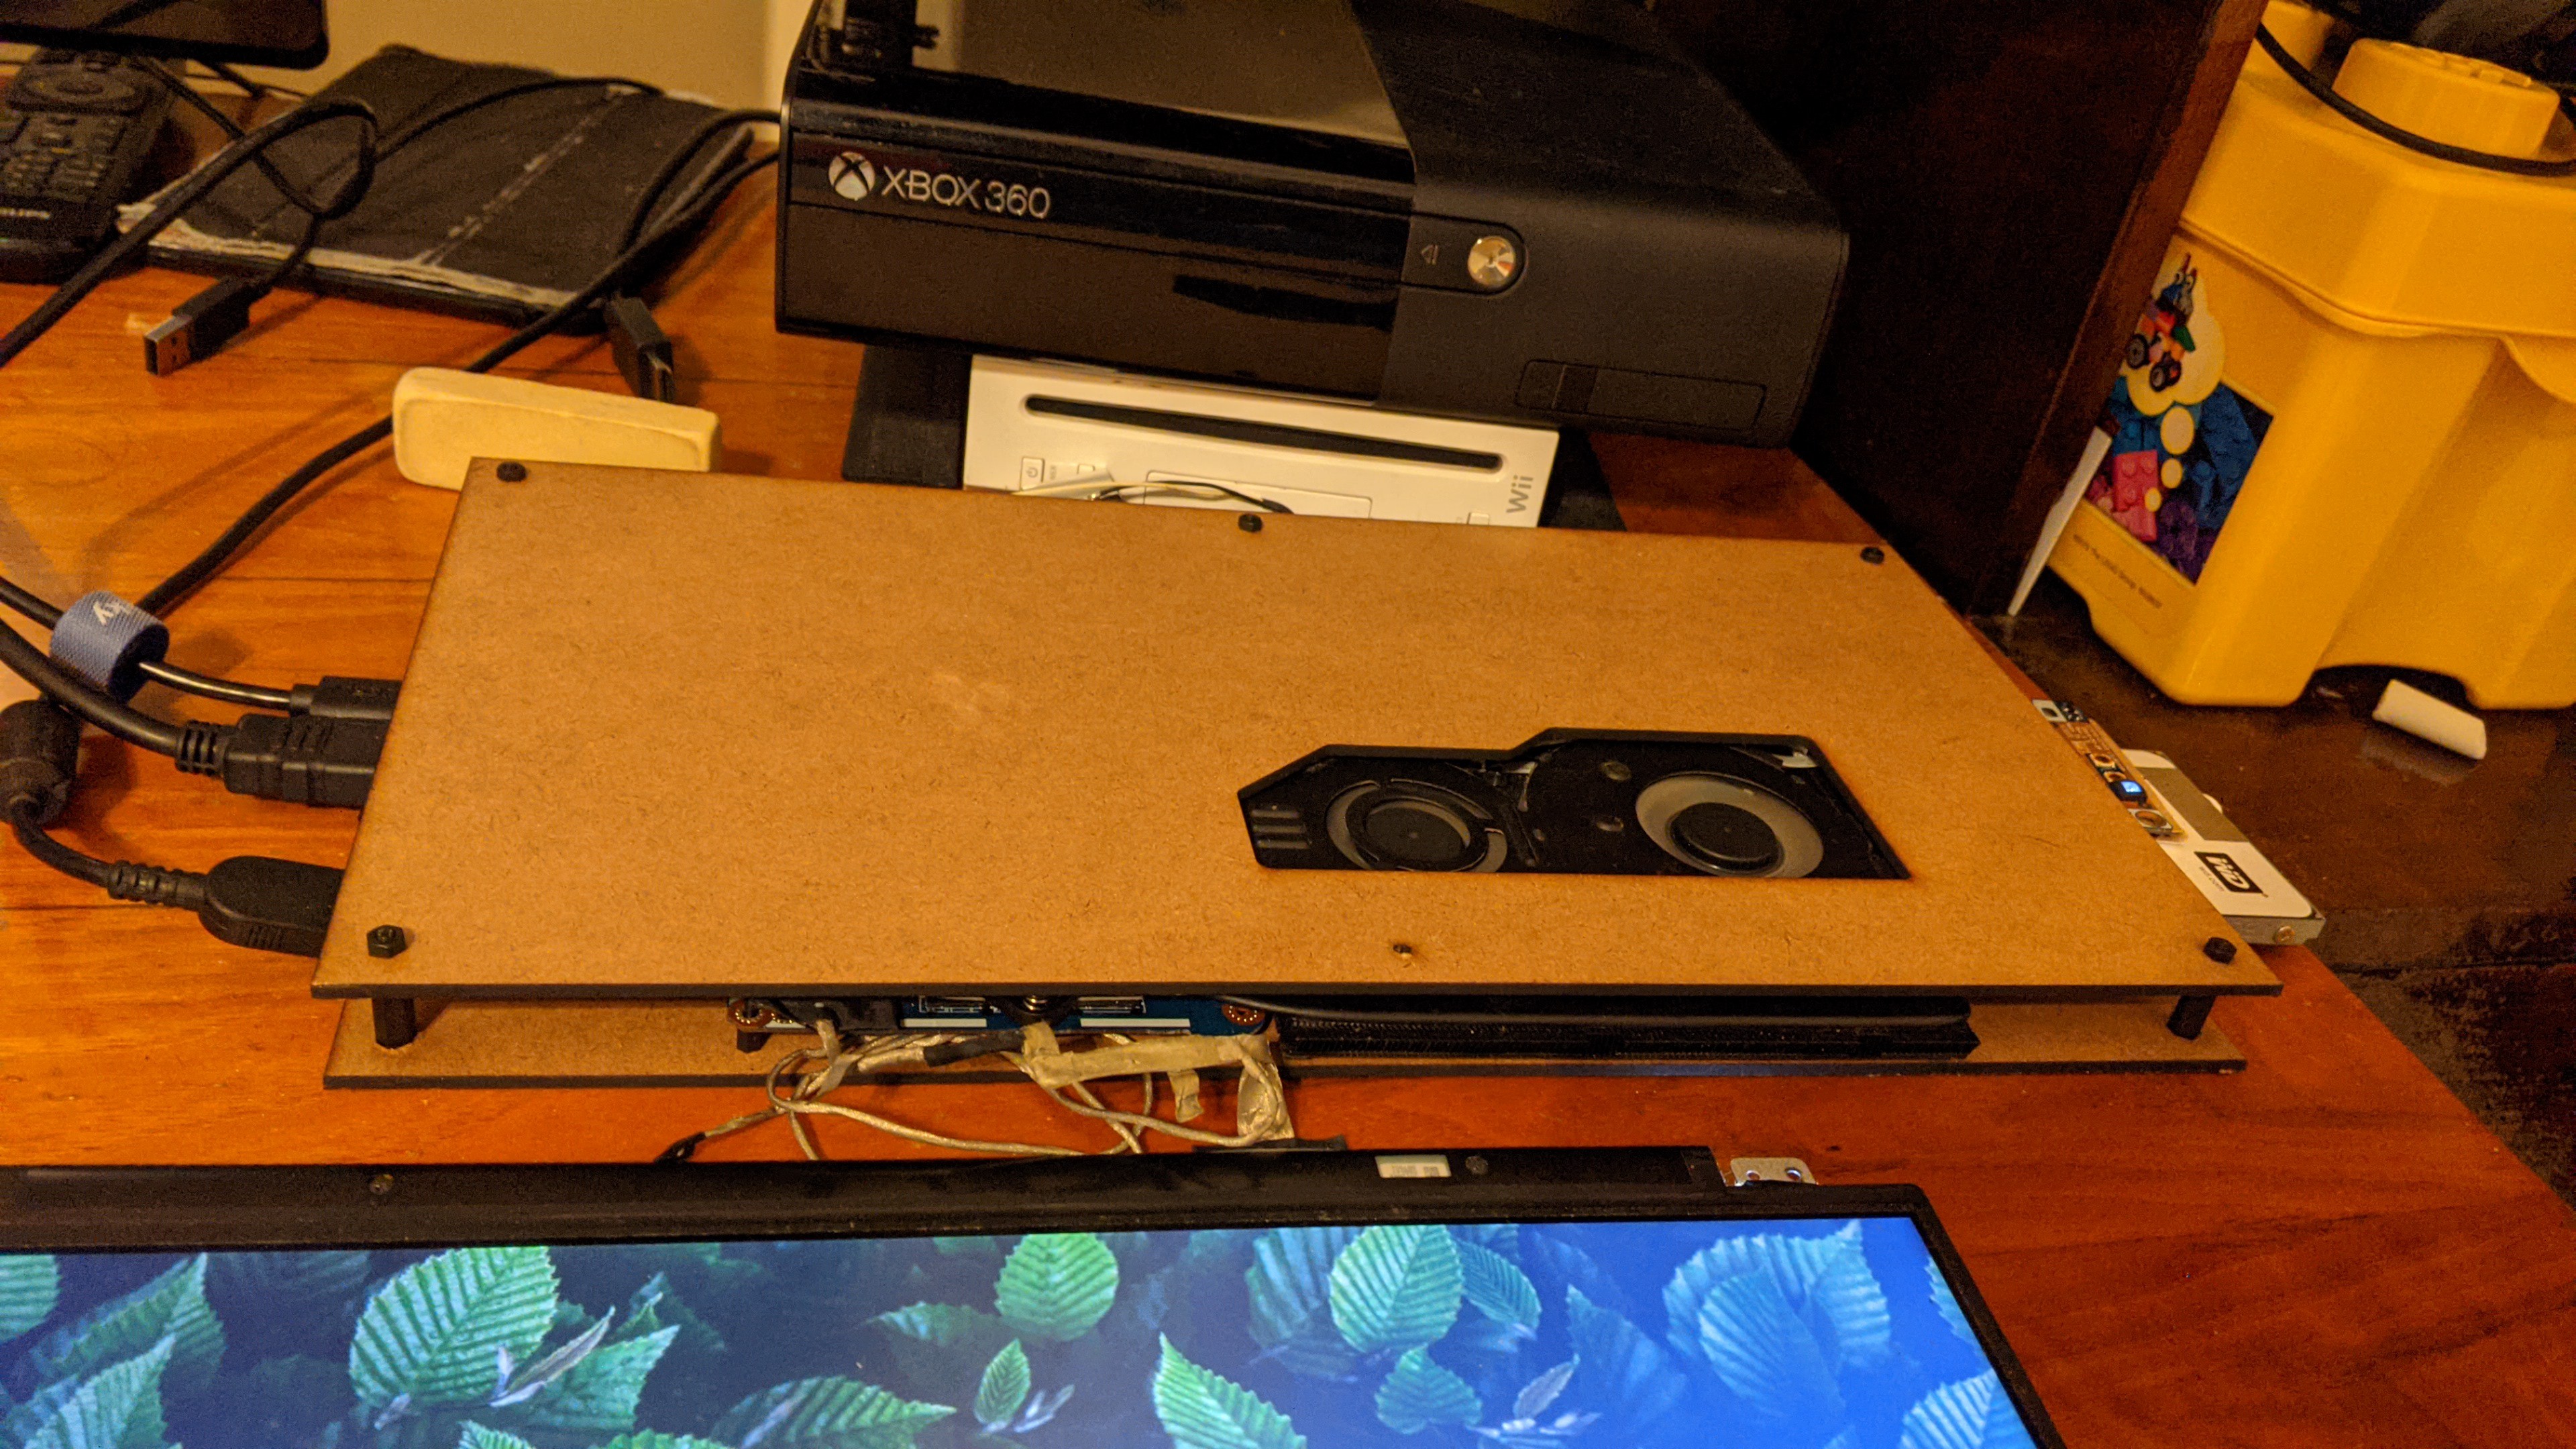
Could start arranging the pieces and play around with the layouts. Once I decided how I wanted the ports and the fan vents I made blueprints to know where each piece would go and the bolts it needed. Traced all into a big sheet of paper that then scanned.
Worked on Fusion 360 to make the CAD 3D models of all the pieces I need to send to laser cut. Made the cuts so I could place nuts as inserts and from there place spacers and lift the components and what will be the cover.
Got my first prototype, all seemed to be fitting right and with enough space between pieces.Only corrections to be made where pushing the hard drive more to the side, adding a grove to expose to heat sink a bit more.
I really wanted to get rid of the messy cable to the monitor with something that didn't had a fixed shape. Tried by getting a normal cable with the same connectors also used for a laptop screen but the computer rejected it. Seems the communication between the board and the monitor isn't standardized so every manufacturer has their own pin layout. Now I see why screens always include a driver board.
Received my second prototype pieces. Waiting for parts makes it take so long, a weekend project took three months because of it so I'm considering getting my own laser cutter.
I realized there was no point on making the nuts fit as inserts when I could tight them like normal bolt and nut through a hole.
Update the design with circular holes, a bigger one to run the WiFi antenna through the back and some to be able to hang on the wall and got it cut for the final pieces.
Once I received the final pieces I painted on mate black the base, cleaned the top acrylic and started to assemble all. The unions felt solid, so was really nice to have the computer on one solid unit instead of all the loose pieces laying on my desk.
I love how it came out and the way it fits on my desk, almost using no space and being easy to hide the cables. Will be gicing much better service than it was before.
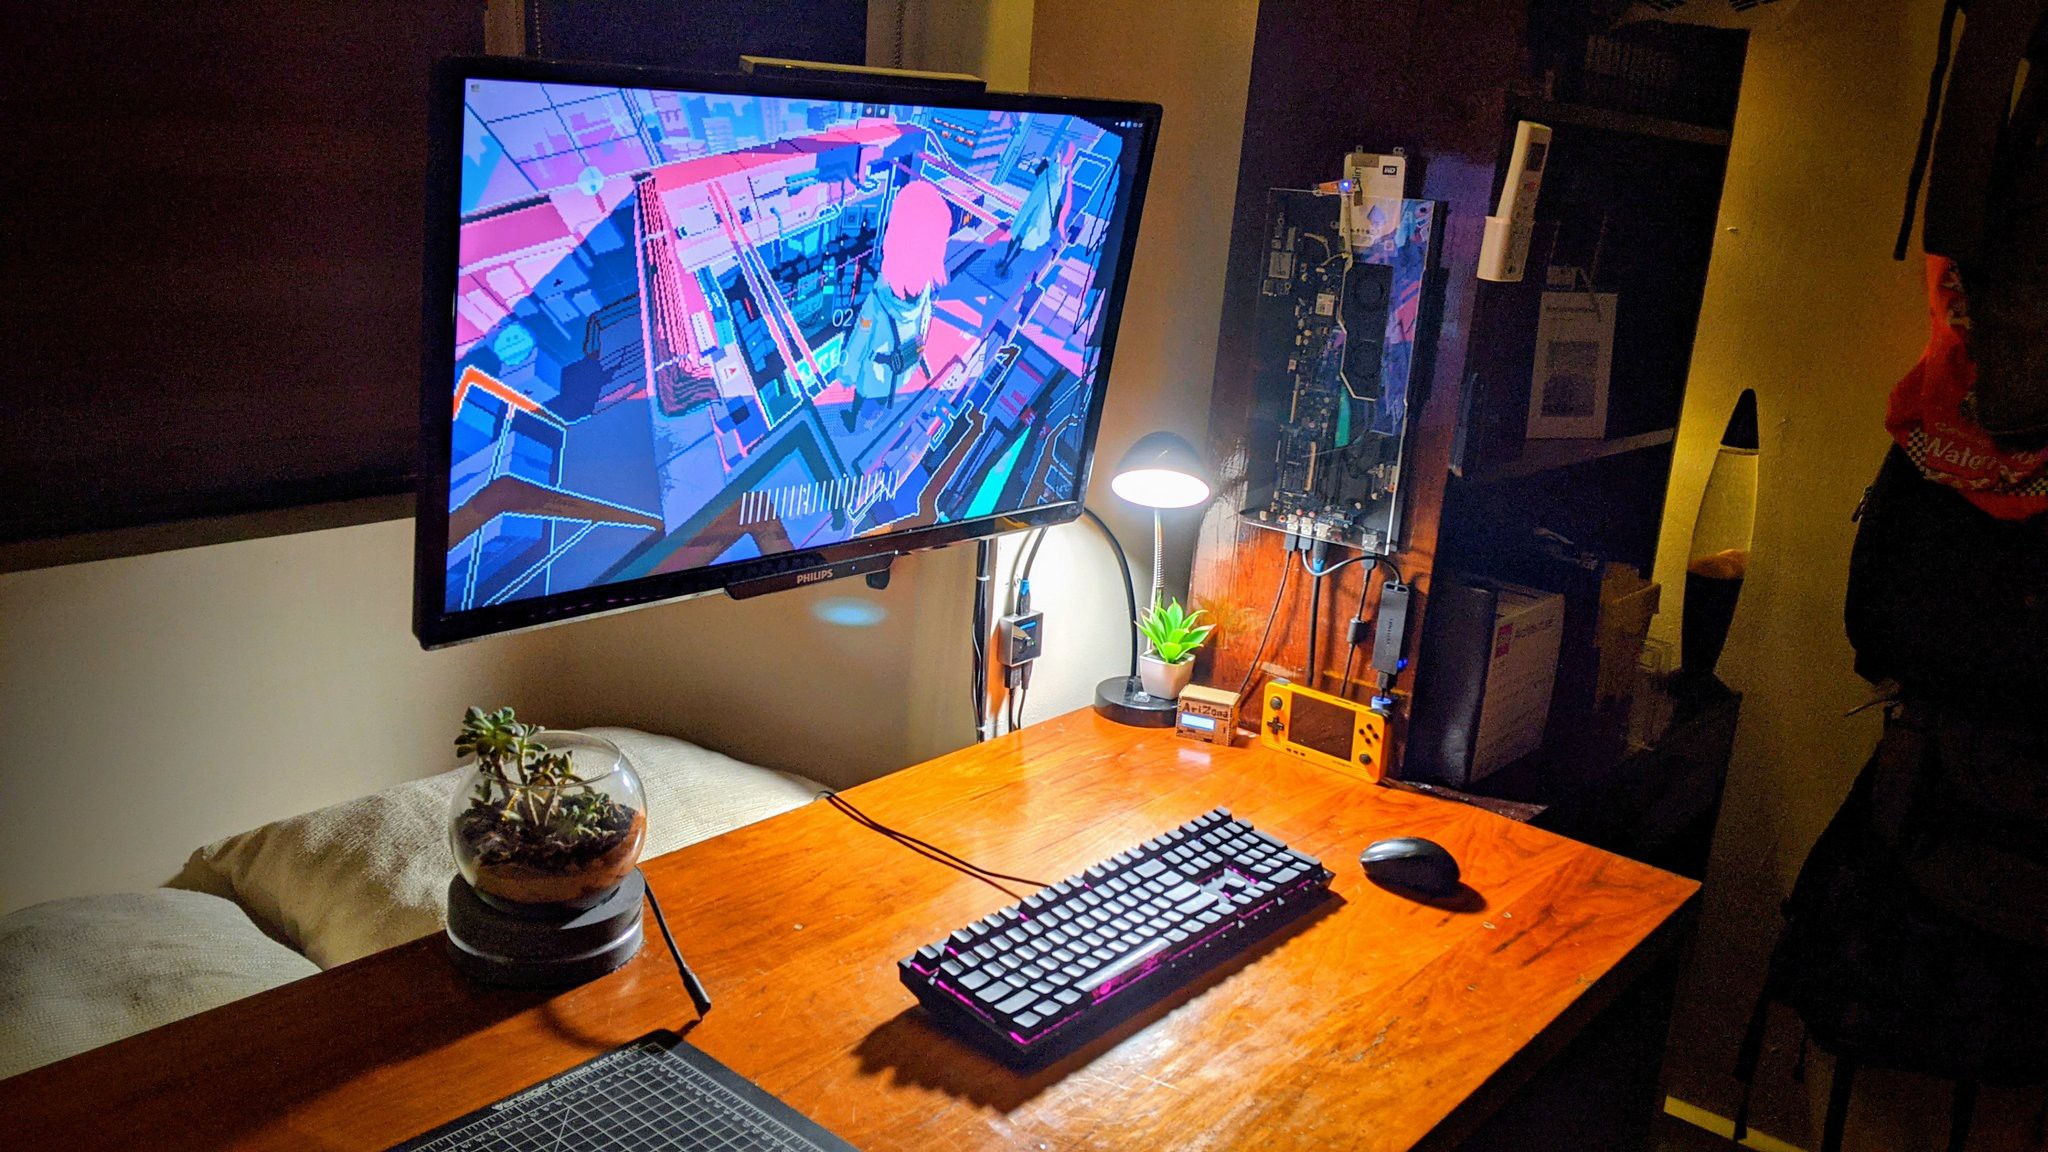
For the final touch I upgraded into an SSD and designed the hinges for the monitor. I took the measurements and used the previous 3d model of the computer to...
Read more »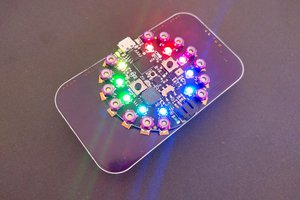
 deʃhipu
 zapwizard
 T. B. Trzepacz
 Sarah Petkus