Joel Kozikowski
-
Introducing the all new QwickFab PCB
11/16/2021 at 23:50 • 0 commentsThe CNC mill I mentioned before, and the software to control it is now ready. I've actually been silently working almost every day since I released the Qwicktrace PCB system to make a new and improved system for homemade PCB fabrication.
There has been so much work done that I think it is deserving of an entirely new project. That project is here: https://hackaday.io/project/182645-qwickfab-pcb
-
Spectacular smoke. PiHat Rev 2.1 released :)
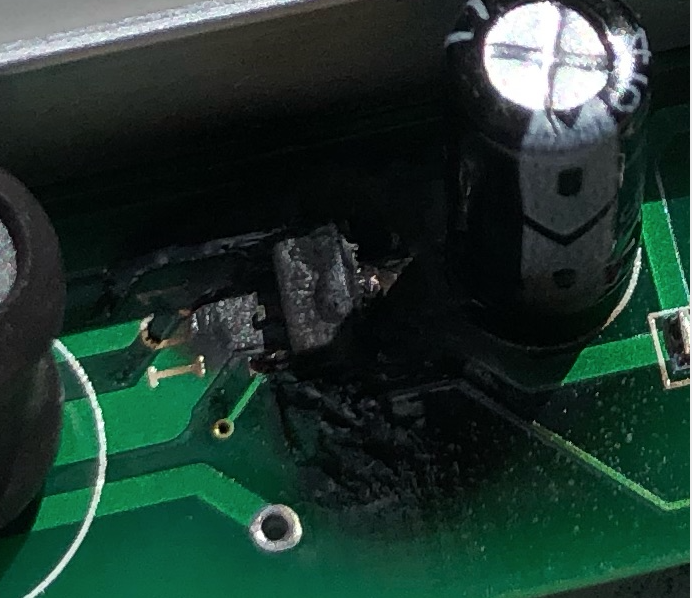
05/22/2021 at 19:55 • 0 commentsFor future reference, the GPIO pins on the Raspberry Pi supports a maximum of about 50 mA of current through the GPIO pins. As I was laying out the rev 2 PiHat board, I mistakenly routed the GND trace of the UV lamp thru a conveniently nearby GND pin on the Raspberry Pi (vs. making a trace directly to the primary ground trace). Big mistake on my part. A bad solder joint actually made the UV lamp work in this configuration for a short period, but once I fixed the joint, I managed to damage the Pi, which in turn sent too much current through the LED control pin of the UV lamp chip, which in turn smoked it in a spectacular fashion! Fortunately I had a spare Pi and a spare Sparkmaker UV lamp (my China shipment finally arrived), which allowed me to test Rev 2.1 of the PiHat.
Lesson learned: The Rat's Nest lines of your EDA tool may pick the nearest connection point, but it may not be the one you need. :)
The rev 2.1 board fixes and Gerber files have been uploaded to GitHub.
![]()
-
Rev 2 PiHat ready for use
05/20/2021 at 21:13 • 0 commentsI have updated the KiCad design, Gerber files, and build instructions on this page to reflect "Rev 2" of the PiHat board, which makes this build officially use the Sparkmaker UV lamp. The Rev 2 board now contains a 5 pin JST header that can be connected directly to the Sparkmaker UV lamp using the cable that comes with it.
The Rev2 board also adds two "expansion connectors": a single 3 pin JST connector, and an additional 2 pin JST connector for 5v continuous power. These two expansion connectors are going to be used in the upcoming CNC mill project that will help speed your DIY PCB fabrication even more!
-
Drilling holes
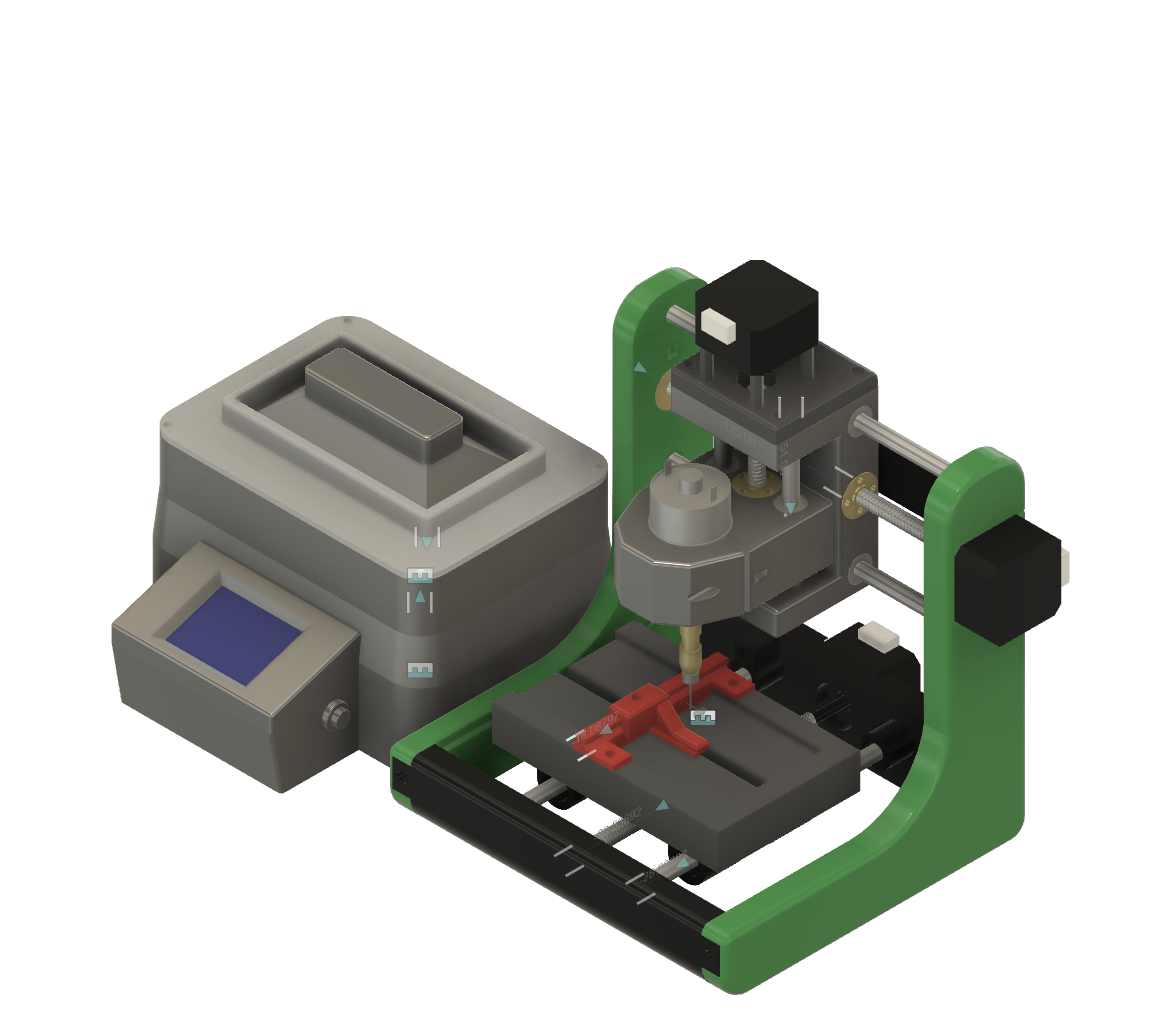
04/29/2021 at 23:28 • 0 commentsAfter a short break to work on other things, I am back working on this project. I've expanded the capability goals and am adding a small CNC mill that integrates with the Pi controller so it will be able to quickly drill PCB holes. This "QwickDrill" module will be optional, but should add a lot. Here is a sneak peek at the Fusion 360 design:
![]()
-
New UV Lamp - HUGE improvement!!
04/16/2021 at 22:08 • 2 commentsI got my hands on a UV lamp from an inexpensive consumer mSLA printer. This lamp fixture is part of the original Sparkmaker 3D resin printer. After hacking a wire harness to retrofit the lamp fixture into the already existing Qwicktrace internals and a super quick software change, I got it functioning and was excited to test.

Sparkmaker UV lamp installed This particular lamp was taken directly from a used Sparkmaker I purchased off of eBay (I didn't want to wait for my shipment from China). While disassembling the printer, I noticed that they had put their protective glass UNDER the LCD, putting the LCD mask much closer to their resin vat. Hackaday community member @crun made some excellent comments on this project regarding defocus problems that can be caused by parallax in glass, so I decided to flip the glass in the Qwicktrace unit over, making the PCB sit directly on top of the LCD and eliminating the two or three millimeters of glass between the mask LCD and the copper board during exposure. What resulted was incredible results!

Latest exposure results The above was four minutes and 30 second exposure with the new lamp and new LCD glass orientation, then 2 minutes and 45 seconds in the developer solution used previously. Notice how sharp the individual traces and pads are compared to the previous results done with my other UV lamp. Ignore the dark boarder to the left and top - this was a scrap piece of exposure board, and the protective film had peeled slightly which pre-exposed that edge of the board.
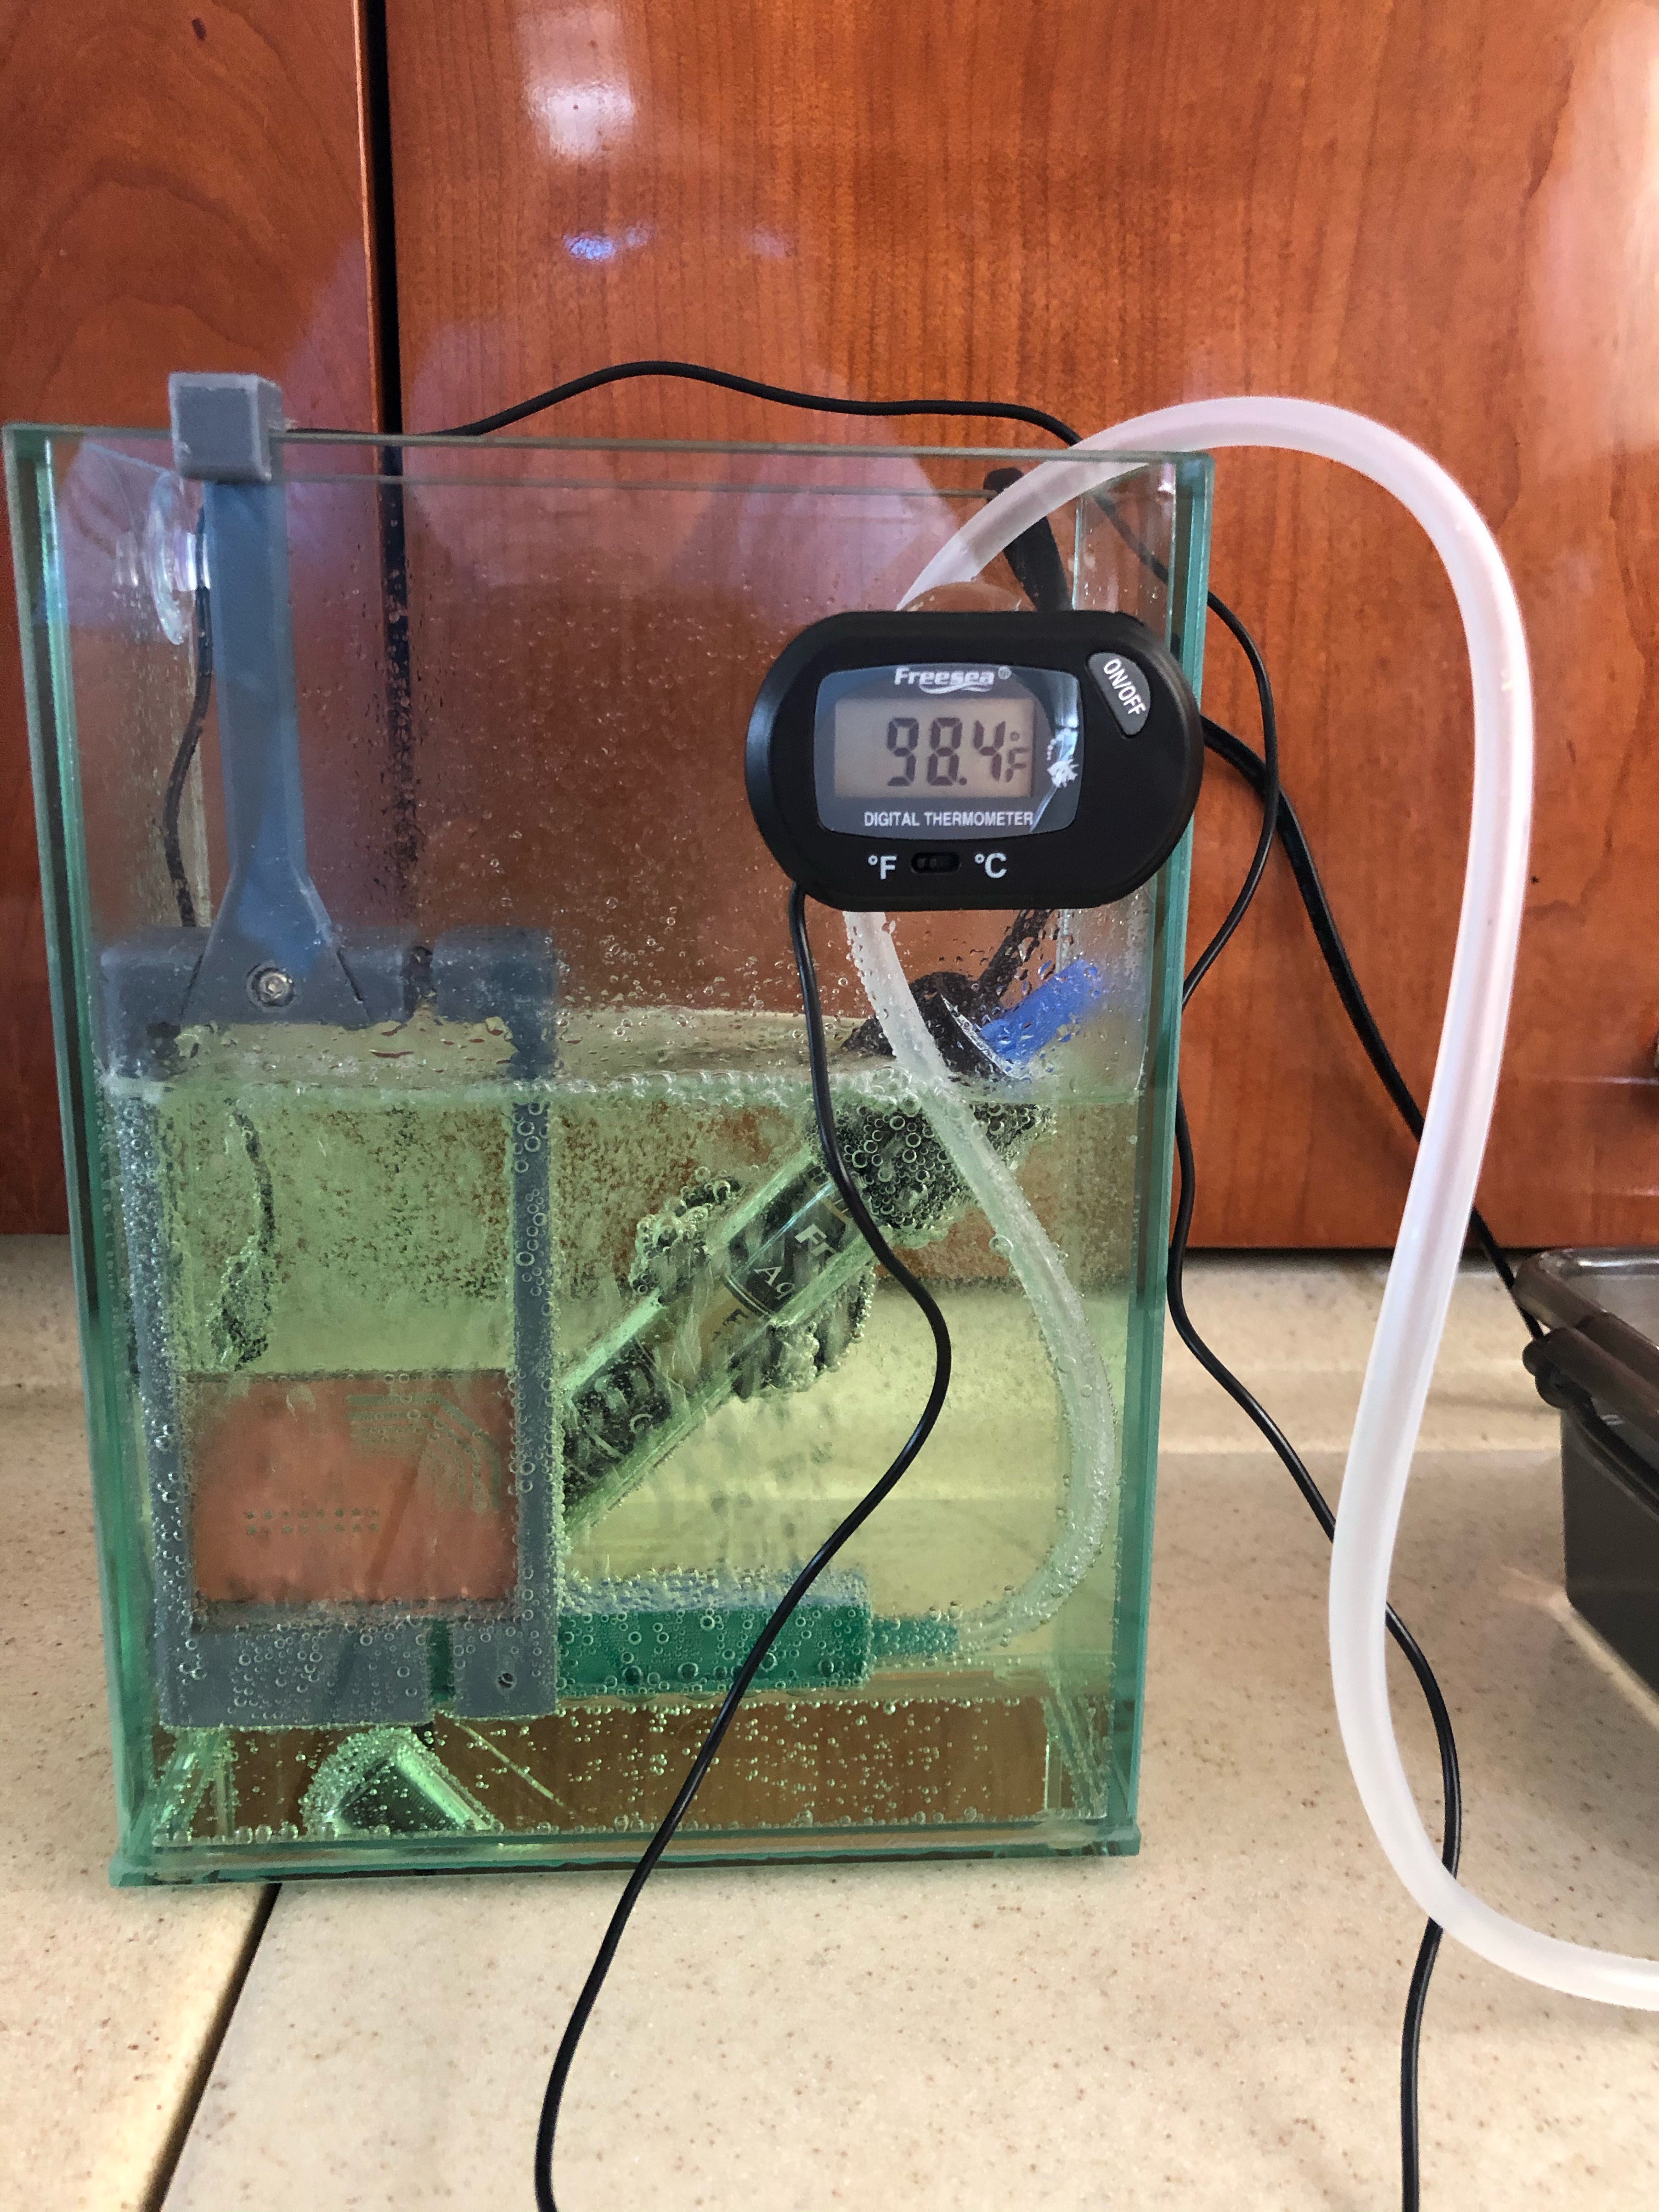
Pleased with the results, I decided to go to the next phase and test out a new etching vat I had put together:
![]()
The "etching vat" consists of a rectangular glass flower vase, an aquarium heater with thermometer, and an aquarium pump with "air stone." Also in the mix is a 3d printed board hanger. All is submerged in a 2 to 1 solution of Hydrogen Peroxide and Muriatic Acid (available at your local pharmacy and swimming pool supply store respectively). I really like this mixture over ferric chloride, as it is less messy, and most important, you can see the board as the etching progresses.
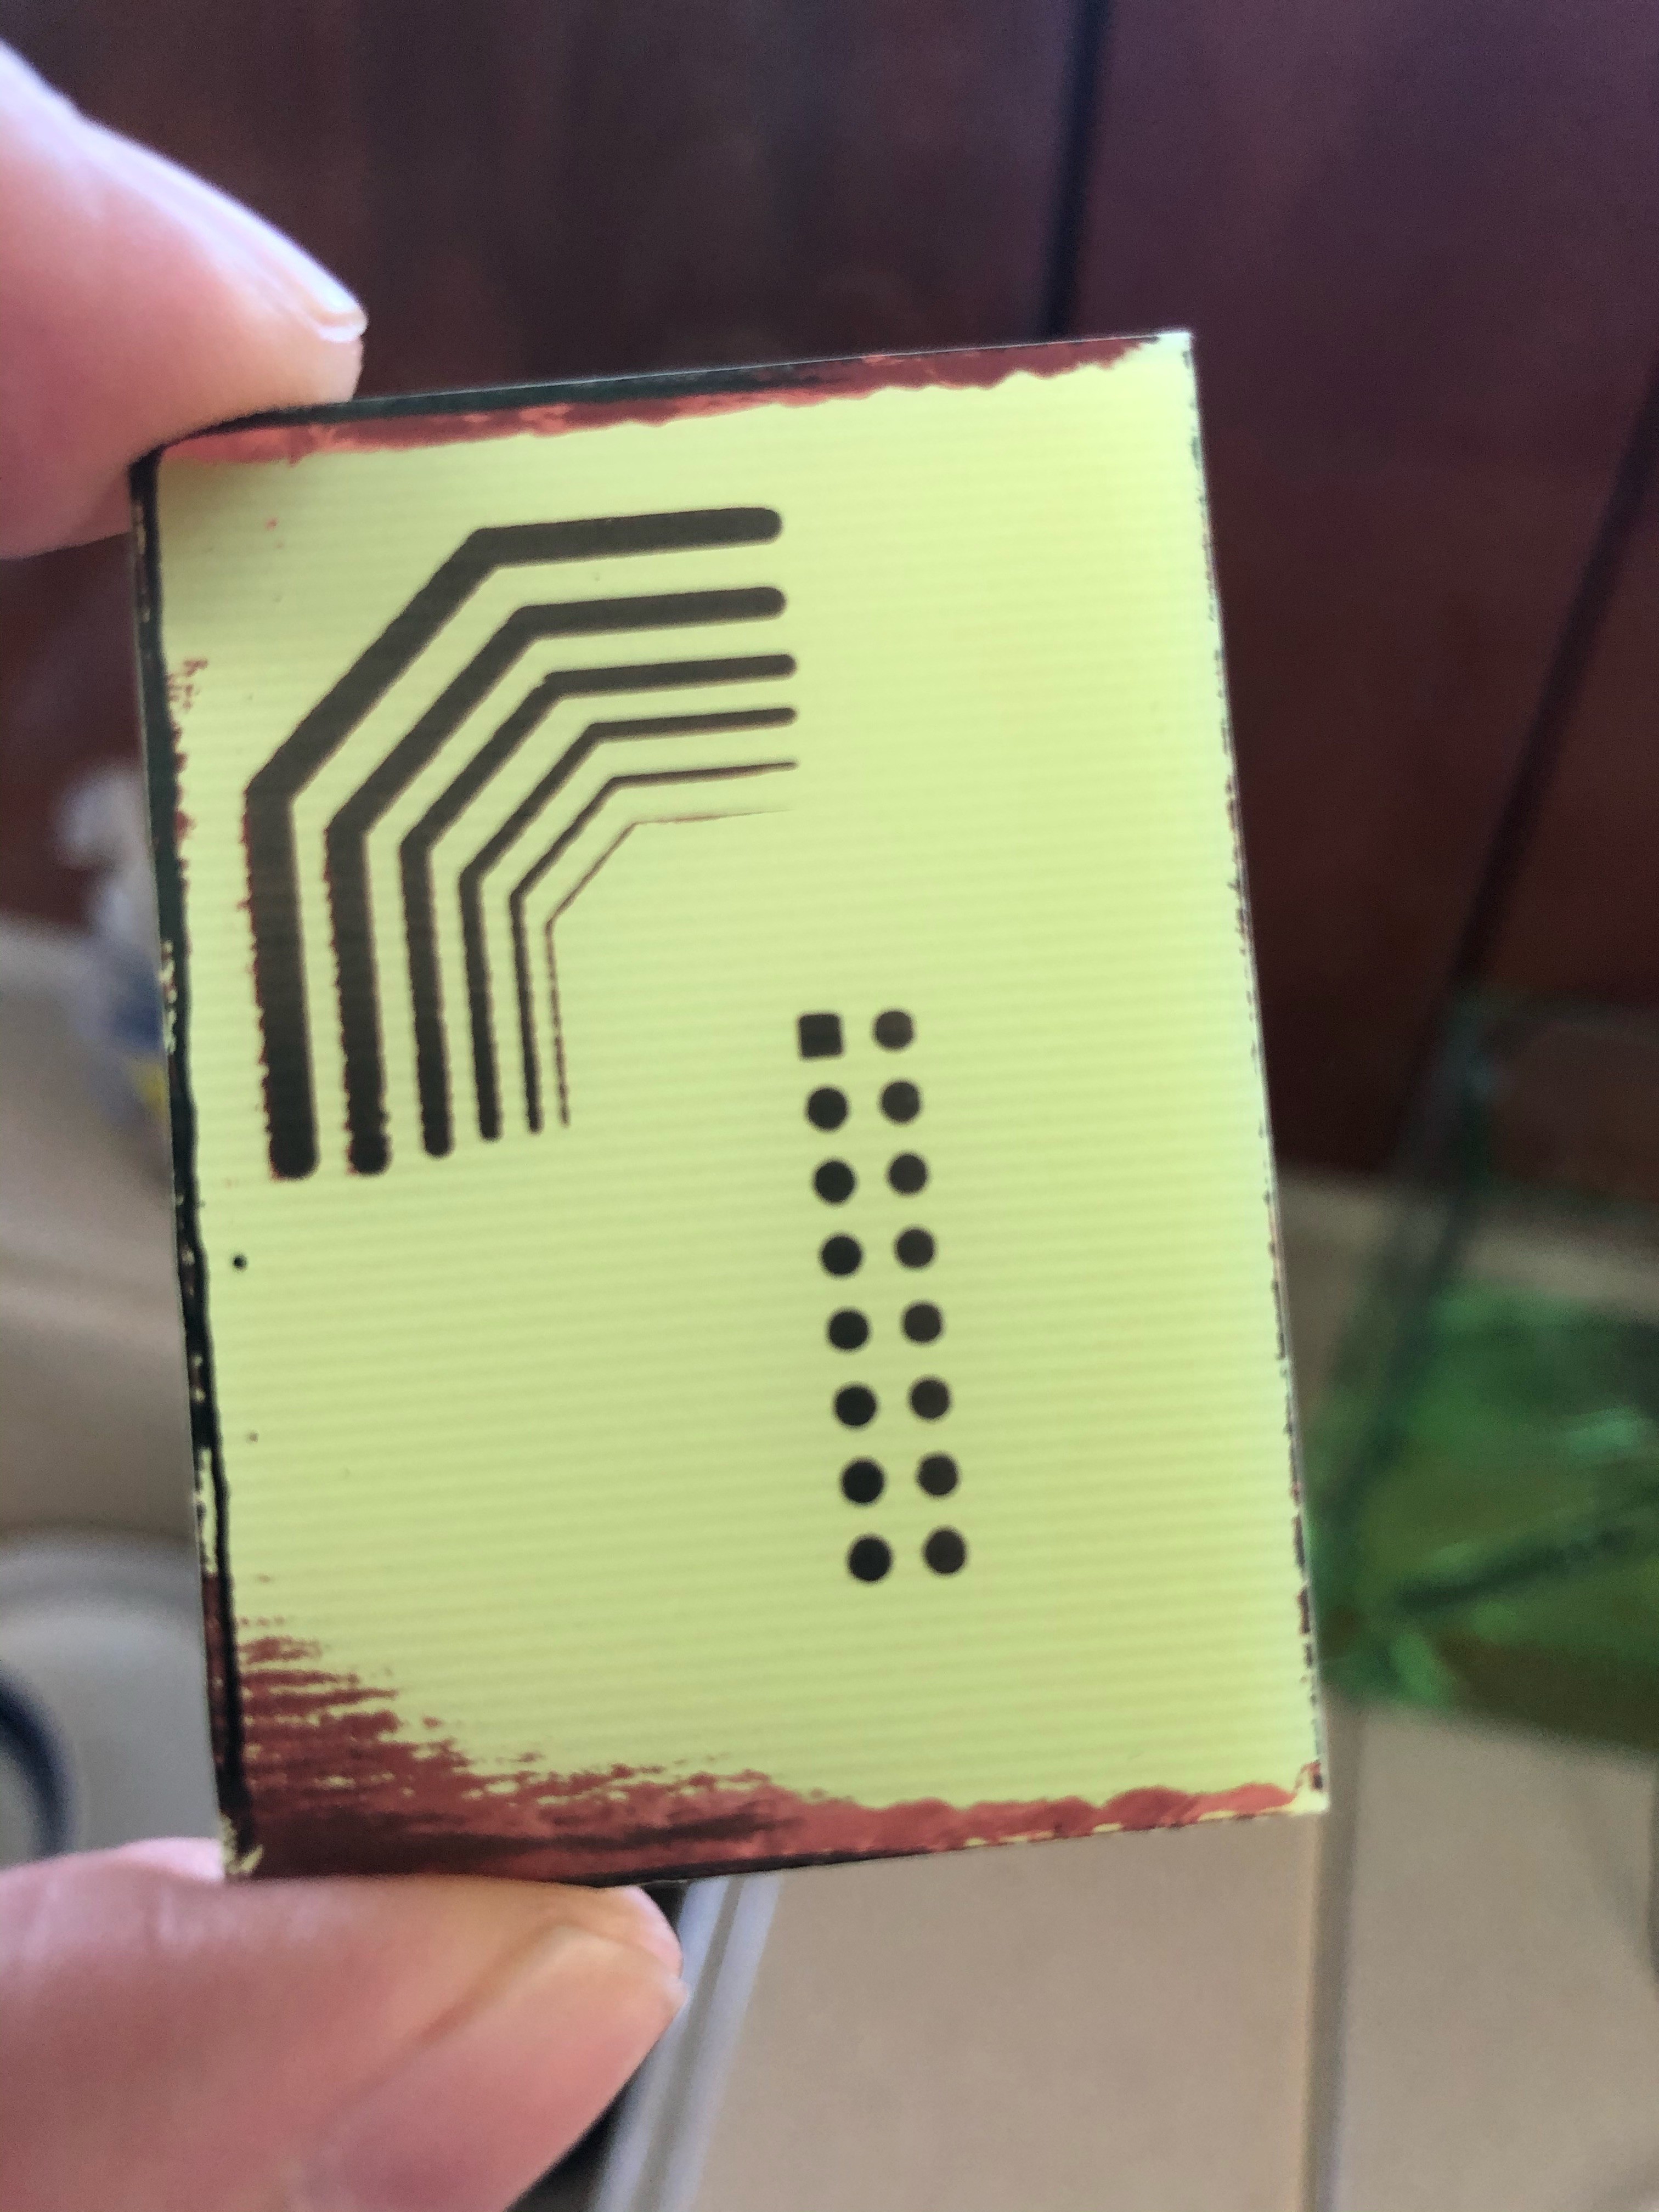
Here is the final results after only five minutes spent in the etching vat:
![]()
Final test results I stopped the etch a little early because I wanted to see how well the 0.25mm trace would come out (it looked like it was about to go). IT SURVIVED! The copper on the top and bottom of the board is a result of how the hanger I made holds the board. It is slotted, and it actually inhibits the acid from coming in contact with the copper, so that needs to be reworked. That, combined with the pre-exposed edges made the sides take longer to etch. At about the four minutes and change mark I think the middle of the board was about ready, so I think the 0.25mm could have come out even better.
These are all things that can be fine tuned, but I'm now confident that this unit is going to be able to produce some really nice boards with minimal effort.
-
LED test fails, but prototype exposures improve
04/07/2021 at 18:20 • 0 commentsI finally got a chance to run some etch tests with the new unit, and sadly it failed. Exposure time went from about four minutes up to 8+ minutes, and the results were almost unusable. As predicted in the project discussions, there was a lot of defocus problems around the edges.
I have ordered three different UV sources to try as alternatives: one is a different LED strip with a higher concentration of LEDs and is intended to use for UV curing, and two are the actual UV sub-systems from two different mSLA printer manufacturers.
To create a baseline (and to prove that this was only a minor setback), I went back to my prototype and made a few minor adjustments based on community feedback: Using the original "UV floodlight" I was using in the prototype, I increased the distance from the LED panel to the LCD by about 3 inches. I also centered the LEDs around the copper board (to remove the "uneven exposure" I had originally dealt with). Doing these changes, I got the best exposure and etch I've had so far, so this is my new benchmark.
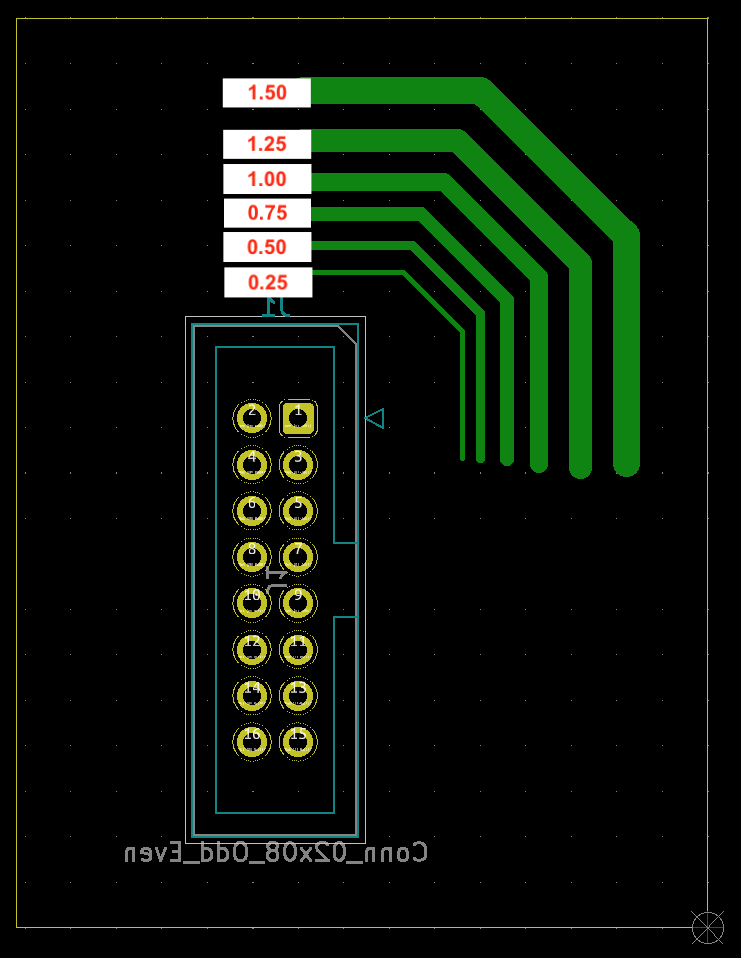
Here is the sample "circuit" I used for testing:
![]()
Notice I am testing for traces between 0.25 mm and 1.5 mm.
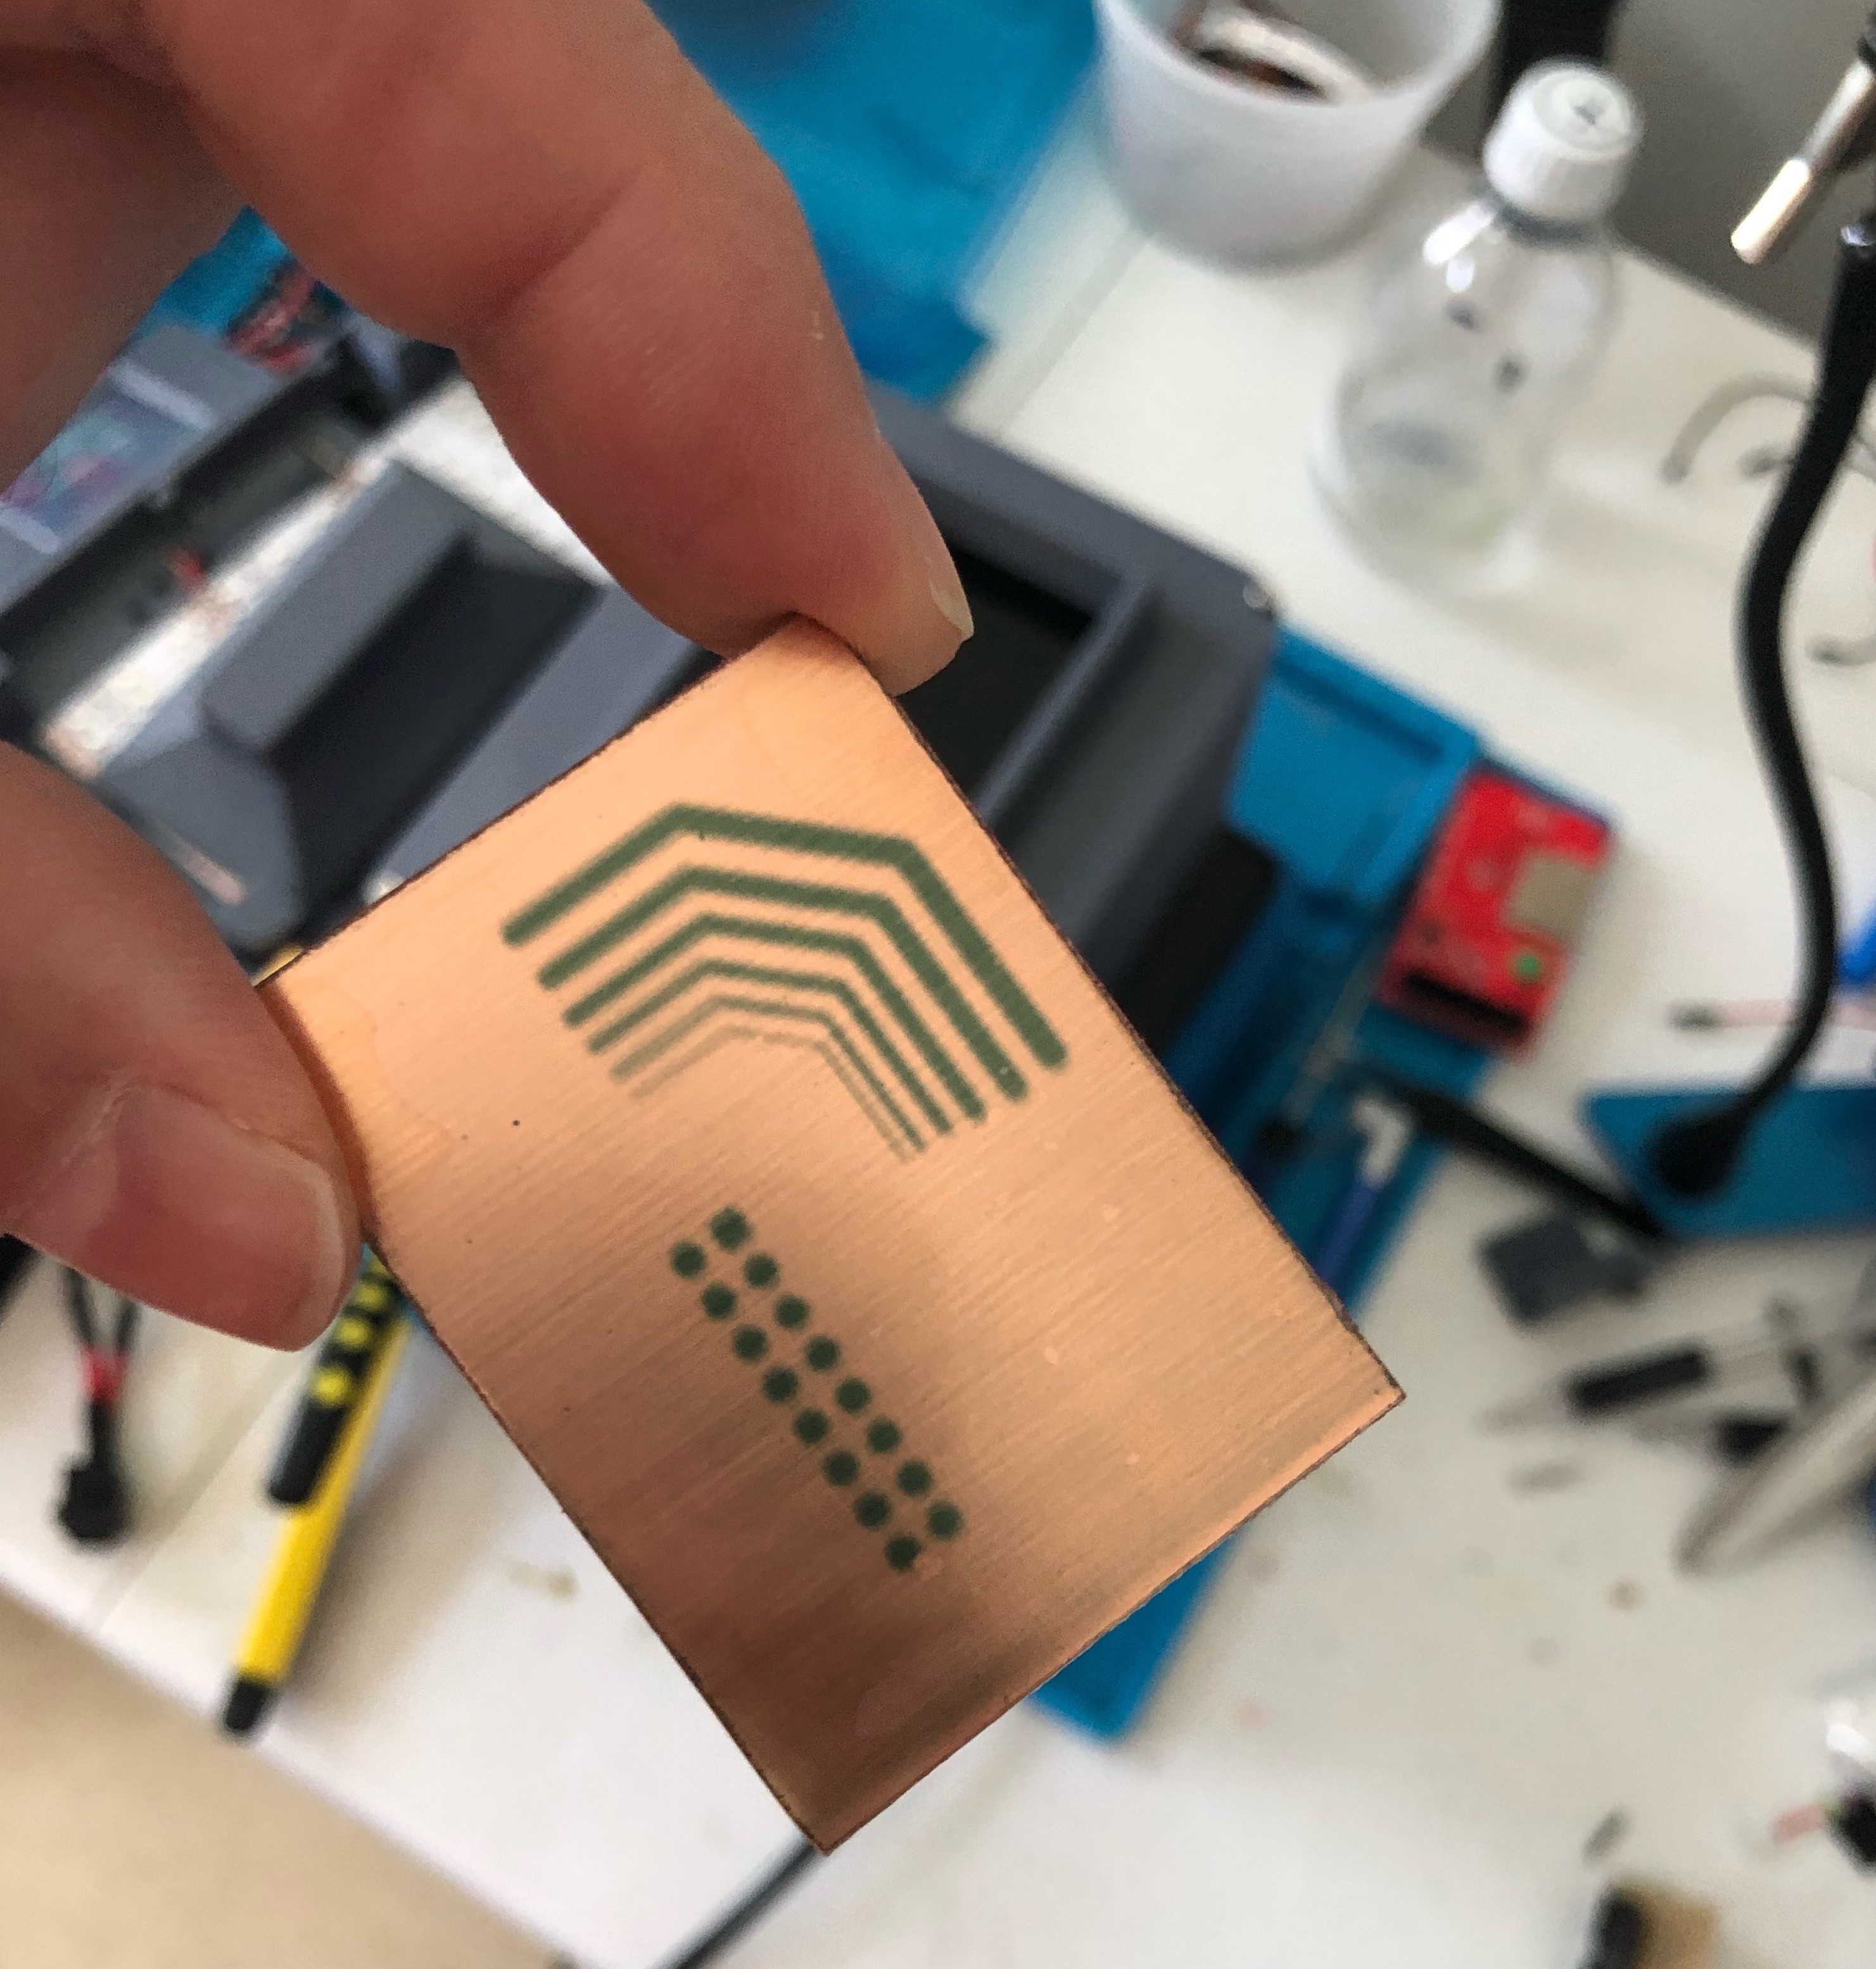
Here is what the board looked like after a 4 minute and 30 second exposure, then 2 minutes and 15 seconds in a "developer" mixture consisting of 10 ounces of water and 3/4 teaspoon of 100% lye drain opener:
![]()
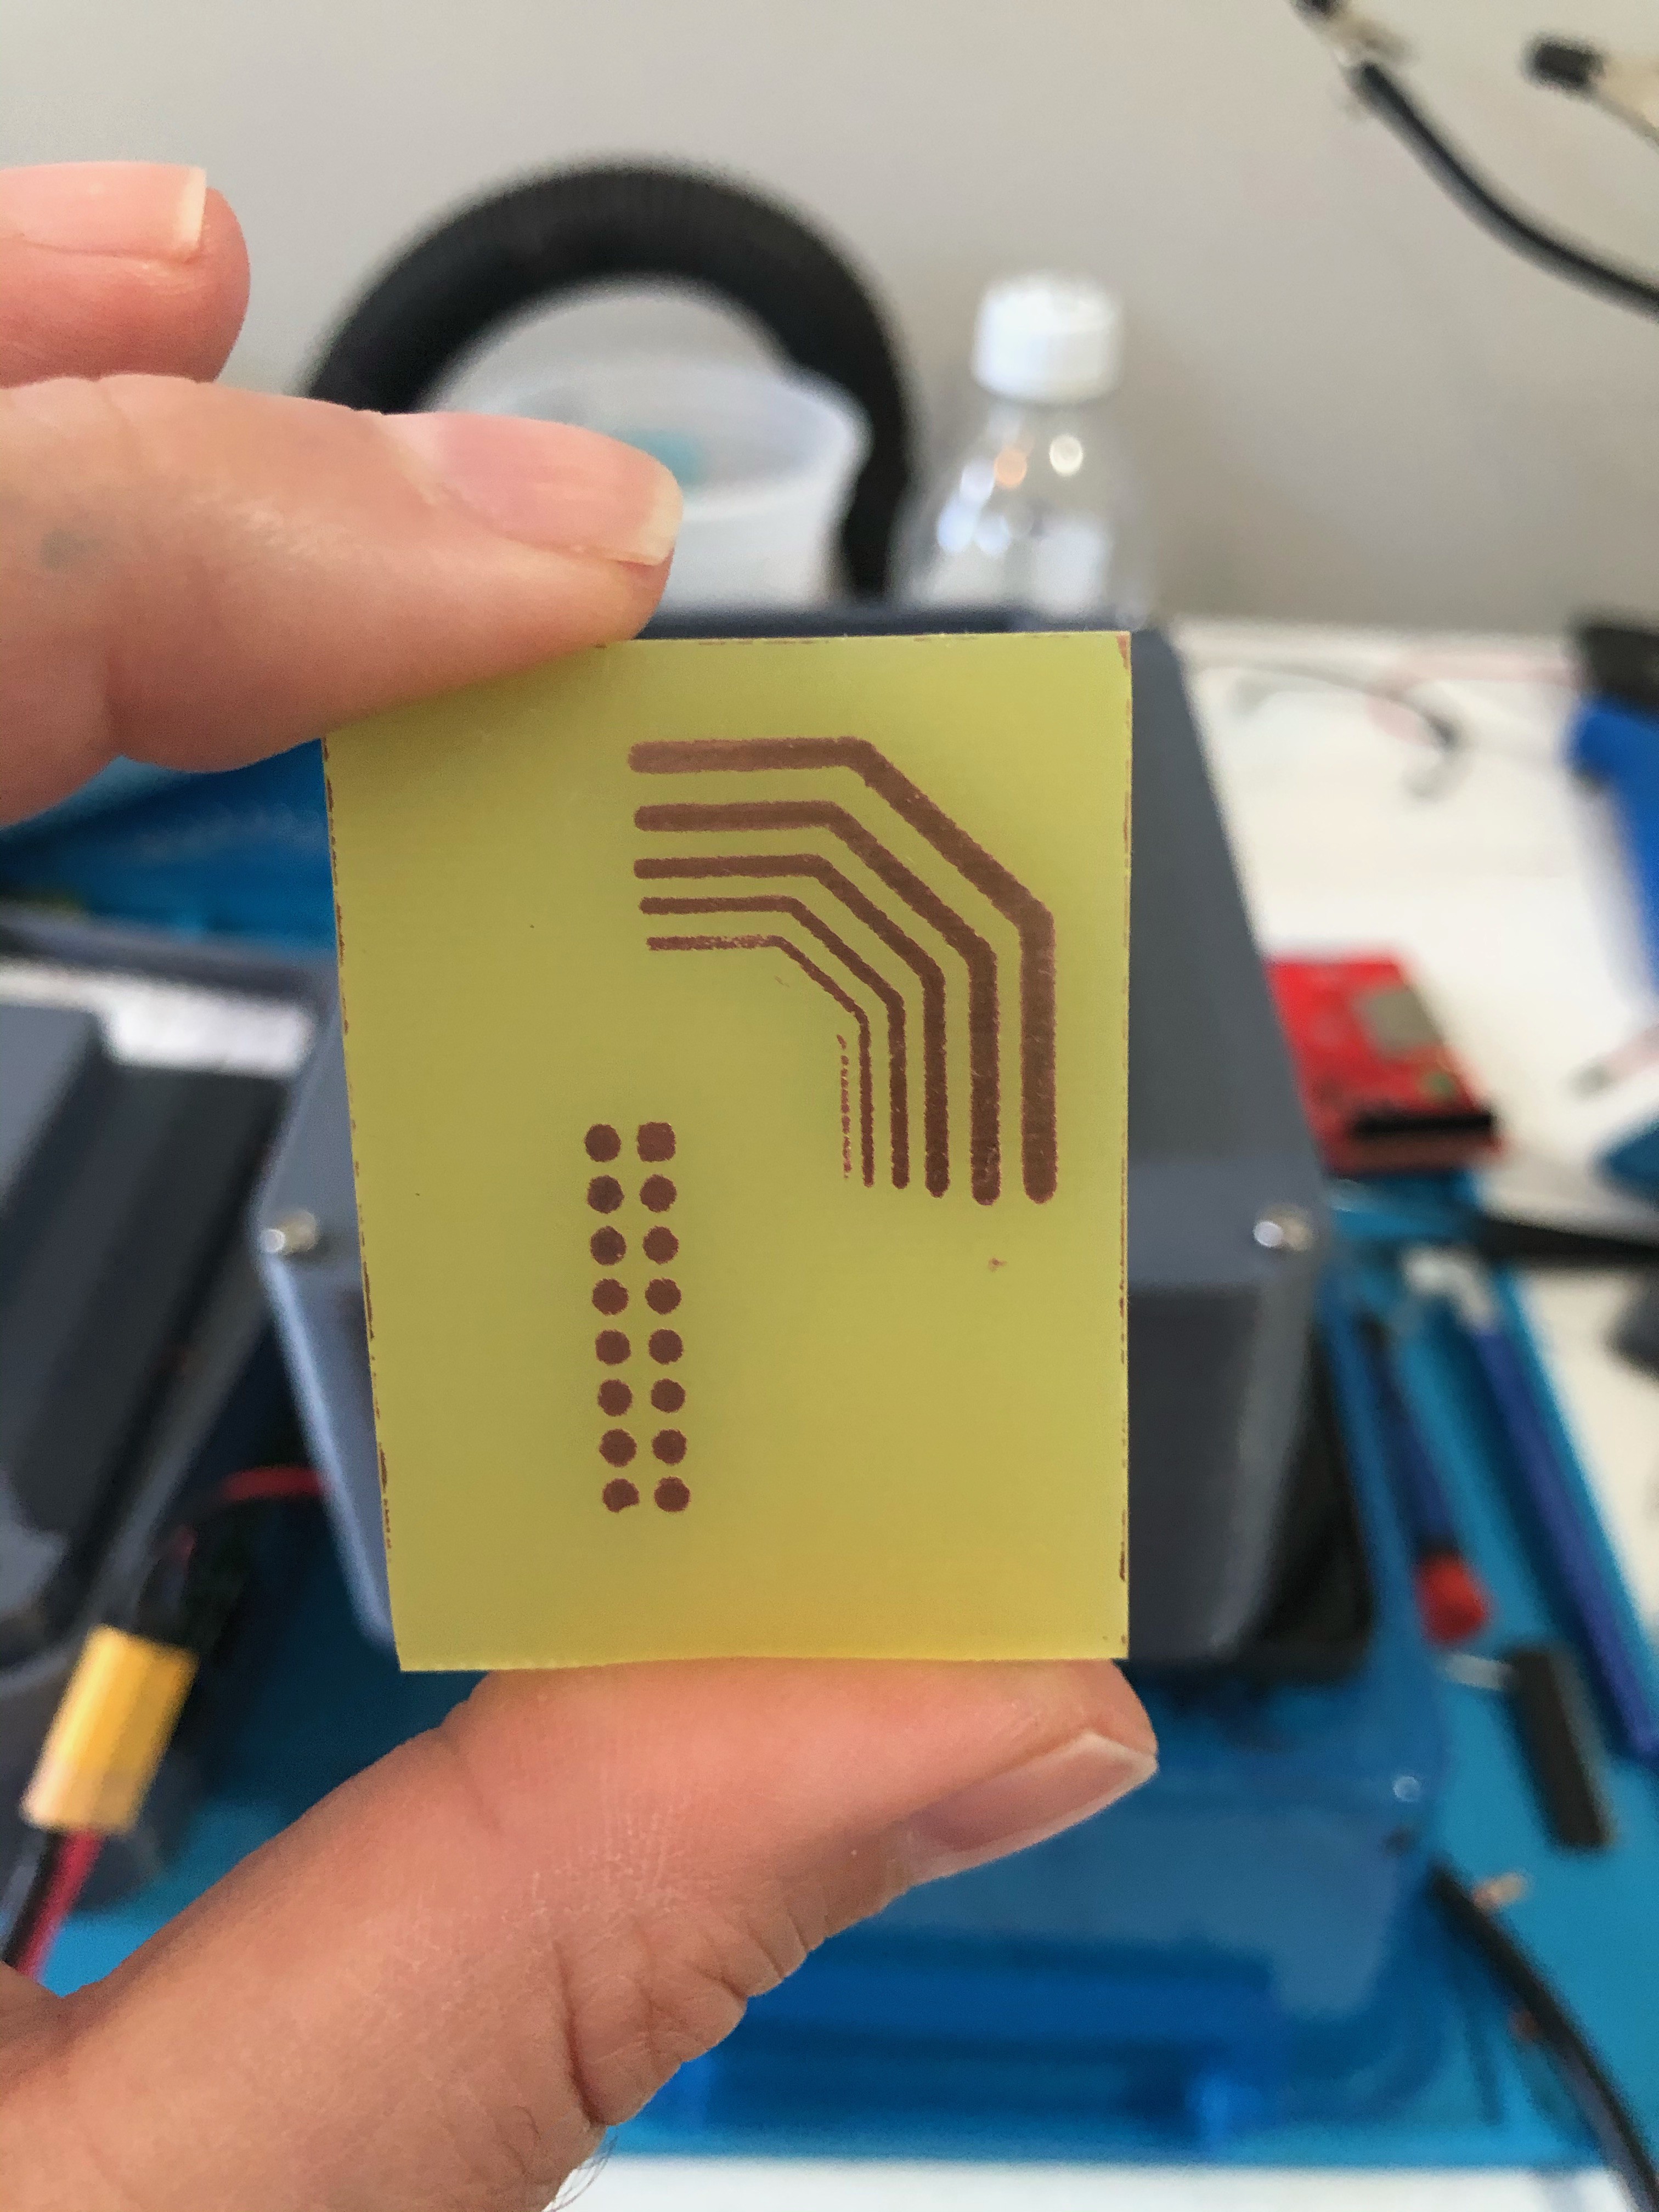
I then put the board in a small container of ferric chloride for 43 minutes, and this was the final result:
![]()
You can see that the 0.25 mm trace was over etched a bit, the 0.5 mm trace is mostly in tact, and the 0.75 mm and beyond traces are perfect. All but one of the 16 pads for the IDC16 connector came out well, and it's fairly easy to see the difference between the square pad of pin #1 and the and round pads of the other pins.
I'm pretty happy with these results. It is more than useable for prototype boards, which is what this device is intended for.
During the etching process, I had time think about things and already plan for the future. For sure I am going to ditch the ferric chloride (first time I've tried it) and go back to the muriatic acid and peroxide mix that I've used before. Ferric chloride is way too messy, but more important: you can't see the board as it's etching to see when it's done. The 0.25mm trace may very well have survived if I had pulled it out just a little earlier. It seemed in tact the two to three minutes prior when I did a spot check.
Another huge idea: I've been thinking about a way to make it quick and easy to apply a solder mask to the board. Solder masks are applied and cured pretty much the same way that the 3d printing resin was applied on the YouTube hack video that inspired this project. If I can come up with a quick way to evenly and consistently apply liquid resin while eliminating mess, this device should handle resin as a much better etch resist, which would eliminate the "developer" step. Also - the exact same process would apply to solder mask.
-
Instructions with pictures
03/31/2021 at 20:40 • 0 commentsI've added instructions with pictures to the project page. There should now be enough information to assemble the unit, as well as install the software. Now that I have this documented, its back to running more tests to perfect exposure times.
-
Instructions and Schematics released
03/28/2021 at 21:50 • 0 commentsI've put some VERY rudimentary instructions on how to configure a stock Raspberry Pi installation for use with the Qwicktrace hardware in the README on Github. Also on Github are the schematics of the Hat, along with several different file formats for making the Hat (if you are so inclined). The README can fairly easily be rolled into a single Setup script (if anyone would like to contribute it :) ).
See the Hackaday project page for a link to the Github repo.
-
Exposing to the world
03/26/2021 at 20:53 • 0 commentsI've been working on this project offline and now have it working. Today is the first day I've uploaded source code and STL files needed to build the unit. I've got assembly and software notes on my machine (or in my brain) that are not really ready for publication, so its going to take me a little time to get everything documented here. We are talking a day or two, not a week or two. I'll get those notes published, and then will start working on phase 2 of the project, which is perfecting exposure times and chemical recipes. You can, for example, buy a 32 oz bottle of developer for $20, and another 32 oz bottle of etchant online for another $20. Or, you can buy a jug of lye crystals, disguised as drain opener, from the local home improvement store for about $12 and you can make swimming pool's worth of your own developer. Same for the etchant.
Qwicktrace PCB
A "smart" exposure table for small photosensitive PCB etching using Raspberry Pi 4 and LCD from SLA resin printers