 Dylan Radcliffe
So, for starters, let me say that this airframe has not been optimized yet, but while in the air, it handles like a champ. That being said, the voltage drop was unacceptable when I pulled the drone out for a flight the other day. I was getting 3v-4v drop on takeoff, plunging my battery into the red zone. This meant that I could get a flight time of around 2 minutes, which is far less than the theoretical 7ish minutes I'm expecting with the current all up weight and battery combo. So I set to work trying to reduce this massive voltage drop.
It was confounding me a little bit as to why this was happening, my battery should have no issue pumping out the required current, so I figured the problem was elsewhere. I started by resoldering some of the connections on the power distribution "brick" that I've been using. After fixing up some of my poor soldering points, I actually decreased the voltage drop by about 20%. Not bad, but still less than ideal.
So I started to have a real good look at my connectors and other solder joints, and then I realized that one of the connectors I was using had 14awg wire! This was definitely a problem, as the main power distribution ideally should have at least 12awg wire, perhaps even 10awg. since the power module used 12awg, I figured I'd start by using that gauge, and adapt if needed.
Unfortunately in my town, hobby supply stores leave something to be desired, I was able to find some new XT60 connectors, but there was no wire to be found! I ended up finding some 12awg wire at the TV and Stereo store, but for some reason, it would not accept solder!!!! Man, I was so frustrated.....
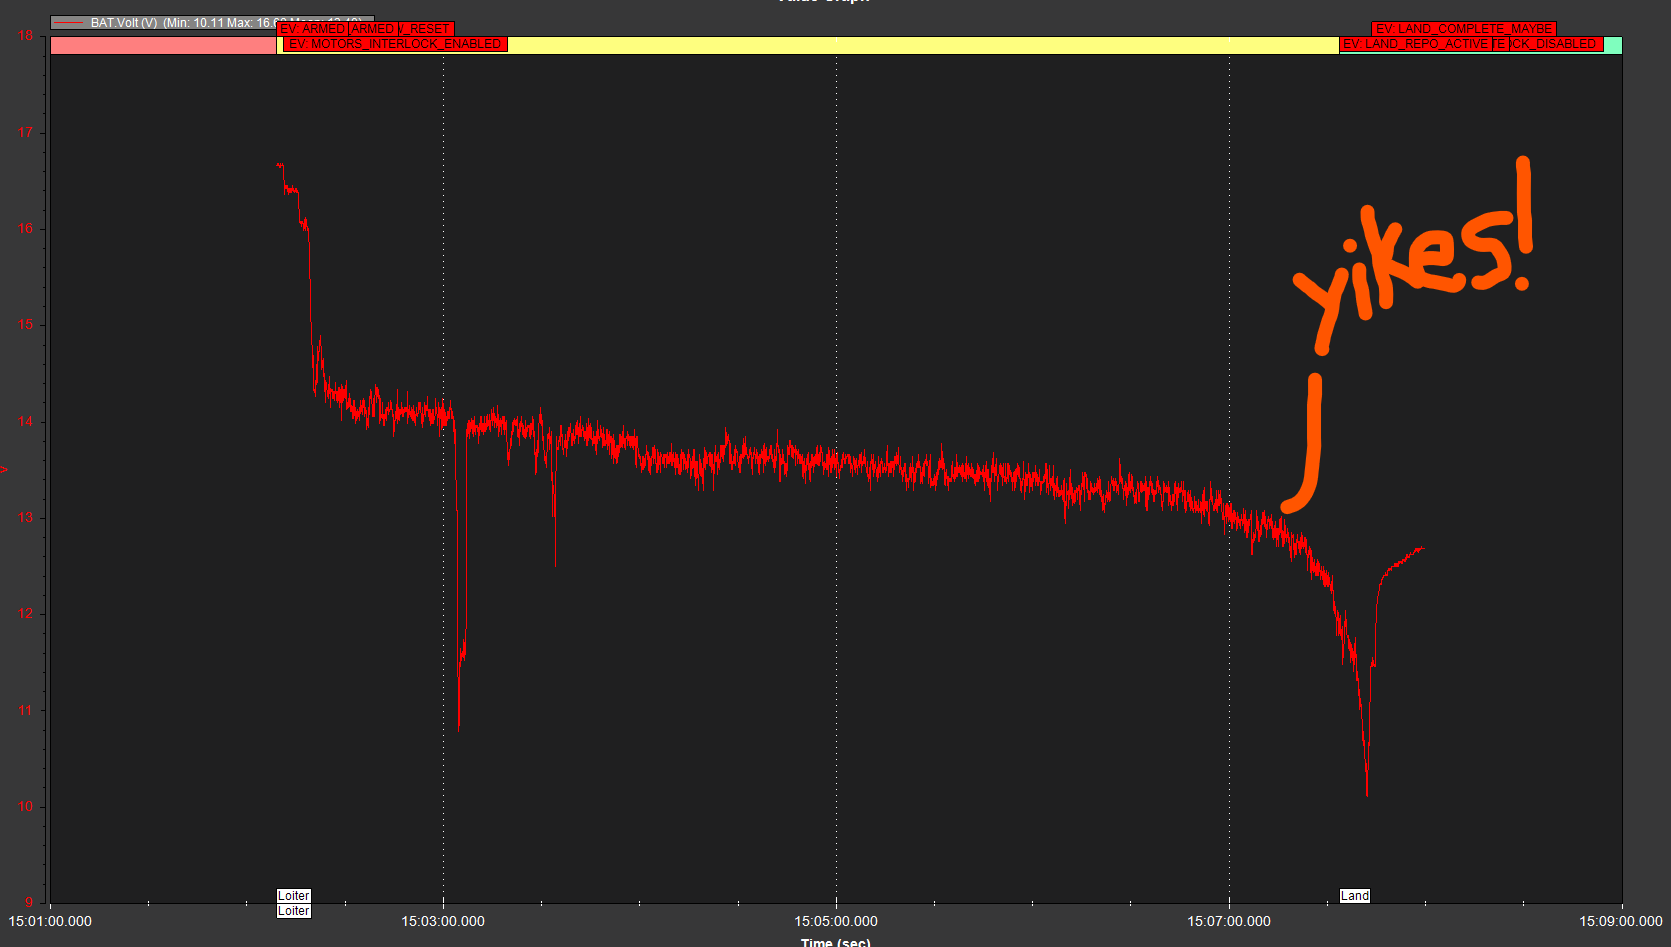
After installing the new 12awg wire, my flight time skyrocketed, instead of 2ish minutes, I managed a cool 5 minutes. I pushed it a little too far, and my battery voltage dropped off the moment I hit 12.8v. For a 4s battery, that's pretty rough, but hopefully I can avoid that in the future.
5 minutes is still a little bit low for my liking, but I think there's some major improvements I can make in the near future! With the current setup, the theoretical limit is about 7 minutes. In the coming weeks, I'm going to focus some attention on cleaning up the airframe to reduce the weight where I can. Some ideas I have for reducing weight:
- Removing redundant screws (9 I can think of off the top of my head)
- Reduced size of T connectors.
- Replacing 3D printed landing gear with carbon fiber plate
- Redesigning the power brick with a custom PCB
- Vacuum formed seed hopper
- A lighter DC/DC converter
- Integrate battery mount into frame
- Possibly replace electronics base with carbon fiber plate.
- Possibly redesign autopilot vibration damper
Once I've done all this, I think it'll be time to think a bit about optimizing the size and / or numbers of the batteries. I'm waiting for a pocket scale and some copper clad to come in the mail, so in the meantime, I'll try to get out for a flight or two to play with the seed spreading capabilities and maybe get a fun little video for you guys. Stay tuned!
Discussions
Become a Hackaday.io Member
Create an account to leave a comment. Already have an account? Log In.