 Dylan Turner
Video Demonstration
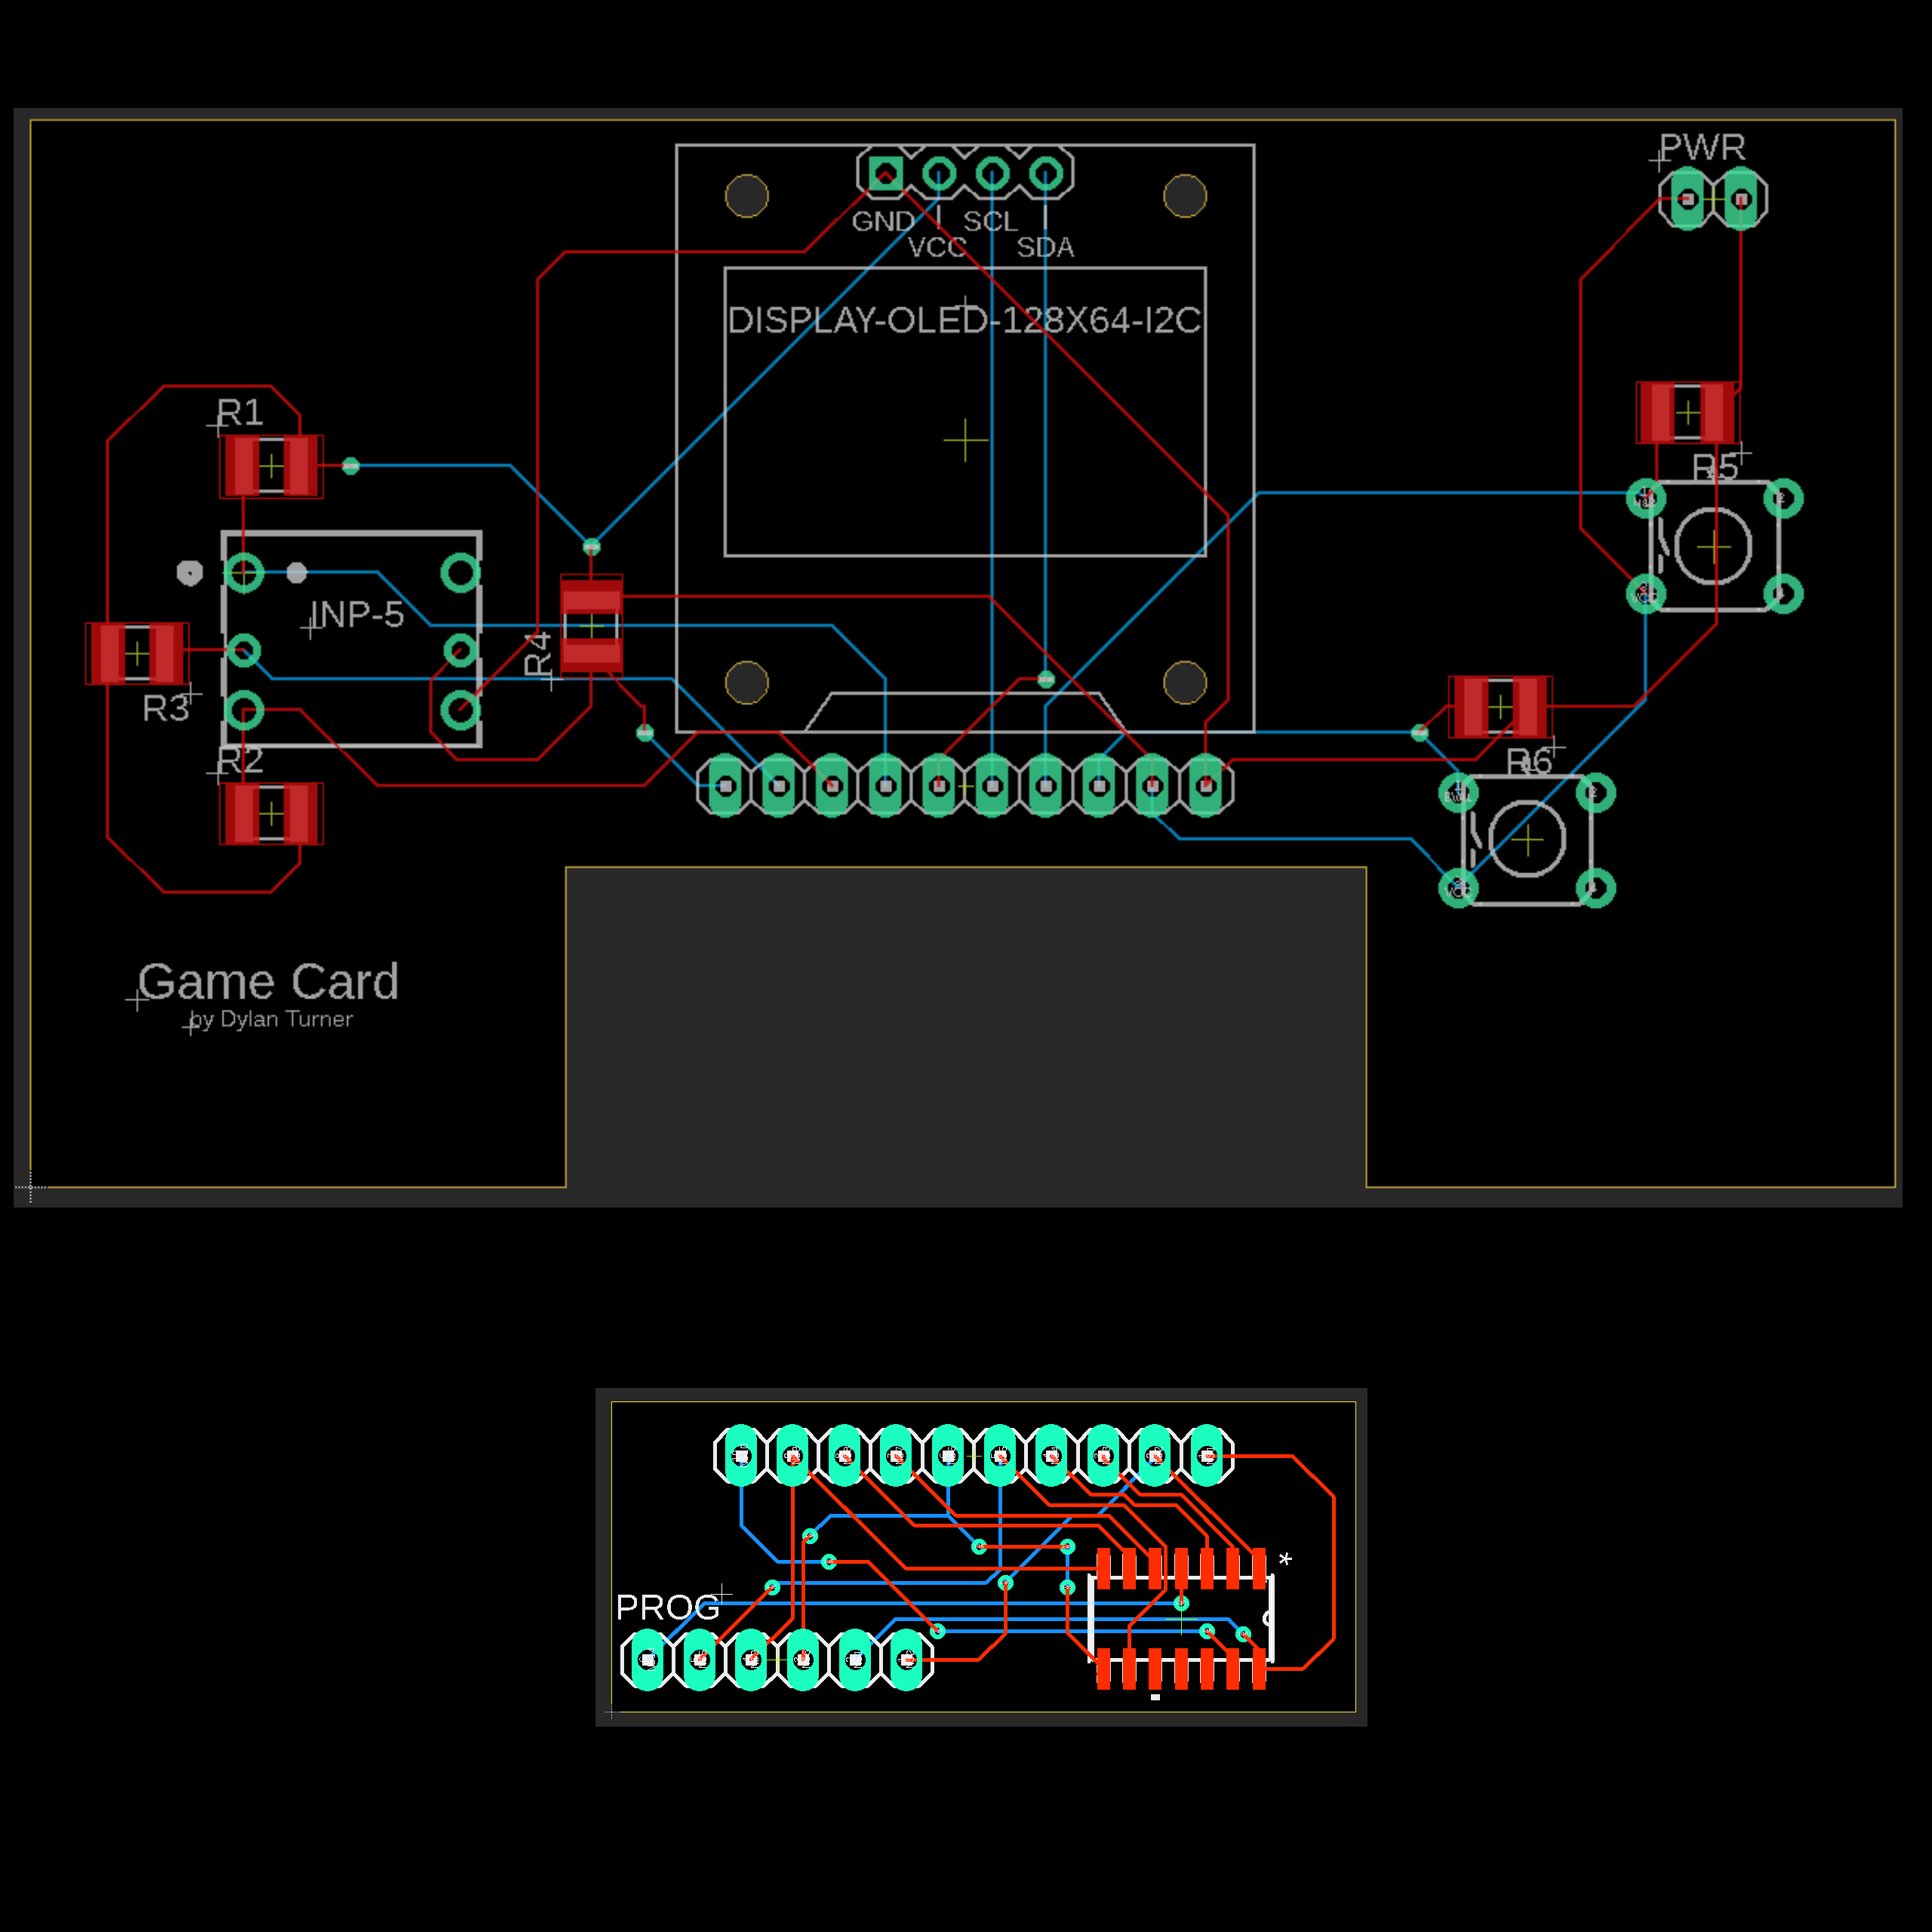
Top Level
At a top level view, the system takes input through buttons, provides output to the OLED, gets power through a battery, and receives program data and processing through an attachable MCU.
I've provided the board files and parts lists that can be uploaded to Mouser to be able to build the card and the cartridges. The only thing no able to be ordered from them is the OLED display. I've found a link on Amazon selling them for decent cost though: https://www.amazon.com/gp/product/B085WCRS7C/ref=ppx_yo_dt_b_asin_title_o00_s00?ie=UTF8&psc=1. Note that the VCC and GND are switched on these, so you'll have to reverse them with wires or something instead of just using the pin headers that comes with them.
Input System
The input system is currently 6 buttons, 4 of the buttons of a 5-way switch for directional input and 2 extra buttons.
In the code these are funneled into a ButtonController class which implements a Controller interface. These abstract the input system from the hardware implementation. The code provides an enum class and an "isPressed" function, so games can be made independent of console implementation. As long as the implemented class uses Up, Down, Left, Right, H, and L, any hardware system could be made to work.
I use H and L because I don't have caps for the buttons, and different people will think A and B mean different things, so I use H for the High non-directional button and L for the Low one.
Display
The game card display uses the SSD1306 128x64 pixel OLED currently, but at the top level, this also uses an abstraction.
Different companies make the pinout for these screens different from others as stated above. The correct board order is (Left to Right) GND, VCC, SCL, SDA, so have caution when ordering this part, so you don't have to do a switcheroo wiring like I did.
There's an interface called Display which has 3 functions: putTile which draws a single 8x8 sprite, putQuadTile which places a tile and background tiles, and fill which fills or clears the entire screen. As long as the display implementation utilizes these, any display could be used in the code.
The Power System
The entire system can run on 3V, so the gamecard is set up to simply connect directly to a CR2302 coin cell battery. On this single battery, the system can run for around 3 hours.
It will also accept 5V, so that could have been used. If you don't want to use the coin cell, there's two pins for power and ground that can be used instead.
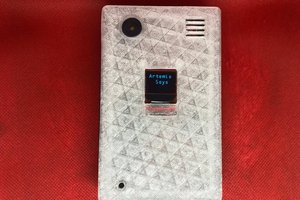
Gallery Pictures
The pictures shown in the gallery are as follows: Final board with game inserted, Penultimate board with debug wires to connect to cartridge, 2nd board design, 2nd board prototype, 1st board design, and 1st prototype. It's like going backwards through time.


 Dillon Nichols
 Thornhill!
 Craig Hissett
 gilphilbert
For what it's worth you could use build a custom board around the RP2040 chip if an off the shelf RPi Pico adds too much cost/bulk.