Close
0%
0%

Cheap Pressure Gauge Replacement for Jandy Filter

Jandy tries to sell you a 65 dollar replacement pressure gauge. Learn how to replace yours for less than 20 dollars.

Similar projects worth following
582 views
This guide will should you how to save 45 dollars when replacing a malfunctioning pressure gauge.

Pool filters have a pressure gauge mounted on them to indicate when the filter needs to be cleaned. These pressure gauges typically last a handful of years before they stop working and need to be replaced.

Jandy pressure gauges are in a housing mounted to the top of the tank. When you need to replace it you learn Jandy wants you to buy the entire housing and pressure gauge at a cost of 65 dollars U.S. (last I checked). Only the gauge itself needs to be replaced and those can be had for under 20 dollars.

This style pressure gauge and housing are used on many Jandy filters including the DEV, DEL, CV, CL, and possible others. These filters are marketed under both the Zodiac and Jandy names. Many brands of pool filters have similar parts so possibly this housing is also used in other brands.

Replacing just the gauge instead of the entire housing is almost as easy to do.  It takes an extra couple of minutes and will save you 40 dollars or more.  There is just a couple of things you need to know in order to do it.  These two things may save you a lot of time and frustration trying to figure out.  They are noted in the instructions.  Once you know how to do it, the entire process takes about 10 minutes to do.

  • 1 × Pressure gauge Pressure gauge with back mounted 1/4-inch threaded fittings.
  • 1 × Thread sealant tape PTFE tape for sealing threads.

  • 1
    Gather the Components

    You'll need thread sealant tape for installing the new gauge.  As a maker/hacker, it's likely you already have some but it's good to double-check before taking your filter apart.

    You'll also need a new pressure gauge.  The pressure gauge you need is one that is back-mounted 1/4-inch threaded fitting.  Often you can even find these as marketed for using in pool filters.

    I used the one from the link below:

    https://smile.amazon.com/gp/product/B000P3ZNTK/ref=ppx_yo_dt_b_asin_title_o00_s01?ie=UTF8&psc=1

    This is a Poolmaster 36672 Pressure Gauge.

    Example of a Pressure Gauge
    This is an example of a new pressure gauge that will work.
  • 2
    Remove Housing Assembly from Filter

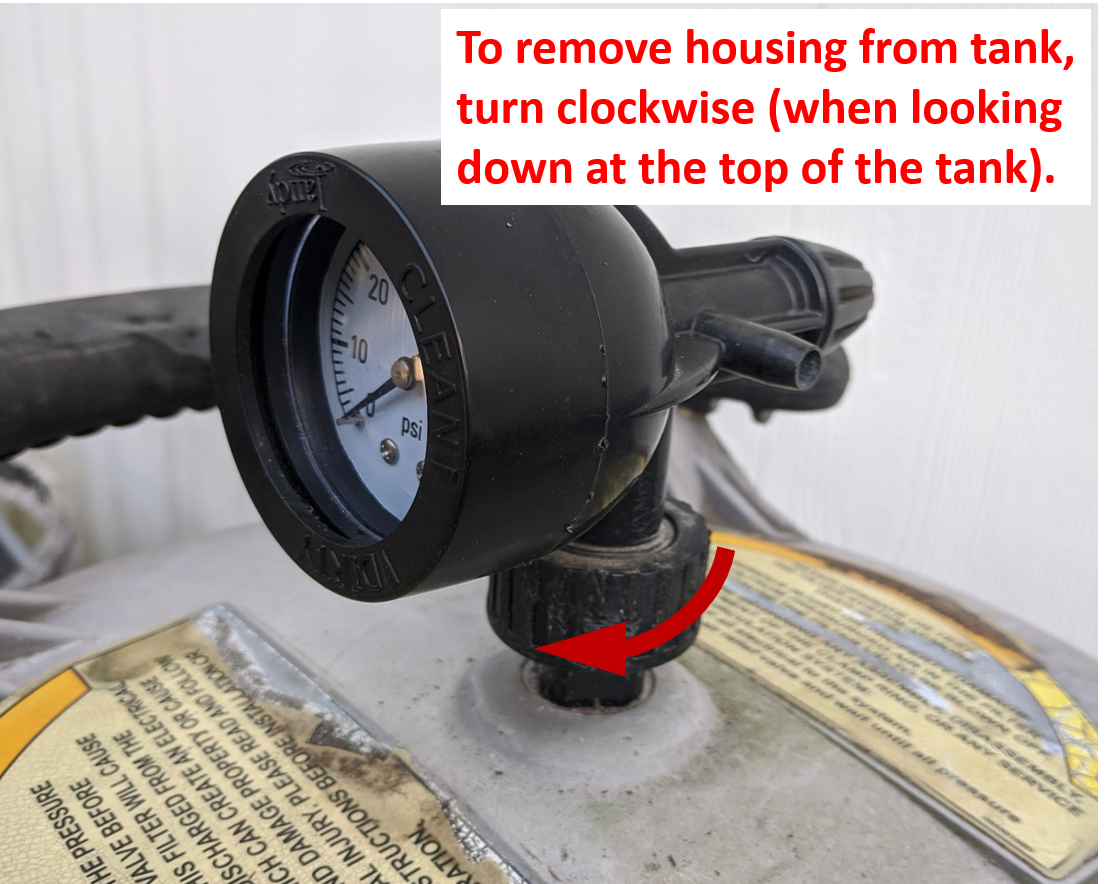
    This step contains the first important item/trick you need to know.  To remove the pressure gauge housing from the tank adaptor you need to unscrew the connector.  However, the connector may turn in the opposite convention than you would think.  It is not screwed down to the top of the tank but rather screwed up to the housing (you'll see once you get it apart).  Here's the important part, turn the connector clockwise when looking down at the top of the filter.  A strap wrench or channel locks will work well.  You'll have to hold the housing to keep it from rotating.

    Removal of Housing
    Be sure to turn the connector in the proper direction in order to remove the housing from the filter.
  • 3
    Remove Front Bezel

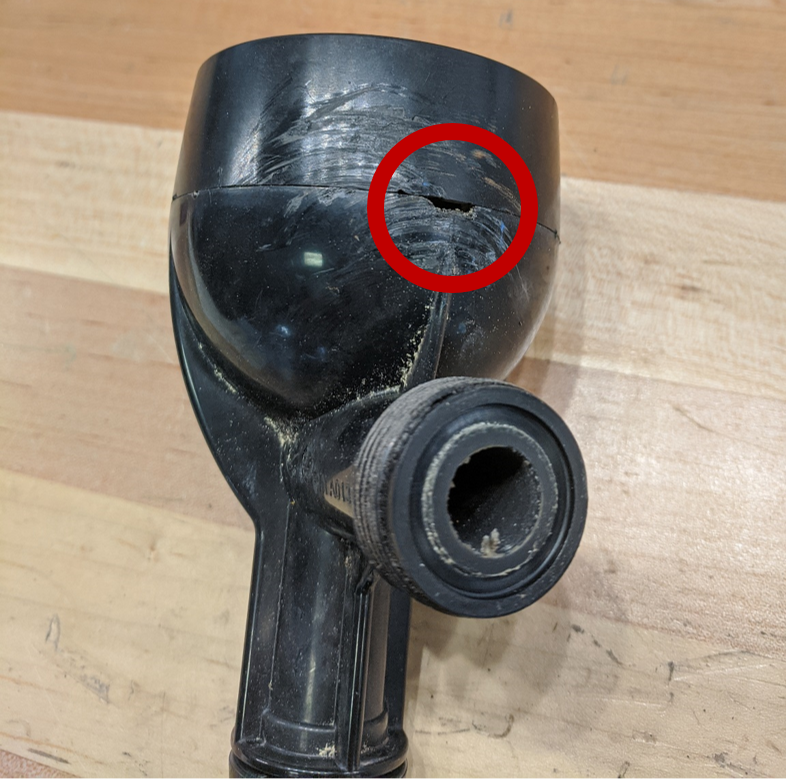
    This is the second important item/trick you need to know.  It's also the reason we removed the housing from the filter.  The pry slot to remove the front bezel is on the bottom of the housing.  It's very difficult to reach while the housing is attached to the filter.  Once removed, however, it's easy to access.

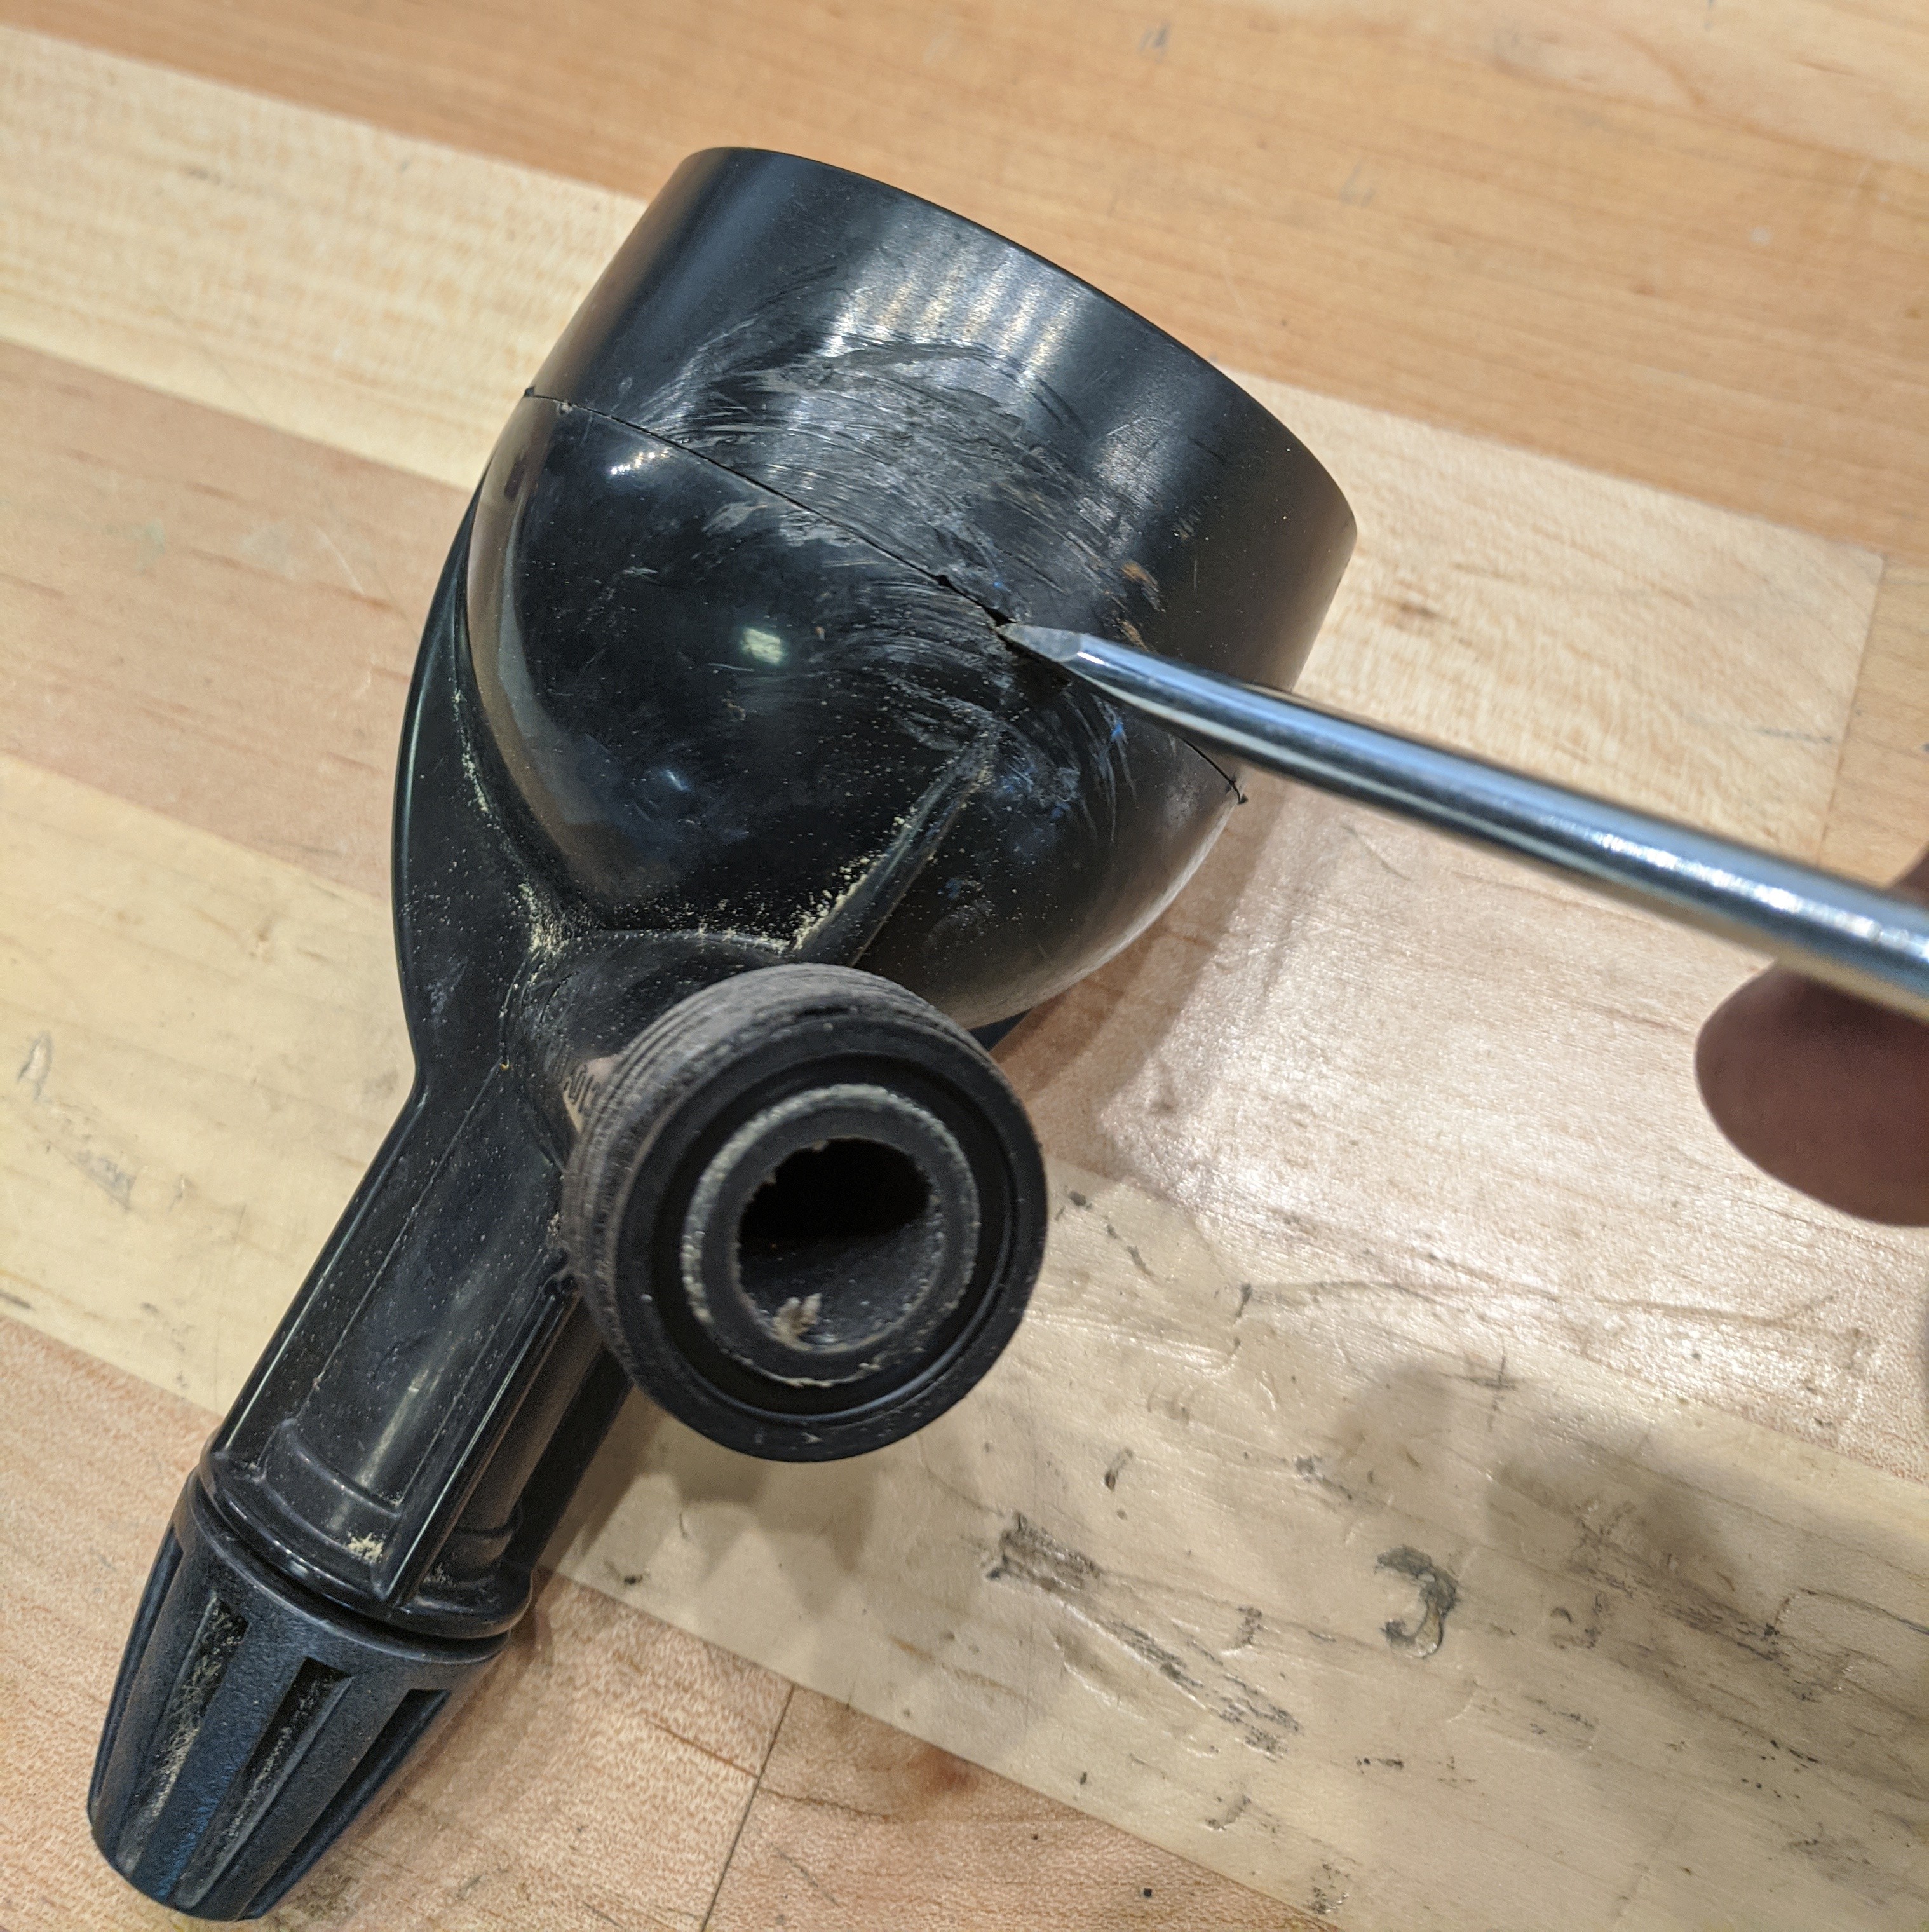
    Use a flat tip screw driver or a similar device to pry the front bezel off.  Start at the pry slot.  Once you pop it at the pry slot, it should give you enough access to pry at other locations if needed.

    Pry Slot Location
    A small slot at the bottom of the housing allows you to pry the bezel off.
    Prying Bezel Off
    Use a flat tip screw driver to pry the bezel off.

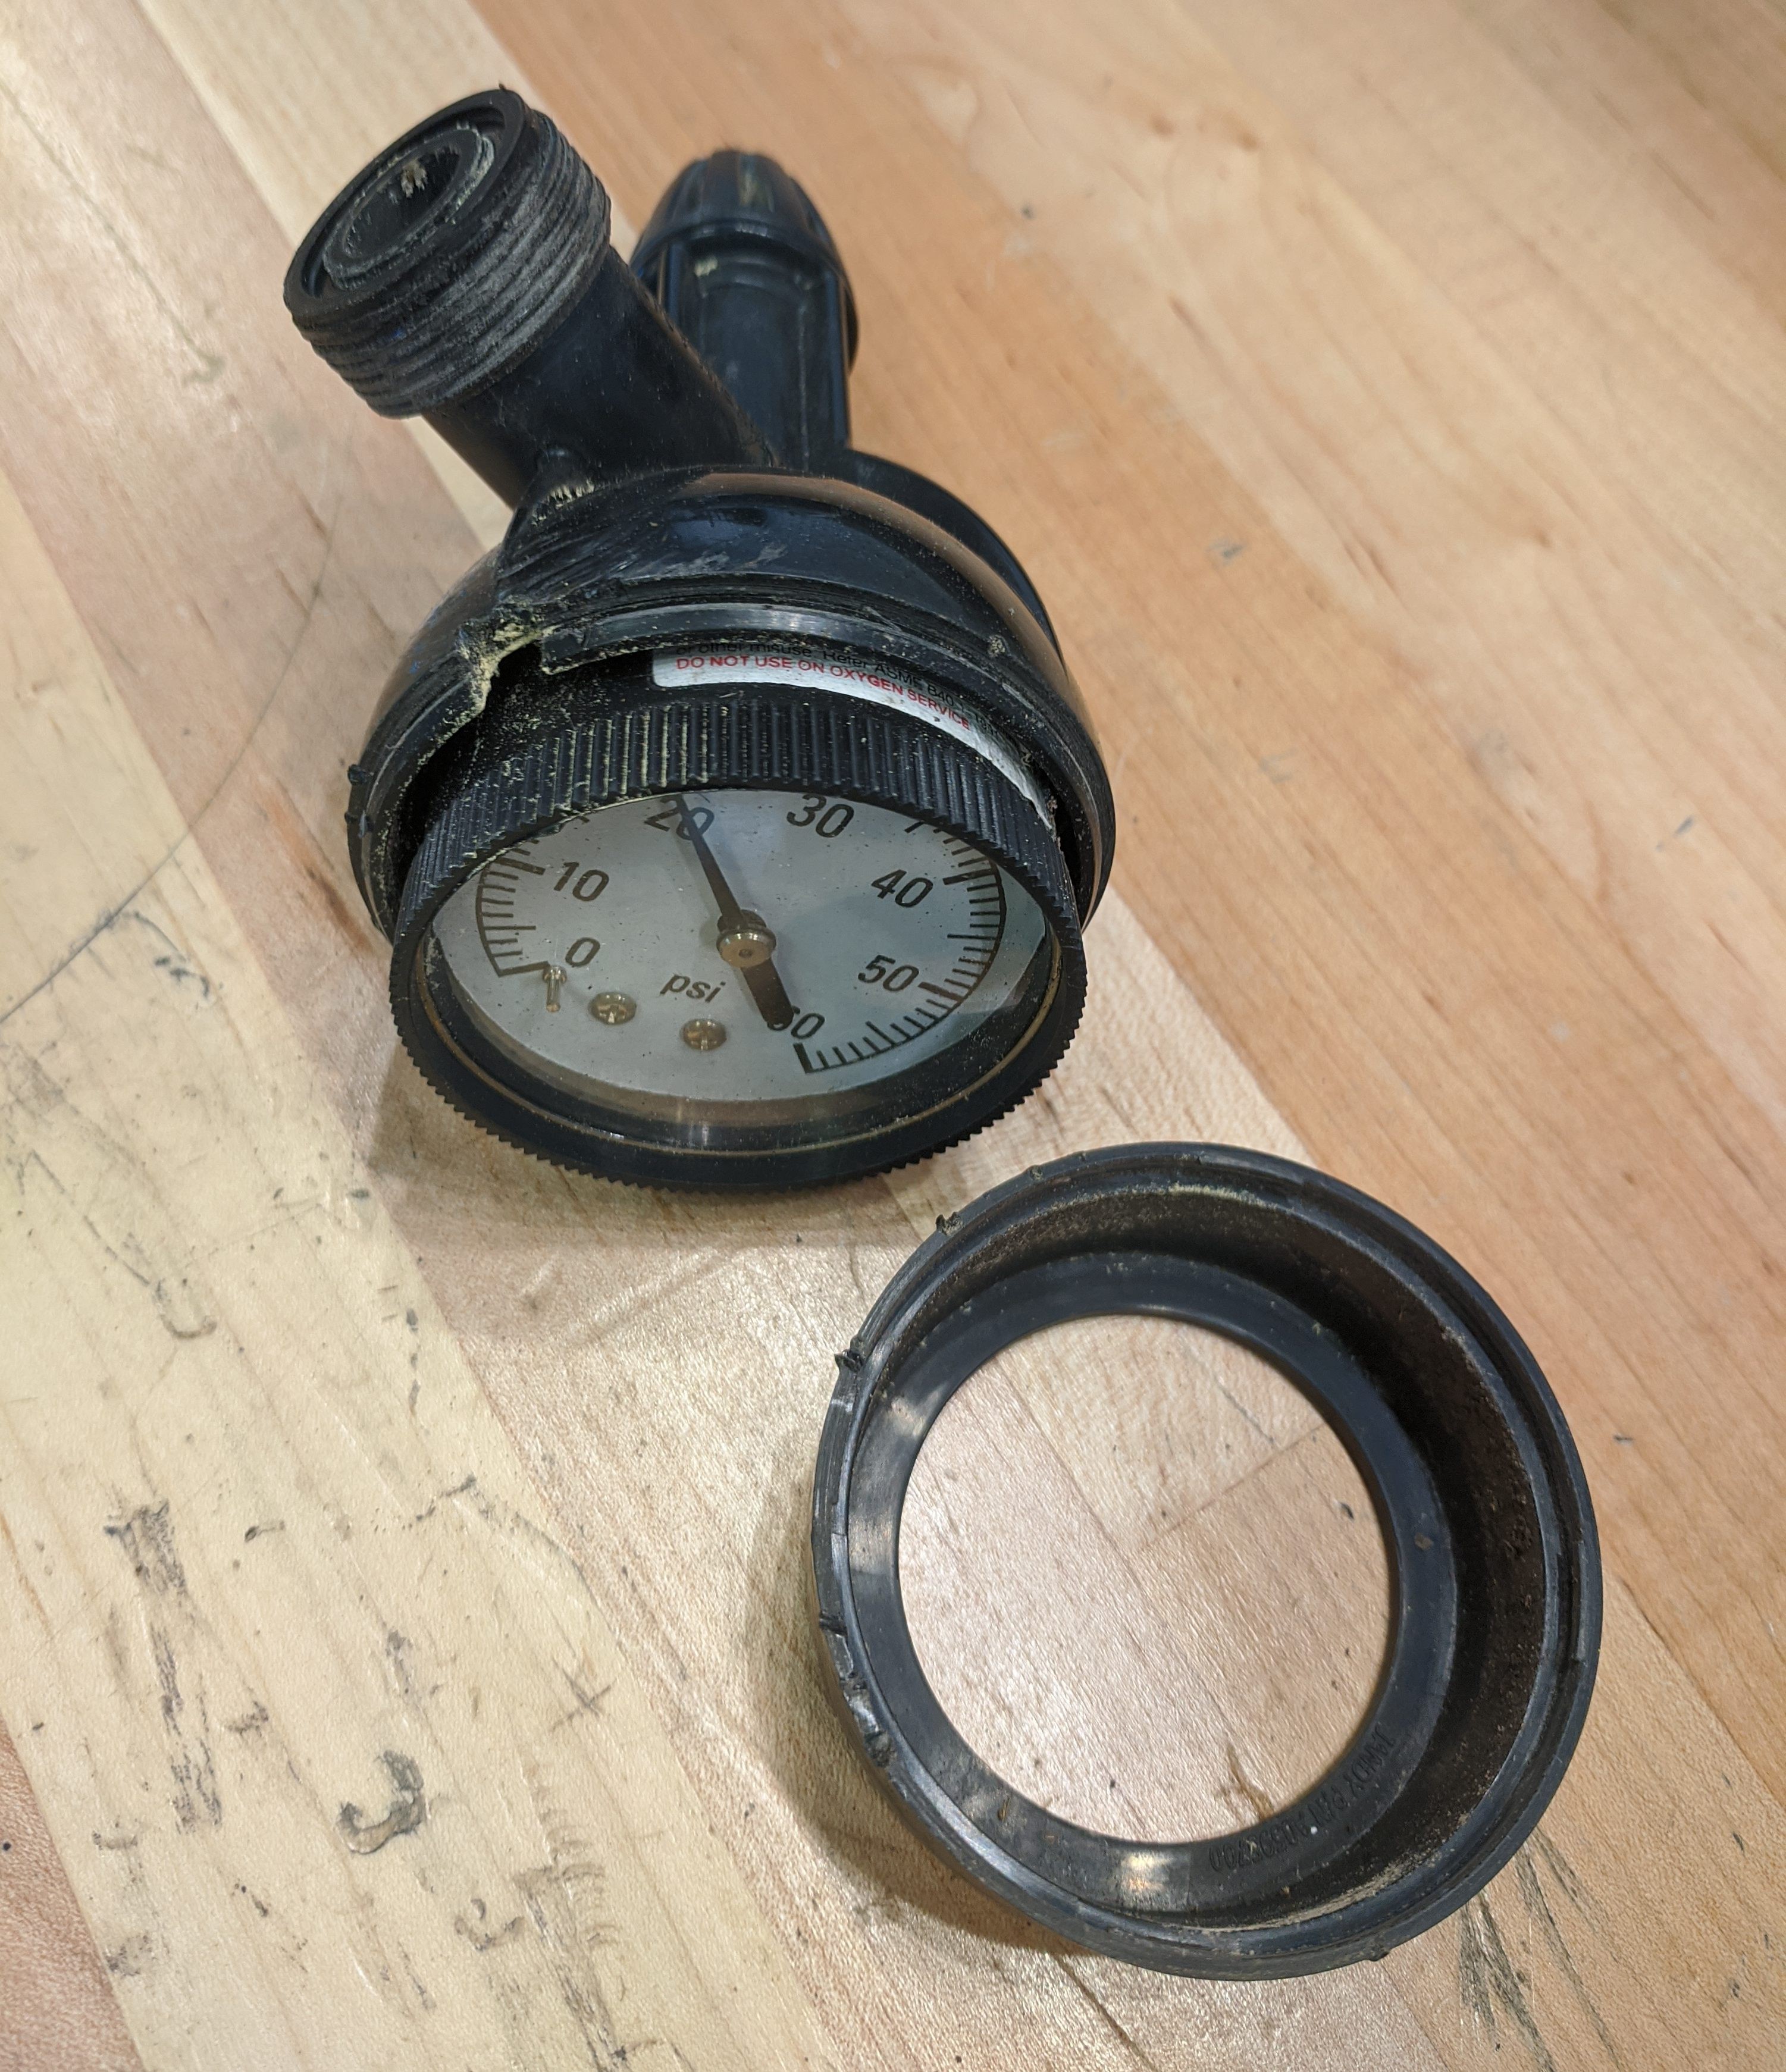
    Front Bezel Removed
    The housing with the front bezel removed.

View all 6 instructions

Enjoy this project?

Share

Discussions

Similar Projects

Does this project spark your interest?

Become a member to follow this project and never miss any updates