 tyler
tylerThe first step in this project was to be the screen. Without it, there could be no laptop, so it got priority.
I set off researching the panel that was in this model (the 2006). I found out it was the B133EW01 from Samsung (if I remember correctly). Armed with this information, I set off to find something that would drive it. Long story short, I found this: the T.SK105A.03. When it first arrived, I had my doubts. It looked pretty janky. But, after extracting the actual panel from the laptop, I was able to connect it - and it turned out that it worked pretty well. It has a small variety of inputs, including audio line in, HDMI, composite, and RGB video. Of course, some of those bulky connectors will have to go.
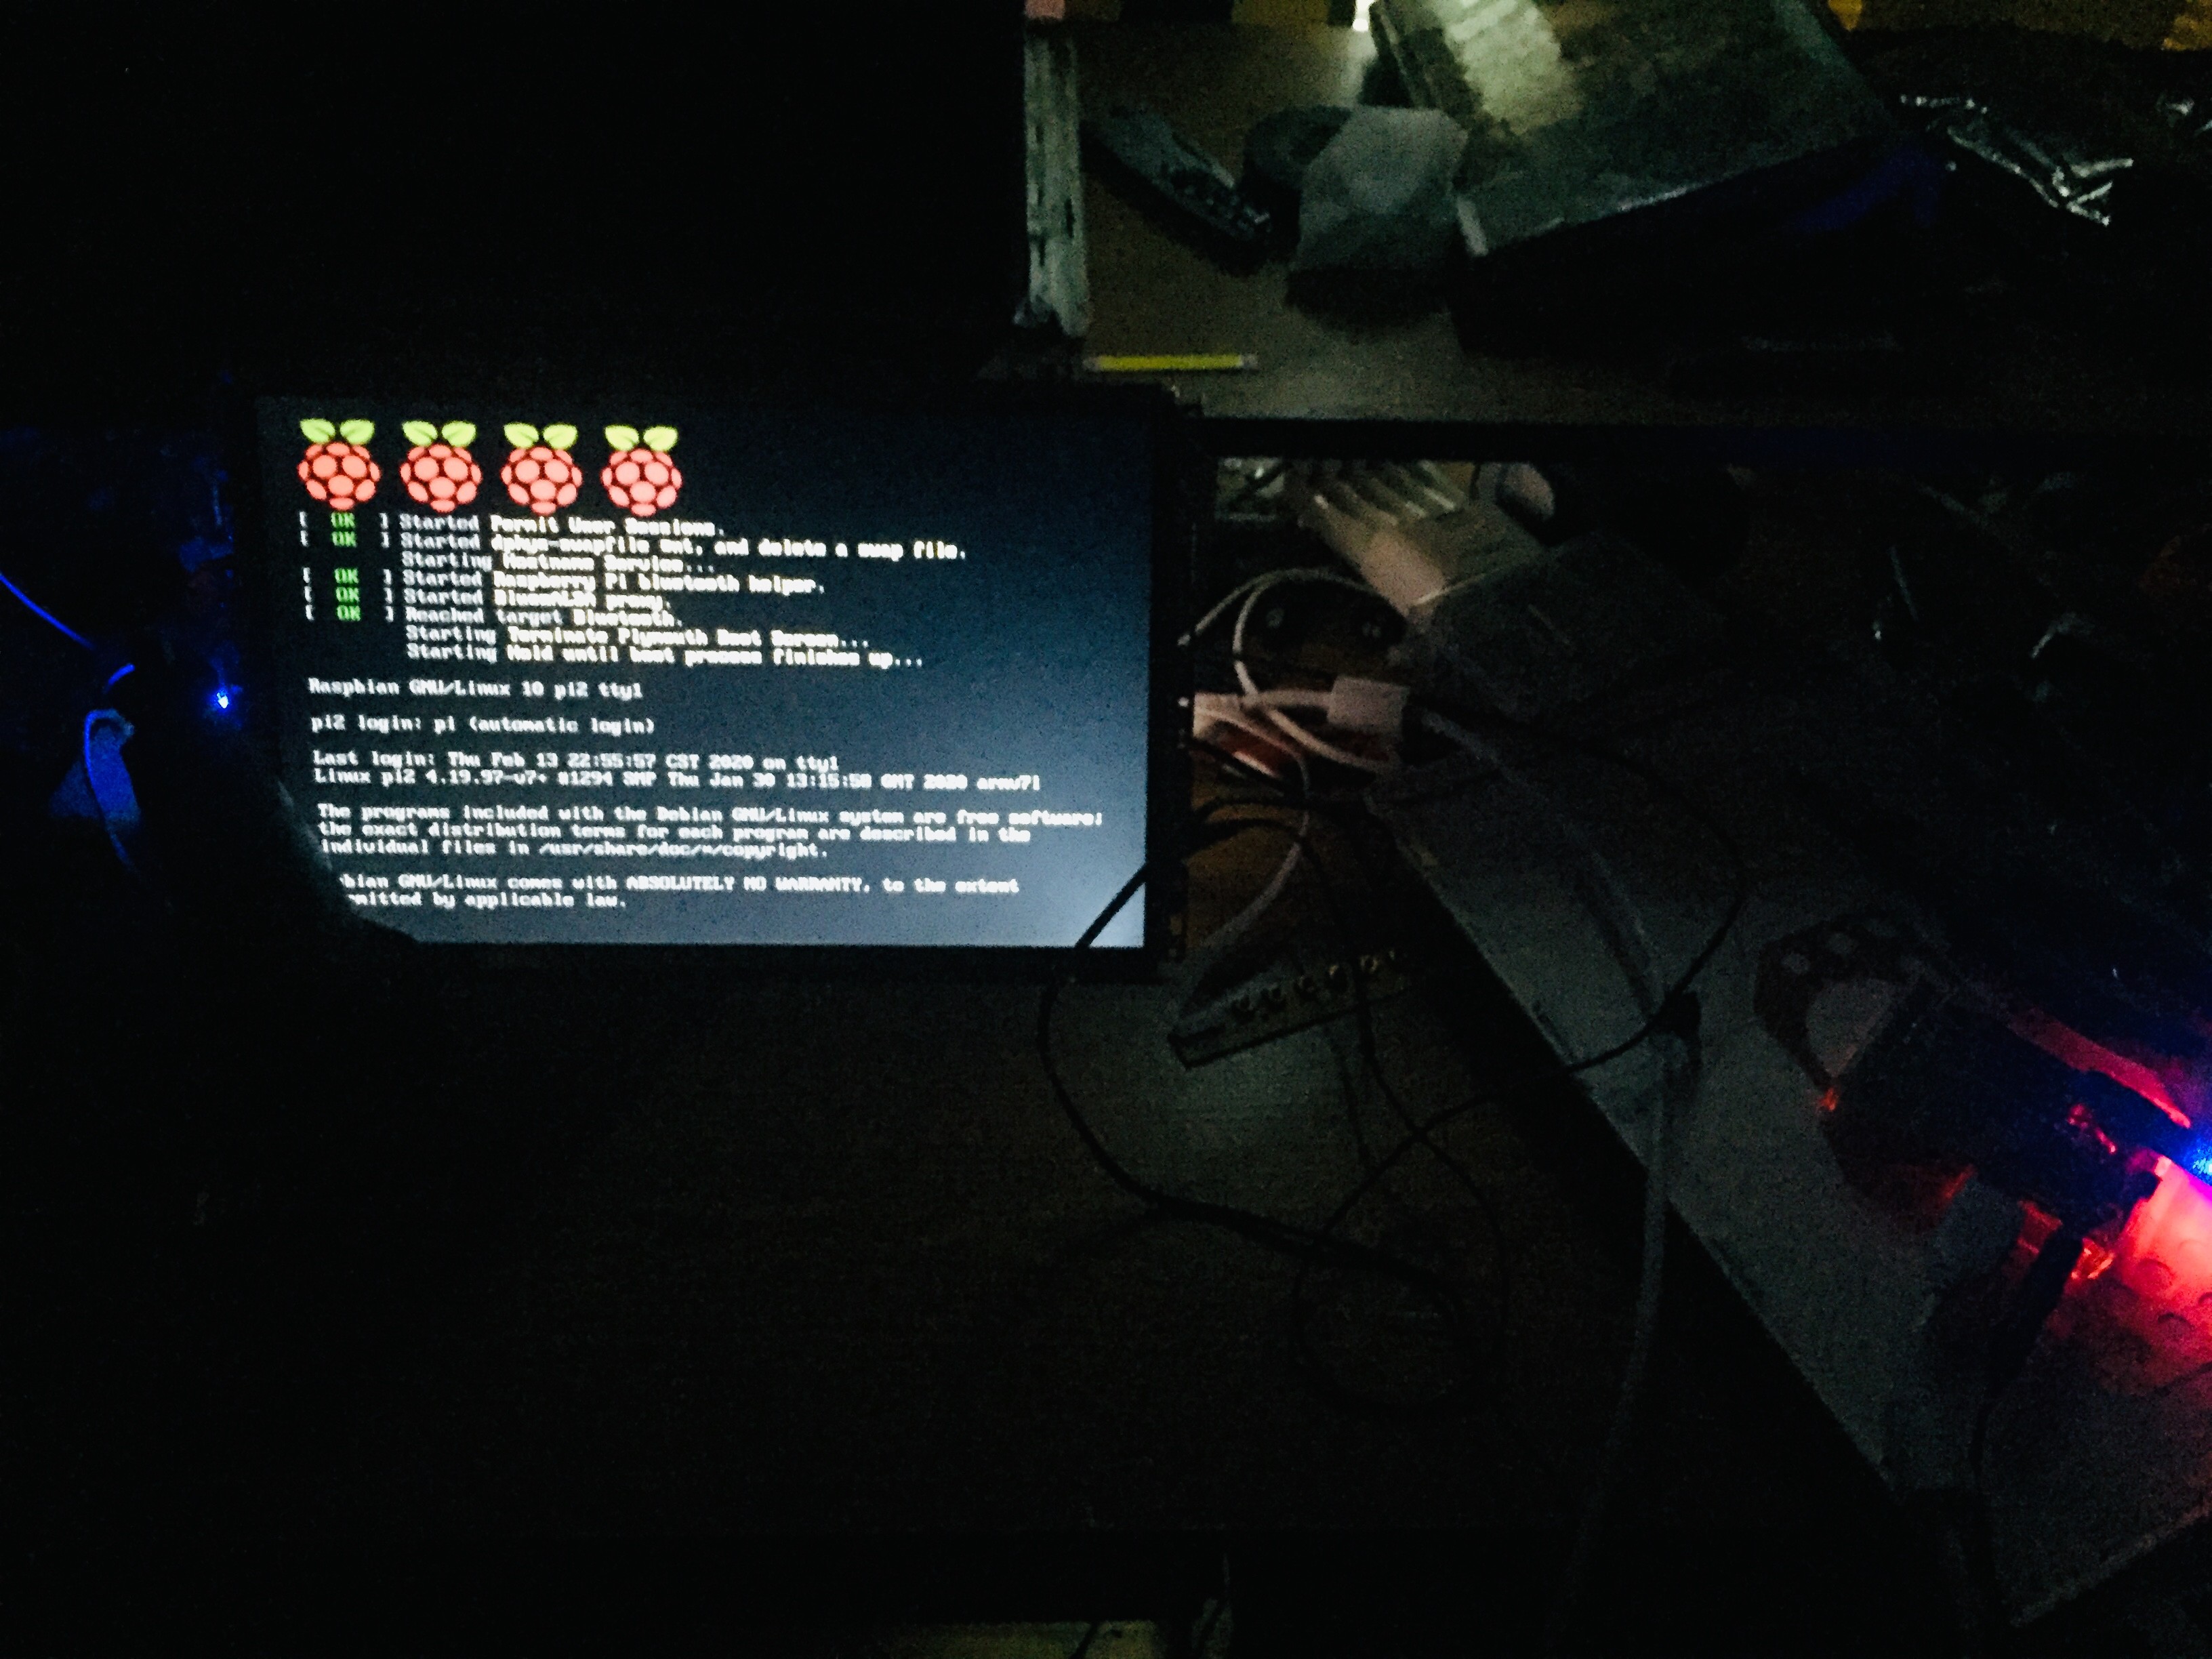
Here's it working with my Pi 2 over HDMI:
Eventually, lots of dremeling later, I got it somewhat trimmed down and sitting in the Mac chassis (and still working!) I routed the cables successfully up to the display assembly (in place of the old LVDS and inverter cables. Interestingly, there was originally a miniature inverter that lived in that little bump below the screen.
As you can see here, I moved the caps off of the PCB with some wires – for the sake of thinness. Not sure if that's a good idea, but it works...
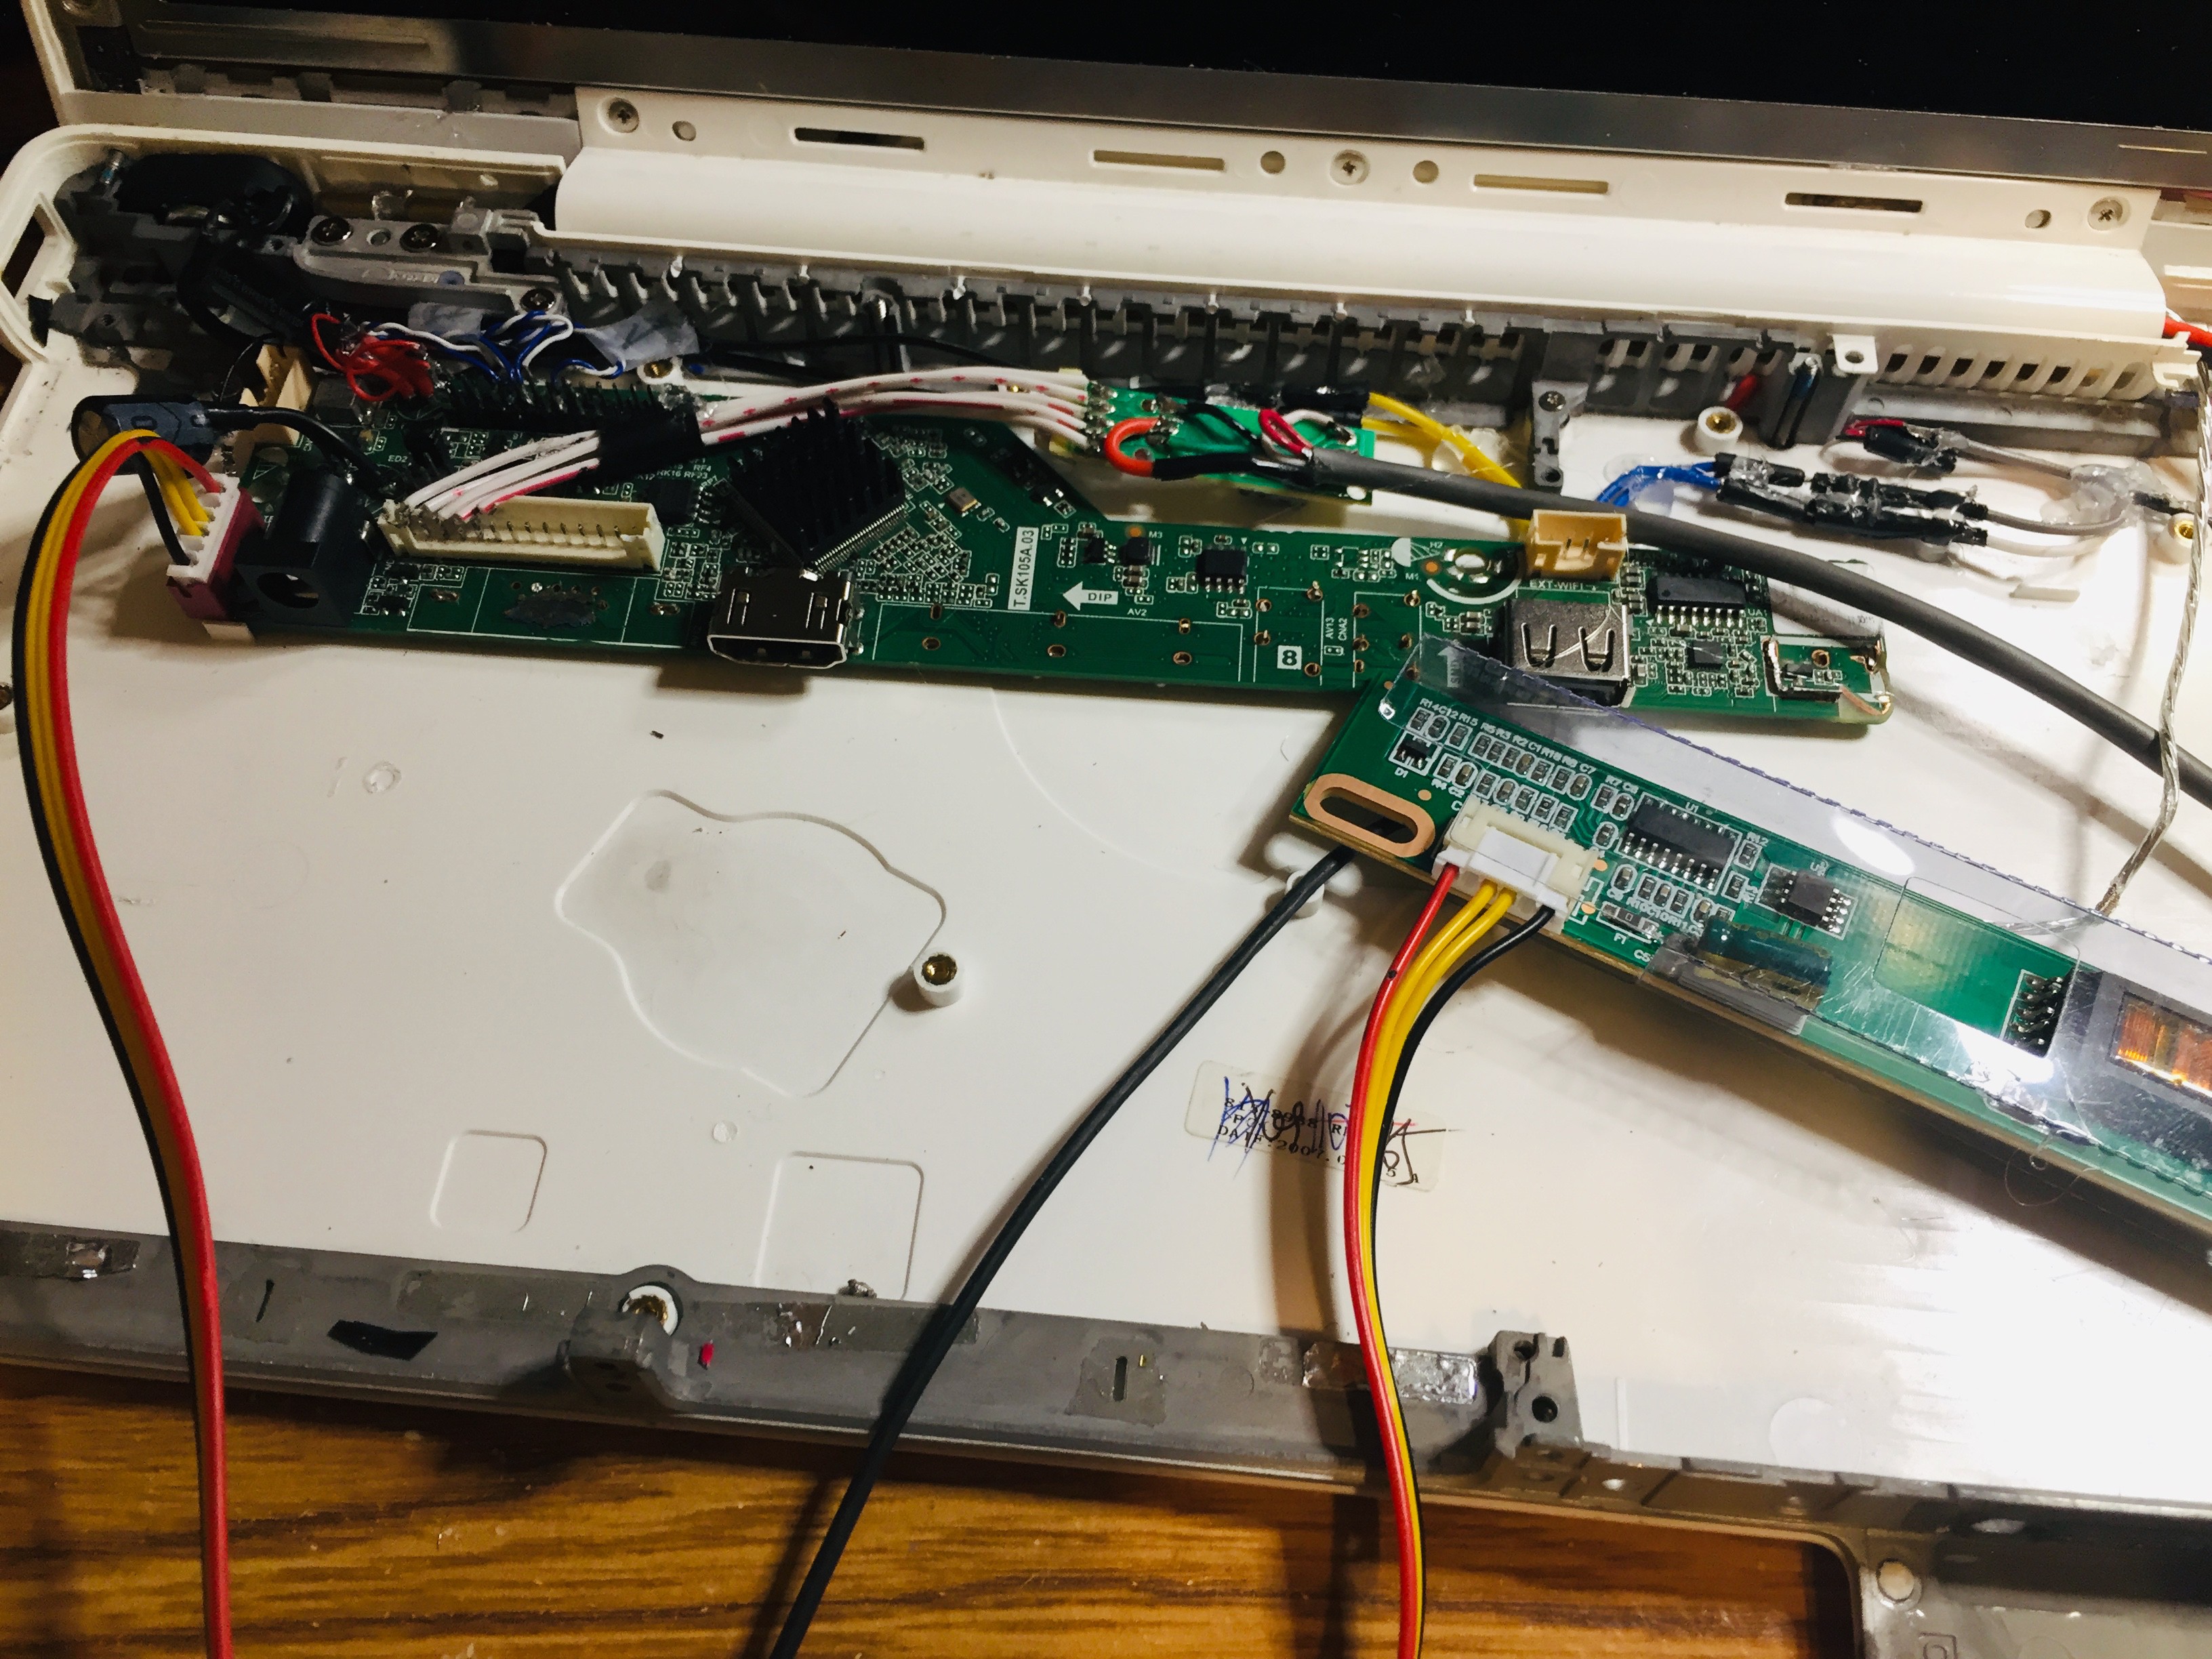
The driver actually comes with a speaker header, but it's not great for the Mac's speakers. I know basically nothing about audio, so there's a good chance I'm damaging these speakers. Ah, well. My plan for the future is to get a USB audio interface that will include a microphone and a decent DAC (the Pi's is notoriously bad).
Discussions
Become a Hackaday.io Member
Create an account to leave a comment. Already have an account? Log In.