 Phantom Chessboard
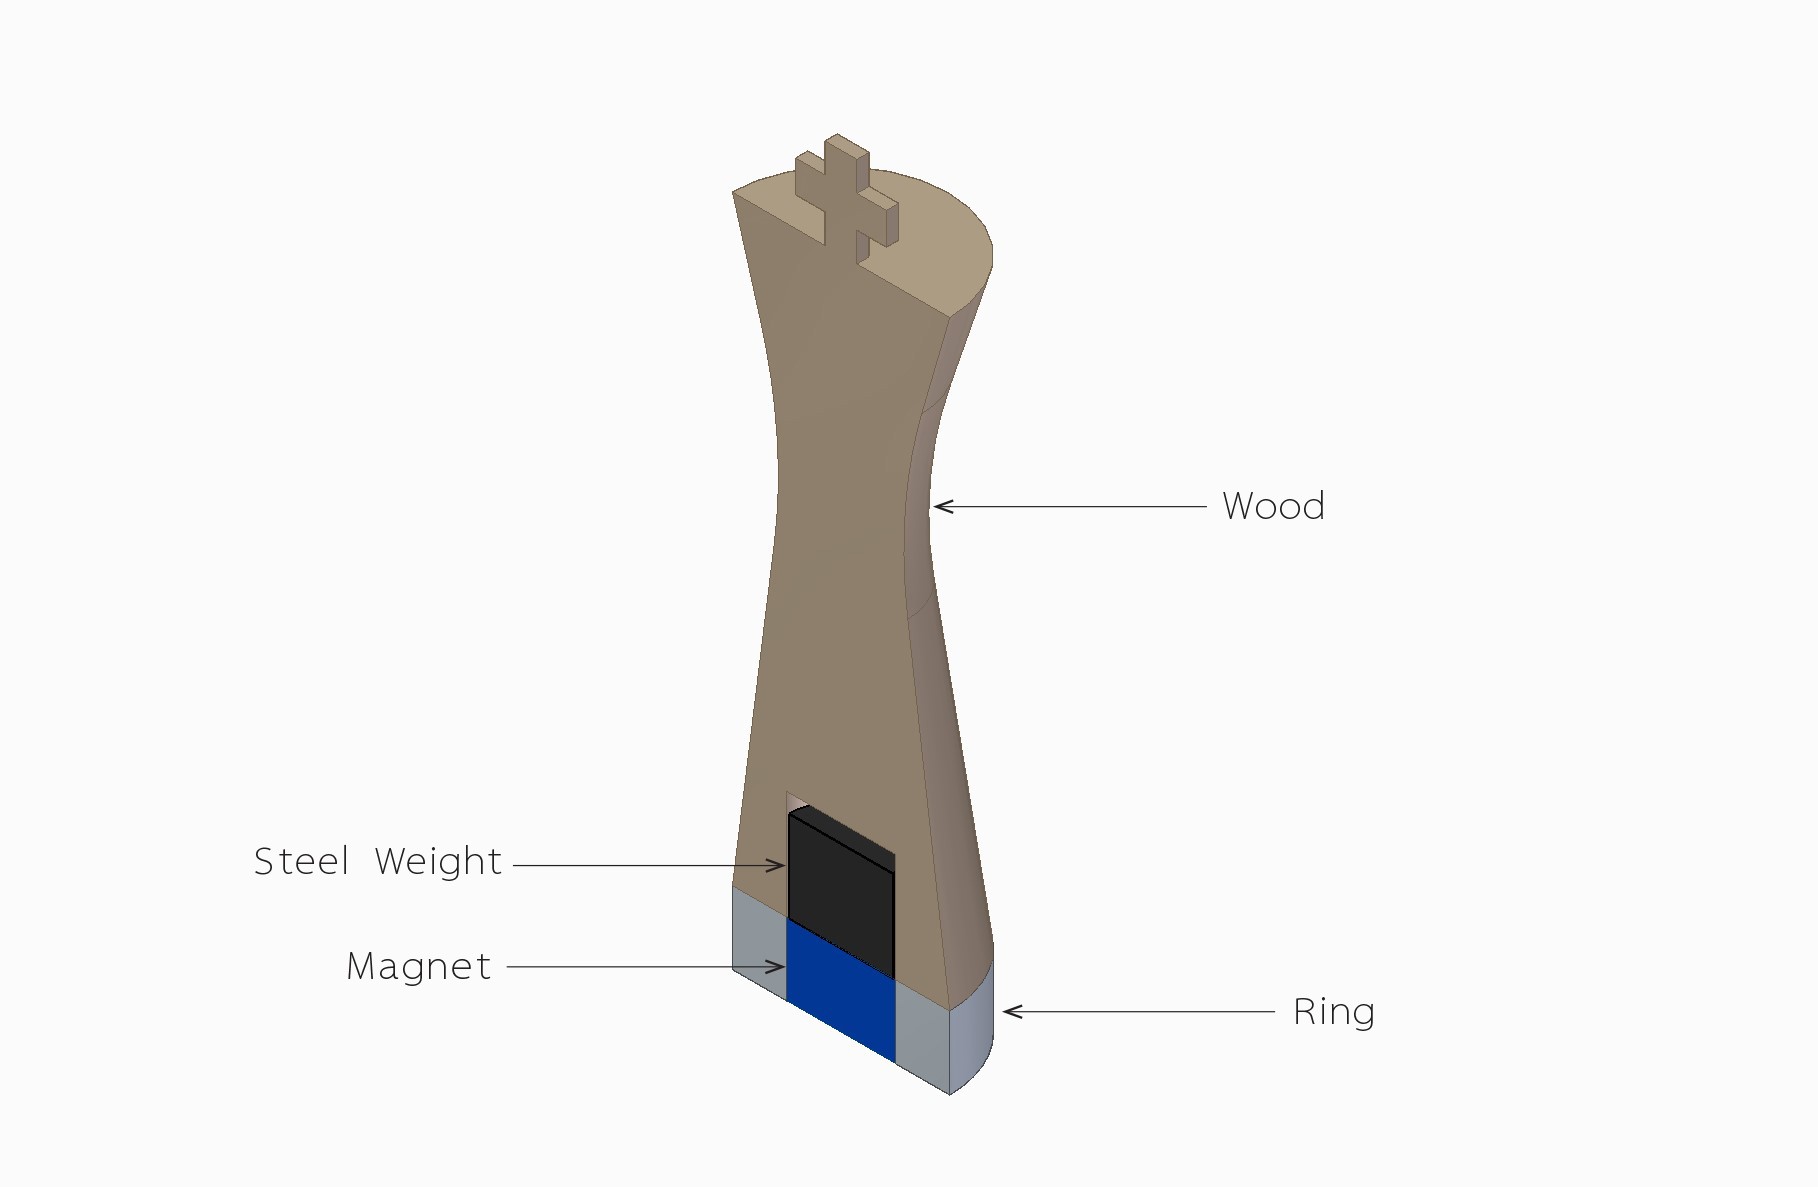
As I said in a previous post, I wanted to redesign every piece to meet my expectations of a quality chess set. It is not only about aesthetics but adding technical specs to the pieces is necessary so they can work perfectly in conjunction with the magnet arm.
Once the components for each piece were decided (wood, magnet, ring), I took the liberty of designing a second version for the chess set.
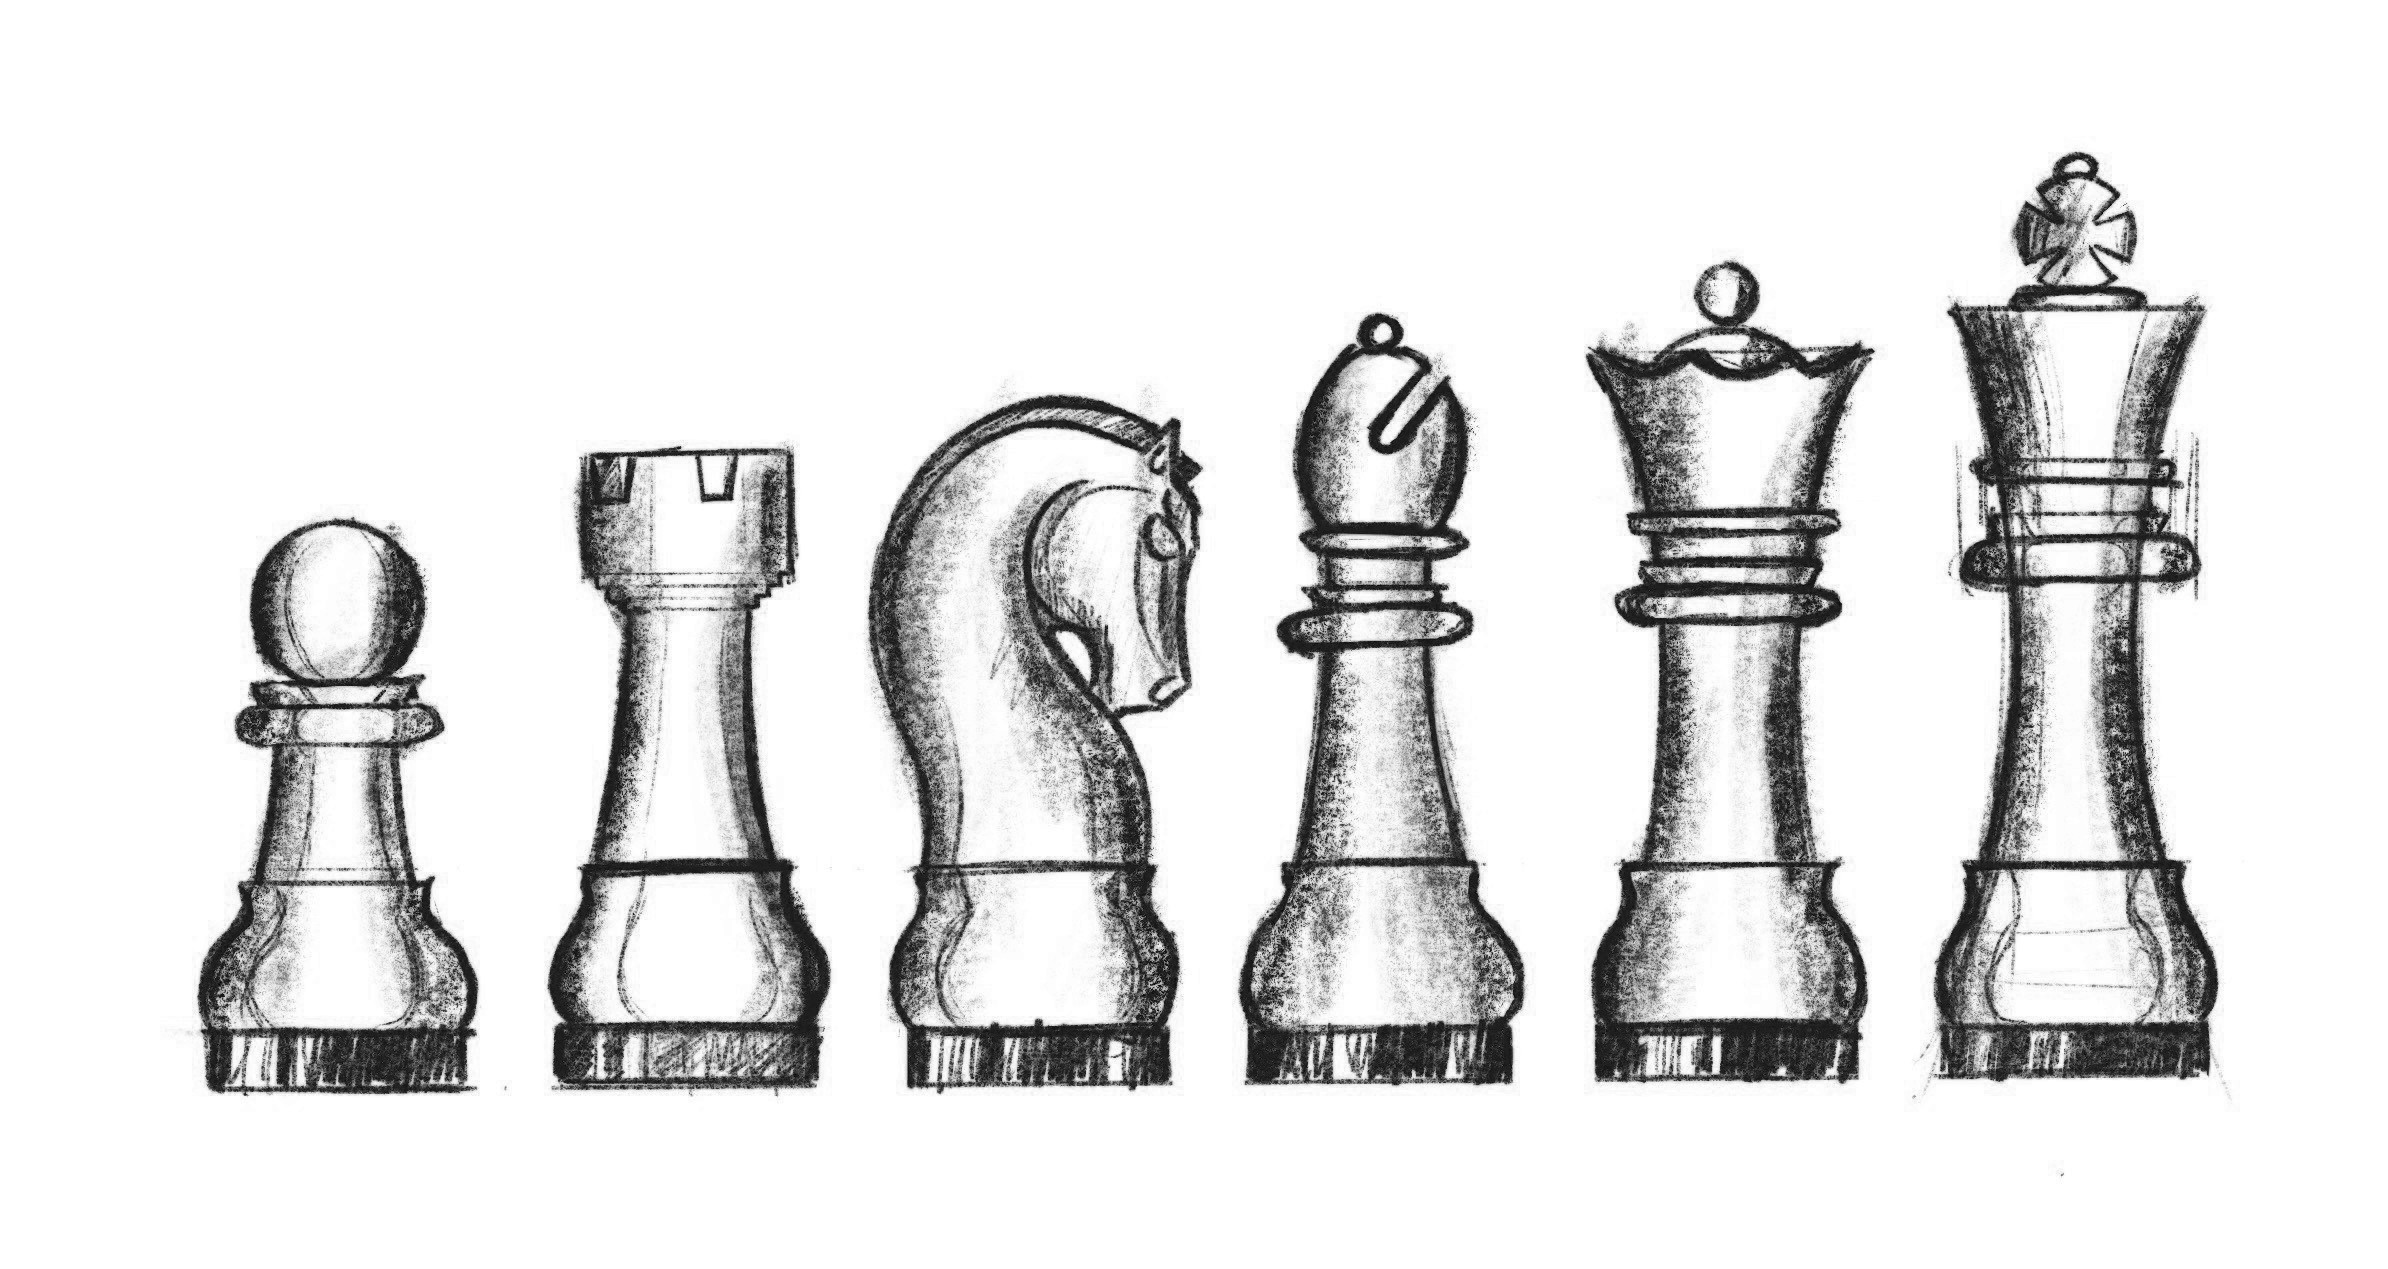
You already saw the pieces with the modern style, but I think that a good old Staunton style won’t do any harm ;)
There are two main principles that the shape of the pieces should follow:
The first one is that the diameter of the base should be less than half the length of each square for all the pieces.
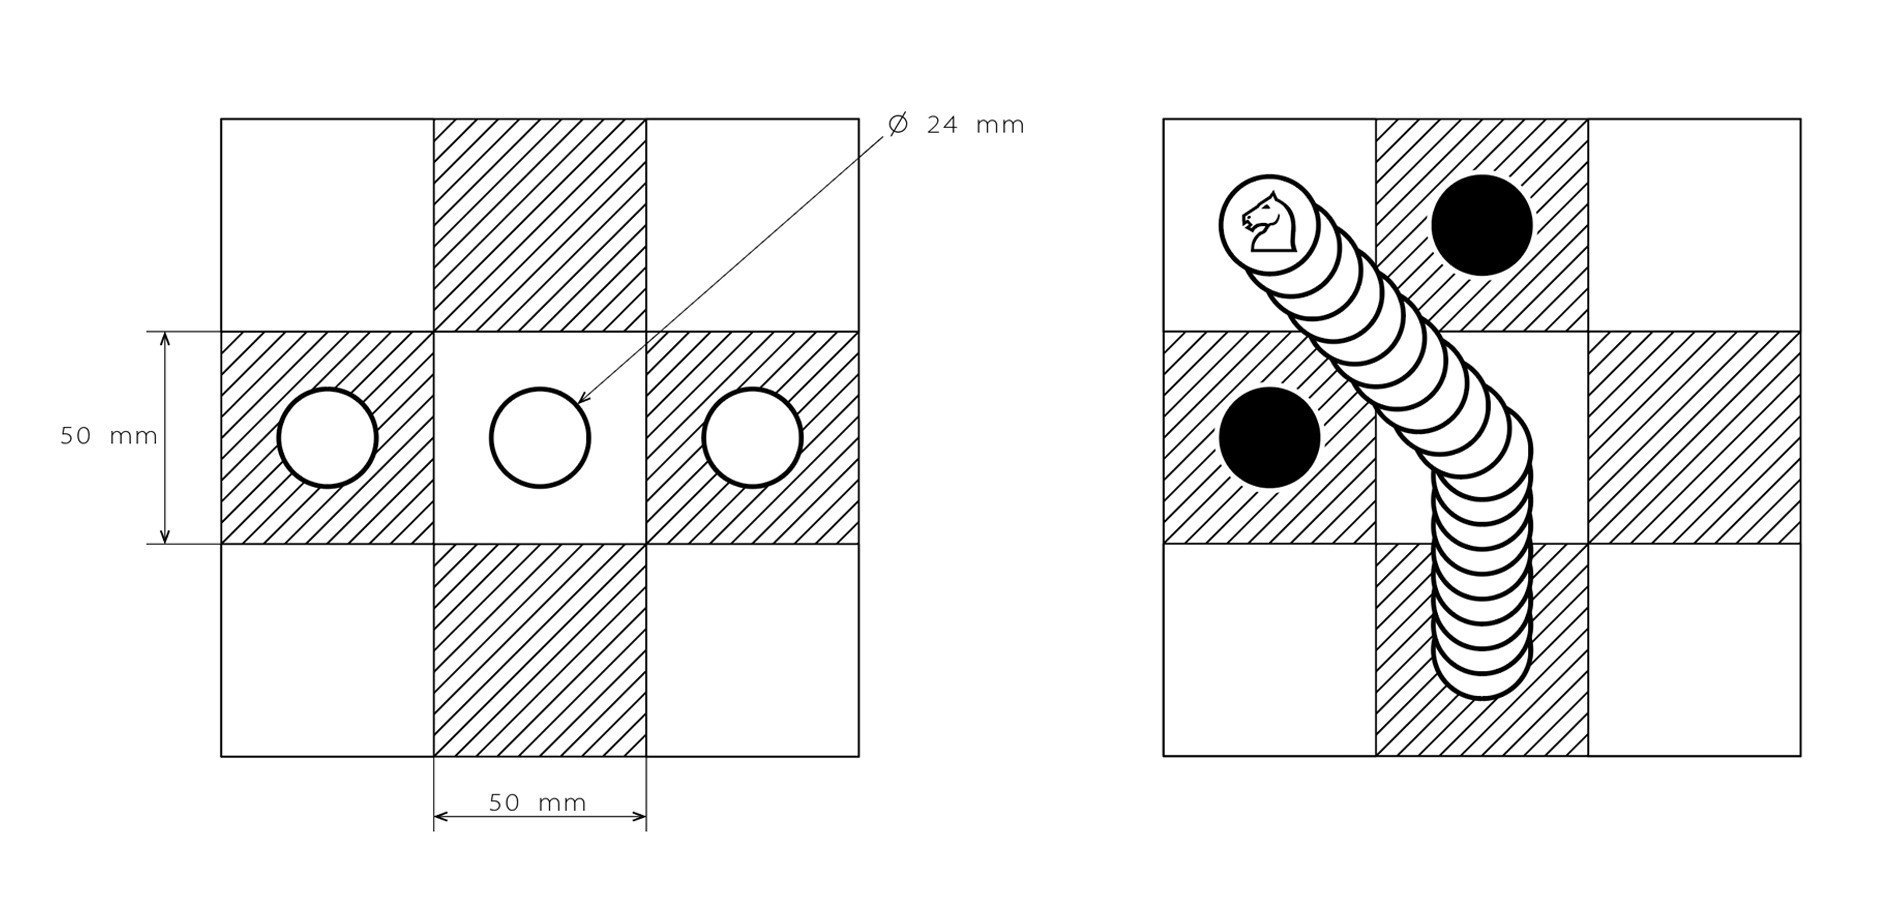
This prevents collisions between the pieces when they move between each other.

The second one is related to height. The King’s height is 3,38”, which is the minimum established by the US Chess Federation, and the Pawn is 2”.
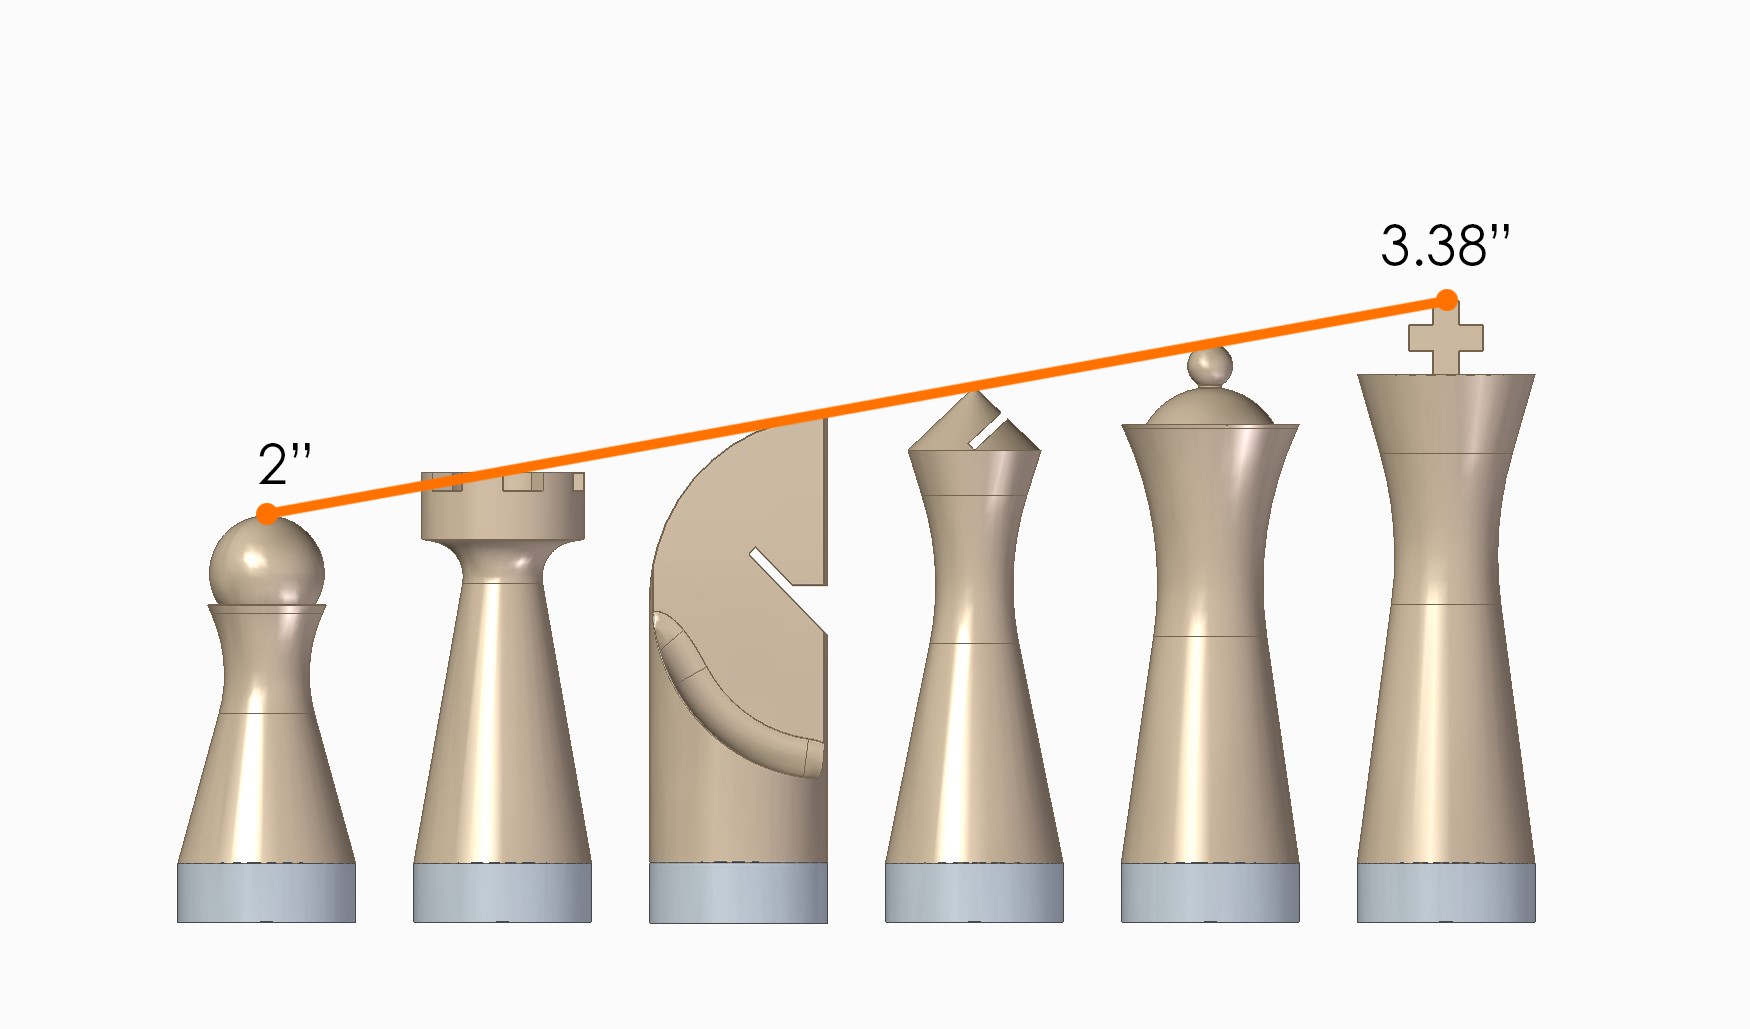
Then, if you arrange the pieces by the traditional height order and trace a line from the top of the King to the top of the Pawn, the top of every piece between King and Pawn touches this line. I applied this concept to both modern and Staunton versions.
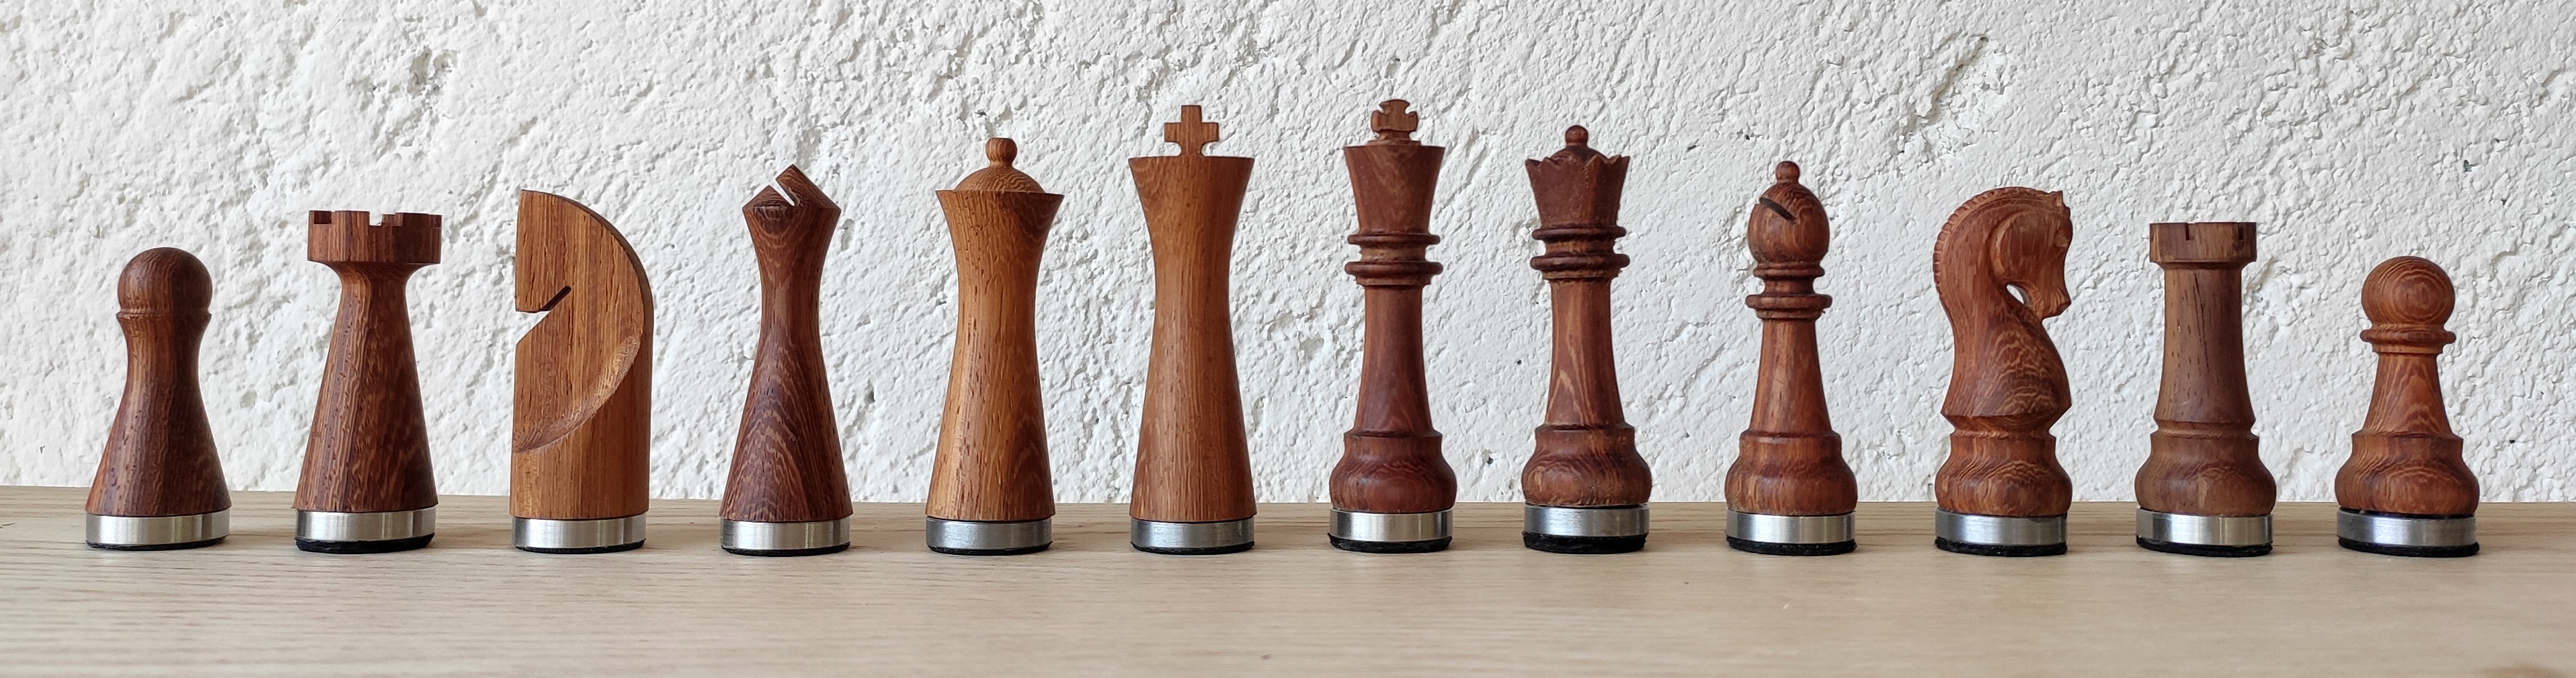
When I started working on the design of the pieces, my first approach was with the modern style. This set is shaped geometrically but also is easily recognizable. My approach with this design is to take the timeless essence of chess into a contemporary look by using simple geometric subtractions from a simple cylinder.
The modern set was effortless to model in CAD, contrary to the Staunton one, which has a lot more detail to distinguish itself from the modern set. The horse, for example, has a more organic shape.
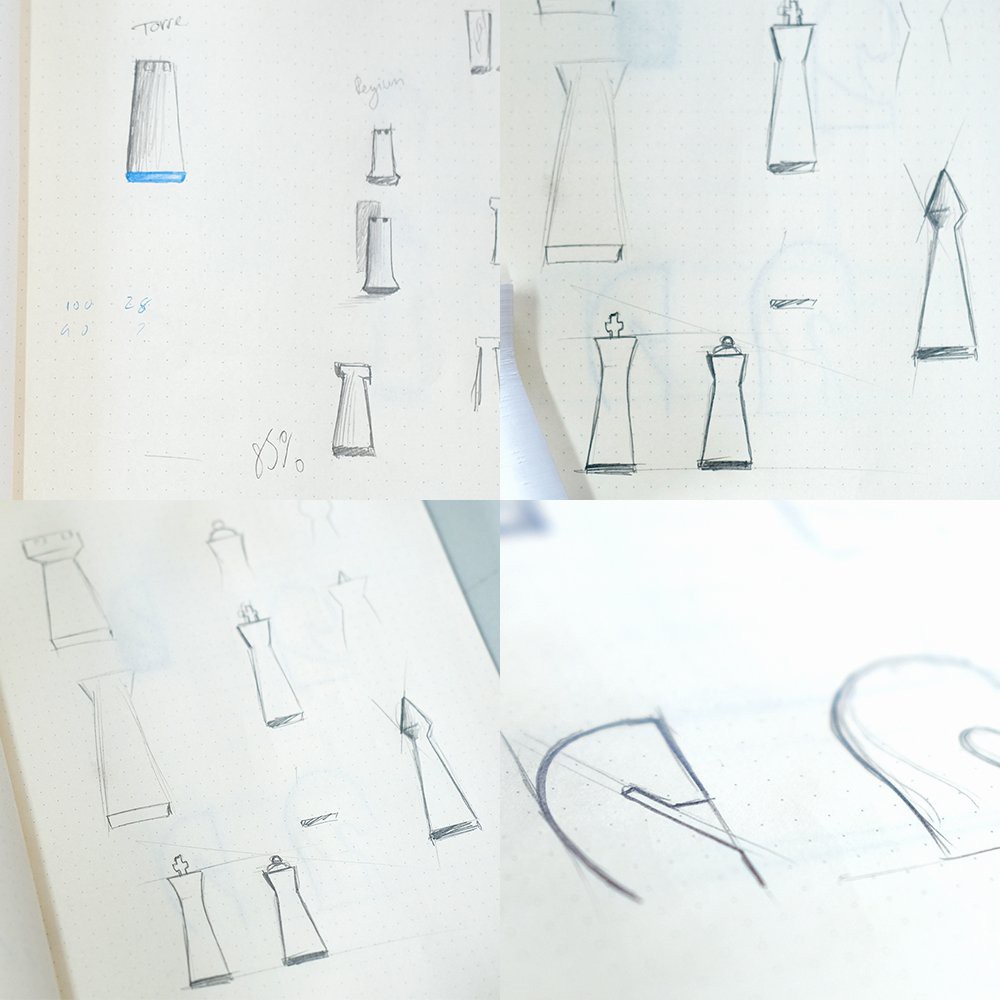
Once the right proportion for each piece is defined, I started working on the 3D models to print prototypes. I prefer this method for shapes and volumes because they come out fast and with enough detail to make decisions.
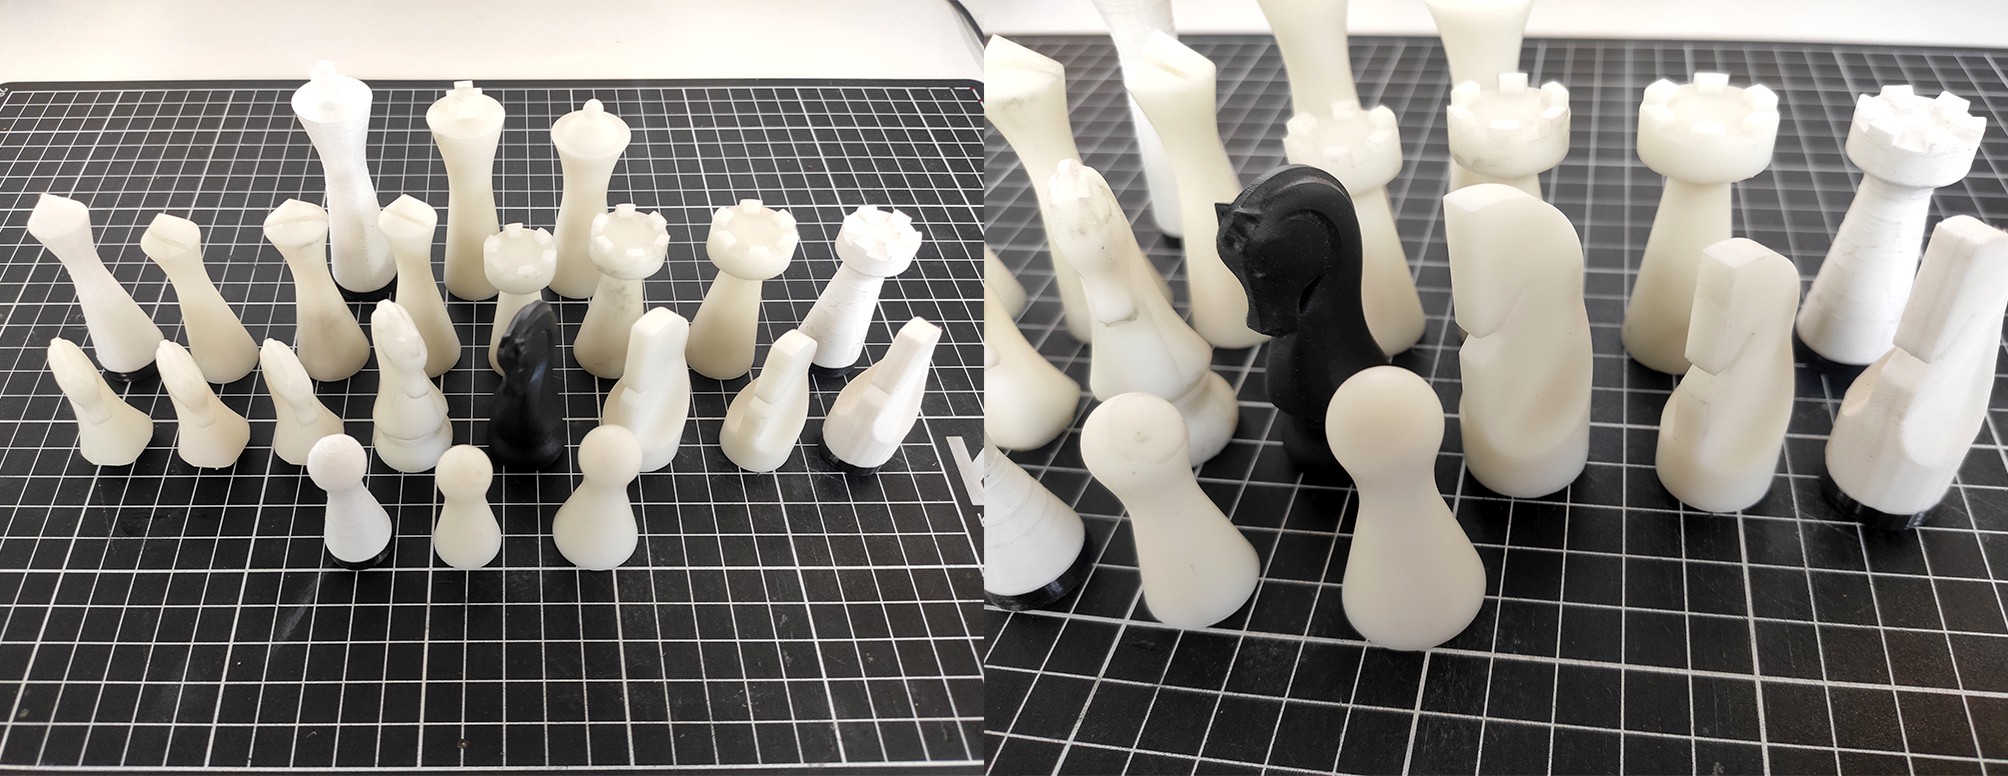
Once I was happy with every piece, I started working in the CNC program. The first step is to test the CNC prototypes using a soft material; I usually use polystyrene foam.
When all the programs run well on the soft material, I started the machining in wood. For the white pieces, I used maple wood and machiche wood for the black ones.
After the pieces were machined, I gave them a finish by sanding them to get a smooth surface, and then I applied Rubio Invisible for the white pieces and Rubio Pure for the black ones. These finishes are mono coats, so they are effortless to apply.
I can’t decide which design is my favourite and the work put into each set was definitely worth it. Which one do you prefer?
I’ll leave our discord server if you would like to chat about this project or leave any suggestions: https://bit.ly/3emyBWy
And my YouTube channel in which I upload progress and test videos: https://bit.ly/3w32wcf
Discussions
Become a Hackaday.io Member
Create an account to leave a comment. Already have an account? Log In.