 Phantom Chessboard
Hi there! I believe naming “automatic chessboard” is not so appealing so I decided to name it: Phantom. Even less appealing is to keep Phantom just to myself, so I decided to launch a Kickstarter campaign as recommended by some of you!
During the last months, I have been sharing the development process and improvements made to the board week by week and got to the conclusion to close the first version to decide the following steps to improve it.
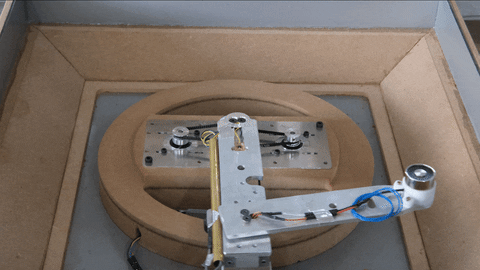
The next step is to be sure all systems are working perfectly fine together before starting important changes. The hardware of the first prototype is conformed by the Scara mechanism, hall effect sensors array, mecha-magnet and 3 microcontrollers running all the features.
I’ll share with you all the files up to this version so you can build your own Phantom Chess, in the files section you will find everything you need: the assembly and 3D model files for each system
-The case is constructed by an aluminium composite sheet with wood veneer for the board surface, and aluminium exterior frame to add support, MDF interior to hold the electronics and an aluminium composite sheet as the bottom plate.
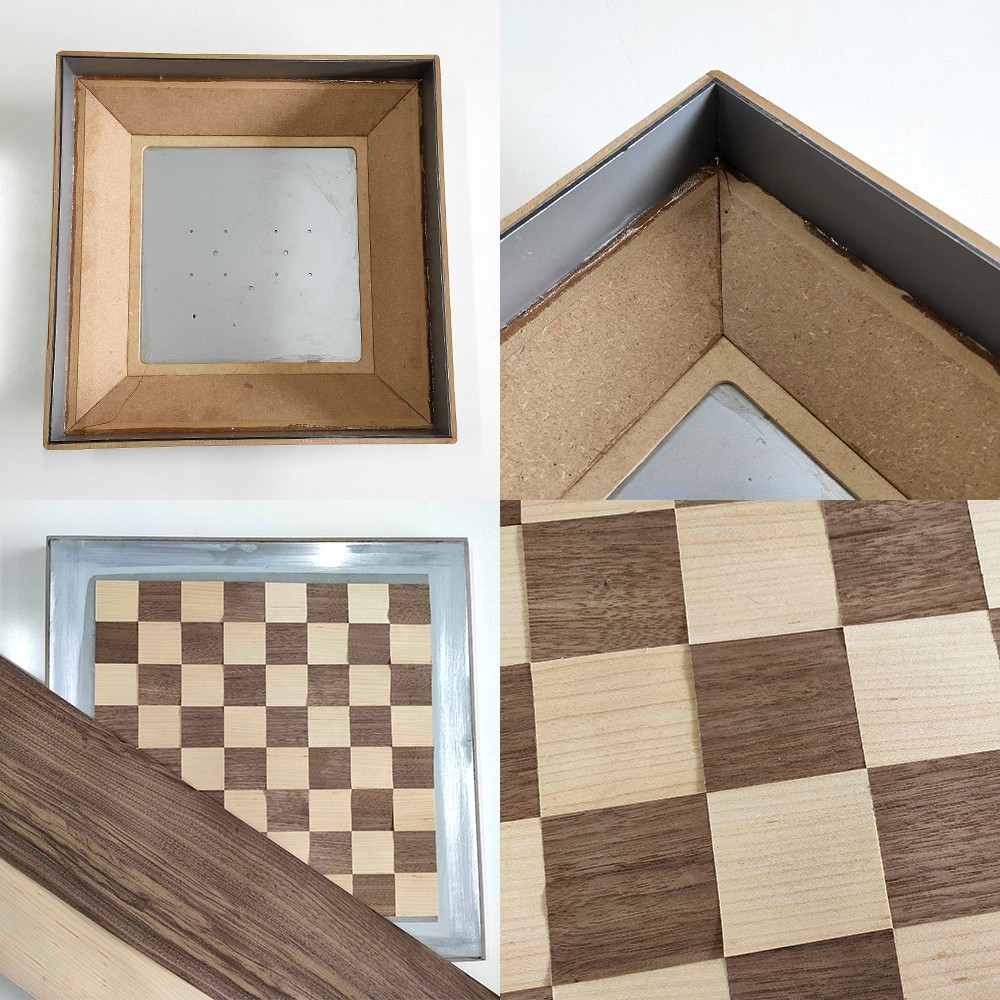
-Under the wood veneer + composite surface the sensor array it’s placed to detect the position of each piece and it is composed of five hundred SS39E hall-effect sensors interconnected with an HC4067 multiplexor.
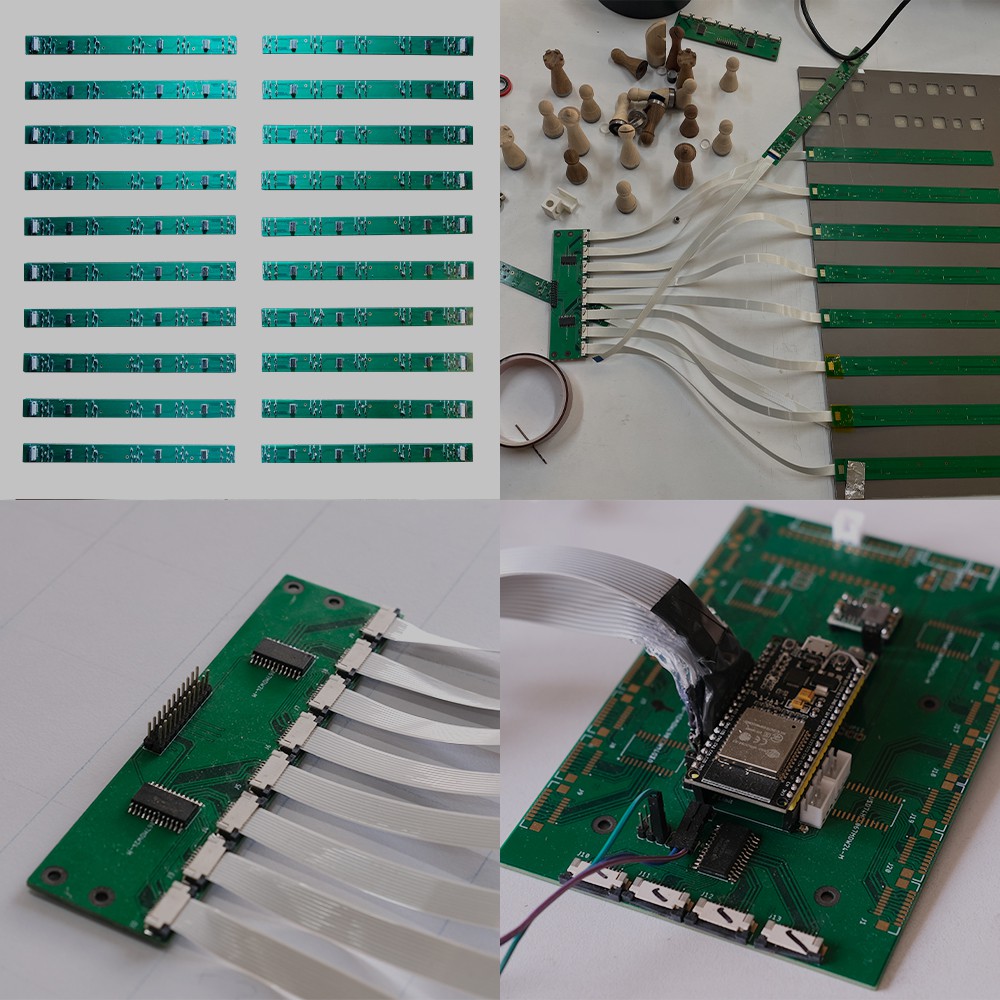
Tavo developed a three stage software that controls all the features:
- The main program is embedded into an ESP32 microcontroller. This software controls the motors and runs the calibration system to spatially the mecha-magnet.
- The second program read each hall-effect sensor to detect the pieces positions. I’m leaving you the code that controls the mecha-magnet here. Through an encoder, it detects the up and down positions and uses this data to control the motors that elevate the magnet with PID control. All this software is embedded into an Arduino Nano
- The third program focuses on connectivity. Through an Arduino Nano 33 IoT we communicate with the Lichess server to send commands as: start game, select adversary, game info and piece movements.
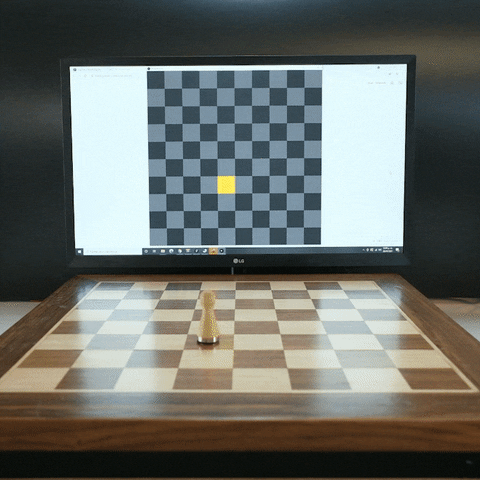
-Each time you move a piece on the physical board , the Nano 33 IoT sends this information to the Lichess server to be reflected in the digital game; it works the same way each time the opponent makes a move on the Lichess game, the move is sent to the board through the same connection.
-The three microcontroller system is interconnected through an i2c protocol. The ESP32 is the master that controls the Arduino Nano and the Nano 33 IoT.
Files, schematics and further instructions are in our Github repository. Take a look at them and let me know your comments for improvements or questions to start building your own e-board! https://github.com/carlosPendass/CAD-Mechanics

I’ll leave our discord server if you need further information from me and to chat about chess: https://bit.ly/3emyBWy
And my YouTube channel in which I upload progress and test videos: https://bit.ly/3w32wcf
Now I’m also on instagram! https://www.instagram.com/phantom_chess/
Discussions
Become a Hackaday.io Member
Create an account to leave a comment. Already have an account? Log In.
Will you be able to replay games on this board?
Are you sure? yes | no