Close
0%
0%

3D Print Time lapses Without Octoprint

In this project, I upgraded my 3D printer to be able to capture time-lapses of the prints without any additional electronics.

Public Chat
Similar projects worth following
In this project, I upgraded my 3D printer to be able to capture time-lapses of the prints without any additional electronics. This means there are no Rasberypies or any other board or module.
The only thing you need for this hack is a micro-switch, a broken headphone, and some wire!

What is it?

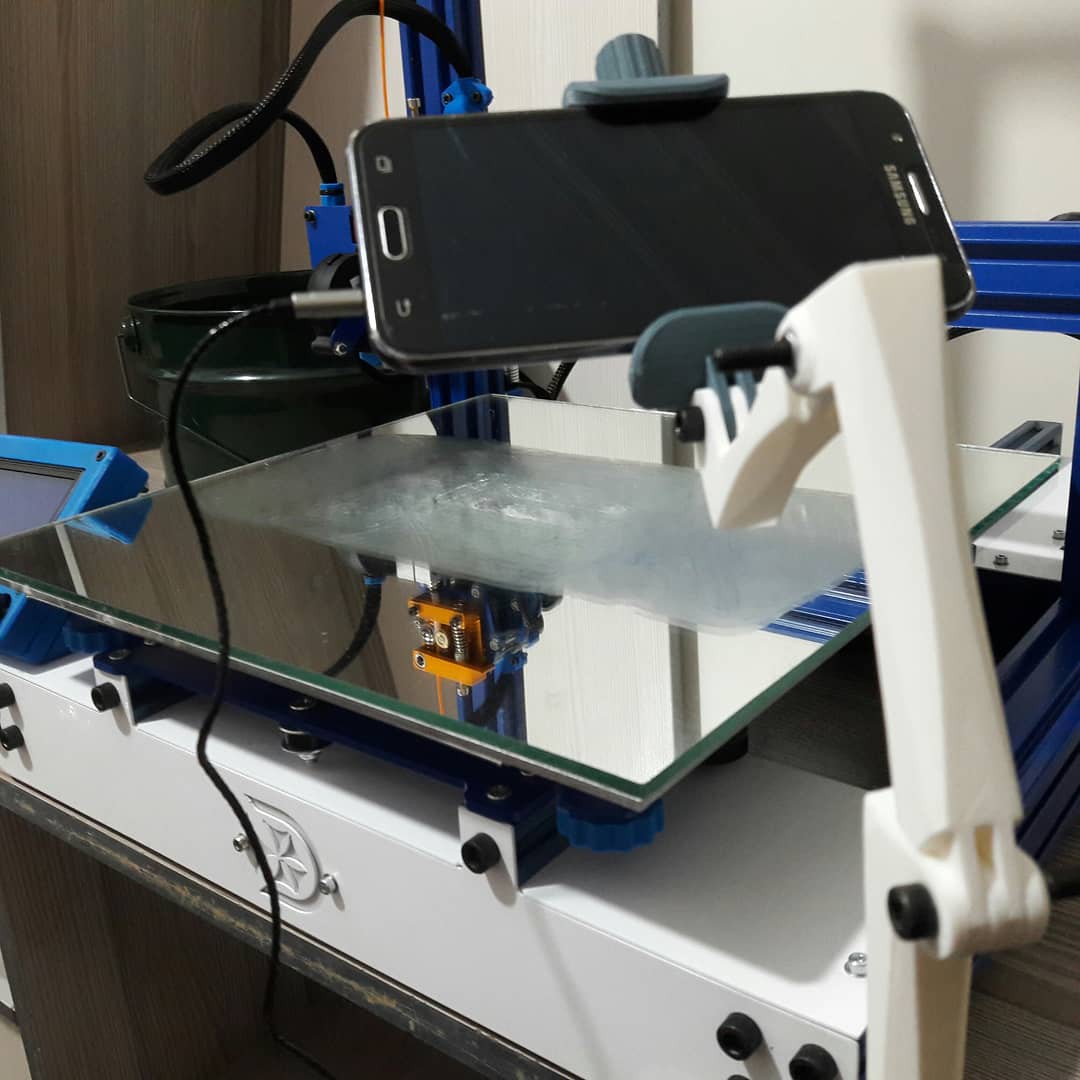
This device will help you to make awesome time-lapses of your 3D prints using only a micro switch and a handsfree circuit (if your using your phone as the camera).


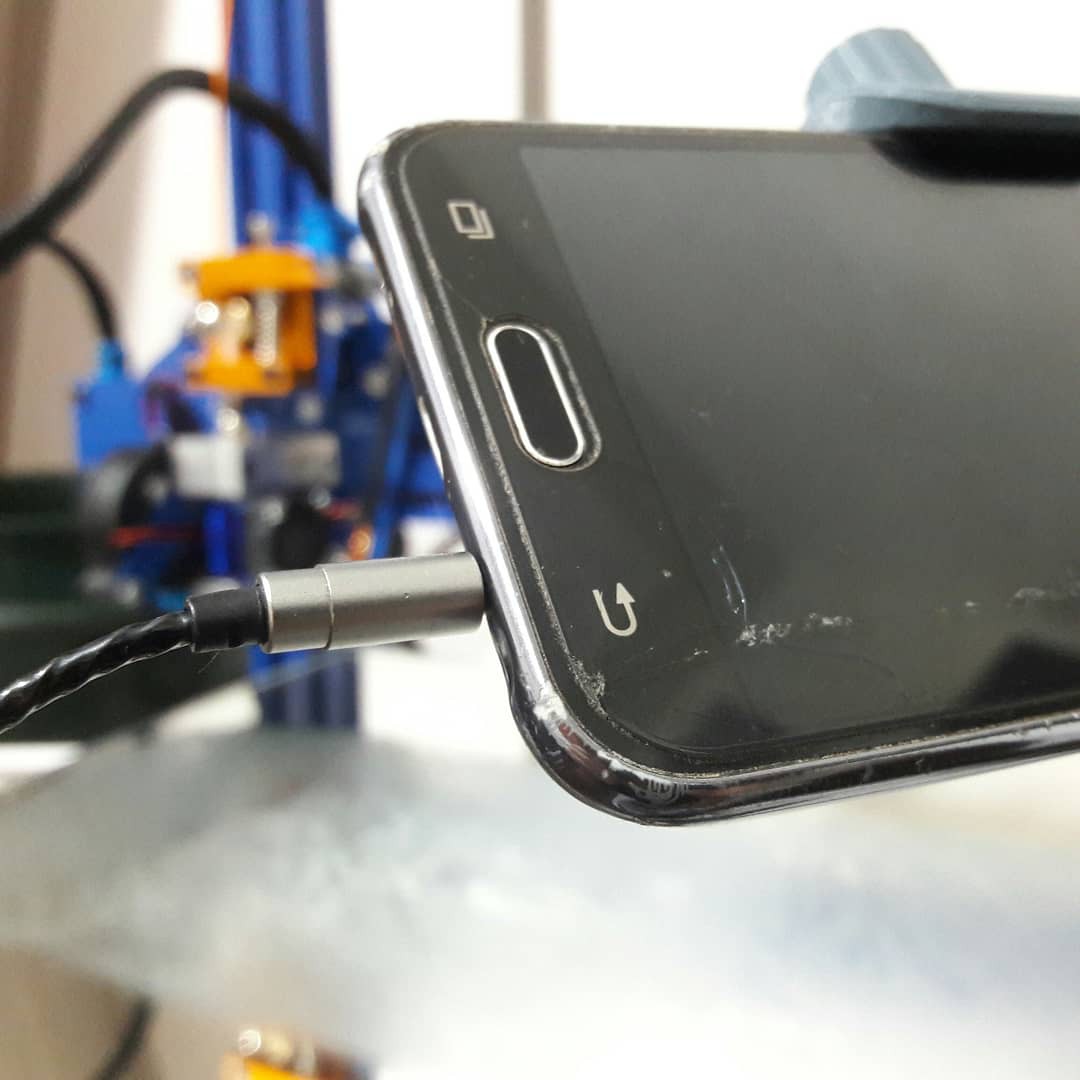
You may ask what a handsfree has to do with a 3D printing time laps, well, I used it as a way to trigger the phone camera.

 In the camera app settings in your phone, you should see an option which can set the function of the phone volume buttons in the camera app, which you can set it to take photos. Now this means that whenever you push the volume button of you phone while you're in the camera app, it will take a picture!

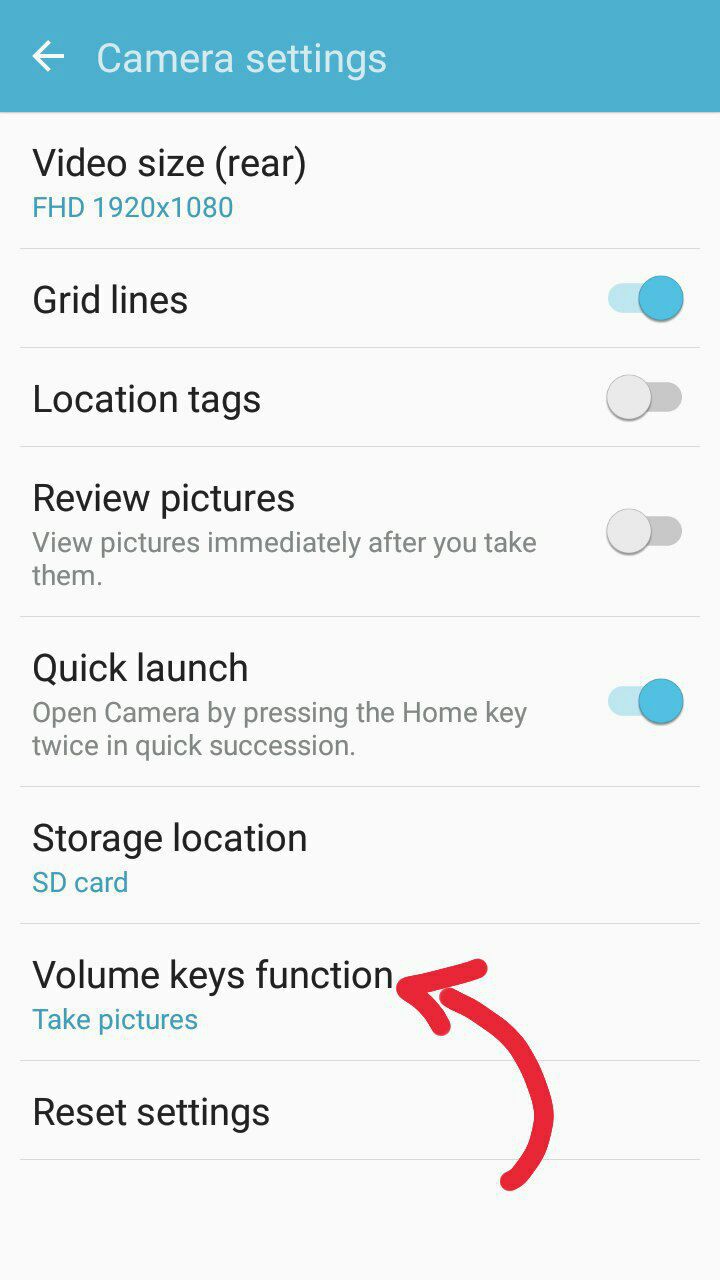
and thats all you need, that's the key to those eye catching time lapses which the print will grow up out of nowhere.


Making the Remote Trigger

So now you get the concept, the idea is to use a handsfree PCB as the remote trigger for the camera. for this, you'll need a handsfree with volume control buttons, thats essential. 

Then you just take out one of the volume control buttons on the headphone PCB and replace it with a micro switch (everything explained in instructions section). Now you have a wired remote trigger.

Note: You only need this if your using a smart phone as your camera, if you have a DSLR camera you can use its own remote trigger.
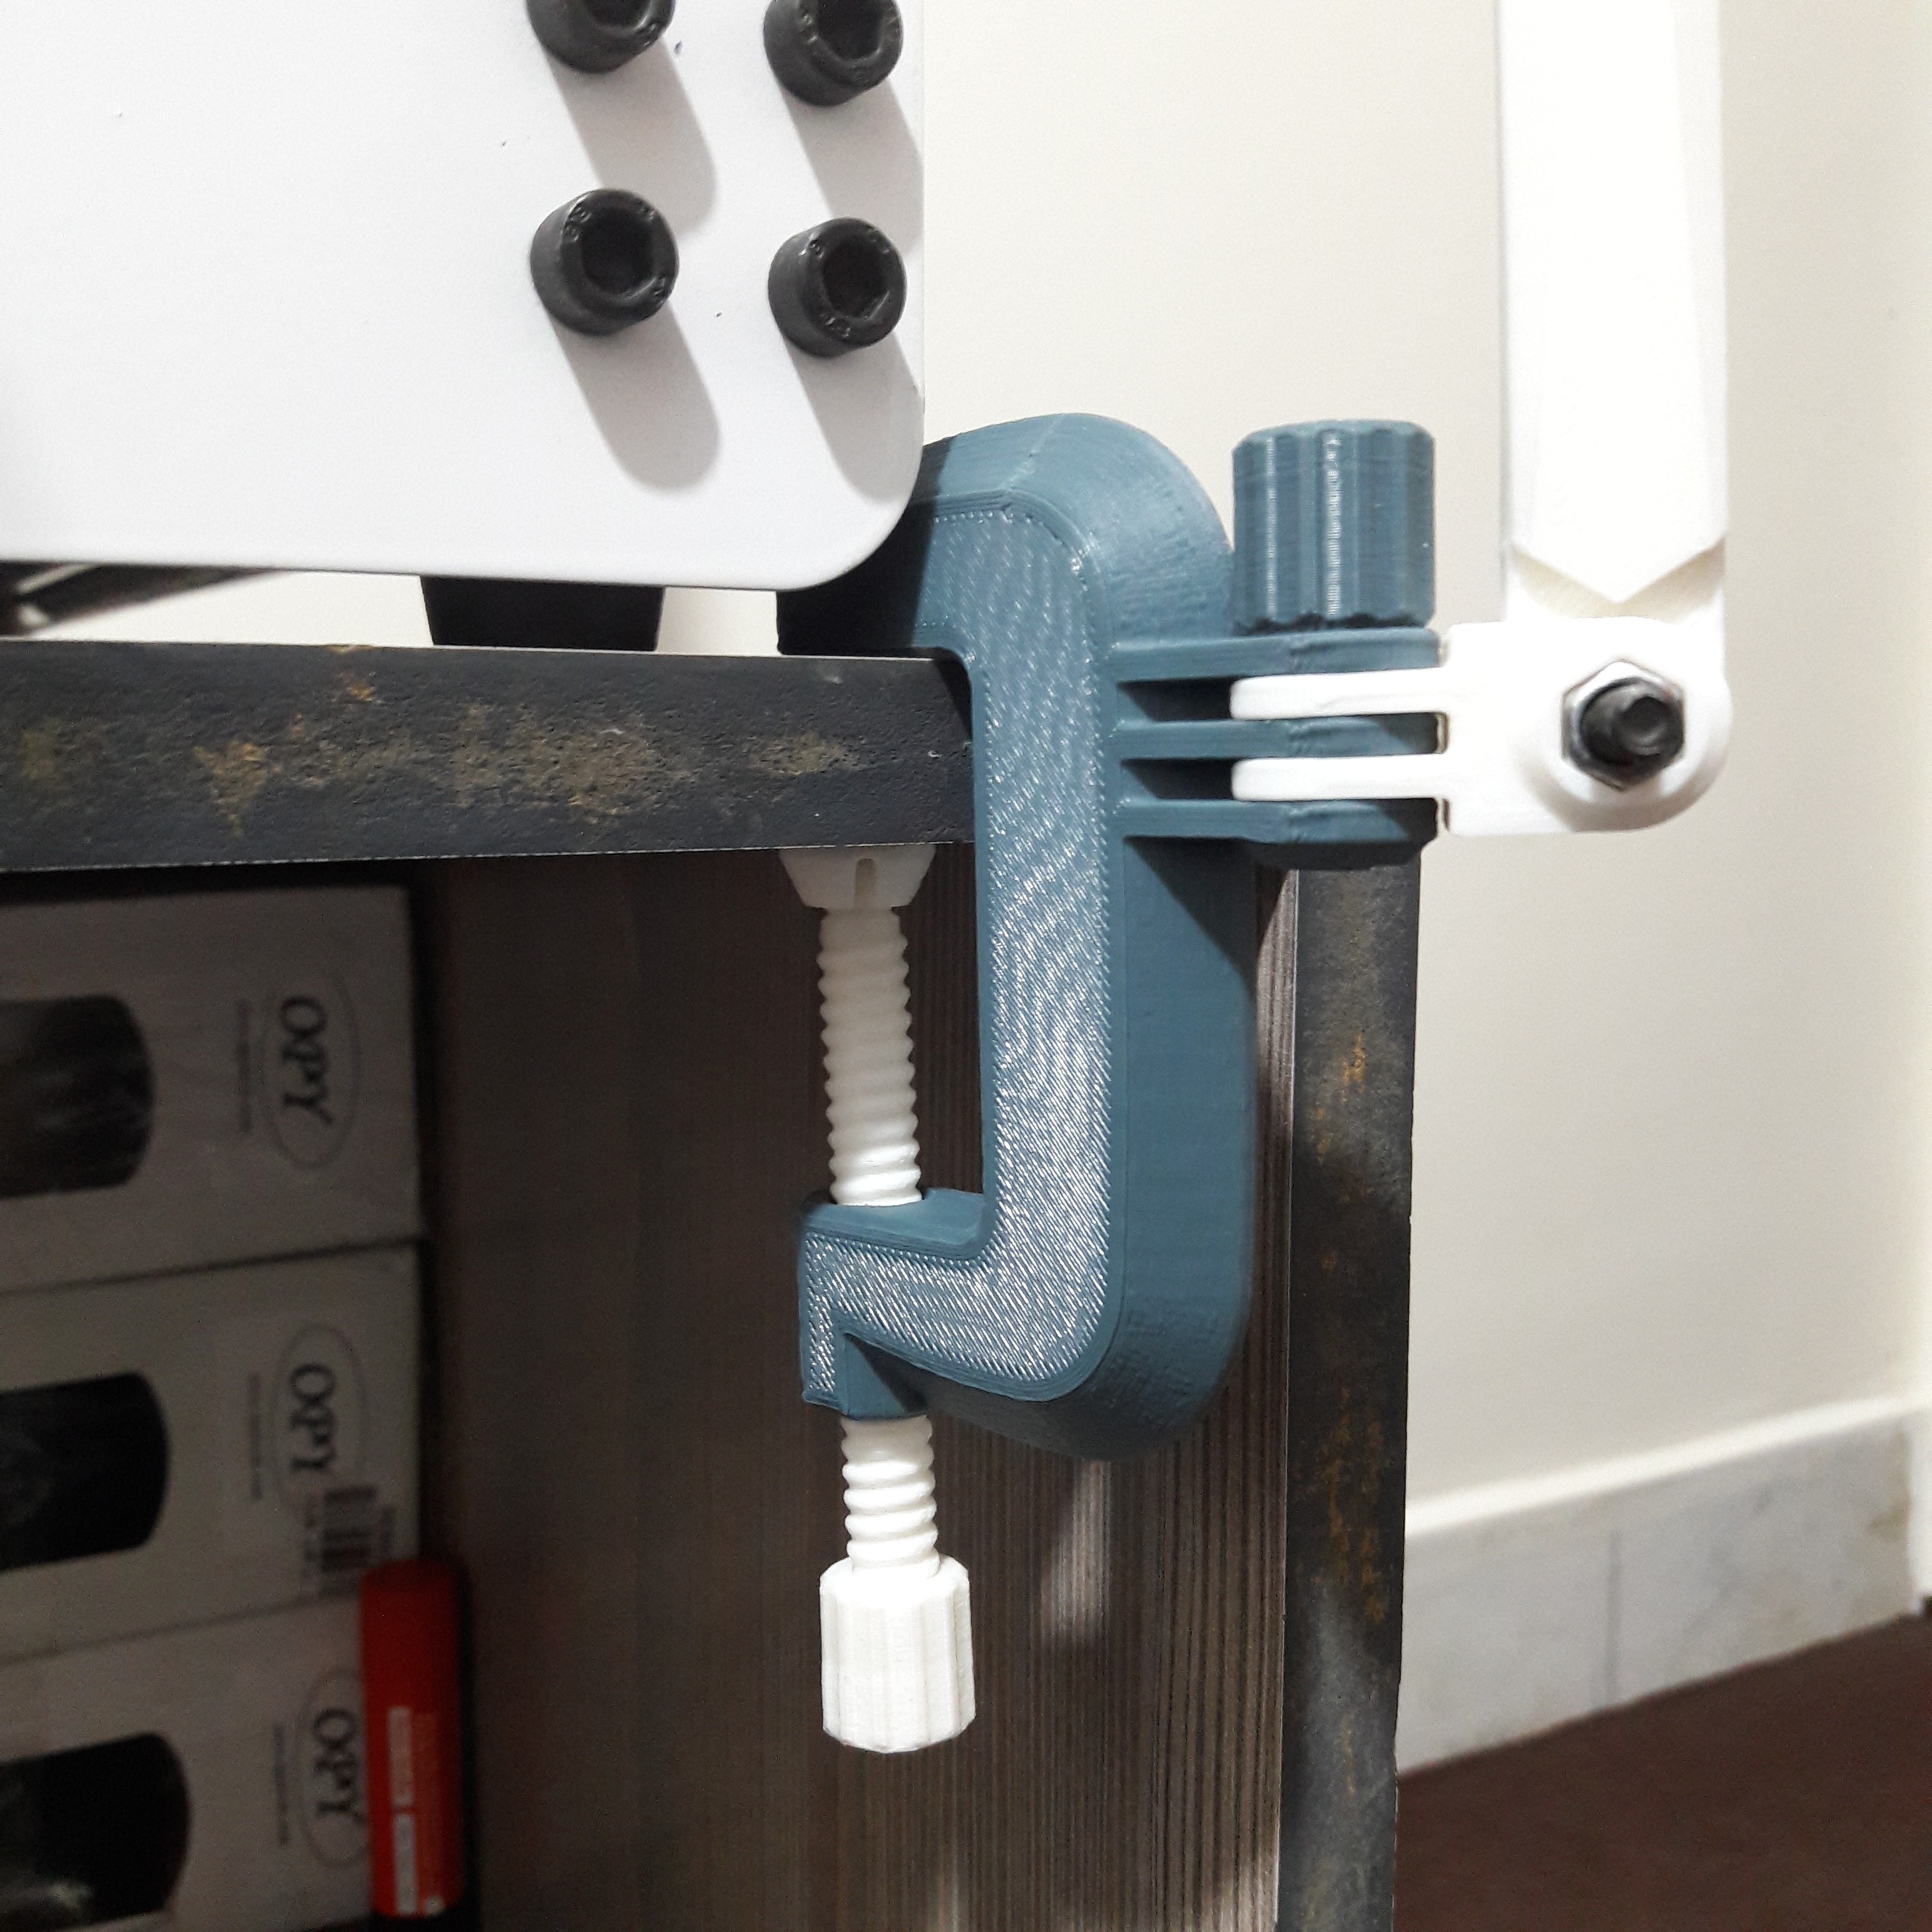
Placing the Remote Trigger

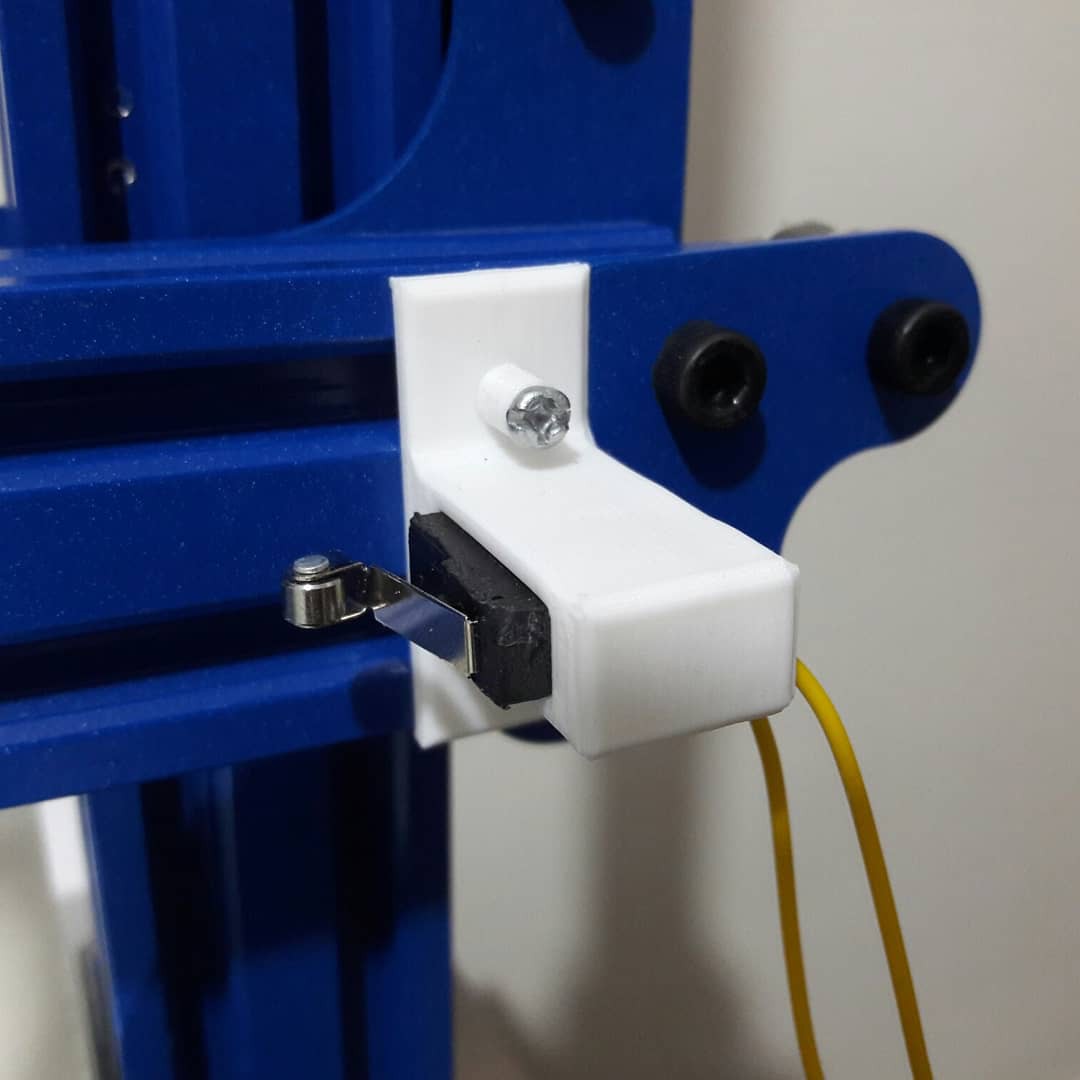
After making the remote trigger, you should place the micro switch on the X axis of your 3D printer, or wherever that moves up and down with the print head of your machine.

For me, I just placed it at the very end of the X axis V slot.

Note: you cant use Y axis if the Y axis of your printer is your print bed, like Ender 3 or CR10 for example.
G-Code Modification

You need to make your printer pause the print after each layer, move up the Z axis a bit, move the Y axis to anywhere that you like it to be for taking the picture, then move the X axis to the micro switch and slightly press it.
In Cura slicer, I made this possible using a costume configuration called "Costume time laps".
Here is the link to its Github page:

https://github.com/simonjamain/CustomTimelapseCuraPlugin

You can find a step-by-step instruction for making this upgrade in the instructions section

Micro switch holder v 1.1.STL

Microswitch holder STL file. For the Microswitch shown in the pictures and to be mounted on 20*40mm V-Slot.

Standard Tesselated Geometry - 22.93 kB - 04/24/2021 at 07:34

Download

Modular Mounting System.zip

The phone mount shown in the pictures. Thingiverse link: https://www.thingiverse.com/thing:2194278

x-zip-compressed - 12.91 MB - 04/24/2021 at 07:41

Download

Micro switch holder.SLDPRT

Microswitch Solidworks part, if you wanted to edit it for yourself

sldprt - 149.94 kB - 04/24/2021 at 07:34

Download

Spacer.STL

A tiny spacer in different sizes (4, 5, 6, and 7mm) for M3 screws.

Standard Tesselated Geometry - 77.43 kB - 04/24/2021 at 07:34

Download

Spacer.SLDPRT

The spacer Solidworks part.

sldprt - 81.02 kB - 04/24/2021 at 07:34

Download

View all 6 files

  • 1 × KW-11 Micro Switch A micro switch with a smale roller on its arm thingy
  • 1 × Micro Switch holder A 3D printed part to hold the micro switch on the X axis of the 3D printer
  • 1 × 0.15mm Wire Just as much as you need
  • 1 × Handsfree circuit board This is essential if you are going to use a smart phone as the camera
  • 1 × Tripod Just to hold your camera/phone

View all 7 components

  • Second Test

    setCREATE04/25/2021 at 20:19 0 comments

    Today I tested the time laps upgrade for the second time and it made a huge difference comparing to the last one. here's the link to the video:

    https://www.instagram.com/p/COFjK4CAYnM/?igshid=1dx568k5vz3wr

    Must of the previous problems are solved, there is a bit of vibration which is caused by a miscalculation from me, I positioned the phone angle a bit low and at the end, the top part of the print would be out of the frame, so I tried to fix that mid-print, which worked but made that shake.

    Also, I downloaded an app called Open Camera from google play, which has an option to lock the focus and exposure of the camera and also prevents the camera from closing itself.

    All and all, I'm happy with the results, but I believe the third test that I did tonight will be even better. I'll share a log as soon as I edited the video.

  • First Try Results

    setCREATE04/23/2021 at 21:48 0 comments

    Today I tested the time-laps feature for the first time. the video below is the final result.

    (sorry Im reale tired to upload a video on YT rn, its 2am, so I just share a link to the video on Instagram)

    https://www.instagram.com/p/COBNvK_LL4X/?igshid=1o4ct1o8tplpe

    As you can see, the time laps is not good at all, which means it needs some modifications.

    First of all, the lighting.

    As you can see the lighting is really bad and it changes constantly. a small part of it is caused by me walking in my room and blocking the light, but the major part is caused by the phone not being able to focus at the right spot and change the scene saturation at the right time. the first part can be solved easily with a constant source of light on the subject.

    But the second part is a bit difficult. it needs to be fixed in both software and hardware. for the hardware fix, I need to mess with the phone camera settings a bit, which is hard because my old Galaxy J7 doesn't give me a lot of options in the camera app... but the G-Code mod should be easier, I need to add a dely before taking the picture so the camera will have enough time to correct the scene lighting.

    The second annoying thing about the footageis the camera moving. I placed the camera mount on the same desk that the printer is sitting on, leading to the mount shaking.

     all I have to do is to place it on the ground or to an another desk.

    The third problem, is the focus. This part is kinda out of focus in the footage and I dont like it. this can also be fixed within the G-Code.

    And the fourth and the most important one is the camera turning off. It seems like that all Samsung phones, have a feature/problem that the camera app will close itself automatically after a minute or so of inactivity. I dont have any idea of how to fix it rn, I'll be happy if anyone  could help me.

View all 2 project logs

  • 1
    Making the Remote Trigger
    1. Take a handsfree with volume control keys, like this one:
    2. Open the PCB cover
    3. Desolder one of the volume control push buttons
    4. Solder a pair of wire to the pads on the PCB
    5. solder the other head of the wires to the COM and NO contacts of the micro switch
  • 2
    Print the Microswith Holder

    Download the microswitch holder STL file from the files section and print it.

  • 3
    Print the T nut M3 V-slot nuts
    1. Download the microswitch holder STL file from the files section and print a few of them.
    2. Insert an M3 nut in it.

View all 12 instructions

Enjoy this project?

Share

Discussions

Similar Projects

Does this project spark your interest?

Become a member to follow this project and never miss any updates