 Fabian
pxlBlck is a basis for a smartHome indication system. Several software and Hardware options are available. Thanks to the ESPEasy interface the devices can be automated wihtout the need of external automation-software. In combination with external automation-software (e.g. NodeRed, MQTT server) it is also possible to display several notifications like doorbell, social media notifications (e.g whatsapp, facebook, ...), call notifications on mobile and landline, etc.
Every pxlBlck can be eqipped with several sensors. So it is also possible to measure different environment data, forward this data via wifi and/or react to this measured data.
Short overview:
- System for displaying notifications in the SmartHome
- Software is based on an ESPEasy plugin
- Runs on an ESP8266 or ESP32
- Display of notifications via an LED matrix and/or sound module
- Various LED matrices supported
- Different animations can be displayed
- Can also be used as a basis for various sensors in the SmartHome
- Display of user-defined icons possible
- Display of time is possible during "standBy"
More detailed overview here: https://nerdiy.de/en/pxlblck/
Future goals:
In the following I would like to list and explain a few of the future goals for my pxlBlck project.
- Simplify structure
I would like to create an app so that the construction and, above all, the programming and configuration of the pxlBlck's is easier. It should be able to program and configure the pxBlck easily. In the ideal case even without the need of a computer. - Implement features for people with hearing impairments
At this point I would like to be honest that I did not have this use case as my goal from the very beginning. But during the development, I noticed that the pxlBlck's can also be used as an optical notification device. Especially people with hearing impairments are unable to hear, for example, the doorbell or the phone ringing. A pxlBlck in every room or in special places could indicate these events optically. As an alternative to commercial systems, I would like to equip the pxlBlck system with these features. - GroupWare status display
Due to the corona pandemic, I (like probably many others) was confronted with the challenges of the home office. Online meetings quickly became part of everyday life and of course the day came when I sat in silence at my desk with the microphone activated and my girlfriend walked into the room talking. By the time I deactivated my microphone, my work colleagues had of course heard the first sentences. Not a big problem in itself, of course, but later we joked that something like an "on-air" display could be usefull to avoid such situations. Like a tiny display that signals when you are in a meeting. Only later I thought, "Wait a minute, something like that can also be made possible with the pxlBlcks. All that is needed is a little bit of software that controls the pxlBlck accordingly." So I want to make this possible as well. :)
Of course, a few more challenges have to be solved before then. If you have any further ideas or suggestions, please leave me a comment. :)
History: Initially, the pxlBlck consisted of an 8x8 WS2812 aka Neopixel LED matrix (looks like a block of pixels. Hence the name :)), powered by an ESP8266 and related software.
The purpose of this was to create a simple way of keeping me up to date on the events in my SmartHome.
It kind of bothered me that I collect all kinds of data with my SmartHome, but that I rarely see this data. For example, I was informed on my smartphone when the doorbell rang. But what if I don't have my cell phone with me (directly) at the moment (which can happen at home)? (Granted: A little luxury problem for me, but for people with hearing impairments this is a real problem.)
So I was looking for an easy way to get information about current events in the SmartHome. In the ideal case, this type of "SmartHome event indicator" would also be so cheap and discreet that I can equip every room with it.
Practical side effect: You are notified of (eg.) the doorbell or a WhatsApp message even if you are listening to music, playing the guitar or using headphones. :)
In the meantime I have integrated the software component into an ESPEasy plugin. With the help of the "pxlBlck-Plugin" it is now possible to control not only the 8x8 LED matrix used at the beginning. Over time, new matrix types have been developed and added to be supported by the pxlBlck-plugin.
Here is a list of the WS2812 aka Neoopixel LED matrices that are supported so far:
- 10x10 (WIP: https://hackaday.io/project/180023-pxlblck-an-unobtrusive-home-information-display/log/193550-the-pxlblckmultipcb)
- 8x8 (https://nerdiy.de/en/howto-pxlblck-pxlblck_8x8-aufbauen/)
- 32x8 (pxlBlck_Pot: https://nerdiy.de/en/howto-pxlblck-pxlblck_pot-aufbauen/)
- 1x60 (=ringClock (https://nerdiy.de/en/howto-pxlblck-die-pxlblck_ringclock-aufbauen/),
- ringClockMini, slotClock (https://nerdiy.de/en/howto-pxlblck-pxlblck_slotclock-aufbauen/))
- pot (https://nerdiy.de/en/howto-pxlblck-pxlblck_pot-aufbauen/)
- cassetteLamp (https://nerdiy.de/en/howto-pxlblck-pxlblck_cassettelamp-aufbauen/)
Quick overview of some members of the pxlBlck family:
Each displayed pxlBlck-type is powered by the same ESPEasy Plugin. The pxlBlck-type can be set in the web-overview of Espeasy. Scroll down for more details and a small overviiew of the web configuration interface.
pxlBlck_Pot
The pxlBlck_Pot is basically a 3D printed flower planter. A 32×8 WS2812 LED matrix can be inserted into this. The whole functionality of the pxlBlck can thus be invisibly integrated into a flower pot.
The LED matrix cannot be seen when it is not switched on. The display is only visible on the outside when the LEDs are activated.
More info incl. detailed build log and material list is available here: https://nerdiy.de/en/howto-pxlblck-pxlblck_pot-aufbauen/

pxlBlck_SlotClock
The pxlBlck_SlotClock consists of a 1×60 LED matrix. It can display the time in the same way as an analog clock. The colors of the individual hands can be adjusted. Hour markers can also be displayed. This makes orientation and reading the time a little easier. :)
Animations can also be shown on the LED display to provide information about events.
More info incl. detailed build log and material list is available here: https://nerdiy.de/en/howto-pxlblck-pxlblck_slotclock-aufbauen/

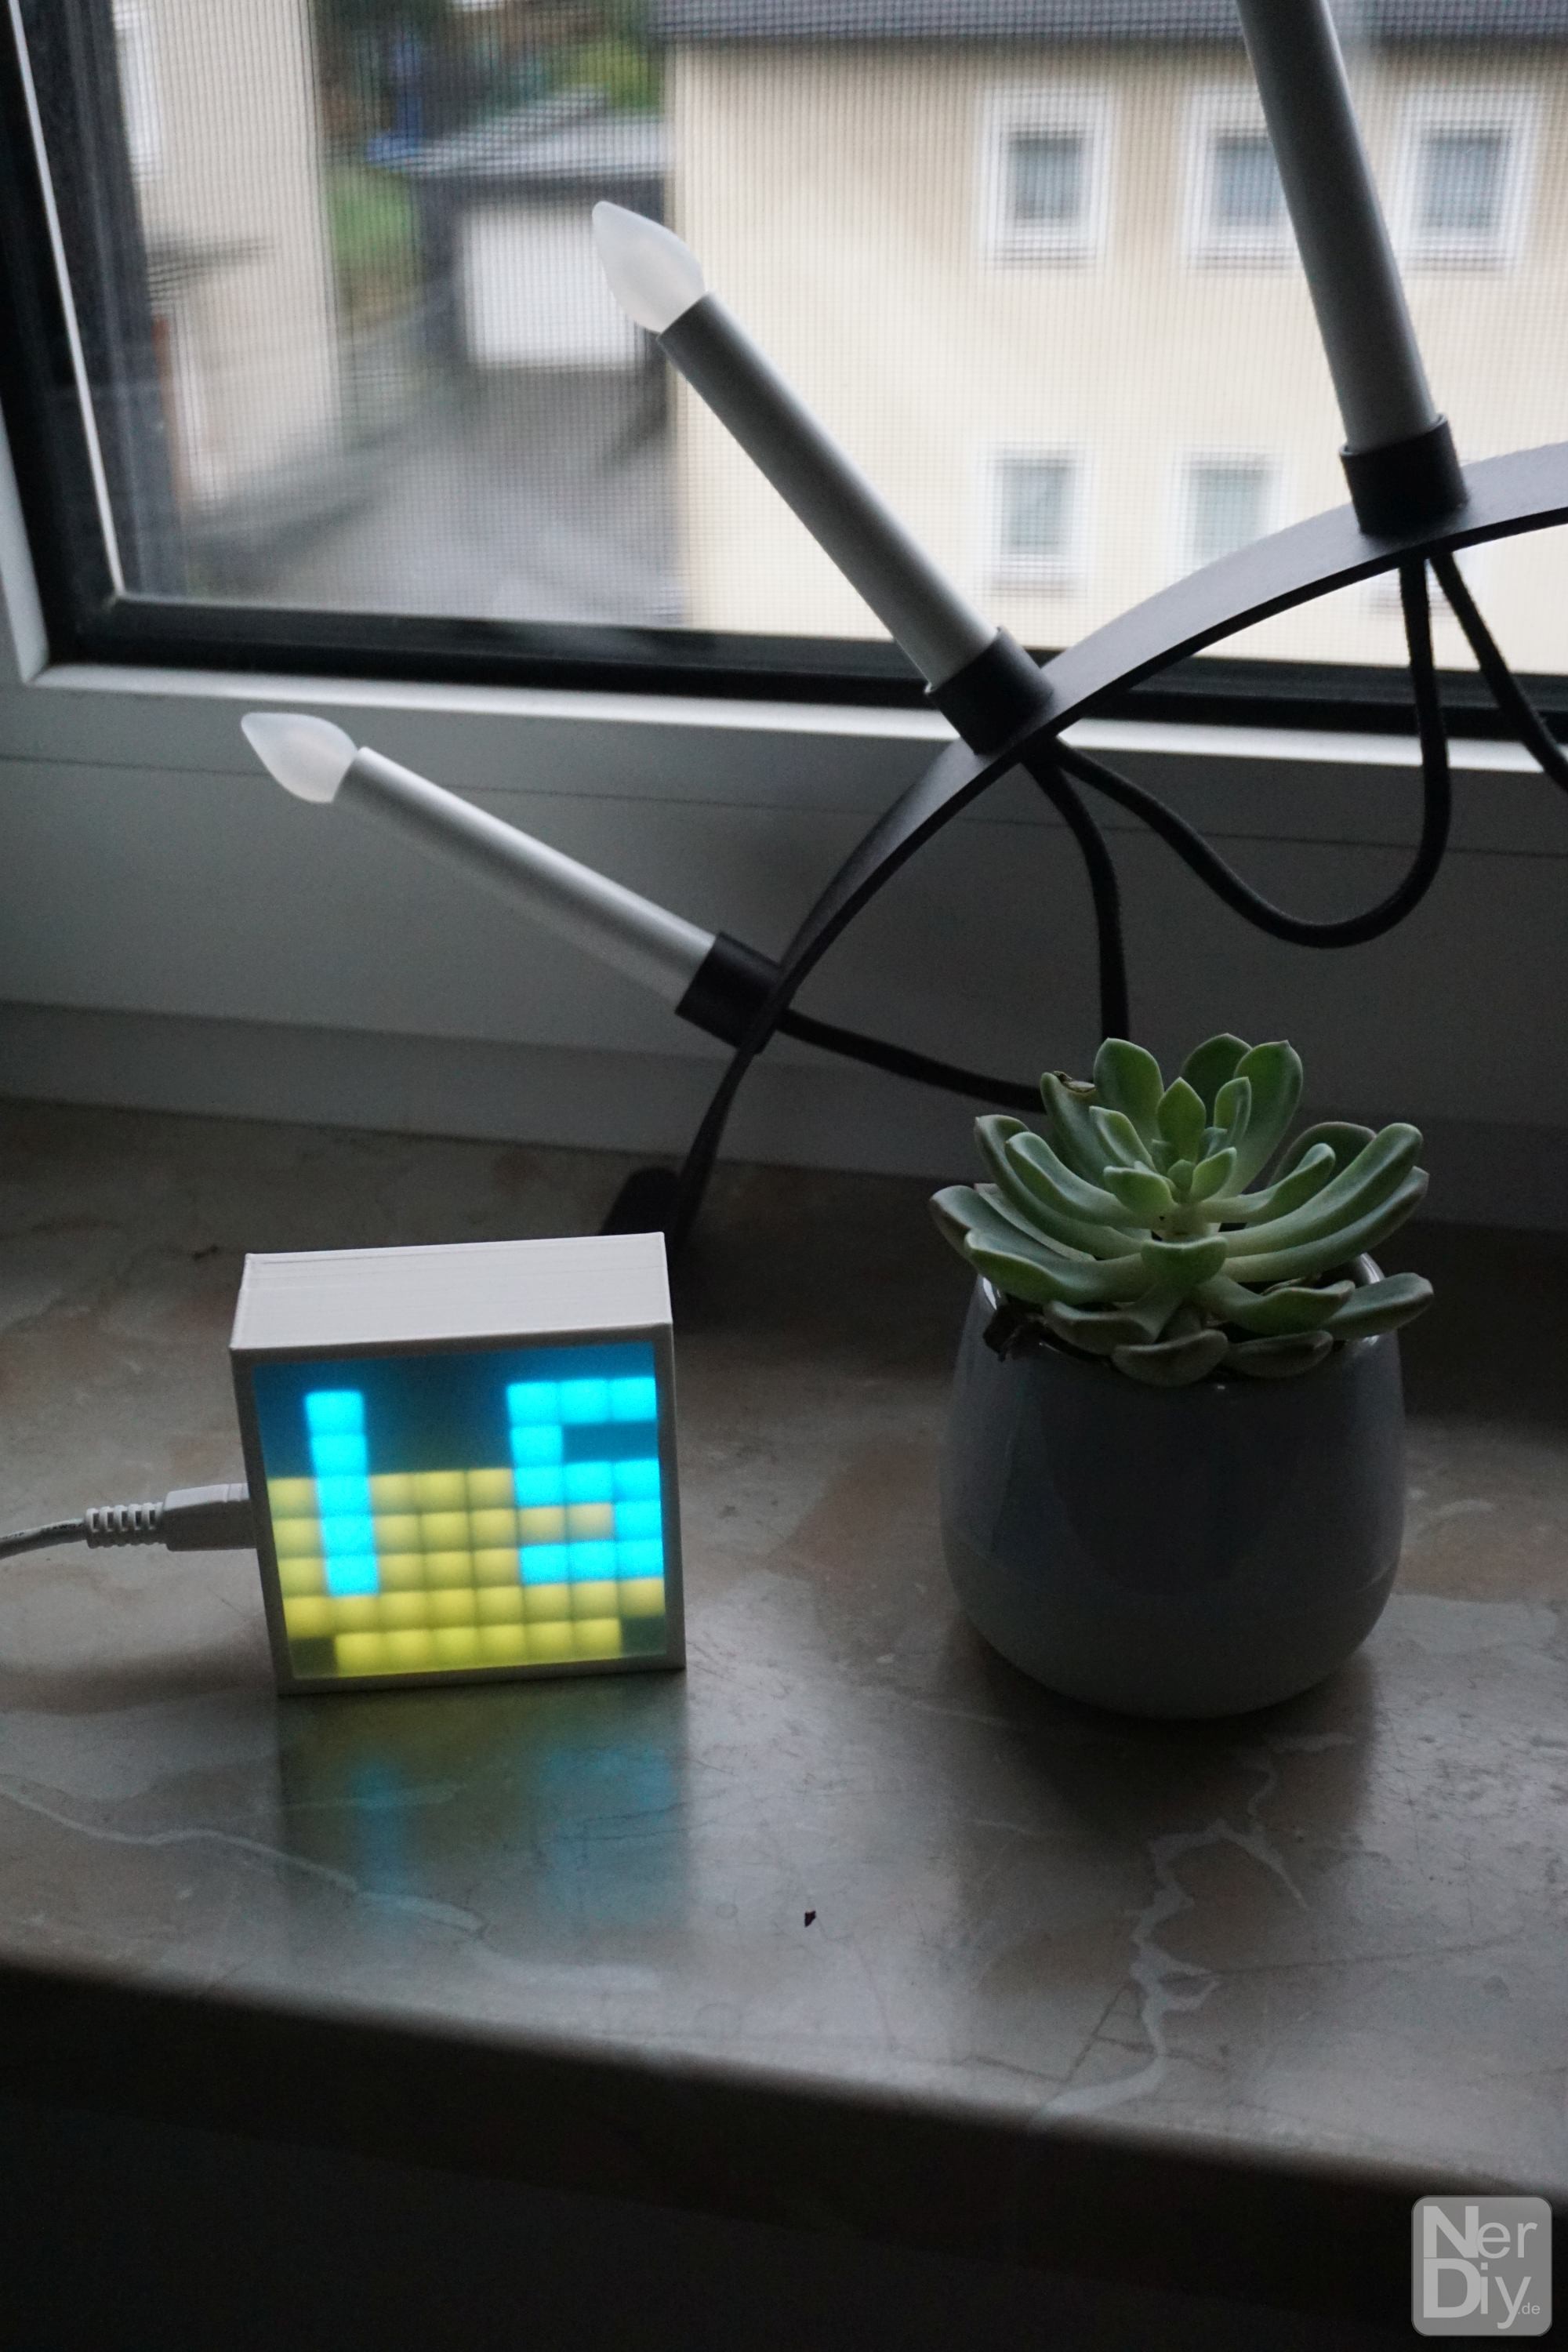
pxlBlck_8x8
The pxlBlck_8x8 uses an 8x8 WS2812 LED matrix to display icons and animations and is powered by an ESP8266 as well. So you can use the complete range of functions of ESPEasy again.
Due to the limited display resolution, it was not so easy to find a clock face with which you can show both hours and minutes simultaneously on the display. The clock face shown now shows the number of hours by means of the large visible number. The minutes are shown by means of the displayed pixels. The display consists of 8x8 = 64 pixels. So the pixels in the corners of the square are not used to display the minutes. Reading down to the minute is unfortunately not as fast / intuitive with this dial as with the dials for the larger LED matrixes, but you can at least roughly estimate how far the hour has progressed (or not). : D
If you have any other ideas for a clock face on such a small LED matrix, I look forward to your comment. :)
The full build article incl. material list ist available here: https://nerdiy.de/en/howto-pxlblck-pxlblck_8x8-aufbauen/
And of course some pictures following. :)
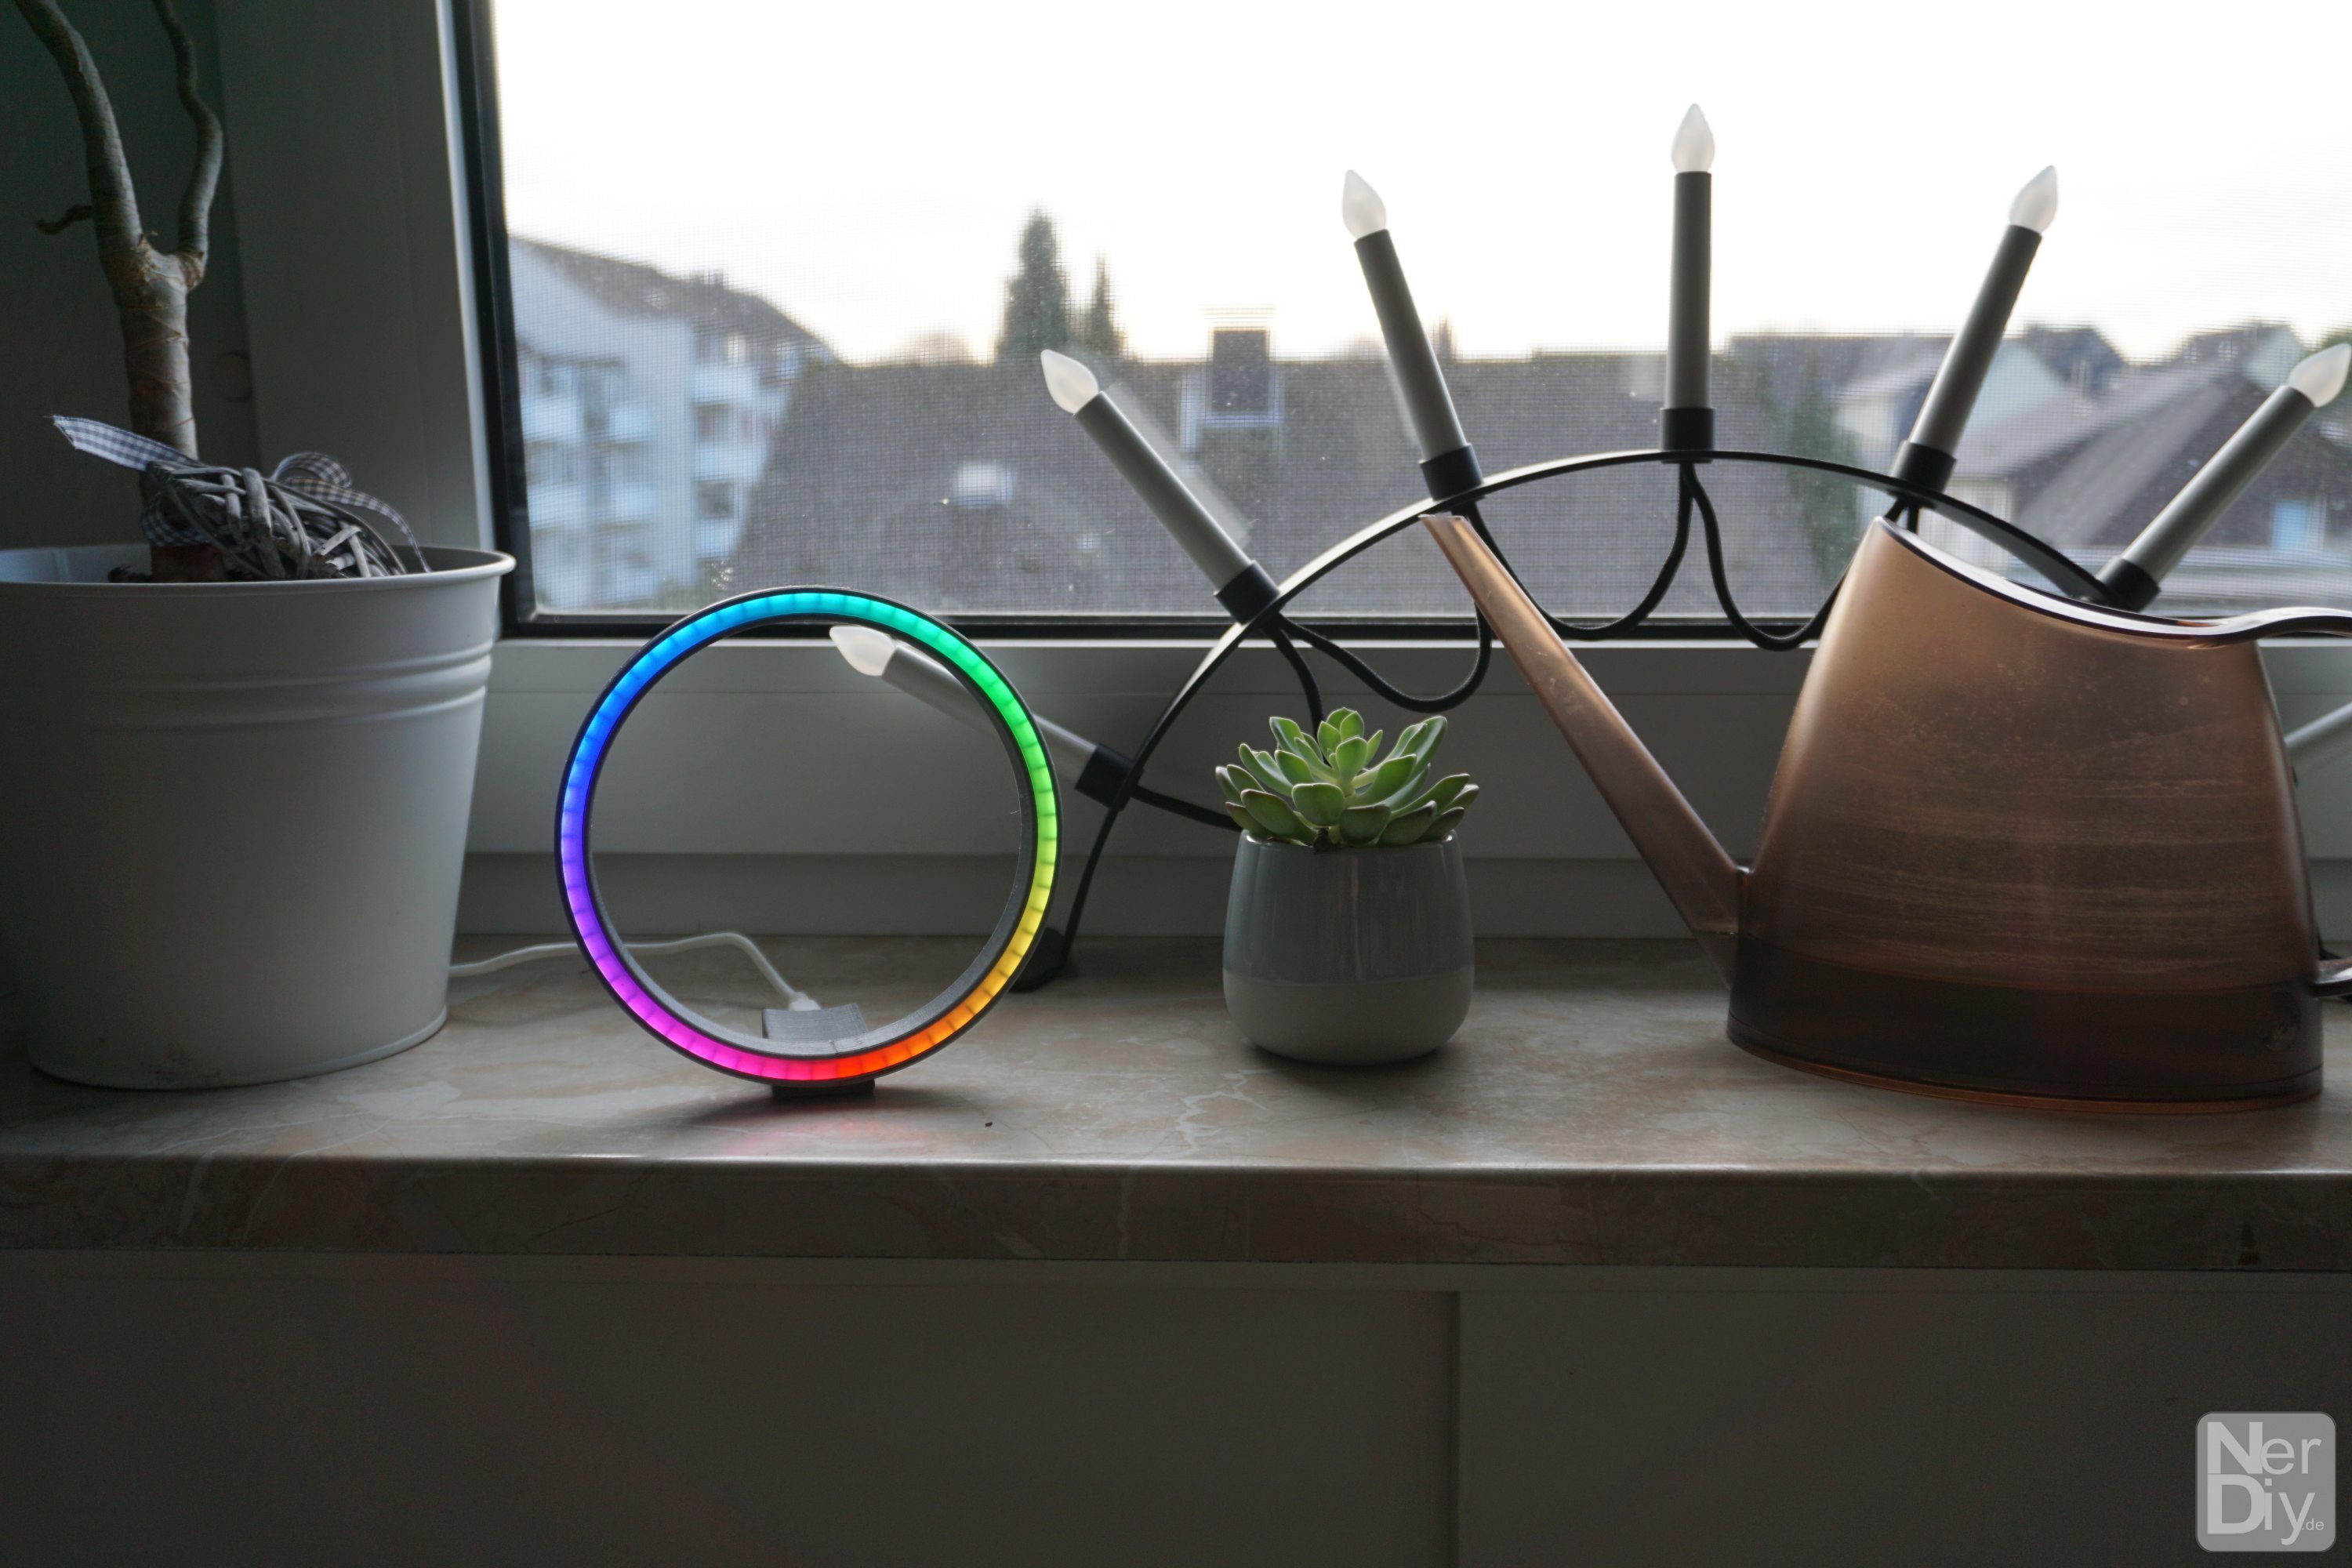
pxlBlck_RingClock
The pxlBlck_RingClock is very similar to the pxlBlck_SlotClock. Only that the frame is a little more filigree. There is also the option to integrate an RTC in the housing of the RingClock. So the clock-functionality can also be used without a time source via NTP. :)
Build article is available here: https://nerdiy.de/en/howto-pxlblck-die-pxlblck_ringclock-aufbauen/
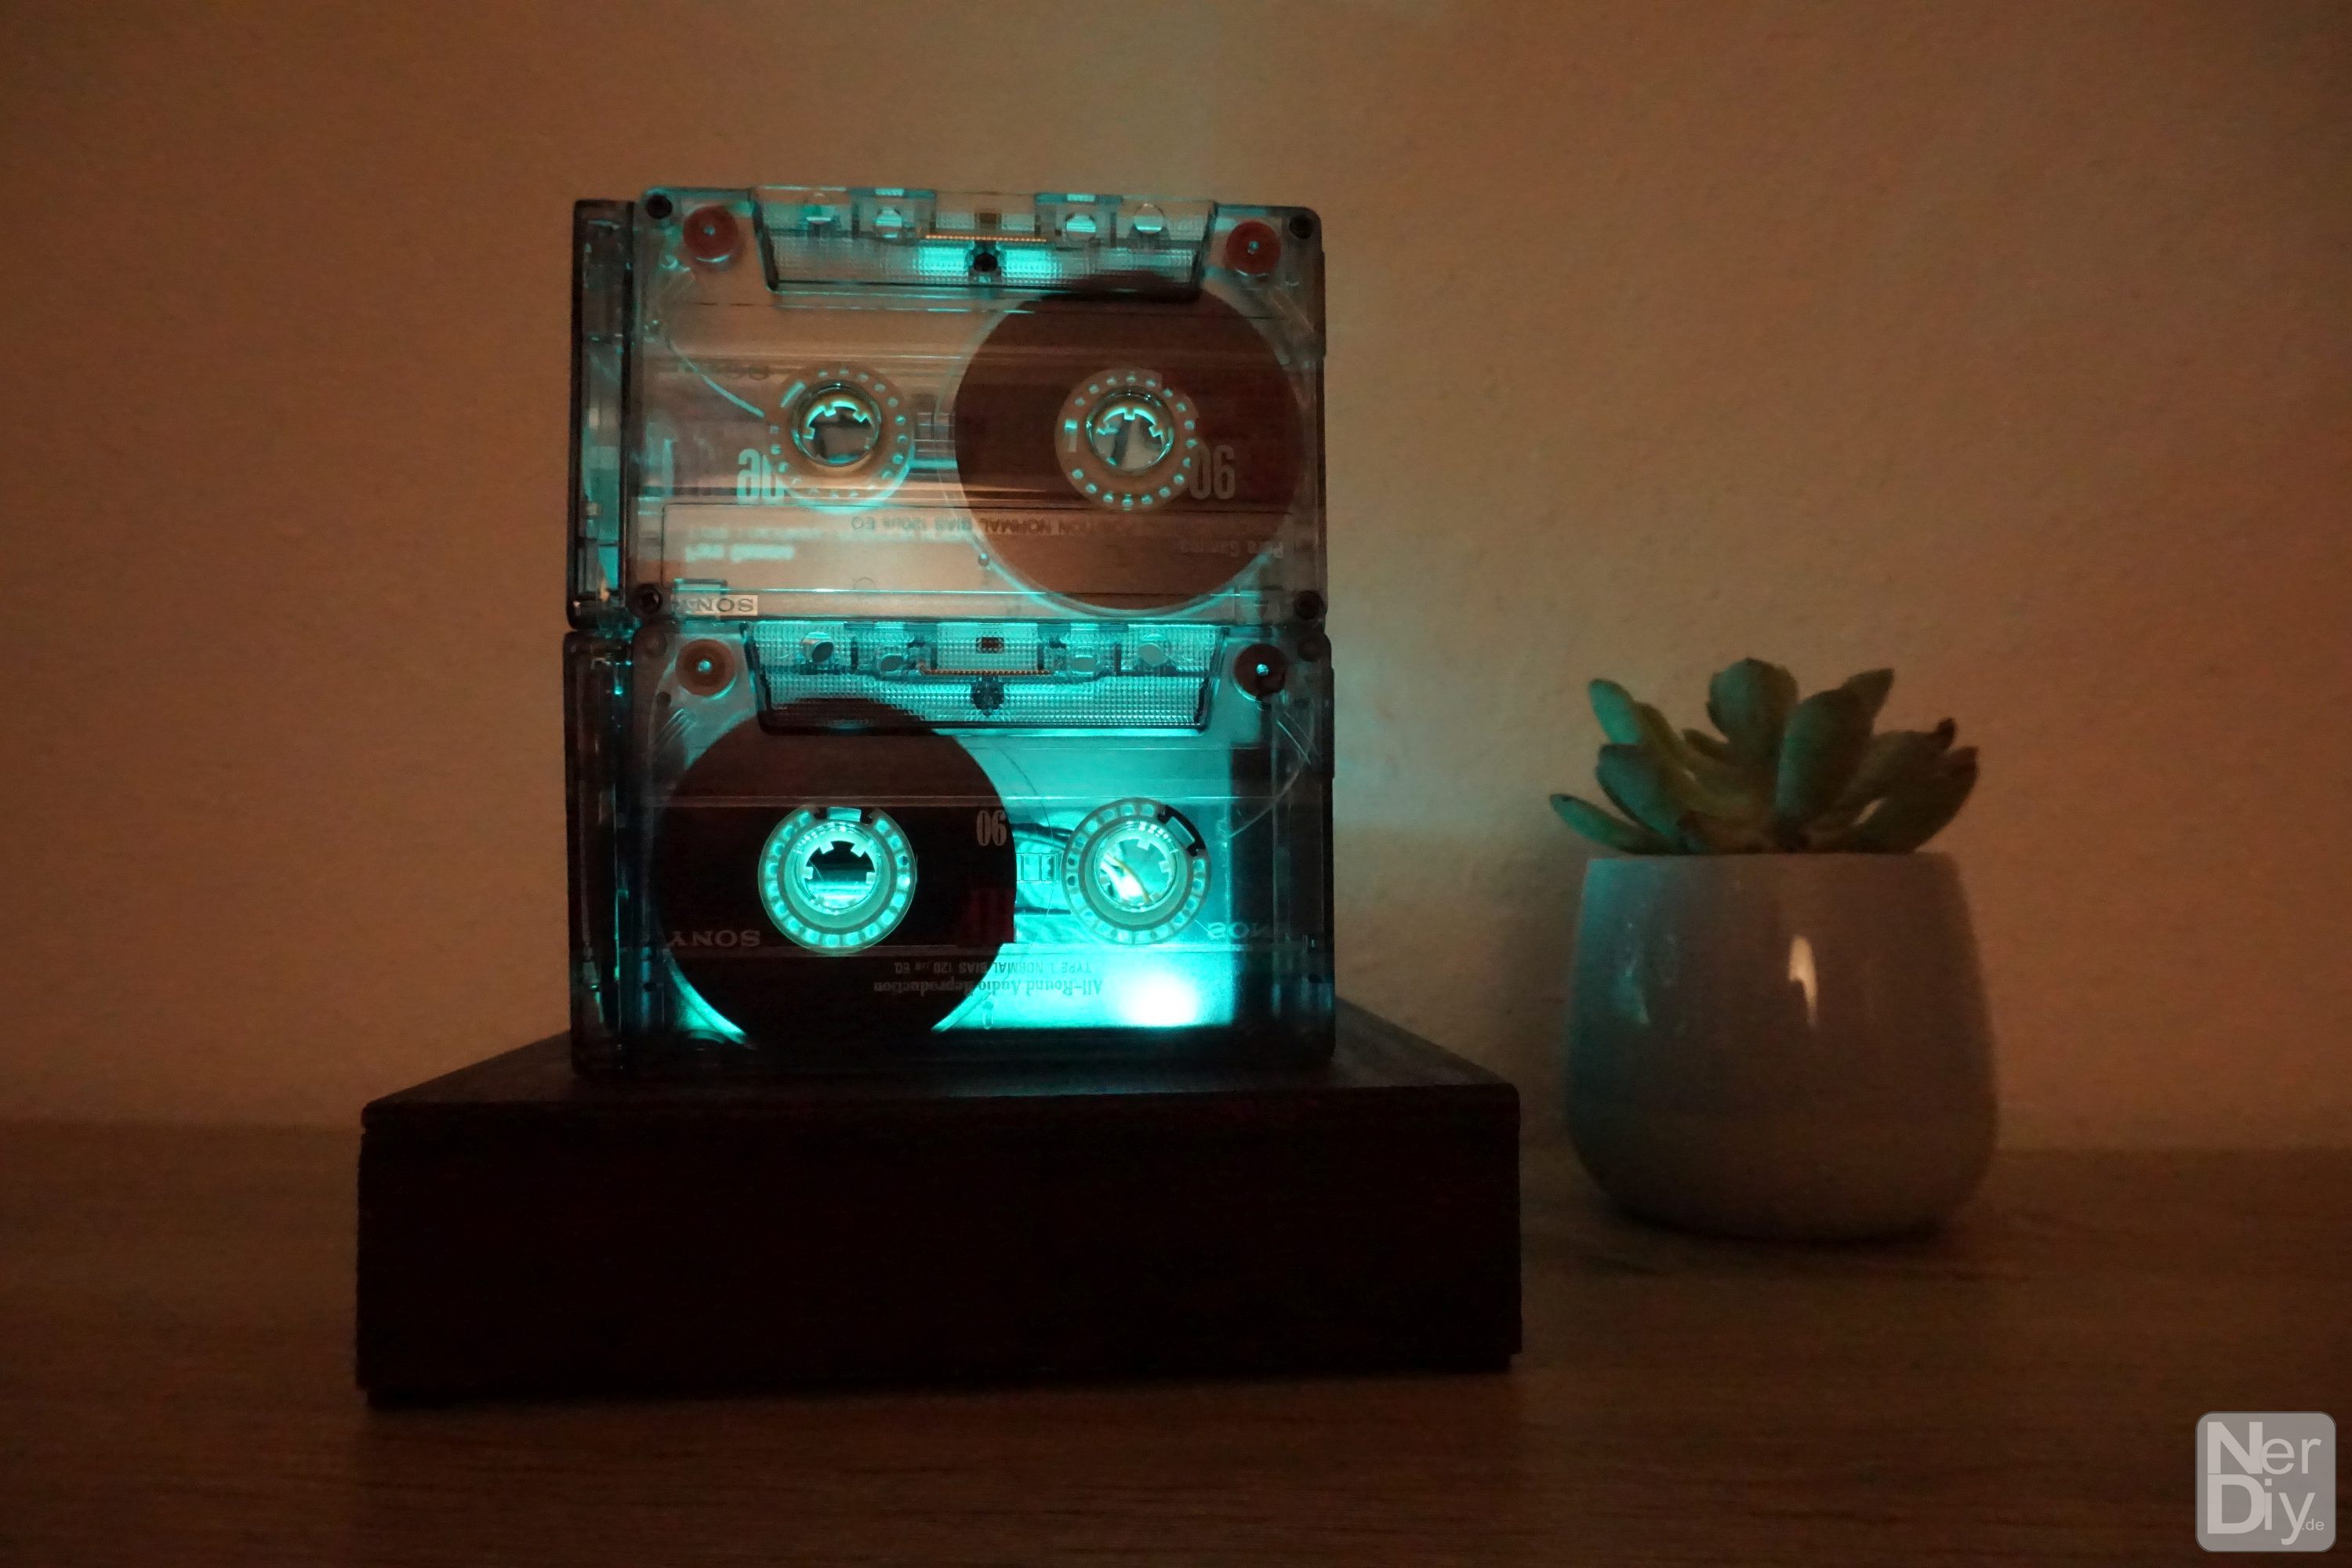
pxlBlck_CassetteLamp
The pxlBlck_CassetteLamp is another platform that is also based on the pxlBlck plugin.
The plug-in controls the 32 LEDs long LED strip that is built into the lamp. So of course no icons can be displayed for it, but the usual animations. :)
More infos are available here: https://nerdiy.de/en/howto-pxlblck-pxlblck_cassettelamp-aufbauen/ or here:https://hackaday.io/project/178225-pxlblckcassettelamp or in the video and pictures below. :)
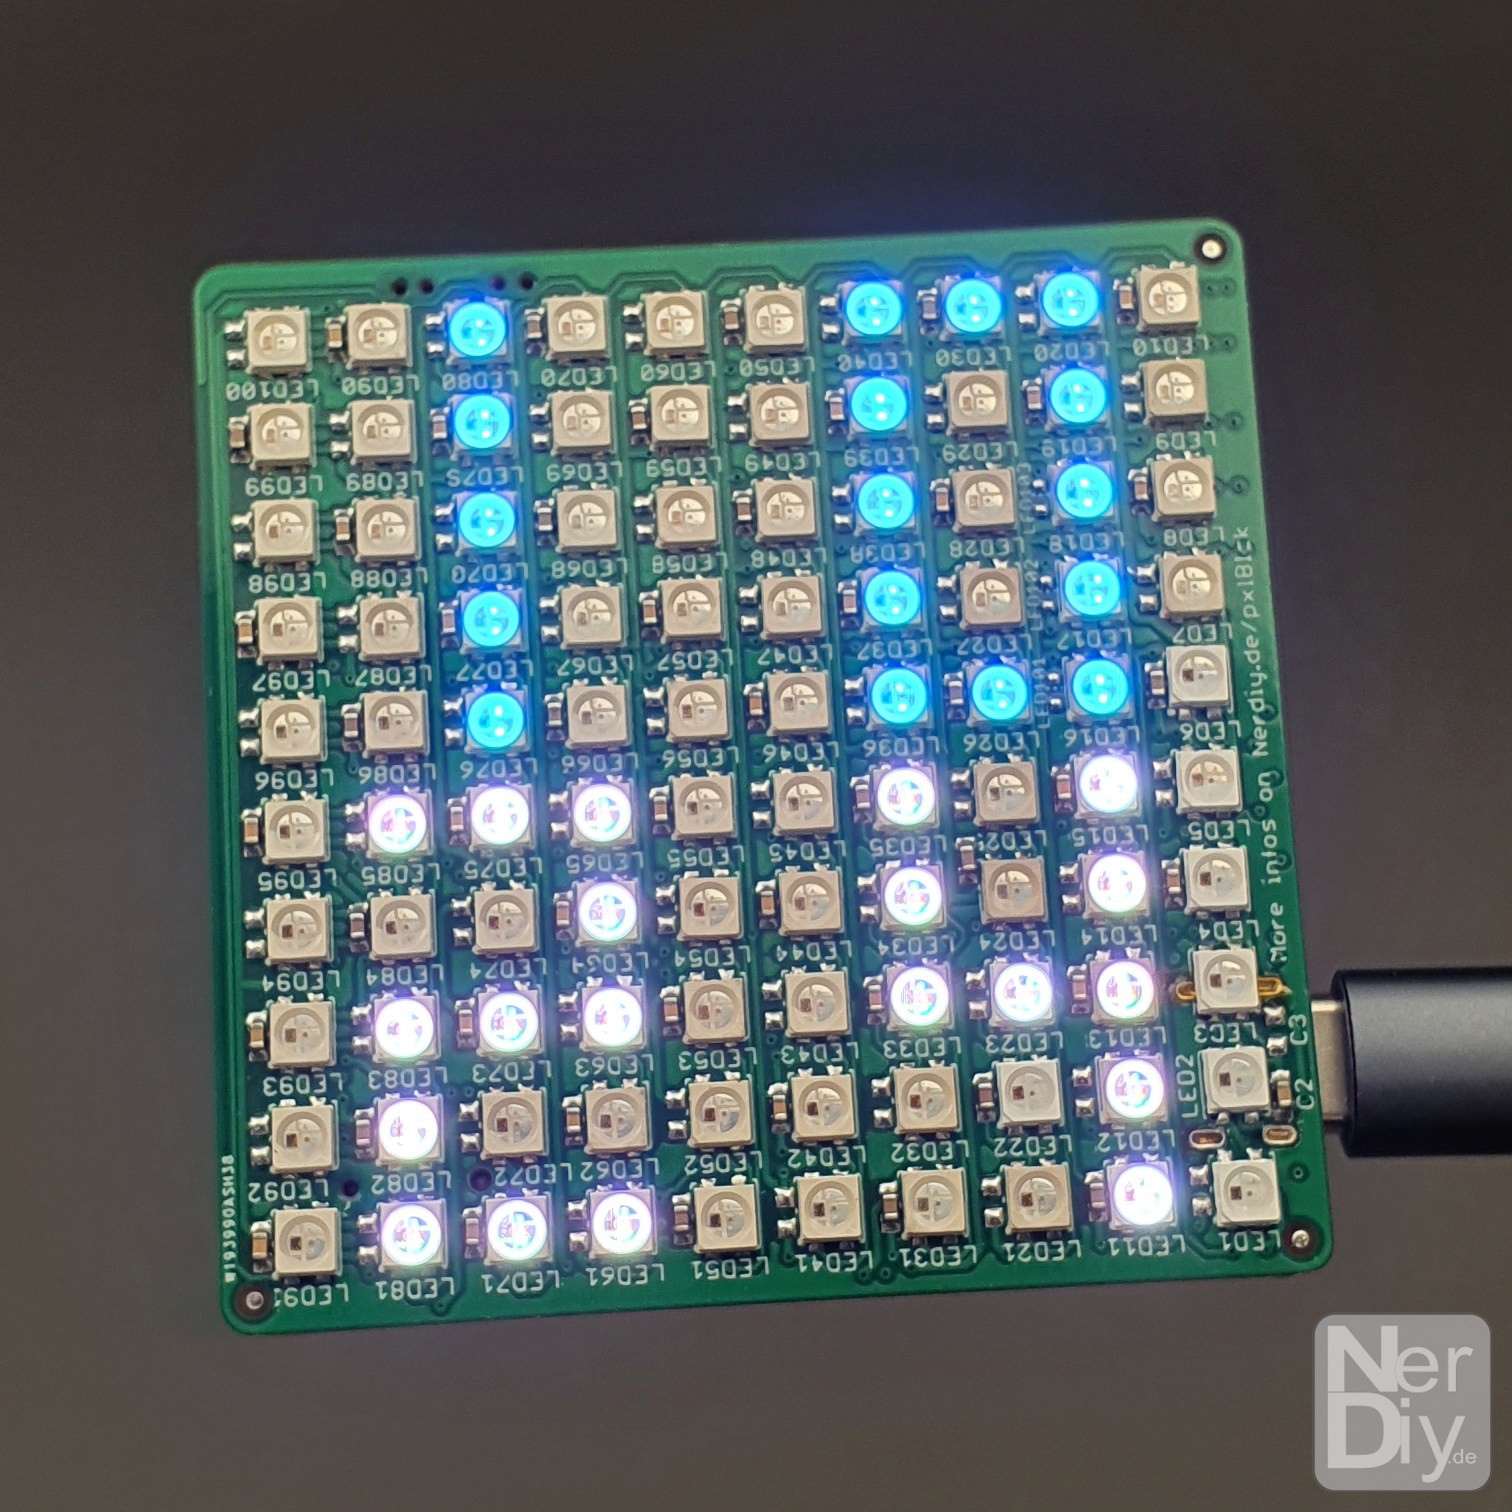
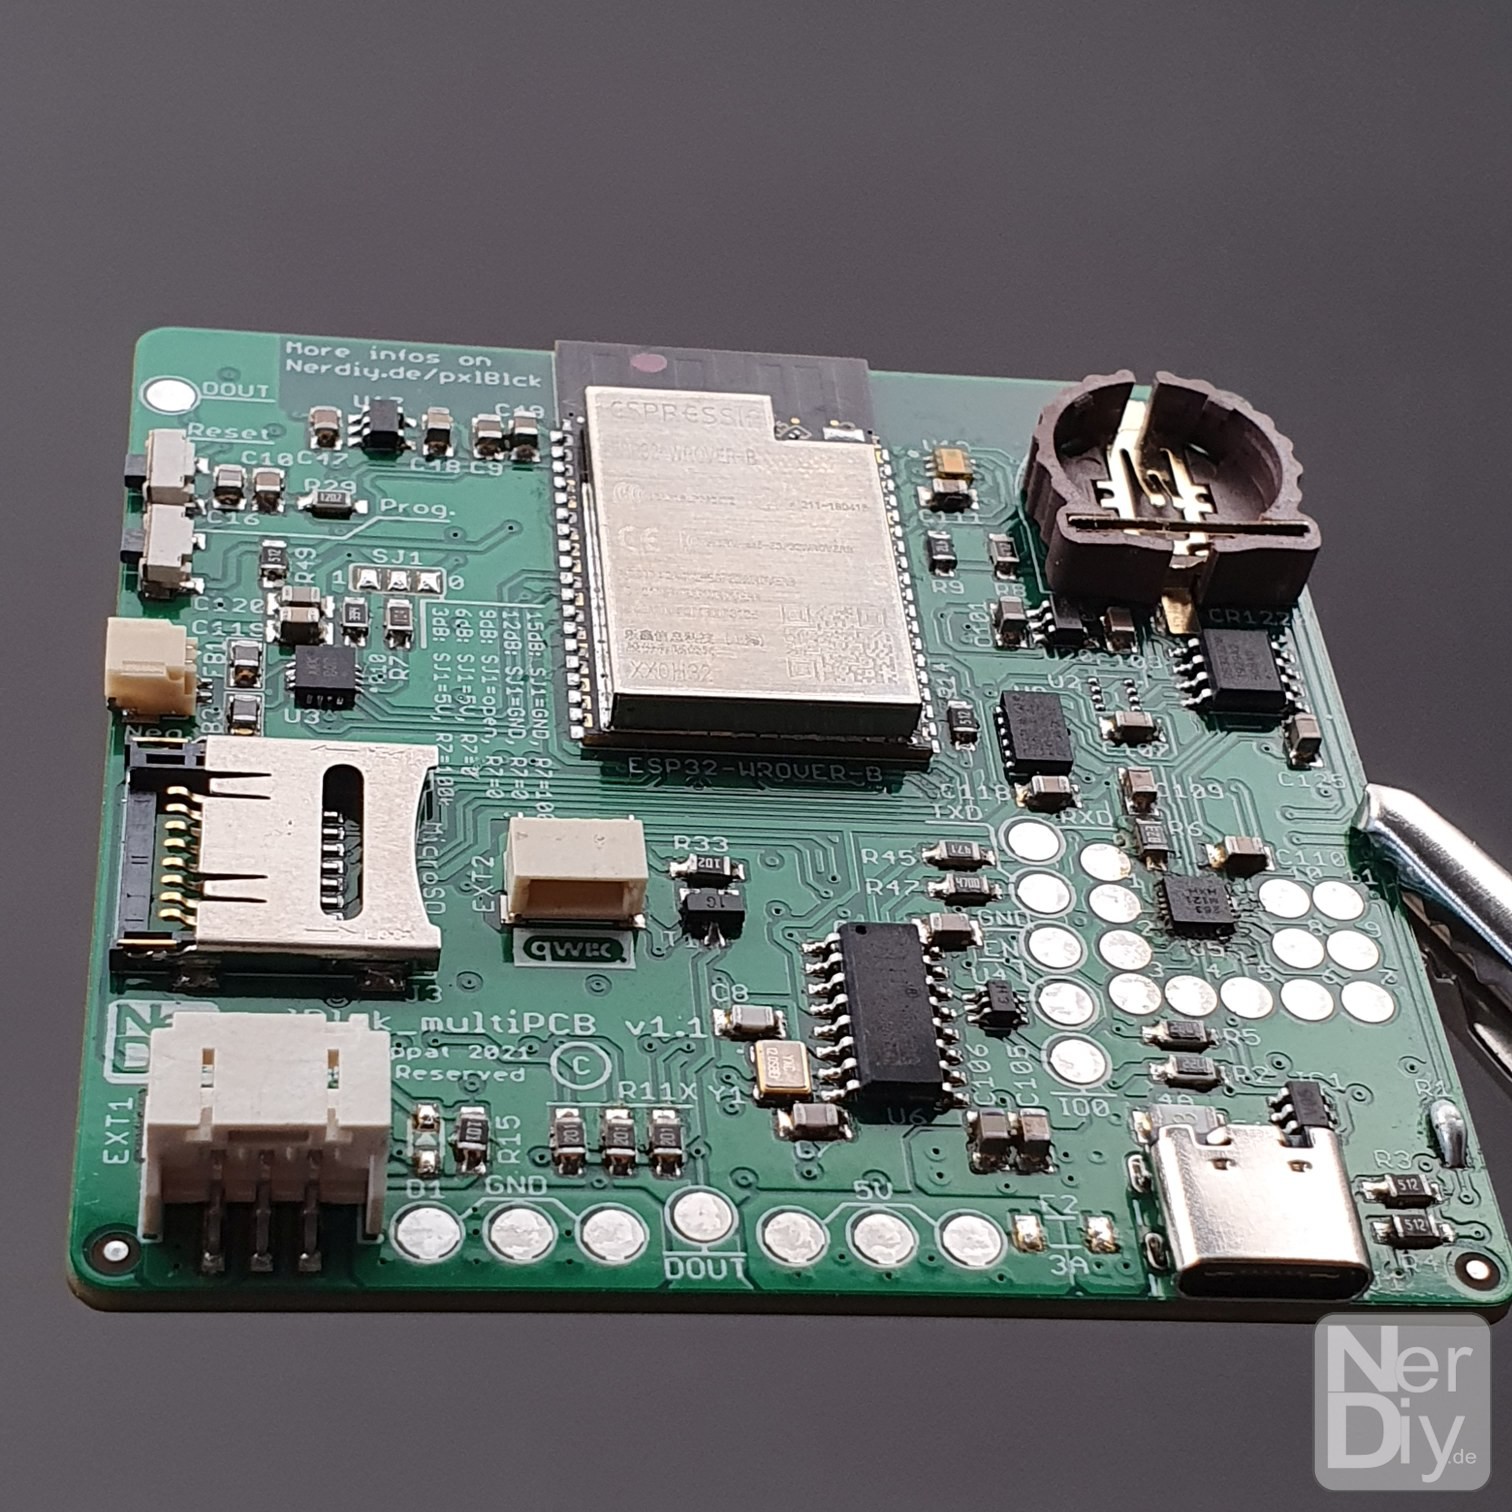
pxlBlck_multiPCB
With the pxlBlck_multiPCB I try to accommodate the pxlBlck typical functions on a compact PCB.
For this purpose, a 10x10 LED matrix made of WS2812 3535 LEDs is installed on the front of the board. As usual, animations, icons, scrolling texts and other notifications can be displayed on this.
An ESP32 Wrover-B including programming circuit and USB-C connection is installed on the back.
The built-in sensors can also be used to read humidity, temperature, air pressure, brightness, UV index, 12 touch electrodes and acceleration values / orientation. In addition, additional sensors can be connected via the #qwiic connection.
Support:
If you want to support me, you can do so by like on this project page, on Instagram or by donating a coffee. :)
Licenses:
Content that is not based on software/code: Unless otherwise stated, all works presented here that are not based on software/code are subject to the CC BY-NC-SA 4.0 license (attribution – non-commercial – dissemination under the same conditions 4.0 international).
You can find a summary here: https://creativecommons.org/licenses/by-nc-sa/4.0/deed.de
You can find the complete legal text here: https://creativecommons.org/licenses/by-nc-sa/4.0/legalcode.de
Software/code-based works Unless otherwise stated, all software/code-based works presented here are subject to the GNU Affero General Public License v3.0
You can find a summary here: https://tldrlegal.com/license/gnu-affero-general-public-license-v3-(agpl-3.0)#summary
The complete legal text can be found here: https://www.gnu.org/licenses/agpl-3.0.de.html