 kutluhan_aktar
- Bitcoin
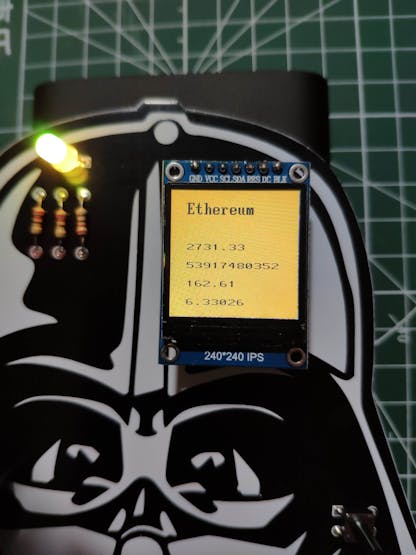
- Ethereum
- Binance Coin
- Ripple (XRP)
- Tether
First of all, to elicit information on cryptocurrency coins concurrently, I decided to use the CoinGecko API V3 because it does not require account credentials or an authentification key. Though it is free, the CoinGecko API provides data in JSON for cryptocurrency coins profusely. After managing to get cryptocurrency data, I developed a web application in PHP, named Cryptocurrency Tracker, running on Raspberry Pi to obtain data from the API, process it, and print a JSON data packet containing these parameters for each requested coin:
- name
- current price
- total volume
- price change in 24 hours
- percentage change in USD in 24 hours
Then, I used a Raspberry Pi Pico to get cryptocurrency data of the requested coins elicited by the PHP web application and display each coin's information with an ST7789 IPS screen. Since the Raspberry Pi Pico is not eligible for WiFi connectivity, I added an ESP8266 ESP-01 to my device to assist the Raspberry Pi Pico in obtaining information from the web application.
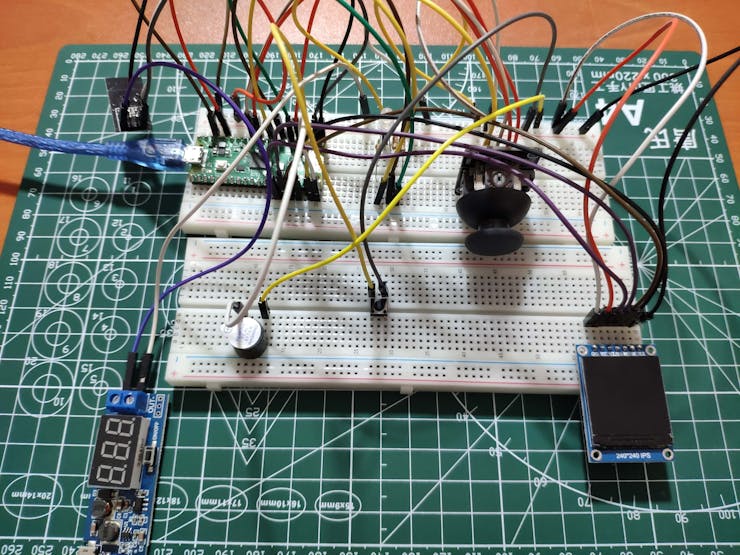
Finally, I added a COM-09032 analog joystick and a button to control the interface of the device.
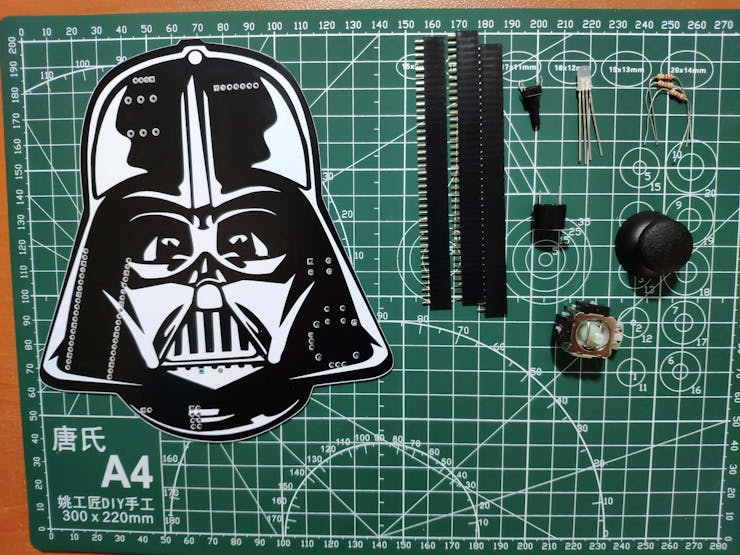
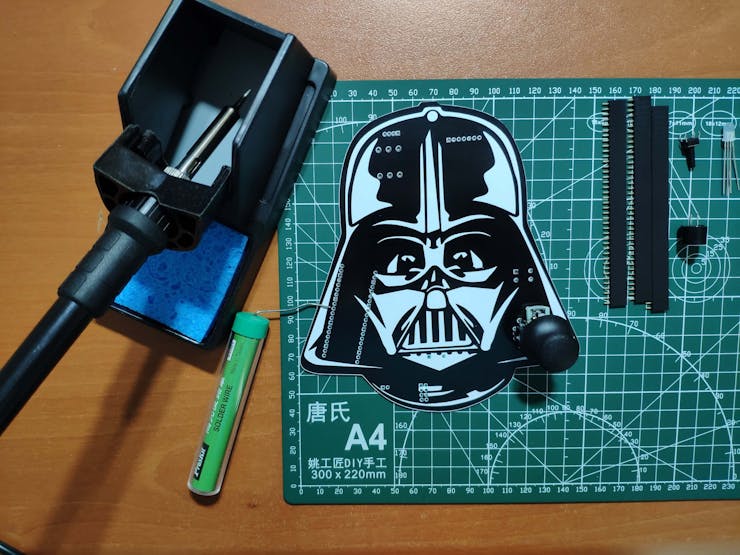
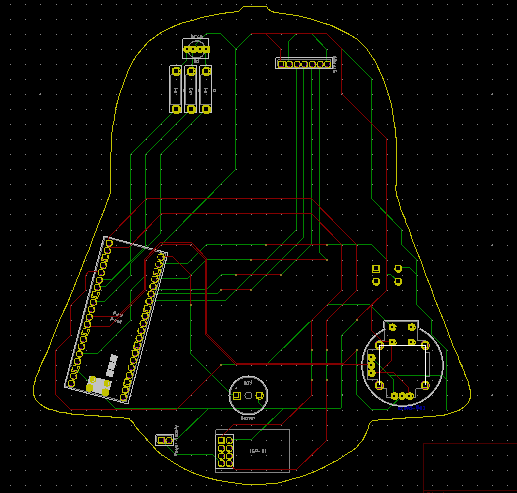
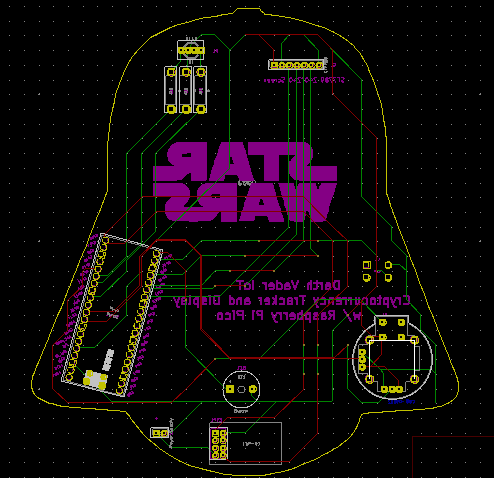
After completing wiring on a breadboard and testing the code, I designed my Darth Vader-shaped PCB to complete my project. It became a stylish and intriguing addition to my workplace as an effective apparatus to track real-time cryptocurrency data :)
In addition to presenting information, the device can be adjusted to notify the user under these two circumstances:
- price depletion
- price surge
Huge thanks to PCBWay for sponsoring this project.
Step 1: Designing and soldering the Darth Vader Cryptocurrency Tracker PCB
Before prototyping my PCB design, I tested all connections and wiring with the Raspberry Pi Pico on the breadboard.
Then, I designed the Darth Vader Cryptocurrency Tracker PCB by using KiCad. I attached the Gerber file of the PCB below, so if you want, you can order this PCB from PCBWay to create a stylish and felicitous apparatus to monitor real-time cryptocurrency data and get notified when there is a change in coin prices - surge or depletion - inspired by Anakin Skywalker :)
Click here to inspect and order this PCB directly on PCBWay.


First of all, by utilizing a soldering iron, I attached headers (female), COM-09032 analog joystick, buzzer, 5mm common anode RGB LED, 6x6 pushbutton, and 220Ω resistors.
Component list on the PCB:
Pico1 (Headers for Raspberry Pi Pico)
ESP1 (Headers for ESP8266 ESP-01)
S1 (Headers for ST7789 IPS Screen)
U1 (COM-09032 Analog Joystick)
BZ1 (Buzzer)
D1 (5mm Common Anode RGB LED)
K1 (6x6 Pushbutton)
R1, R2, R3 (220Ω Resistor)
J1 (External Battery)

Step 2: Setting up a LAMP web server on Raspberry Pi
If you are a novice in programming with Raspberry Pi, you can inspect well-explained instructions and tutorials on the official Raspberry Pi website.
To go to the official Raspberry Pi setting up tutorial, click here.
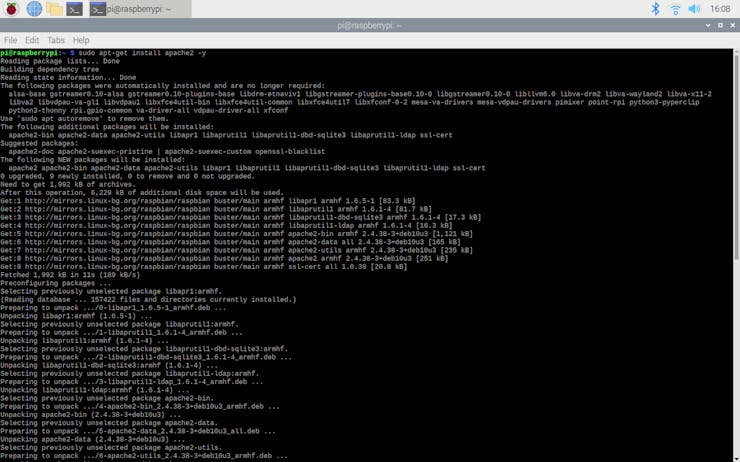
⭐ Open a terminal window by selecting Accessories > Terminal from the menu.
⭐ Install the apache2 package by typing the following command into the terminal and pressing Enter:
sudo apt-get install apache2 -y
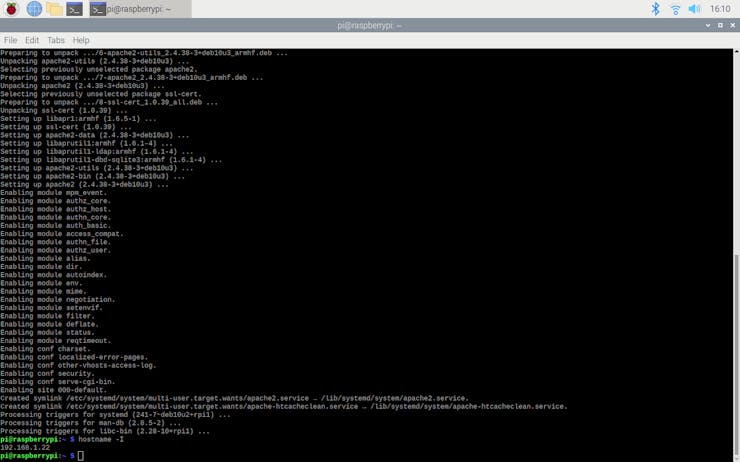
⭐ To test the server, open Chromium by selecting Internet > Chromium Web Browser from the menu and enter http://localhost.
⭐ If you want, you can use the IP address of your Raspberry Pi as well.
hostname -I

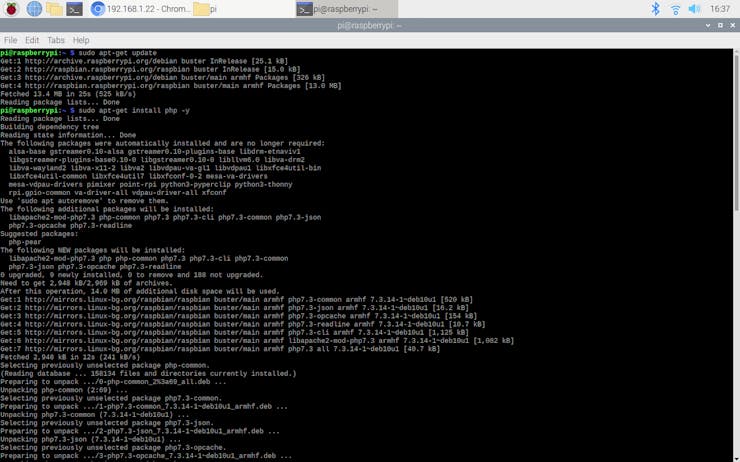
⭐ Install the php package with the following command:
⭐ Do not forget to update the Pi.
sudo apt-get update
sudo apt-get install php -y
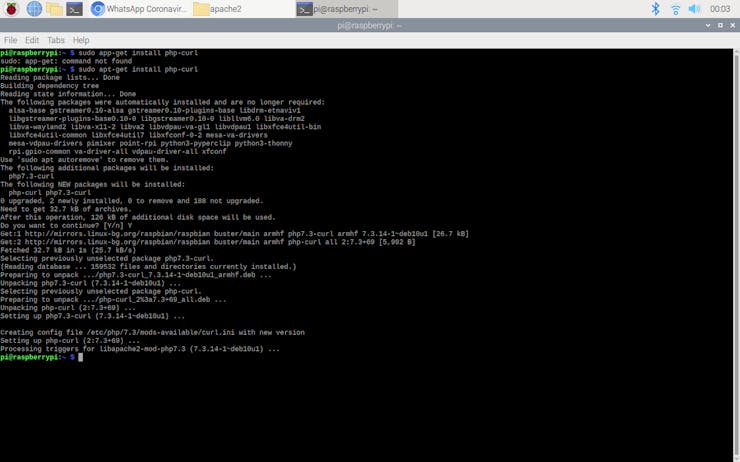
⭐To be able to obtain information from the CoinGecko API V3, install the php-curl package:
sudo apt-get install php-curl
⭐ Then, restart the apache server to be able to use the installed packages on the localhost:
sudo service apache2 restart
Step 3: Developing the Cryptocurrency Tracker web application in PHP to obtain data from the CoinGecko API
I decided...
Read more »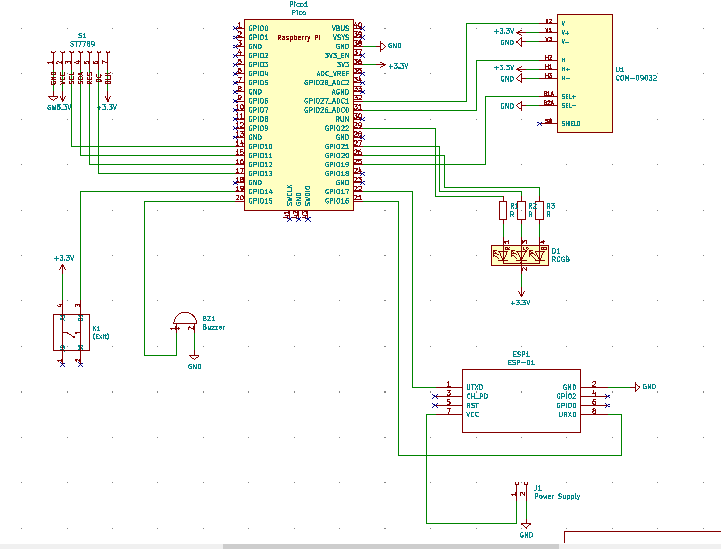


 Sumit
Sumit
 simon
simon
 Dmitry
Please feel free to leave a comment here if you have any questions or concerns regarding this project 😃