Screws are great!
I miss those bygone days when all you needed to open any device was a screwdriver set with 30 odd bits.
But in a 3D printing context screws are frowned upon (at least by me). It's just annoying to find something from Thingiverse you want to print only to realize it will involve a trip to the hardware store to pick up the right lenght of M3. Screws are simply antithetical to the Start Trek replicator dream inherent to 3D printing.
So I found myself in a dilemma when my initial design sketches seemed to call for quite a few machine screws. I didn't think I could eliminate all of them, but I wanted to bring the number down to a bare minimum.
Keeping the lid on
Both the upper and lower body sections consists of a hull part and a lid part that fits on top. When the parts are assembled the lids would be held down in the center by a screw running through the main gear axle. To secure the lids along the edges as well, some additional fasteners was needed. Of course the initial design sketch involved some screws. But I felt there had to be a better way.
Another problem was that I needed a way to fasten the leg hinges to the body. Even more screws for that? No way!
To kill two birds with one stone, I went with a snap fit solution where the leg hinges snaps into the body in a way that also holds the lid down. Due to the fact that left and right legs aren't symmetrically placed, two additional clasps was added on the right side of the body.

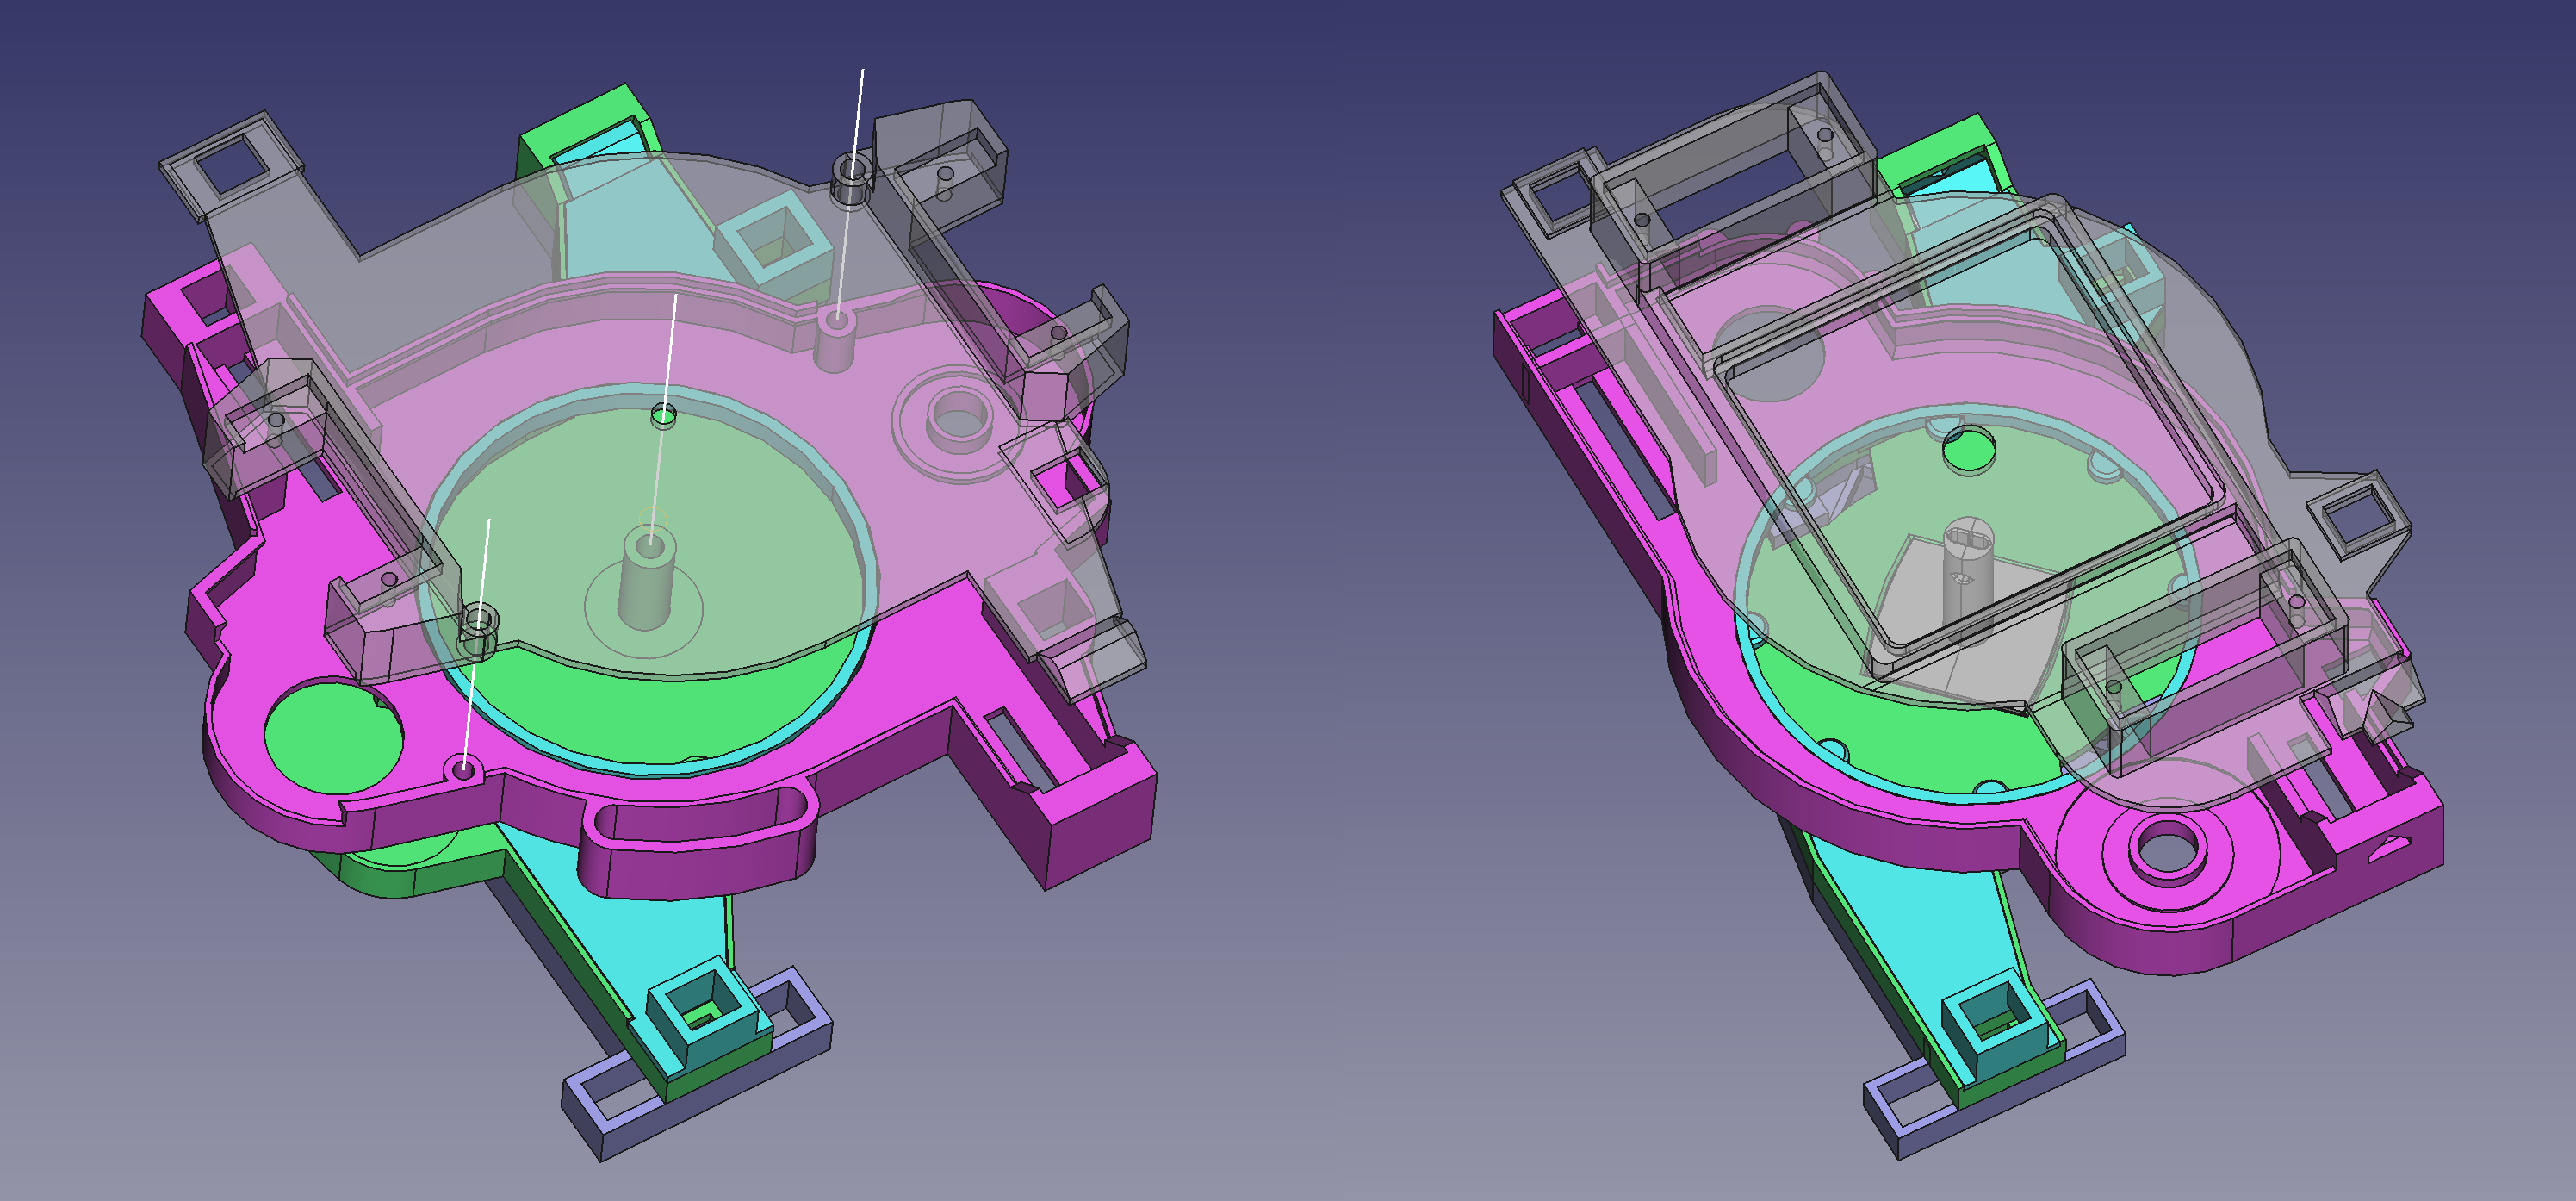
On earlier models I had placed one servo motor on each side of the body. This meant that the clasps and snap fits wasn't enough to keep the lid secure around all edges. I had to place two additional screws on the sides. I didn't like it.
This prompted me to redraw the entire thing and place the motors front and rear instead. It was a tight fit since the upper and lower body needs to be able to swivel 15° respective to each other without hindrance. Only by offsetting the motors counter clockwise about 6° was I able to get enough clearance for everything to fit.
With this new motor arrangement I could eliminate the two extra screws on top. This also resulted in a more streamlined body shape, which made the robot lighter and gave it better balance. So it was an improvement all around.
I managed to get rid of the center screw as well. I'll get into that in a later post.
Discussions
Become a Hackaday.io Member
Create an account to leave a comment. Already have an account? Log In.