Close
0%
0%

Tenkeyless Keyboard with 2 Port USB-Hub

I build my one tenkeyless mechanical keyboard running QMK with an added 2 Port USB2.0-Hub

Public Chat
Similar projects worth following
So I wanted to build myself a mechanical keyboard after seeing tones of build-videos online. But since I know how to design electrical circuits and make them in to an PCB, I decided to create it fully from scratch.
I planned the PCB in KICad and build the Housing with Freecad. The Software on the keyboard is a costume QMK firmware that i programmed.
As extra added features I wanted a USB-Hub for my mouse dongle and to connect a USB-Stick on occasion. Also an encoder for volume-adjustment and RGB backlightning was added.

The USB-Hub a Microchip USB2513BI chip was used. It is a 3 Port USB2.0 Hub controller.
The keyboard controller is standard Microchip AT90USB646.

For the housing i used Freecad to design a housing that i could print on my 3D-printer and a plate that i got lasercut out of stainless steel by a spanish company.
After printing the housing I did an lot of sanding, filling, more sanding, primer and than a white spraypaint layer and matt clearcoat.

Project files on Github: https://github.com/JKR-31/JK_M0nkey_Keyboard

So in this project i wanted to solve a luxurie problem of mine :P

--> Having a nice mechanical keyboard that fulfills all my wishes I would ever have for one.

What I wanted:

-Teenkeyless layout (don't need that number pad)

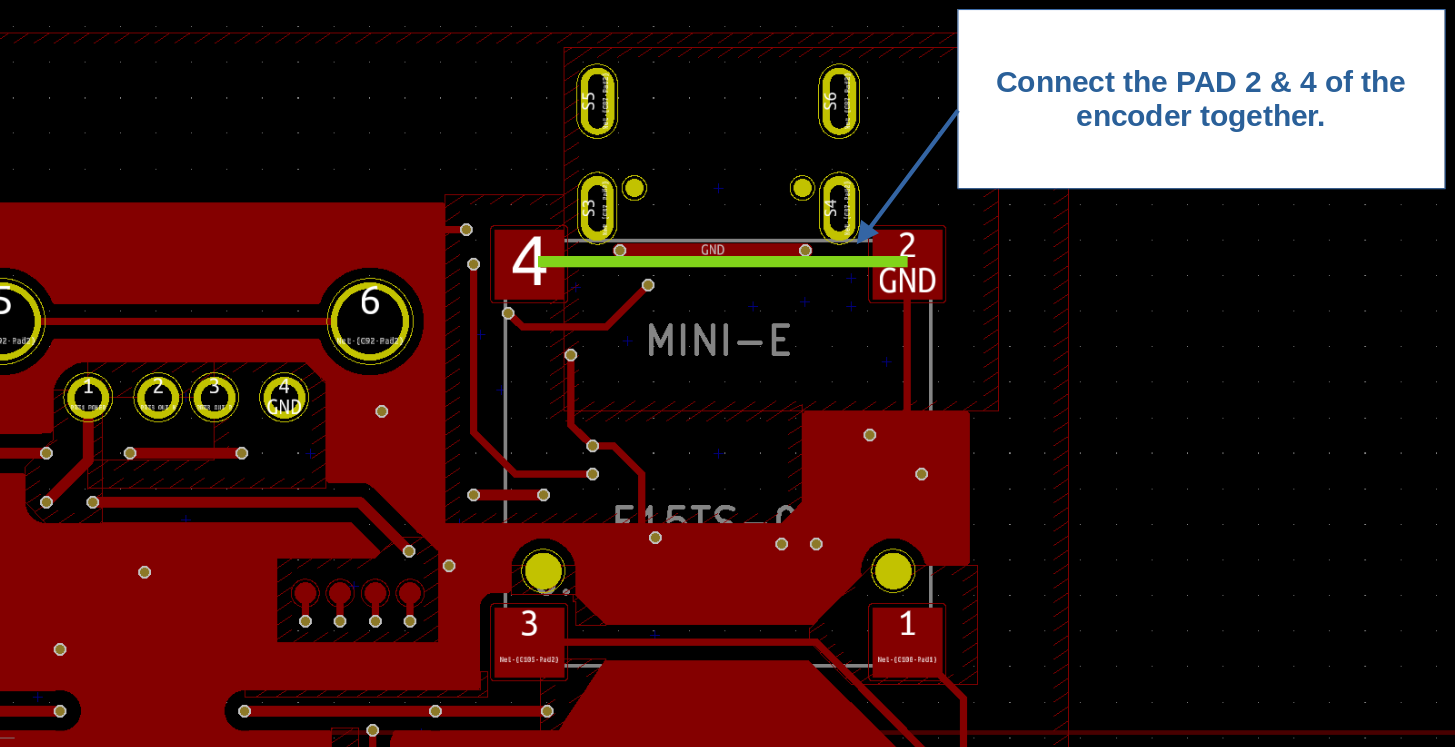
-An Encoder for volume adjustment

-RGB back lightning with possibility of having animations like fading & rainbow

-hardware that supports QMK-firmware

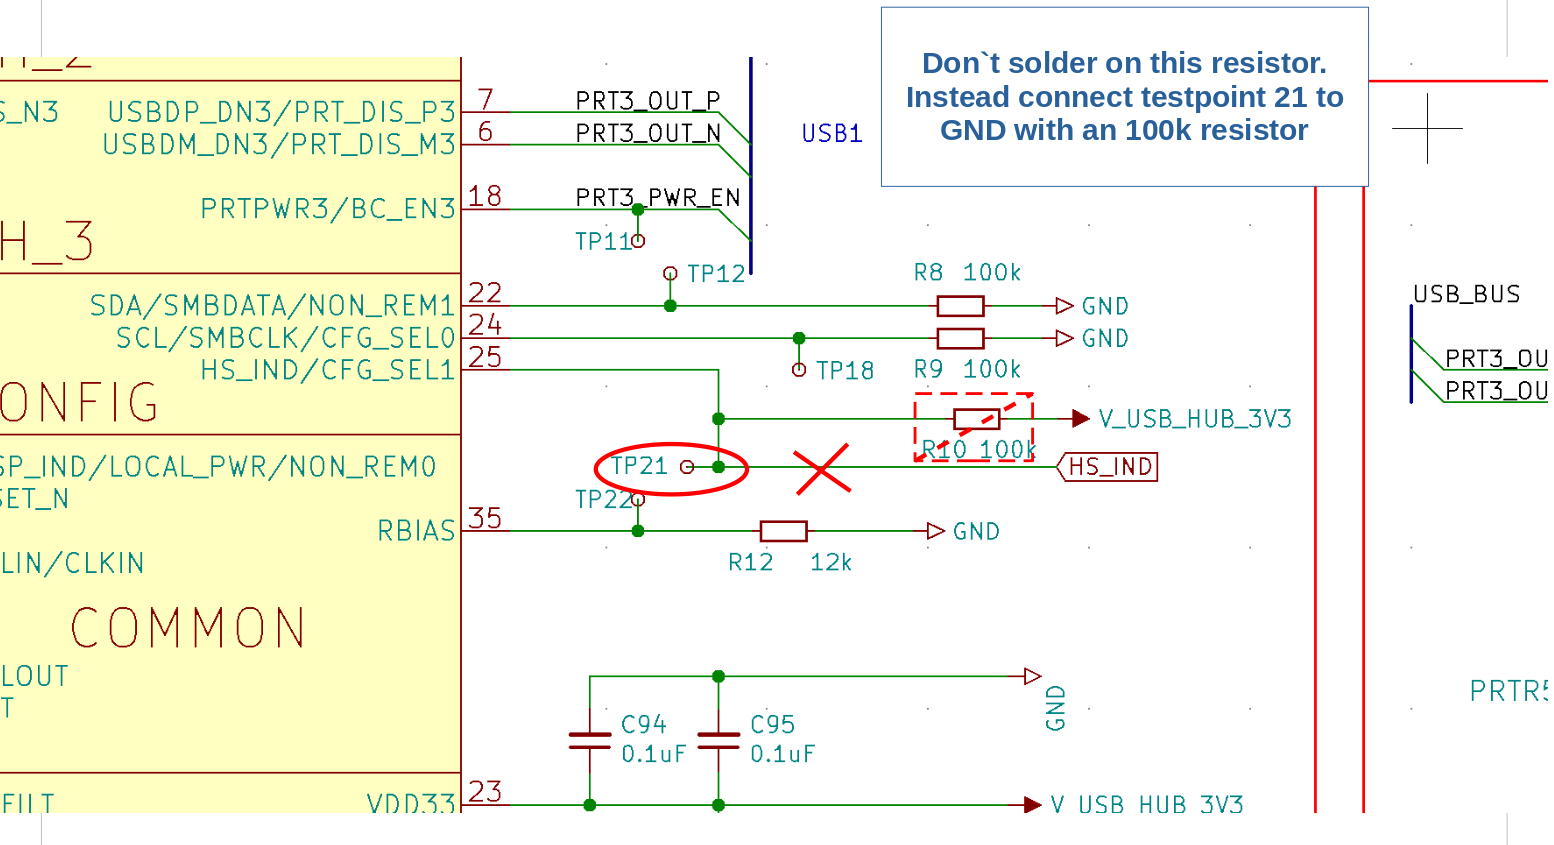
-A USB-Hub to plug in a mouse and for example an USB-Stick

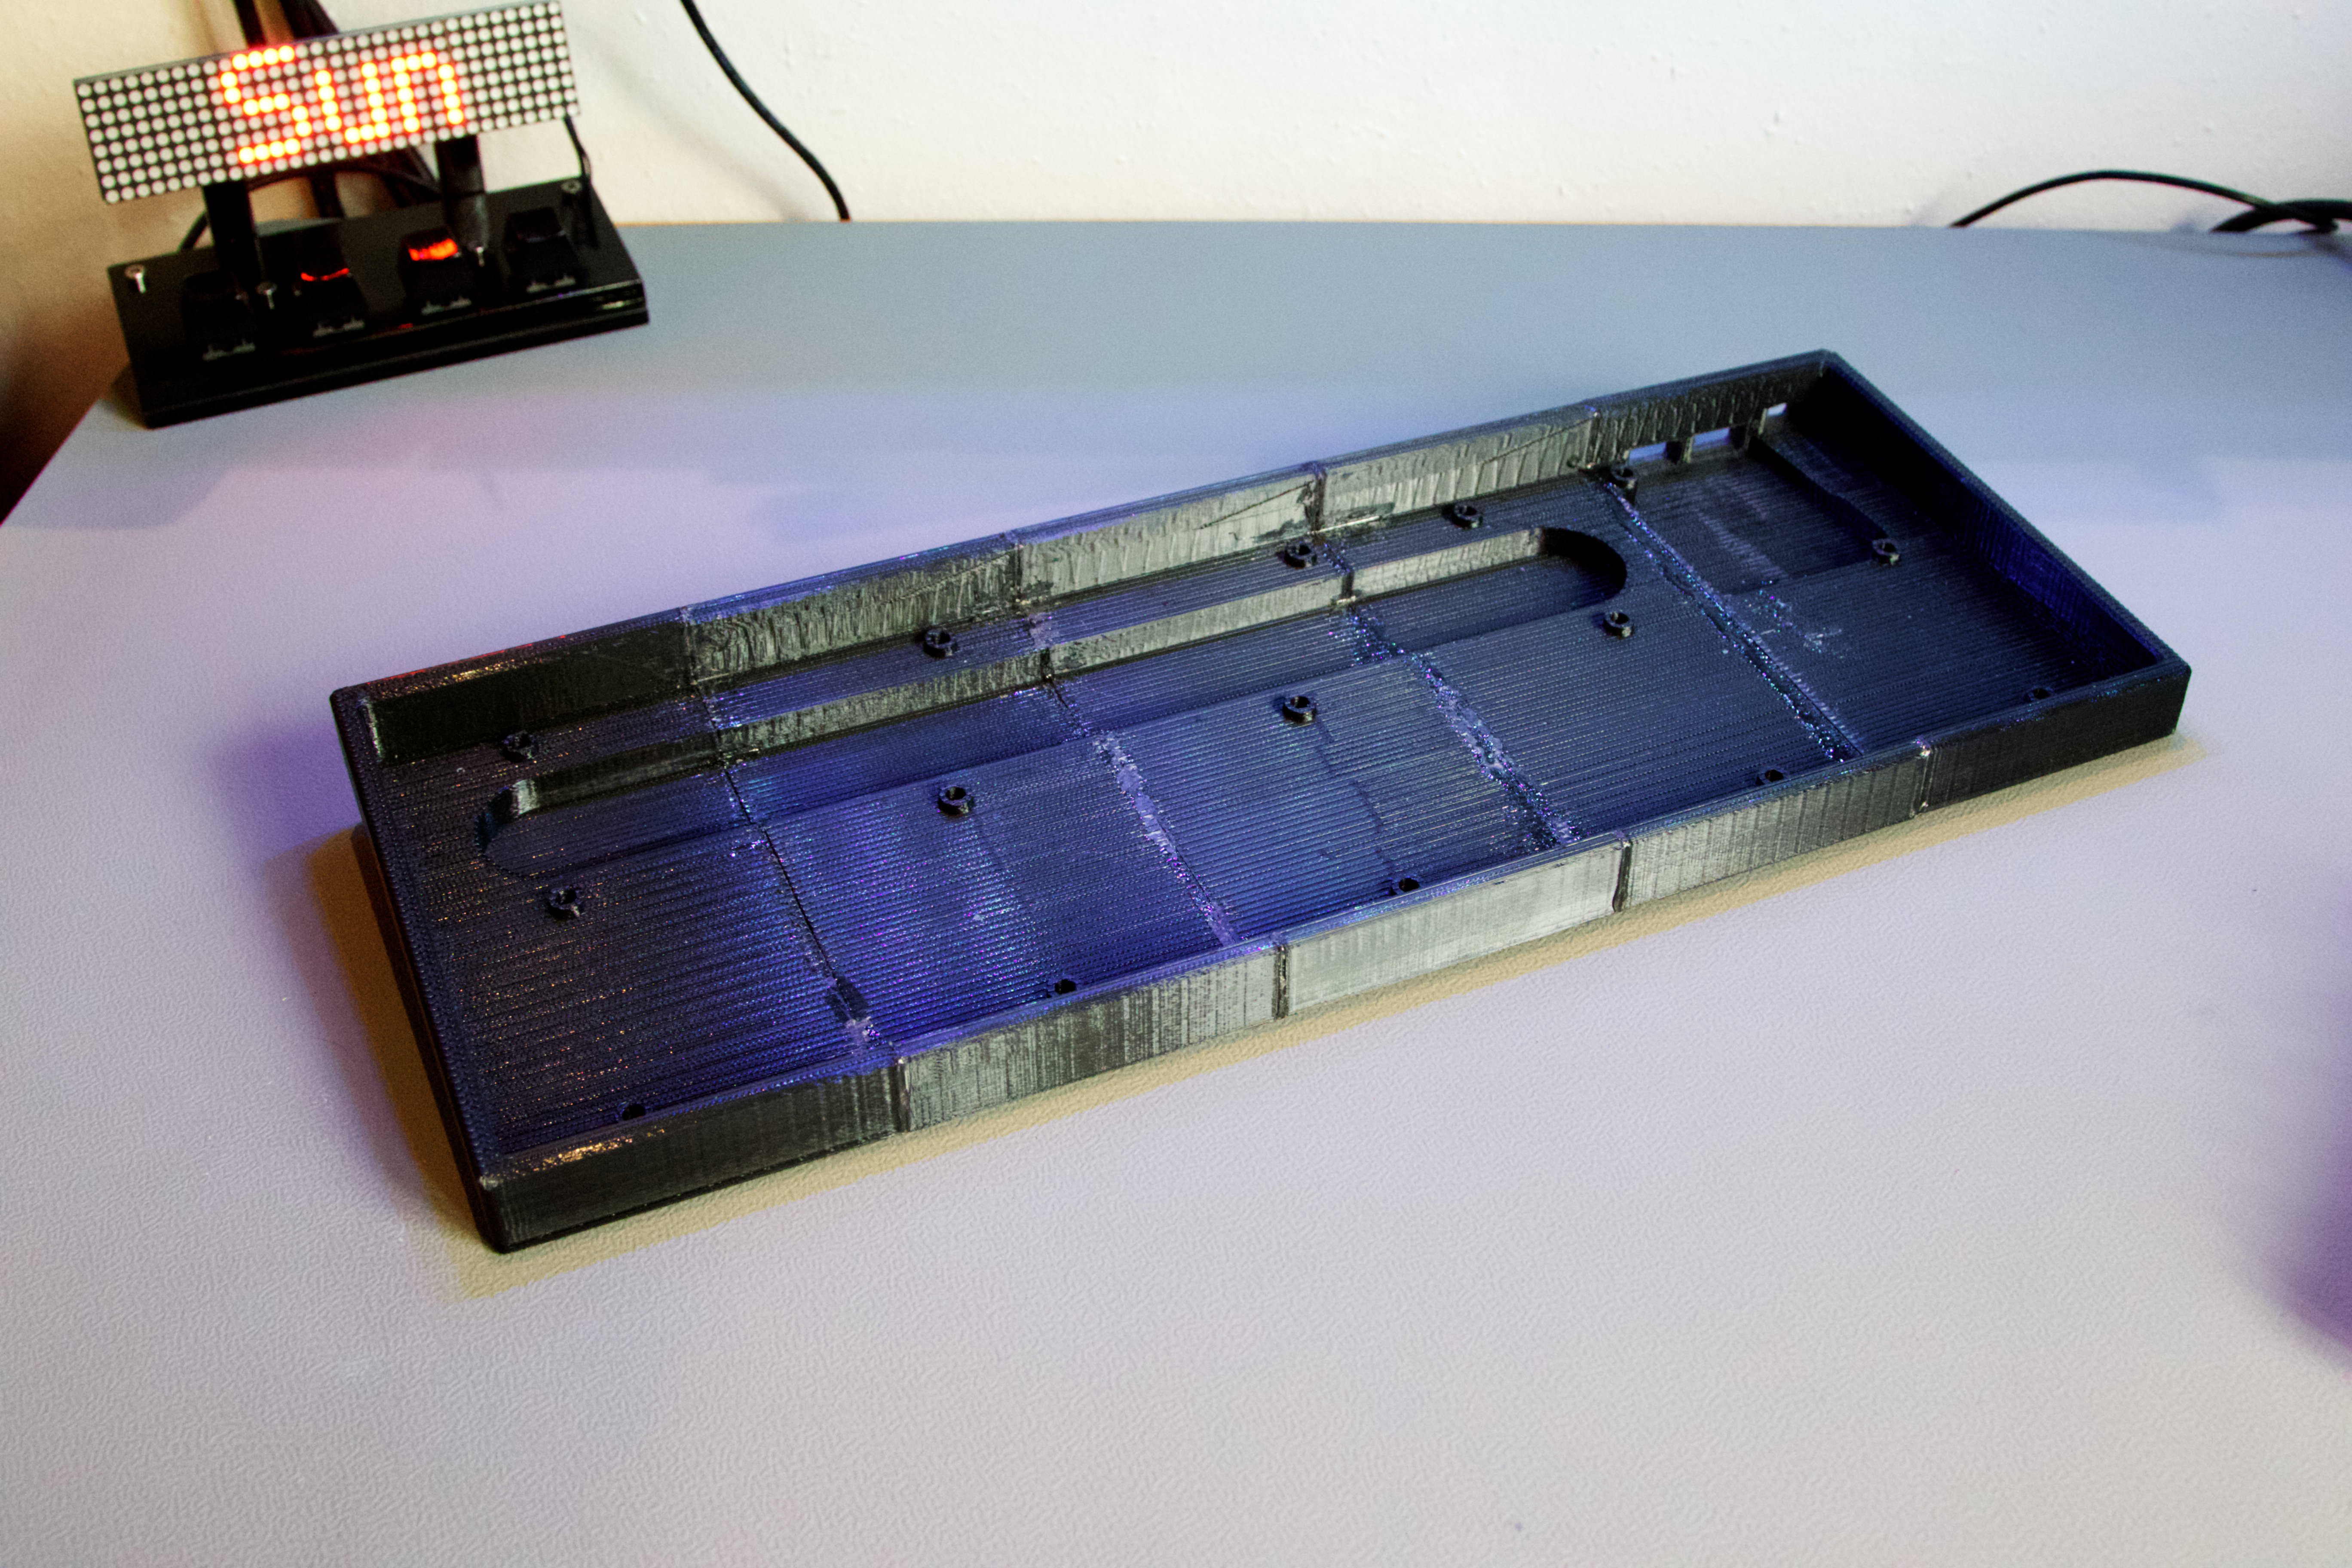
-Not cheap looking (metal plate and nice finished housing)

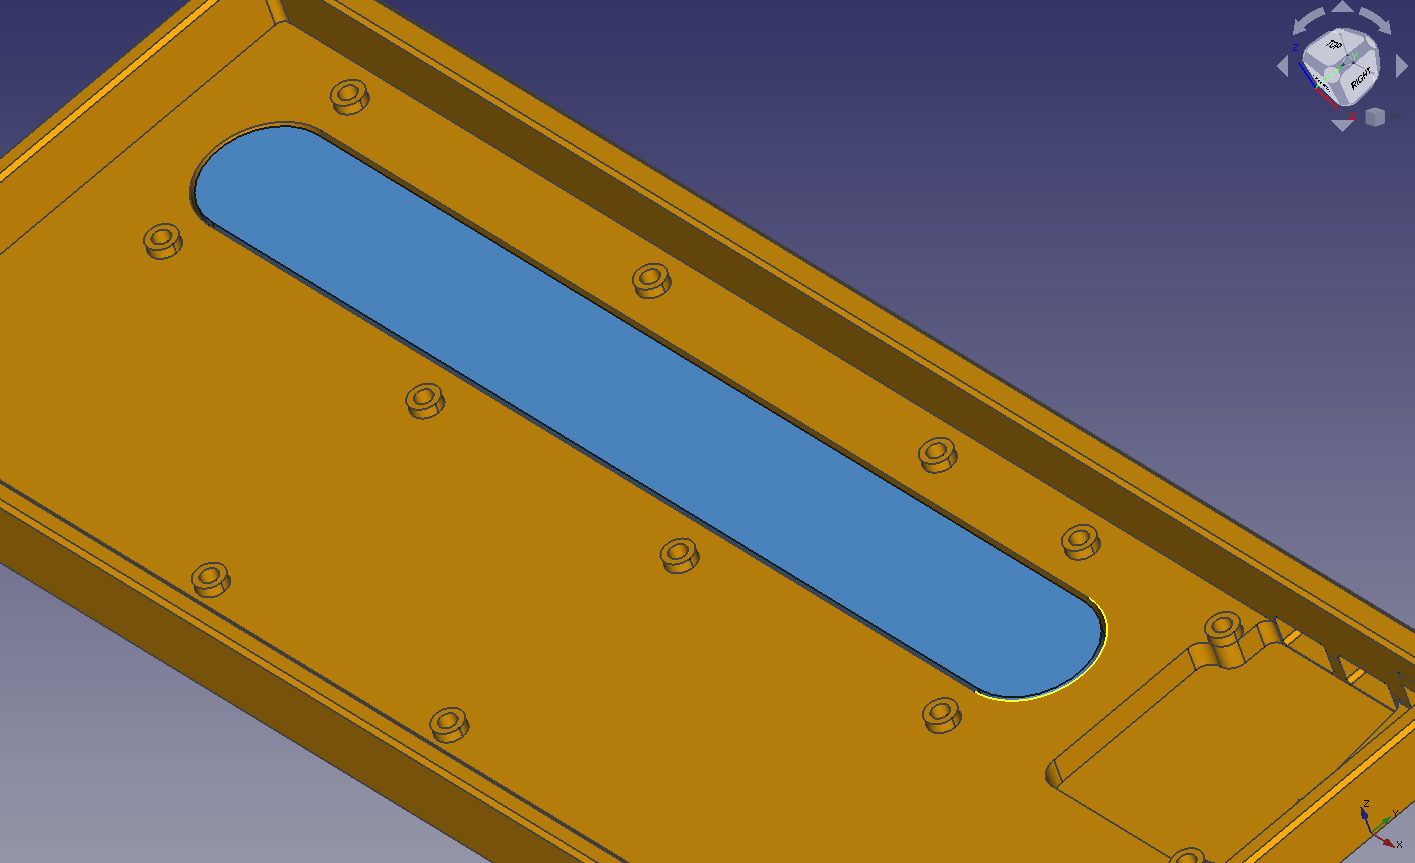
-use 3D-printing in the project

-as low profile as possible with cherry mx

-give possibility of using cherry mx low switches (didn't work, maybe in a future projects)

Hard parts of the project:

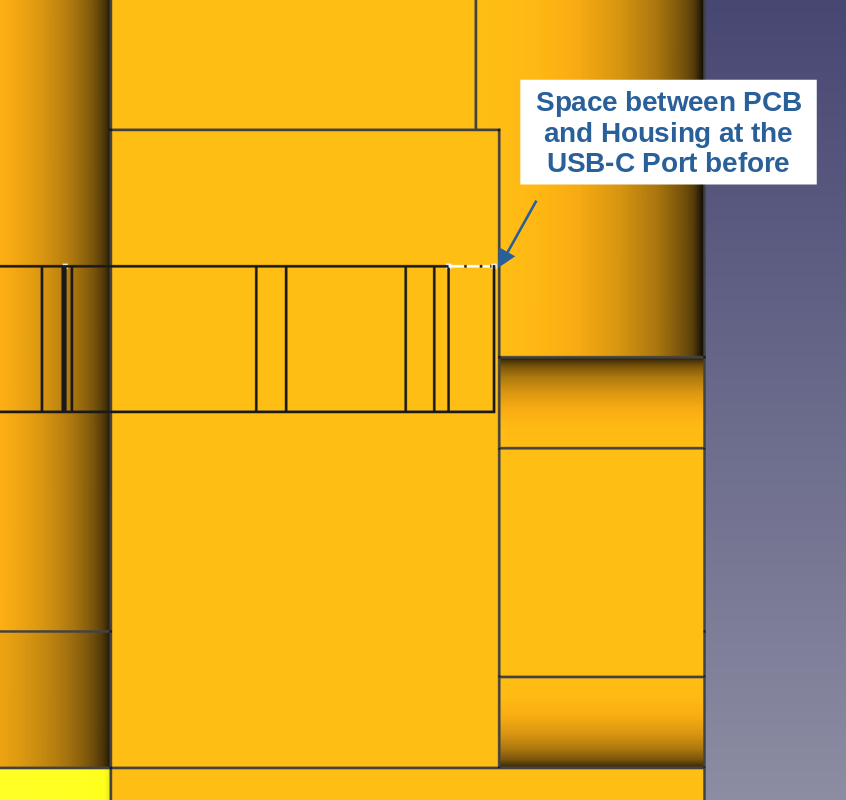
-Fitting 2 USB-A port and a USB-C port in a keyboard wasn't that easy, in the end had to remove two switches in the upper right corner

-Second challenge was to program this much for the first time except writing a blink program for an arduino

Licences:

This project is open source from my side.

Link to QMK-license: https://qmk.fm/license/

Link to Freecad license: https://wiki.freecadweb.org/Licence

Link to KiCad license: https://www.kicad.org/about/licenses


  • 1 × AT90USB646-MU Microcontroller for the keyboard
  • 1 × USB2513BI-AEZG USB-HUB Chip for 3 downstream ports. 1 for the keyboard and 2 USB-Ports
  • 1 × MIC2026A-1YM-TR Power Management IC following the USB protocol for the 2 USB-Ports
  • 4 × PRT5V0U2X My favorite way to do ESD protection on USB ports
  • 1 × Amphenol E15TS-06 The Surface mount encoder that i used

View all 11 components

  • 3D Printed case before finish

    Jonas Kraus06/26/2021 at 11:18 0 comments

    Here is a picture of the 3D printed case before finish.

    I actually printed it in 5 separate parts that i than glued together with epoxy. Did this because of the limitations of the pint-bed size and because i didn't want such long time prints. (I have a Wanhao Dupilcator I3 Plus btw.)

    After printing and glueing i than pushed in threaded inserts to connect the PCB to the case. Than i sanded the print smooth, filled bigger holes/print mistakes with filler, sanded again, sprayed it with primer and than put on the color (RAL9016) and a coat of clear varnish

  • Schematic mistake at the encoder

    Jonas Kraus06/19/2021 at 16:58 0 comments

    2 and last mistake with the schematic was having the ground connection of the encoder on the wrong pin.

  • Mistake on PCB with USB-Hub

    Jonas Kraus06/19/2021 at 16:50 0 comments

    I made a upsi in the schematic with the USB-Hub Chip. I pulled-up a configuration pin, instead of pulling it down to GND. This changes the USB hub between buspower and selfpowerd.

  • Adding option of a weight

    Jonas Kraus06/19/2021 at 16:32 0 comments

    I added a cut-out in the housing for a metal weight.
    I calculated it to be 450g in copper, or 570g in lead. To make the keyboard make fell more solid and make the sound better.

  • Small change to 3D model

    Jonas Kraus06/19/2021 at 16:10 0 comments

    Had to remove some material at the housing around the USB-C Port. So that no material has to be removed with any tools after 3D-printing.

View all 5 project logs

Enjoy this project?

Share

Discussions

Similar Projects

Does this project spark your interest?

Become a member to follow this project and never miss any updates