 Madaeon
-
1110) LightCrafter programming
The first step is to download the DLP LightCrafter Firmware and Software Bundle - Windows on this page: https://www.ti.com/store/ti/en/p/product/?p=DLPLIGHTCRAFTER.
Then after the projector is connected via Usb, the 96 horizontal "slices" of the 3 model must be downloaded into the memory of the LightCrafter.
To make these slices, use the Windows software in the "files" section.
In the "Open frame" version of the VVD, there is no PC inside; to change the 3d model shown, the VVD must be connected to a computer, and USB connection the the Lightcrafter, used to upload a new 3d model.
The "closed frame" version has an Udoo X86 inside, and a 5" touch screen, so the 3d model can be changed without the need to connect the VVD to a computer.
![]()
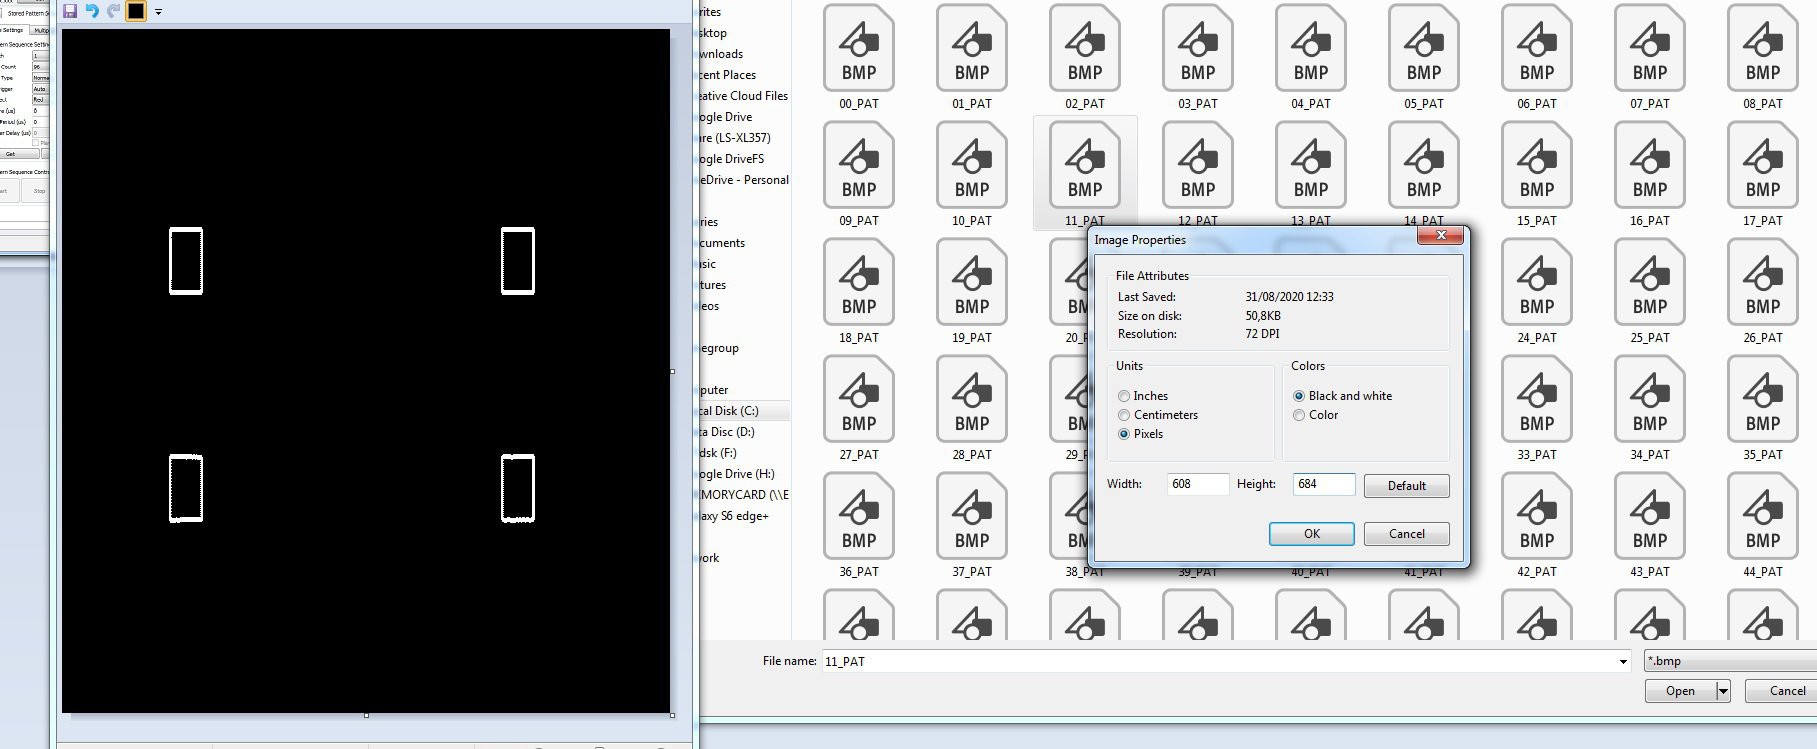
This is the software used to upload the pictures to the Lightcrafter onboard memory. I strongly recommend reading the User manual of the projector very well because there are many parameters involved. The basic guid is that "pattern images" refers to the 96 "slices" of the 3d model that we can store in the memory of the projector.
![]()
The slices must be 608x684 pixels, black and white Bitmaps.
-
1212) How to create the slices form a 3D Model
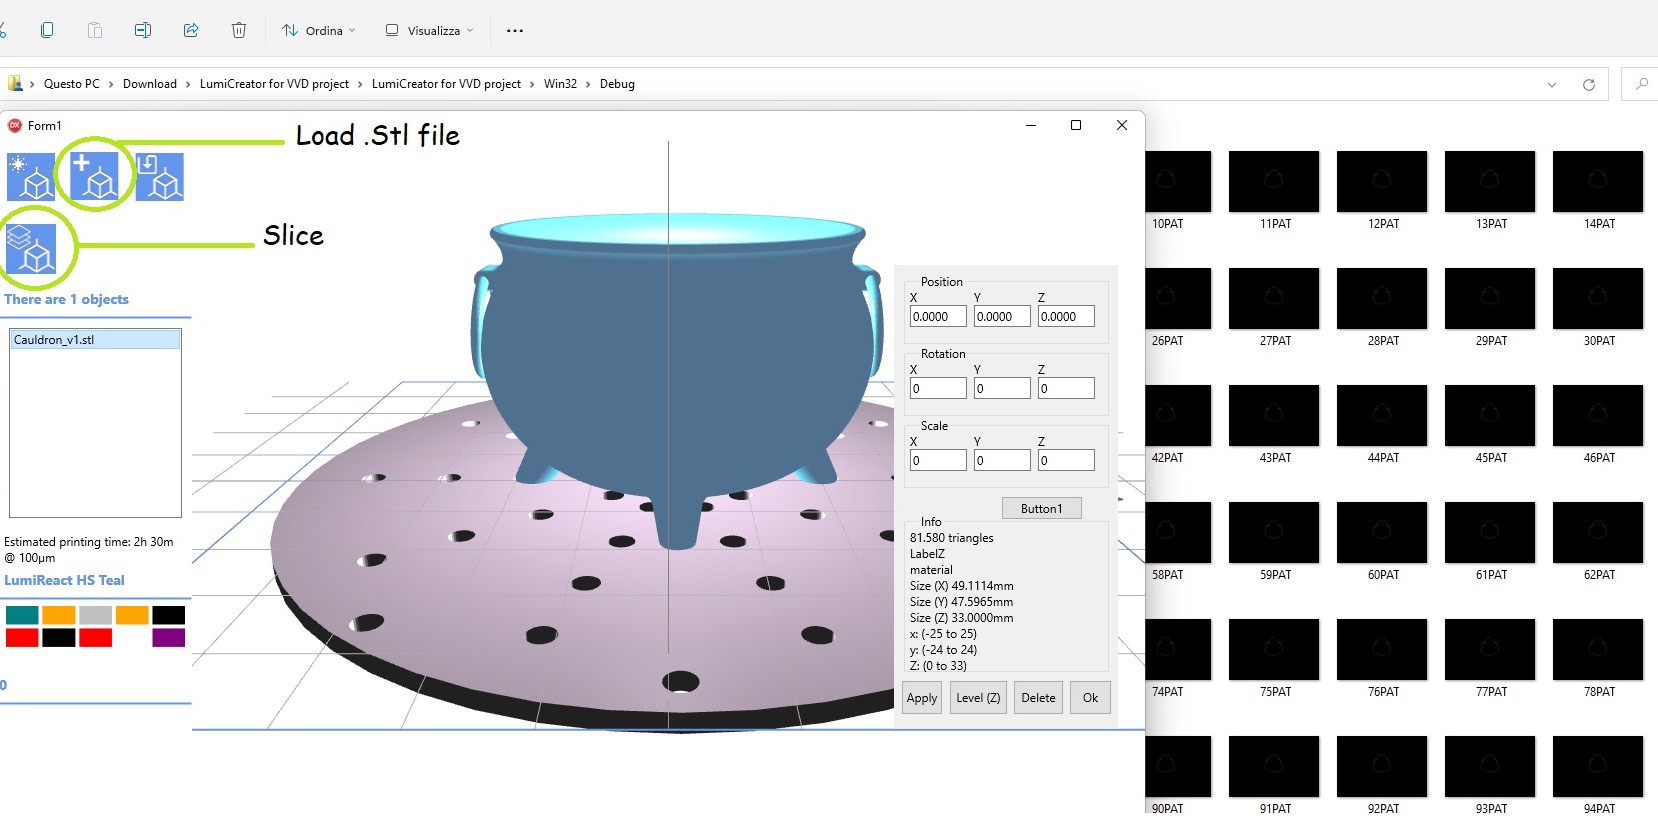
Launch the Windows Executable Lc2.exe from \debug\win32. Remember, this is an experimental program I wrote, even the slicing is my own code ;)
Click on the icon on the top left with "+" to add an .STL file.
After loading is 100%, If you click on the file name in the list, the object becomes blue. Please be sure that the Stl is already ato coordinates 0,0,0 (by opening the Stl with Netfabb). On this program, you can change position and scale, and press "apply" (NOT button1). "Level to Z" also works. But they will not affect slicing, that can have some errors if the object is not in the center.
Press "Slice" button.
![]()
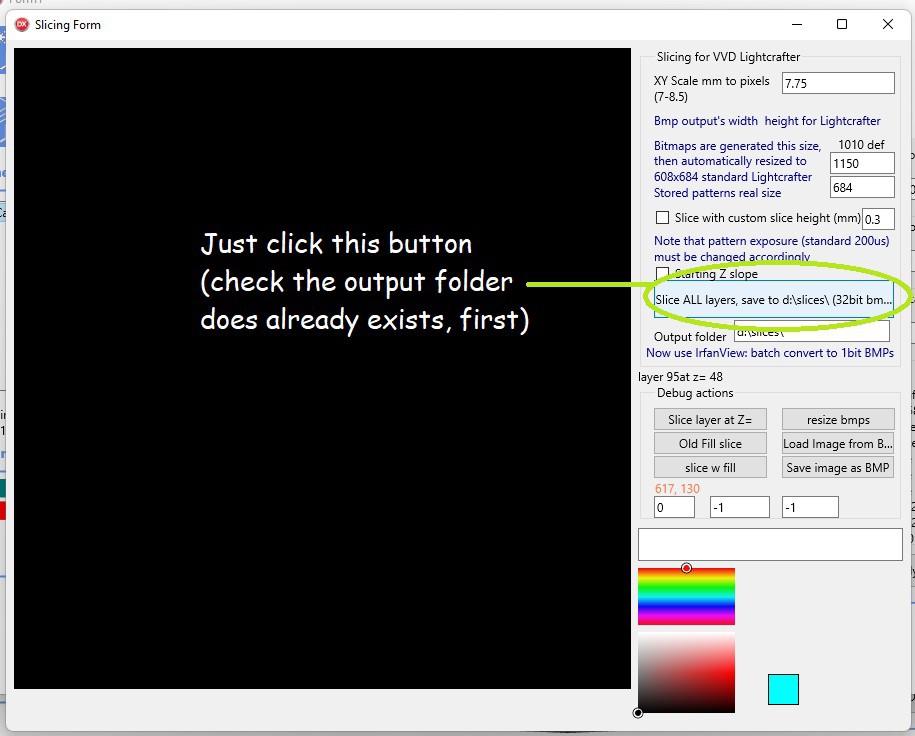
On next window, set the slices folder output (default is c:\slices).
![]()
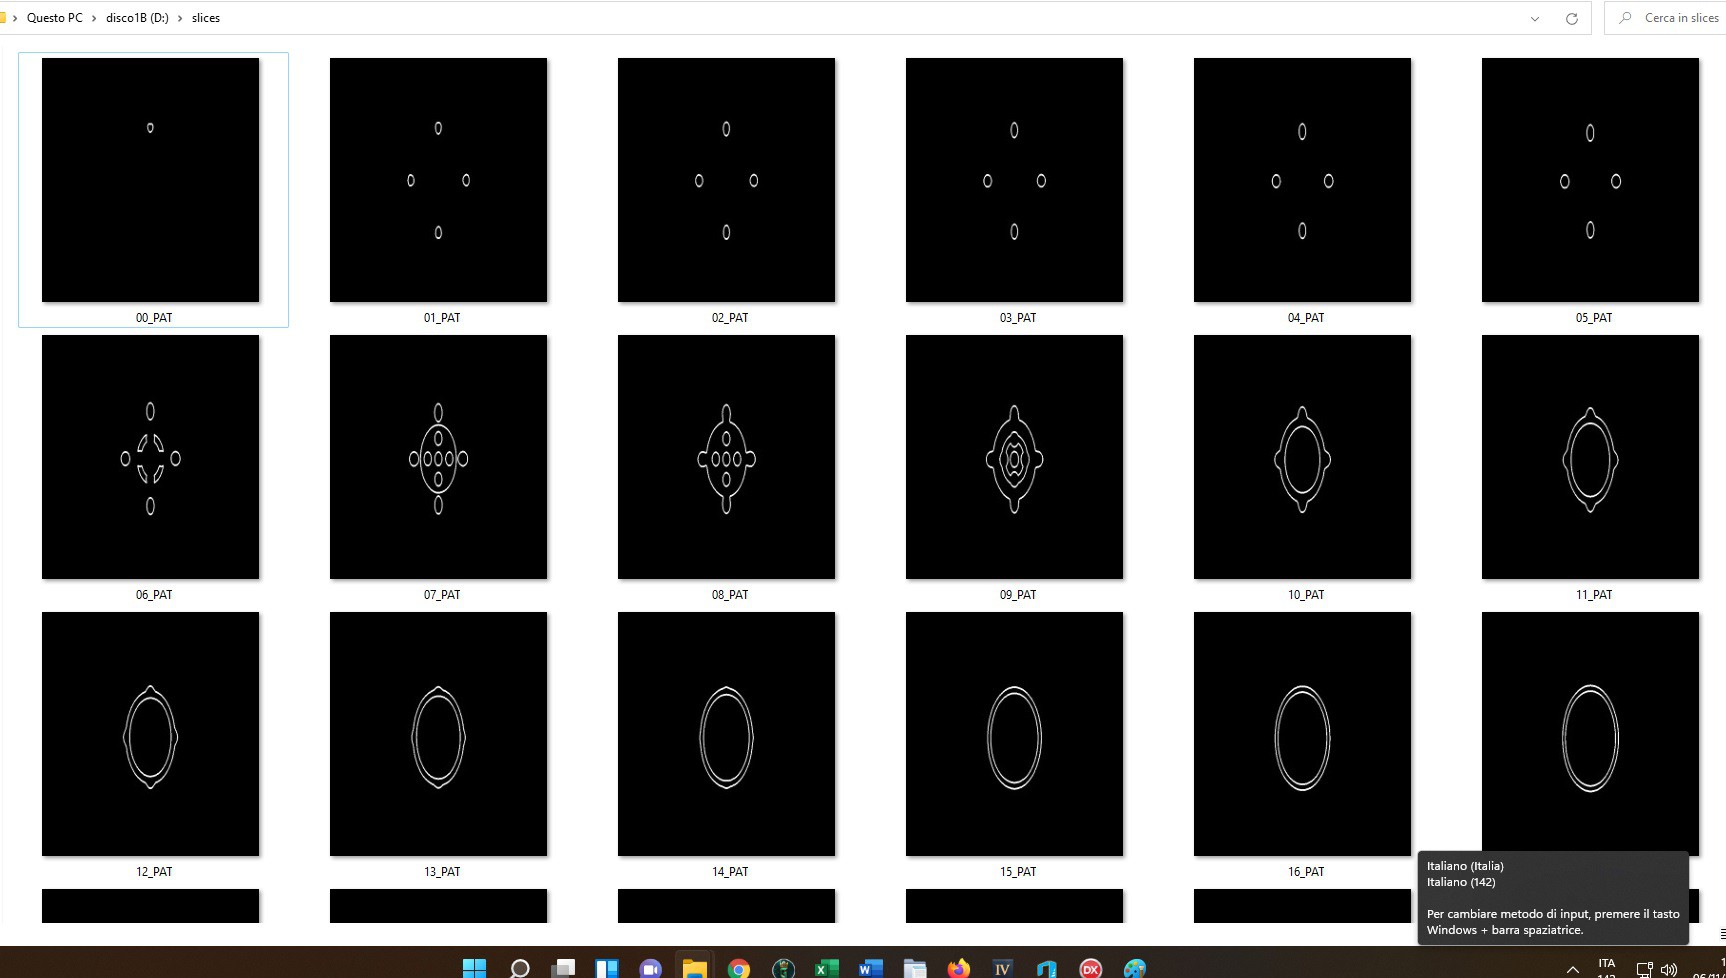
Now if everything goes well, you have now 96 bitmap, one for each slice.
![]()
Yes, they look deformed. This is fine. The Lightcrafter engine needs this image format, the final output is not deformed.
FInal step, is to open these images with IrfanView or similar software, and batch convert them into 1 Bit Bitmaps.
Well done!
VVD: an open source Real 3D Volumetric Display
Your 3D content on a real PoV volumetric display, no glasses needed!

Discussions
Become a Hackaday.io Member
Create an account to leave a comment. Already have an account? Log In.