 SAYANTAN PAL
Now what reflow soldering actually does and why do we need it in the first place?
You see most of us generally use soldering iron to solder electronics components on a PCB. but it gets really challenging sometimes when it comes to solder SMD parts because they are so tiny so hand soldering them is a bit difficult. So instead we use a heated plate. We apply solder paste on the PCB pads and put the component on it. Then we put the PCB in the hotplate which showly heated up the PCB from the bottom upto a point when the solder paste melts and joins the component to the PCB.
Lets see which are the components we need,
- A dry iron - I am using this 600w iron I have in my house but you can use any old electric iron
- A Solid state relay or Normal relay
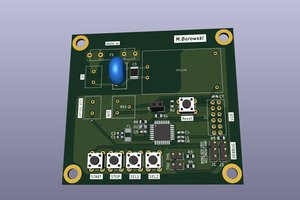
- An arduino or any other microcontroller
- A display - I am using a touch shield for arduino which gives it a nice looking interface.
- A 5v power supply for the arduino - I am using this SMPS type because it’s easier to connect wires in the screw terminals
- A MAX6675 module with K type thermocouple to read the temperature.
- A 5v cooling fan
So why did I decide to upgrade it?
Well, with my previous setup I had a couple of issues, like I couldn’t know the temperature of the iron and I pretty much had to rely on the built in thermostat which isn’t that accurate. So I added the thermocouple inside the iron to read the temperature of the hotplate.
The working principle of this setup is pretty simple, after powering it up we have some basic settings in the display which we can adjust according to our needs. There are 3 stages of this reflow soldering process.
- First one is the preheat where the whole board rises towards a certain temperature(about 120-150°C).
- When the temperature reaches that value the reflow process begins with a set temperature for a brief amount of time(about 180-200°C).
- And everything cools down at the end, when the reflow process is over.
I use a timer to keep track of the reflow timing. The predefined values can be modified in the code if required. We can also adjust the values while it’s operational if we need to.
After setting all the values we press the start button and the relay activates and begins the preheat stage. Here the temperature of the iron increases gradually. Once it reaches the set temperature, it enters the reflow stage and the timer starts counting down. In the reflow stage If the temperature exceeds the set value it will cut off the power by turning off the relay and turn it back on when the temperature goes below the set value.
When the countdown finished the relay turned off. Earlier It was taking quite some time to cool down the iron so I decided to add a small DC fan which blows air to speed up the cooling process. And this is how you can reflow our PCBs quickly and easily.


 mateuszbor22
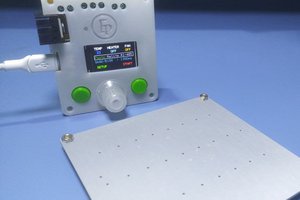
 MG
MG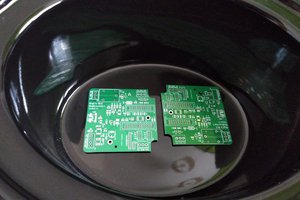
 Gerriko IO
That's funny, just watched an unrelated video and caught a glimpse of a similar reflow setup. Never thought of a clothes iron as a heat source -- always thought I'd build my reflow from a kitchen hotplate. I like that the sole of the clothes iron is Teflon coated. Nice build!