Raspberry Pi Pico with HC-SR04 Sensor and micro-ROS
We'll look at how to connect an HC-SR04 range sensor to a Raspberry Pi Pico and use micro-ROS to post its values to the ROS 2 graph. This post expands on the previous one, ‘Getting started with micro-ROS on the Raspberry Pi Pico.' As a result, if you're unfamiliar with the subject, I recommend reading it first.
Sonar Sensors
We'll utilize a sonar, which is one of the most used sensors in robotics. Under ideal conditions, these sensors are inexpensive, simple to use, and remarkably accurate. Distances are measured with sonars. As a result, they may be used to identify and locate impediments, allowing a robot to avoid them. It's not difficult to see why they're so popular.
So, what exactly is a sonar, how does it operate, and which should I choose?
A sonar is an echolocation sensor that may be used to calculate distances. Sonars function in the same way as bats do to keep things simple to understand. They don't fly around at morning hunting bugs, nor do they combat crime. Obviously, I was referring to the way bats view the world. An transmitter and a receiver make up a sonar.
The former sends out an ultrasonic signal that bounces off of nearby objects and returns to the receiver. The distance travelled by the sound wave, and hence the distance to the obstruction that echoed the sound, may be simply calculated by monitoring the time difference between signal emission and reception.
If, for example, the sound wave is echoed away from the sensor, this technique might suffer from a variety of problems. Or if two barriers at different distances bounce it back to the sensor. Alternatively, it might be absorbed by a sound-dampening substance.
If you're still confused or want to learn more, I'll recommend you to your favorite online search engine because it's a bit outside the scope of this essay.
HC-SR04 Range Sensor
I propose the ‘HC-SR04P' model, which is a 3.3V version of the extremely popular ‘HC-SR04' type (5V). In this tutorial, I'll be utilizing this model (the HC-SR04P). It may be powered straight from the Pi Pico RP2040 microcontroller due to its low power consumption. As a result, the entire arrangement may be powered just by a USB cable.
If you're using a 5V package, please careful to adjust the wiring specified below, or your Raspberry Pi Pico might be damaged! For comparison, I paid less than $10 for a batch of five pieces, including delivery. With the Pi Pico pricing included, that's a lot of sensing for the money!
Connecting the HC-SR04 Range Sonar Sensor to the Raspberry Pi Pico
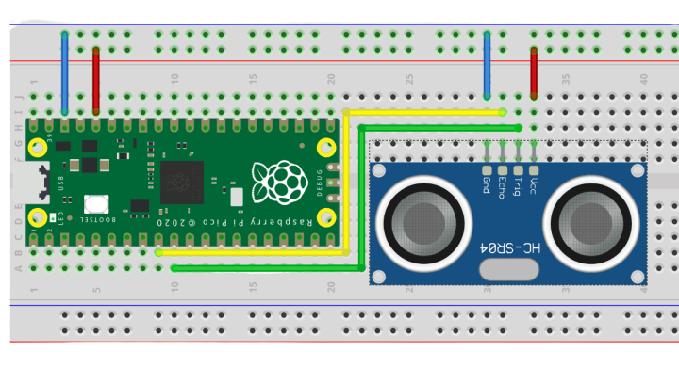
The HC-SR04P board has four pins labelled "Vcc," "Gnd," "Trig," and "Echo." The Vcc and Gnd pins, as you may have guessed, are for the 3.3V line and ground, respectively. The sensor is triggered by ‘Trig,' and the reception of the echo is reported by ‘Echo' (the reception of the wave that bounced off of an obstacle).
The wiring is simple from there, referring to the Pi Pico pinout:
- 3V3 OUT (pin 36) to the ‘Vcc' of the sonar
- GND (pin 38) to the ‘Gnd' of the sonar
- GPIO 6 (pin 9) is connected to the ‘Echo' function of the sonar.
- GPIO 7 (pin 10) is connected to the sonar's 'Trig'.
The arrangement is shown in the diagram below.
In terms of hardware, we're finished. Let us now turn our attention to software.
Micro-ROS code for the Raspberry Pi Pico
We saw how to set up VSCode for developing micro-ros on the Raspberry Pi Pico in the last post, as well as how to build and flash a programme. As a result, we'll move right to the main course, bypassing all the boilerplate code and only showing the parts that are relevant to our application. However, this example (and many others) may be found on GitHub at artivis/mico ros.
In terms of hardware, we're finished. Let us now turn our attention to software.
Micro-ROS code for the Raspberry Pi Pico
We saw how to set up VSCode for developing micro-ros on the Raspberry...
Read more »
 Maria Carlina Hernandez
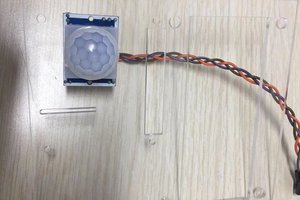
 yoyojacky