shank
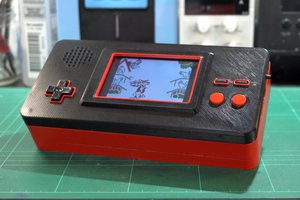
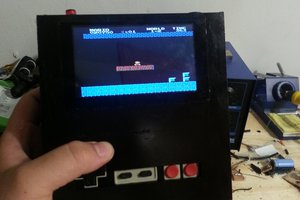
shankThis console uses a real Virtual Boy motherboard with all original chips. This is not a Virtual Boy emulator.
The case itself is made using multi-material 3D printing, and the entire project assembles with no glue whatsoever. The IPS panel is driven by a VGA signal generated by the VirtualTap, which is an open-source virtual boy video mod by Furrtek. IO includes a USB-C jack for charging, 3.5mm audio jack, HDMI Video Out jack, VB link cable port, VB controller port and an original cartridge slot.
The buttons are resin cast GBA buttons made by my friend Bassline25. For the controller, I used 2 shift registers with a microcontroller in the middle to serve as a man-in-the-middle. With the help of my friend CrashBash, I wrote a program that will pass along all button presses, except when specific combinations are pressed. Those combinations will trigger other functions tied to the IO, including adjusting screen controls, enabling backlighting for the LEDs, change the color palette, and even enable an RGB autocycle on the color palette.
The batteries are 2 18500 cells, which give it a few hours of battery life. USB Type C charging is achieved through simple pull resistors on the CC lines for 5v charging. HDMI out is achieved through splitting off the VGA to an HDMI converter, with adjusted termination resistance to keep it at 75 ohms.
The audio amp is the U-Amp from the BitBuilt store, which has since been discontinued and replaced with the Uamp 2 on 4LayerTech.com. The battery management is achieved through the N64PMS, an open source board for powering N64 portables designed by GmanModz.
The entire case assembles using screws and snap fits. There is no glue whatsoever used in the entire build, so it can easily be disassembled for repair. The total power consumption for the Virtual Boy is less than 1.5 Watts across several large chips, so active cooling was not needed.
The entire build process was quite complex, but I heavily documented it in a YouTube video, featured in the links.
0%
0%
Real Boy: The Handheld Virtual Boy
I turned a broken virtual boy motherboard into a fully functional virtual boy handheld
Become a Hackaday.io member
Already have an account? Log in.
Just one more thing
To make the experience fit your profile, pick a username and tell us what interests you.
Pick an awesome username
hackaday.io/
Your profile's URL: hackaday.io/username. Max 25 alphanumeric characters.
Pick a few interests
Projects that share your interests
People that share your interests
 Solderking
 The Lab Guy
 Lucas Rolfes