BONUS FUN FACT: Now you can be a part of the Arduino Beta Test Program with Tuya and win some really really exciting gifts worth $7.5 and even more if you provide your valuable feedback. Arduino Beta Test Invitation from Tuya with gifts(Get your Tuya Module for free)
The coupon can be used when select and order the modules.
Do you want to build a professional automation product? Do you want to offer a tool with greater ease of use for your customer? Want to have a tool that is easy to integrate into any technology with ESP8266? Do you want an app with a simple interface and a great experience for its user?
Did you know that most of your equipment can be controlled over the internet? Today, I'm sure most of the devices in your house are manually powered.
Implementing an automation system will provide you with comfort, reduced energy consumption, and financial savings.
There are several ways you can do this. Many people indicate that you implement your own system and develop your own control interface. But that's a big problem.
It's a big problem because you need to do a lot of things like:
- Develop the project's electronic circuit;
- Implement the communication protocol between the devices and the server;
- Create your own app to communicate with the server;
- Create a visual structure for your app with buttons, icons, user management, among others;
- Create the control device programming logic.
It takes a lot to implement all these things. Unfortunately, we weren't able to implement it because it requires a large team of people working to create the entire automation and control system.
Now imagine the following situation. Imagine you have:
- A server developed for IoT systems;
- Minimum structure of electronic circuit created to be used;
- It has an application developed with several features;
- The application has a beautiful and easy-to-use visual design;
- The app allows you to register your device on the internet in a few seconds.
Is it possible to do that? Yes, that already exists. We are talking about the Tuya Smart Platform. Tuya Smart has developed a system to facilitate the connection of your devices to the internet.
In just a short time you are able to create the entire automation solution. All control is done by cell phone. The interface is nice, clean and pleasant. A complete solution for you to use Arduino and connect your devices to the internet.
Why does the Tuya Smart Platform work?
Tuya wants to facilitate and democratize the internet of things. She wants anyone to be able to create their own automation systems.
That's why their engineers have developed a firmware that can communicate with any device over the internet.
How to communicate between Tuya Platform and Arduino?
Tuya is a platform that is simple to use. It is a bridge between your control application and your hardware. You don't have to worry and develop a communication protocol. Tuya already offers the complete solution to your IoT problem.
The figure below shows the working structure of the Tuya Platform with Arduino.

Tuya Platform has a mobile application that communicates with its server in the cloud. The user sends the commands and they are sent to the Tuya module. This module can be created through an ESP8266 WIFI. Tuya provides a firmware that turns your ESP8266 into a bridge between Tuya's server and your Arduino.
This is how you will learn to create this IoT luminaire with Tuya Smart. See the luminaire in the figure below.

This system is simple and it works. See the control interface. It is a professional application designed to be easily used by any user.
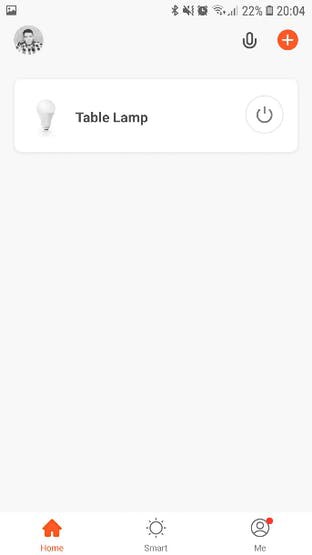
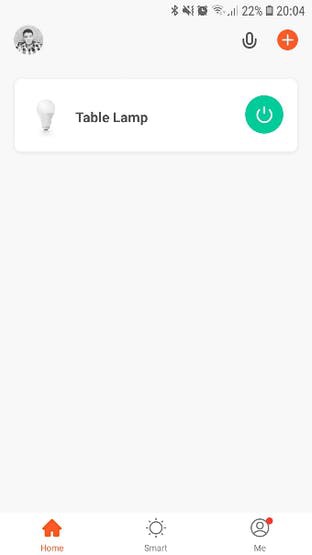
In the images above you can see the two control states of our lamp in the luminaire. We have the lamp turned on and off by the user. See the light-activated in the figure below.

Note that the app's interface is beautiful and well-designed. You can register various types of devices in your App.
Okay, but how can we automate our luminaire with Arduino?
Let's explain it to you now!
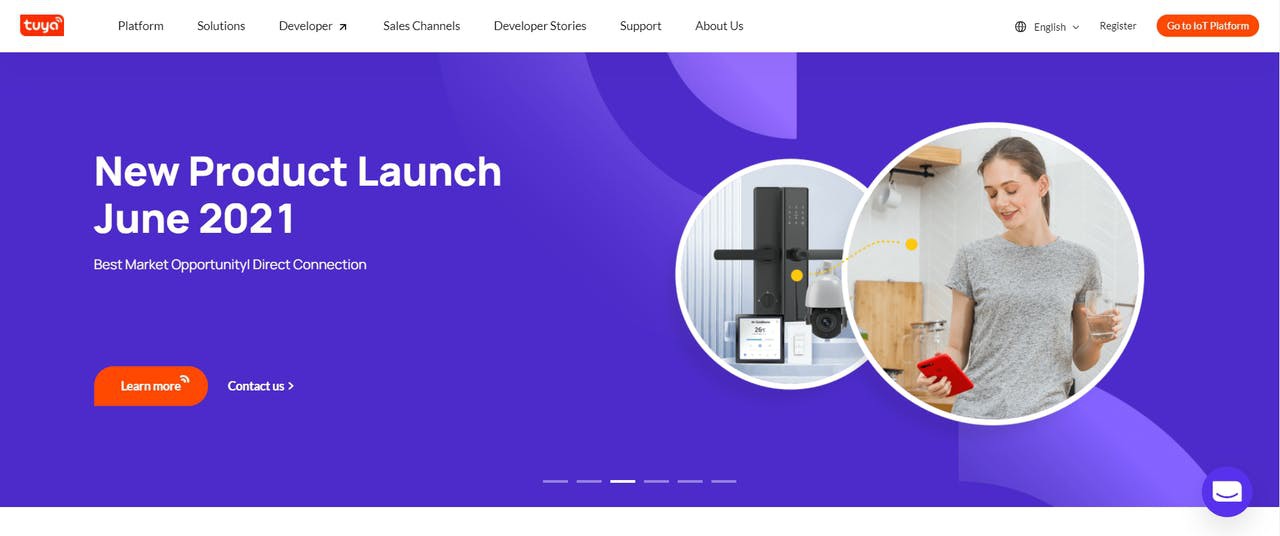
First, go to Tuya Smart Platform website.
Then click on the orange “Go to IoT Platform” button.
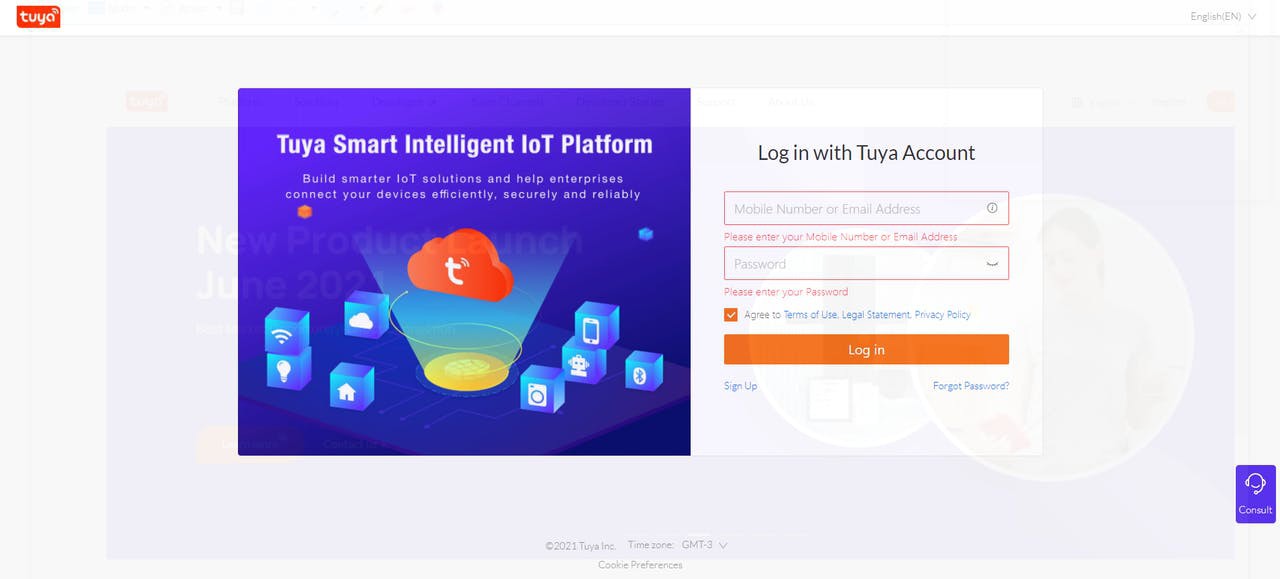
The screen below will be displayed. Click on Sign Up, create your account, and finally, login to the platform.
This is the Tuya Platform IoT creation environment. Click on “Product”.

After accessing the “Product” environment, click on the “Create” button.

In this environment, you will configure your Tuya device. The device is its own automation system with ESP8266 and Arduino.

Click on the “Light” option and then select “Light Source”.
Click on the “Light Source” option.

In this window, you must enter a name for your product, check the option “WI-FI + Bluetooth” and the option “Standard Power Consumption”.

After this process, the system will ask you to configure the default device control functions. Leave these 3 functions selected.

Choose the color style for your control app's theme. In our project, we selected the Classic Style Light Template 2 style.

Here is our selected template.

After selecting the template you must select the “Hardware Development” option. In this tab, you must select the option “Tuya Standard Module MCU SDK” and then select the option CBU WI-FI&Bluetooth Module.
BONUS FUN FACT: Now you can be a part of the Arduino Beta Test Program with Tuya and win some really really exciting gifts worth $7.5 and even more if you provide your valuable feedback. Arduino Beta Test Invitation from Tuya with gifts(Get your Tuya Module for free)
The coupon can be used when select and order the modules.
Ready! You have finished creating and configuring your Tuya Smart product. But if you can't wait to try it like me, you could use the ESP8266 by your side. Now let's start installing the tuya firmware. Remember: Tuya uses firmware to turn your ESP8266 into a communication bridge between the application/server and your Arduino.
Turning your ESP8266 into a Tuya Smart device
See the GitHub link as guide.
And I will show you step by step.
Access the website, create your account, and login to activate your Tuya Smart platform usage code.

Log in to the platform, access the “Activation Code Verification” option and enter your “Production Certificate” code. Click on “Confirm” to complete the activation process.
Send their PID and Tuya Account for devops@tuya.com and you’ll receive your token code.

Then download the files from this link.
Extract the file and run the file “Tuya_TYDA_Install_V2.4.0”.

This window will be displayed after installation. Log in with your account created on the PMS System platform. Click on “Online Login”.

The screen below will be displayed after login. Click on the “File -> Set Up” option.

The “SET UP” window will open. Set the “Burning Baud Rate” value to 921600 and click “Ok”.

After that, plug your ESP8266 into the USB and access the Tyda Installer folder again. Access the CP210X file folder and run your system version. There are two versions: 32-bit and 64-bit.

Return to the TYDA software after installation. Select the communication port of your ESP8266 and click “ENTER TOKEN”.

Click at “Ok” button. After, click in Run button and wait to finish the process.
This screen should be displayed after downloading the Tuya Smart firmware.
Ready. Firmware has been installed on your ESP8266. Now your ESP8266 is a Tuya device.
How will we make the programming logic for our Arduino? You will learn this now.
The control logic for the Arduino to turn on the Luminaire's lamp
Before starting the code creation, you need to install Tuya's library for IoT with Arduino. Go to this link and download from GitHub.
Tuya MCU SDK Arduino Library is built on the Tuya Wi-Fi general integration solution. The device's Microcontroller is connected to a Wi-Fi module (ESP8266, for example) via a serial port to implement a network connection. Development is based on general firmware, which supports a baud rate of 9600 and 115200.
The figure below illustrates the communication process between the devices and the server/application.
Now, let's install the Tuya Smart library. This library will allow us to create Arduino applications to communicate with the Tuya Smart server/application.
How to install Tuya Smart Library
Access this site and download the library.
After downloading, open the Arduino IDE and go to “Sketch -> Include Library -> Add ZIP Library”.
Browse your library file and click "Open." Ready! Your library has been successfully installed.
Now, let's open up the example code to control our lighting fixture.Acesse a opção “File -> Examples->Tuya_WIFI_MCU_SDK->start”.

The code below will open.
/** @FileName: start.ino* @Author: Tuya* @Email:* @LastEditors: Tuya* @Date: 2021-04-10 11:24:27* @LastEditTime: 2021-04-28 19:48:31* @Copyright: HANGZHOU TUYA INFORMATION TECHNOLOGY CO.,LTD* @Company: http://www.tuya.com* @Description: This demo is based on the Arduino UNO, and the LEDs on the UNO board are controlled by the Tuya Smart App.* Enter network connection mode when Pin7 to GND.* @Github:https://github.com/tuya/tuya-wifi-mcu-sdk-arduino-library*/#include <TuyaWifi.h>#include <SoftwareSerial.h>TuyaWifi my_device;/* Current LED status */unsigned char led_state = 0;/* Connect network button pin */int key_pin = 7;/* Data point define */#define DPID_SWITCH 20/* Stores all DPs and their types. PS: array[][0]:dpid, array[][1]:dp type.* dp type(TuyaDefs.h) : DP_TYPE_RAW, DP_TYPE_BOOL, DP_TYPE_VALUE, DP_TYPE_STRING, DP_TYPE_ENUM, DP_TYPE_BITMAP*/unsigned char dp_array[][2] ={{DPID_SWITCH, DP_TYPE_BOOL},};unsigned char pid[] = {"4hbtepy7j6tbxepq"};unsigned char mcu_ver[] = {"3.1.4"};/* last time */unsigned long last_time = 0;void setup(){// Serial.begin(9600);Serial.begin(9600);//Initialize led port, turn off led.pinMode(12, OUTPUT);digitalWrite(12, LOW);//Initialize networking keys.pinMode(key_pin, INPUT_PULLUP);//Enter the PID and MCU software versionmy_device.init(pid, mcu_ver);//incoming all DPs and their types array, DP numbersmy_device.set_dp_cmd_total(dp_array, 1);//register DP download processing callback functionmy_device.dp_process_func_register(dp_process);//register upload all DP callback functionmy_device.dp_update_all_func_register(dp_update_all);last_time = millis();}void loop(){my_device.uart_service();//Enter the connection network mode when Pin7 is pressed.if (digitalRead(key_pin) == LOW) {delay(80);if (digitalRead(key_pin) == LOW) {my_device.mcu_set_wifi_mode(SMART_CONFIG);}}/* LED blinks when network is being connected */if ((my_device.mcu_get_wifi_work_state() != WIFI_LOW_POWER) && (my_device.mcu_get_wifi_work_state() != WIFI_CONN_CLOUD) && (my_device.mcu_get_wifi_work_state() != WIFI_SATE_UNKNOW)) {if (millis()- last_time >= 500) {last_time = millis();if (led_state == LOW) {led_state = HIGH;} else {led_state = LOW;}digitalWrite(12, led_state);}}delay(10);}/*** @description: DP download callback function.* @param {unsigned char} dpid* @param {const unsigned char} value* @param {unsigned short} length* @return {unsigned char}*/unsigned char dp_process(unsigned char dpid,const unsigned char value[], unsigned short length){switch(dpid) {case DPID_SWITCH:led_state = my_device.mcu_get_dp_download_data(dpid, value, length); /* Get the value of the down DP command */if (led_state) {//Turn ondigitalWrite(12, HIGH);} else {//Turn offdigitalWrite(12, LOW);}//Status changes should be reported.my_device.mcu_dp_update(dpid, value, length);break;default:break;}return SUCCESS;}/*** @description: Upload all DP status of the current device.* @param {*}* @return {*}*/void dp_update_all(void){my_device.mcu_dp_update(DPID_SWITCH, led_state, 1);}
You need to change these two lines.

Access the Tuya platform and copy your PID. The PID is your Product Identifier.

The firmware version is shown below.

Copy this data and add it to your code.

Ready! Now you need to transfer the code to your Arduino. Next, you must assemble the project circuit.
The circuit of the IoT Tuya Smart luminaire
The luminaire circuit is shown below.

This circuit features serial communication between the Arduino UNO and the ESP8266. Two resistors were used on the TX and RX buses. These resistors are used to divide the voltage from 5V to 3.3V.
The circuit was mounted on the structure of the luminaire. See the figure presented below.

In addition to the boards, we have the relay module. He will be responsible for activating the lamp in the luminaire. Connect the relay to digital pin 12 of the Arduino UNO.
In the rear structure 3 elements were installed: an ON/OFF switch, a WIFI registration button, and the 9V to 12V power supply of the luminaire system. Look at the following picture.

Let's explain the purpose of each component of the luminaire structure. The user must power the system through the 2.1 mm female jack connector with a voltage between 9V and 12V. Then he must turn on the luminaire using the ON/OFF switch. This switch serves to turn the circuit power system on and off.
After the call, you must press the device registration button. This button is used to put the card into device registration mode for the Tuya Smart app.
Go to your app store and search for Tuya Smart. Download and install the App. After installation, login with your Tuya IoT Platform account.
Now, it's time to register the device. Follow the steps shown in the images below.
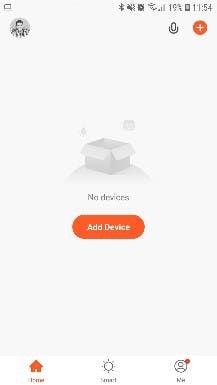

The steps are these:
- Click the “Add Device” button and get ready to add the device.
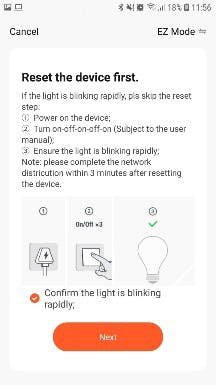
- Select the Light Source option, check the confirm option, and click next.
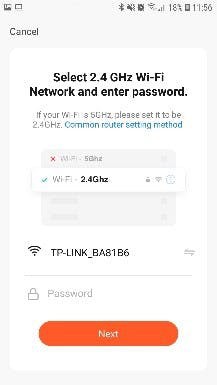
- Select your WIFI network and enter the password. Click next.
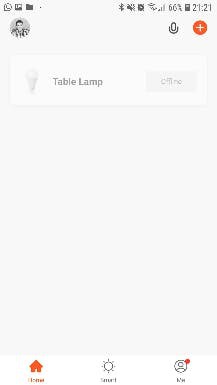
- After that, your luminaire will be registered and it is ready to be controlled by WIFI.
After that, your lamp is ready to be activated. Click the button and the relay will fire to activate the lamp. See the image below.

From the app, you are able to turn your light fixture on and off. This is the end result of the entire project creation process.
Conclusion
Do you want to build a professional automation product? Do you want to offer a tool with greater ease of use for your customer? Want to have a tool that is easy to integrate into any technology with ESP8266? Do you want an app with a simple interface and a great experience for its user?
The answer to all these questions is: integrate your devices with Tuya IoT Smart technology.
You have seen that Tuya technology is useful for connecting any IoT device with little time and resources.
Access the Tuya System and develop several projects and products. We want you with us!